I didn’t have a better title. Sue me.
Since I couldn’t find a better project that was appropriate for a beginner, we’re going to be changing some battle calculations. This project will have you writing assembly code in a text file and assembling it, rather than writing it directly into the debugger.
Project 3
Today, I woke up and decided that thieves and rogues don’t do enough damage.
But Tequila, thieves aren’t supposed to be damage dealers, you say.
Says who, says I.
Says I, says you.
Well, I’m the boss, and I decided that thieves should deal more damage, I say.
WIZARD’S CREED: Do first, ask whether it was a good idea later.
First, let’s see what the calculations currently look like. For this, Serenes Forest is a good resource. Go to Sacred Stones -> Calculations, and you should find this:
I think that, for thieves and rogues, instead of using Strength, we’re going to change the calculation to (Strength + Skill)/2. Seems reasonably fair, no?
If it doesn’t, see the Wizard’s Creed again.
Now that that’s settled, it seems that we have 3 different things to find and modify, right? Well, actually, #1 and #3 are basically the same, merely replacing strength with magic. Since there’s no str/mag split in vanilla FE8, those are effectively the same. So there’s 2 things we need to find and change.
Let’s start with #1, and think about where and how to set a break. Since this is a battle calculation, it stands to reason the battle struct will be involved. And since the numbers need to be calculated for the pre-battle display…

…we can set a break on read on the weapon selection screen.

Ok, that takes care of when to set the break, but we still don’t know on what to break. Well, we want to modify the part where it gets strength. Seems to be that we should break on read to the strength byte in the battle struct, which we do by entering…
Answer
[203A4EC + 0x14]?
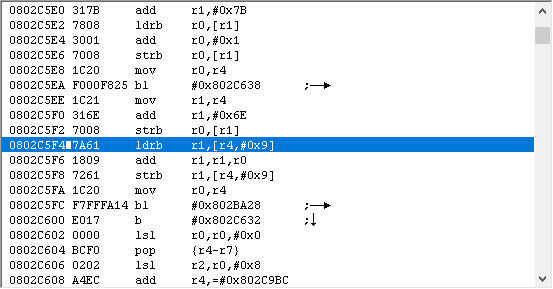
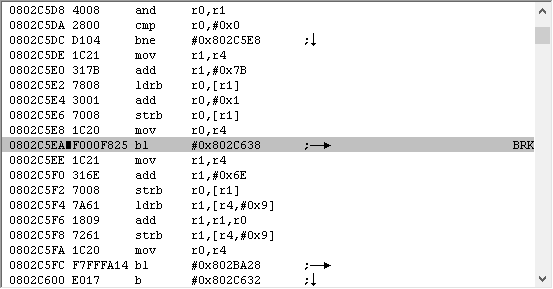
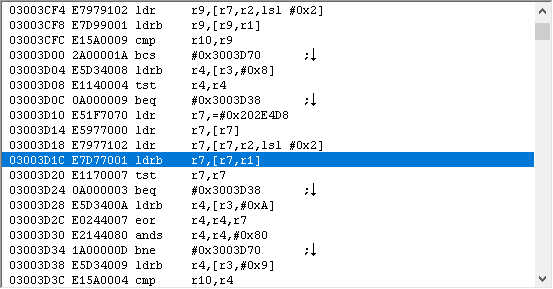
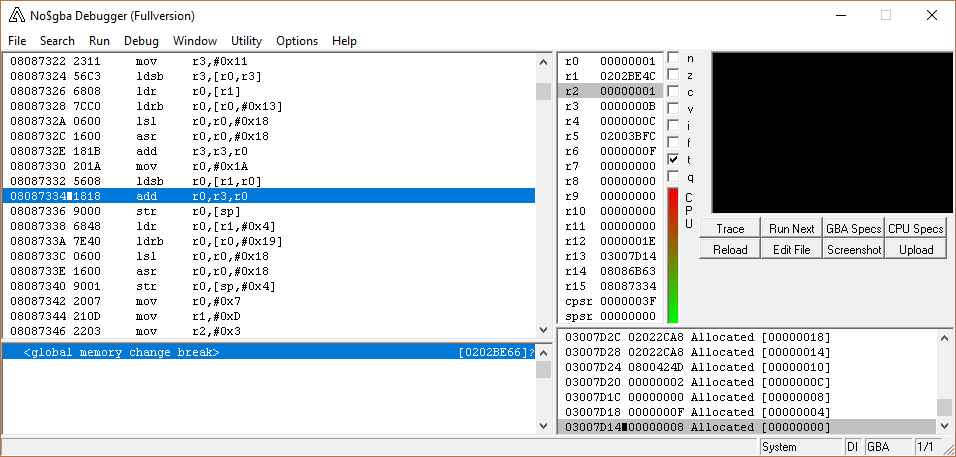
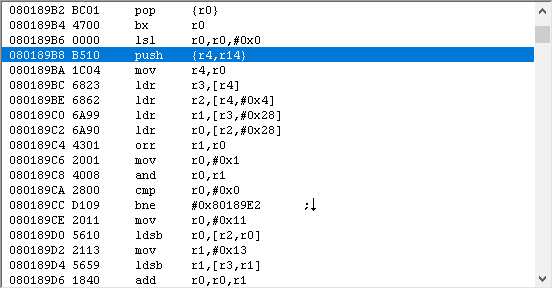
So let’s go ahead and set that break. Here’s where I ended up.
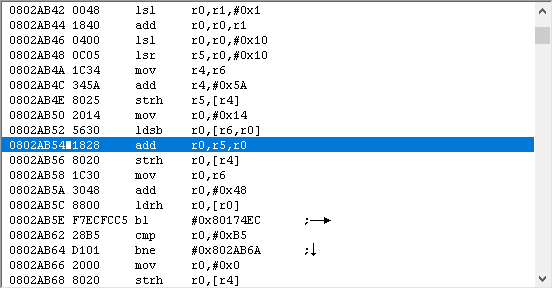
Here’s my thought process when I see this:
First, set a break on the line that we stopped on. This is for 3 reasons:
1), if I accidentally click in the game window and lose my place, I can easily get back.
2) if you set a break on execute, you can double click on the break in the breakpoint viewer to be taken to that line.
3) If you’re scrolling up and down to take a look at the surrounding code, the BRK on the side acts as a bookmark to draw your attention.
Next, I’m going to write down my train of thought as I go through this.
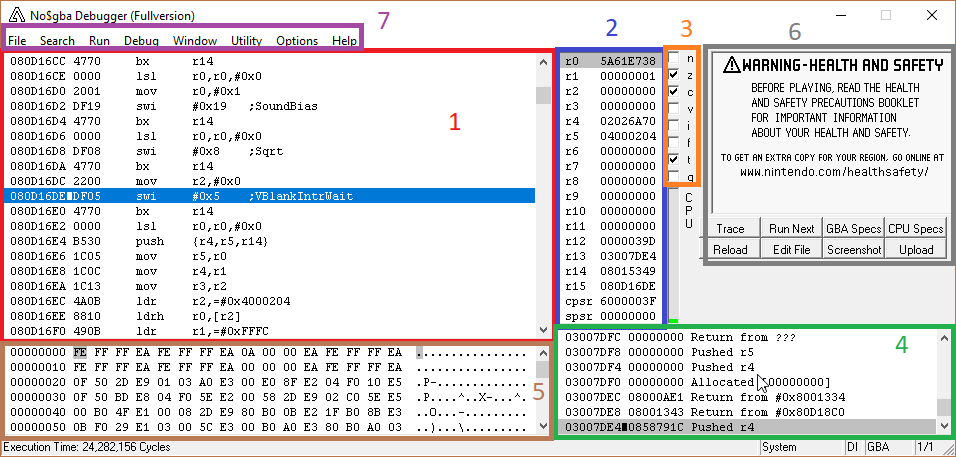
First, I look at registers. I see that r6 is used. This tells me that at the bare minimum, r4-r6 were pushed. Also, looking at r6, it’s the attacker struct (203A4EC).
It’s probable that if the attacker struct is saved, as it is here, the defender struct is also present. I see it at r8 and r12. r12 I immediately disregard, since that’s treated as a scratch register. If r8 was pushed, then I can use the value in r8; otherwise, I should ignore it. If I scroll down a bit, I see that we’re near the end of the function because there’s a pop at 2AB6A, and r8 is in fact restored, so I know I can refer to it if I want to.
Uh...why do we care?
You might be wondering why I made a big fuss of seeing whether r8 was being used in this function or not. Well, here’s a story that might explain why.
One of my first hacks was creating an item such that if it was in a unit’s inventory, that unit would have the Acrobat skill, ie, all traversable terrain costs 1 mov. I did this by finding the function that copies the class’s movement costs from ROM to IRAM, which looked something like this:
For each movement cost value:
    store cost in iram
Pretty easy, right? I changed it to:
set flag (a register) to 0
if unit has acrobat:
    set flag to 1
For each movement cost value:
    if cost != 0xFF (indicating that terrain is not traversable):
        if flag is set:
            cost == 1
    store cost to iram
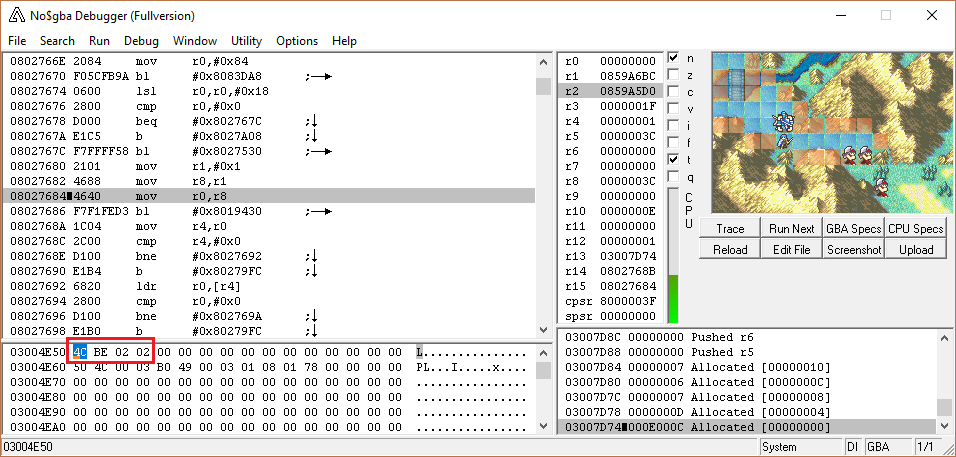
The problem was that the function was not passed in the unit data struct, only a pointer to the class’s movement cost table entry. However, I happened to notice that r4 had the unit data struct from an earlier function, so I just went ahead and used that. Everything worked fine…until I went outside the highlighted squares, came back in, and the game crashed, because r4 was no longer what I expected it to be since it had been called from a different place.I later found there were about 14 calls to this function, and Circles taught me of the wonder that is 3004E50.
Moral of the story is, don’t use an important register in a function unless it’s been pushed.
Do I actually need the defender struct for this particular calculation? No, actually. But it might be useful to know for the future. All we actually need is the attacker struct. Which we have. Hooray.
However, there’s an issue: space. We don’t have room to insert our code here (at this point, if you don’t believe me, just take my word for it). So what we have to do is jump to free space, insert our code there, and then return once we’re done. There’s a couple of ways to do this, both involving macros found in EA’s Extensions/Hack Installation.txt, jumpToHack and callHack.
jumpToHack:
jumpToHack is pretty simple. It looks like this:
ldr r3,PlaceToJumpTo
bx r3
PlaceToJumpTo:
@literal here
As the name suggests, it’s a simple jump. Here’s an example of using it.
PUSH
ORG $10000
jumpToHack(MyHack)
POP
ALIGN 4
MyHack:
#incbin "MyHack.dmp"
You might recall that bx requires addresses to be have the first bit set (ie, the address is odd) if you want the function to be executed in THUMB mode. The macro takes care of that for us, so you don’t need to use jumpToHack(MyHack+1) or anything.
callHack
There’s a variant for each low register: callHack_r0, callHack_r1, etc. I’ll use callHack_r0 as an example:
ldr r0,FunctionToCall
bl bx_r0
b End
FunctionToCall:
(literal is here)
End:
Slightly more complicated, yes, but not too bad. As with jumpToHack, we first load the address we want to go to. However, instead of jumping directly to it with bx, we bl to a bx (if you look at the macro, the address of bx_r0 is 0xD18C0, which is, as you might expect, a bx r0). We do this so we can return when we’re done executing code, but aren’t restricted with bl's range limits. Some instruction sets have a blx opcode which does the same thing, but we don’t.
Once we return from the bl, we need to jump over the literal that we loaded, since we don’t want to execute that as code, hence the b End. After that’s done, business as usual.
Using it looks virtually identical to jumpToHack, aside from having to make sure you use the register to jump with:
PUSH
ORG $10000
callHack_r0(MyHack)
POP
ALIGN 4
MyHack:
#incbin "MyHack.dmp"
That’s great, but what do we use?
First thing we must note: both of these macros need to be placed at word-aligned offsets.
The main difference is that jumpToHack doesn’t return, and callHack does. If you’re replacing an entire function, or you want to expand an existing one and add a jump to the end of it, jumpToHack is perfect.
The second difference is that jumpToHack takes 0x8 bytes (2 opcodes and a literal), while callHack takes 0xC bytes (3 opcodes, one of which is bl, and a literal). There may be occasions where you need to insert a jump but simply don’t have 0xC bytes free where you need them. In such a scenario, I would use jumpToHack, and then jump back after executing the new code. I don’t particularly like doing this because it requires hardcoding the return address, but sometimes you don’t have a choice.
Example
In my FE7 str/mag split, I had a bug brought to my attention where arena fights wouldn’t work properly if the arena’s equipped weapon was magical and the unit’s actual equipped weapon wasn’t, or vice versa. The issue turned out to be because IntSys didn’t expect units to have both physical and magical weapon ranks, so they never thought the currently equipped weapon and arena weapon would be different types. I
ANECDOTE TO BE FINISHED UPON ACCESS TO OTHER COMPUTER
Ok, back to our situation. I’m going to use callHack, because there is still code to execute later. Now we have to figure out 2 things: 1) where do we insert it, and 2) which register do we use to jump.
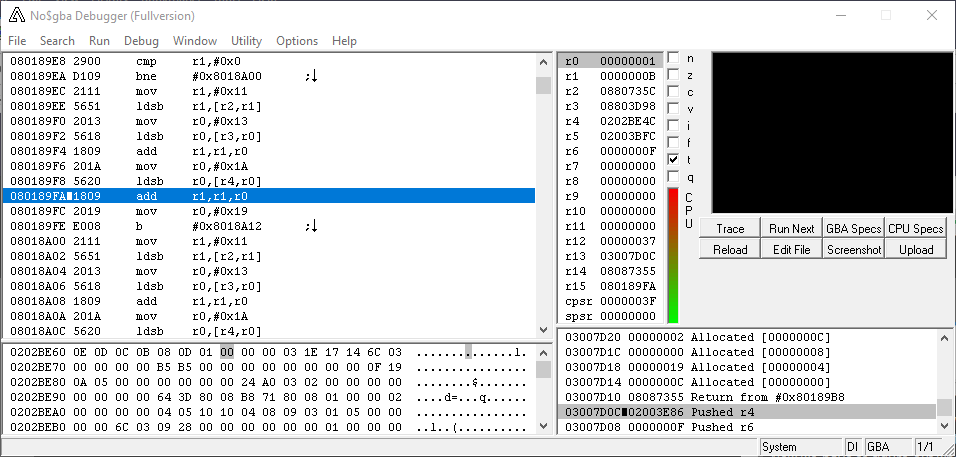
To answer 1), we need to find a word-aligned offset at or slightly before the code we want to modify (which is around 0x2AB50), count off 0xC bytes, and make sure that area isn’t complicated. What do I mean by complicated? If there’s a branch in the middle of the code you’re replacing, that’s a bit annoying (since you’re probably jumping to free space, you’ll need to replace b with bx and it just makes things uglier). If there’s a branch from elsewhere to your code, then you have a big issue; trying to jump into the middle of another jump will probably crash/hang the game, or at the very least not do what you want. So you have to have an idea of what the code surrounding the block you’re using to jump looks like!
If you scroll up a bit, you’ll notice 0x2AB3C has a jump to 0x2AB48, so our jump needs to be later than that. Either 0x2AB4C or 0x2AB50 would work. I’m going to use 0x2AB4C.

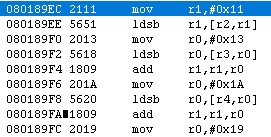
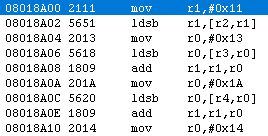
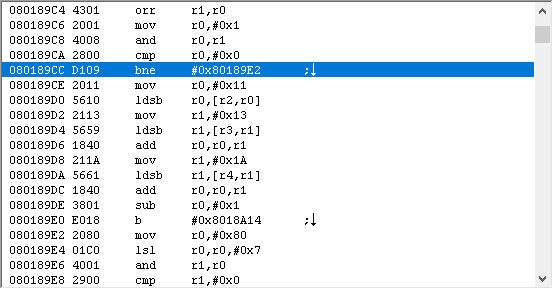
Using breakpoints as markers. Everything between them, including the endpoints, will have to be copied over. That’s why I prefer to determine where the jump goes before writing my assembly code.
Now that I know where to insert the jump, I need to figure out which register to jump with. To do that, I check what registers are using during the jump itself, and what will be required later, in case I need to preserve those values. In the jump block, none of the scratch registers (r0-r3) are used. After we return, the only register used is r0, and that’s filled in after returning. So that means we can use any scratch register to jump with. By default, I like using r3, so we’ll use that.
We can now start filling in our buildfile, after picking a suitable label name:
//FE8 Make Thieves Mediocre Again
//By Tequila

#ifndef _FE8_
    ERROR "You're not assembling to an FE8 ROM!"
#endif

#include EAStdlib.event
#include "Extensions/Hack Installation.txt"

#ifndef FreeSpace
    #define FreeSpace 0xB2A610
    ORG FreeSpace
#endif

PUSH

ORG $2AB4C
callHack_r3(MyThirdHack)

POP

ALIGN 4
MyThirdHack:
You’ll notice that I made a new buildfile for this minor project, but you don’t have to. You can add it to the one you made for projects 1 and 2 if you’d like.
Well, we have our jump, or hook. Next, we’re gonna write some assembly. Are you ready? ARE YOU READY??
crickets
Good enough.
First, let’s open a new file in your text editor of choice.

Perfect. Now, you’re gonna write .thumb at the very top. This is a directive, or command, for the assembler. If you don’t put .thumb, the assembler automatically assumes your code is in ARM mode, and it won’t work.
Next thing we’re gonna is do is push stuff. If you wanted to use the non-scratch registers (r4-r11), you’d do that here. We’re not going to, however, so the only register we’ll push is r14.

QUICK NOTE: Whitespace (spaces, tabs, extra line breaks, etc, are all ignored by the assemble. Use that to your advantage to make your code look neat; it’ll make debugging easier.
ANOTHER QUICK NOTE: To insert a comment (which you should use liberally), use @. If you’re new to this, it may be useful to comment every line to understand what it does and how it works.
Actually, I’m going to add a note saying where our function got called from; if I need to know that, I don’t have to refer back to our buildfile. And while I’m at it, I’m going to note what registers have things that are important to my code:

Next, we look at the code we replaced with a jump, and see what parts of it need to be included in our code.

add r4,#0x5A definitely needs to be added.
strh r5,[r4], at first glance, should also be. However, we’re going to immediately overwrite that value when we add strength (or whatever unholy bastardization of stats we come up with) to the weapon might, as at 0x2AB56. So this is completely redundant.
The rest is loading strength, adding it to might, and storing it. We’ll definitely be doing that later.
Conclusion: The only opcode we need to add right now is add r4,#0x5A. So let’s go ahead and do that.

Next, I’m going to insert my check for whether the unit is a thief. Hmmm. How do we do that? By consulting our Nightmare modules. Byte 4 of the class data is the class id, and we can get the class data from the battle struct.
Answer

Now, I want to compare that value to 0xD, and branch if not a thief. The nice thing about using an assembler like DevkitARM is the ability to use labels for branches. Rather than saying “bne 0xC bytes”, or something of that ilk, we can use “bne LabelName”, define LabelName somewhere, and the let the assembler take care of the “how far away do we jump” issue.
How do you define a label? Simply put the label name on a new line, followed by a colon.
NOTE: If you have a jump to a label, but don’t define the label, the branch will jump to itself, leading to an infinite loop. You can’t count on the assembler giving you an error when that happens! To avoid this happening, I usually define the label further downward so that I don’t forget about it.
So let’s make that branch, shall we?
Answer

Notice how I already defined the label.
Now we’re going to write code for each outcome. If the class is not a thief, we want to load strength. If the class is a thief, then we want to load strength and skill and average them. Once we have our value, then it’ll get added to weapon might and stored in the appropriate location.
That last sentence applies to both outcomes, right? There’s no point in writing the same thing twice. Therefore, a sensible thing to go would be to have your strength (or strength/skill average) result in the same register, and then use an unconditional branch to get both conditions in the same place. Go ahead and try that.
Answer
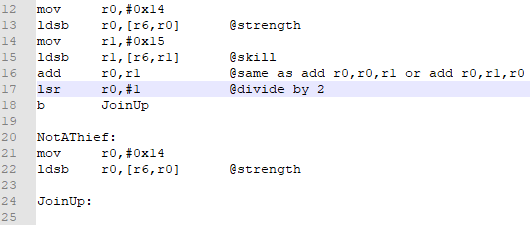
Next, we add our value to weapon might and store it in the right location. If you picked your registers correctly, it should be identical to the code replaced with the hook. If you didn’t, well, that’s not a big deal.
Answer

Finally, we just need to return to where we came from.
Answer

NOTE: We could have not pushed r14 in the beginning used bx r14 at the end, since we didn’t have any function calls (no bl's of our own). But it’s only two extra opcodes, and if we did insert a function call, we wouldn’t have to remember to add a push {r14} and pop/bx combo.
Voila! We’re done. I think. Here’s my complete file:
Answer
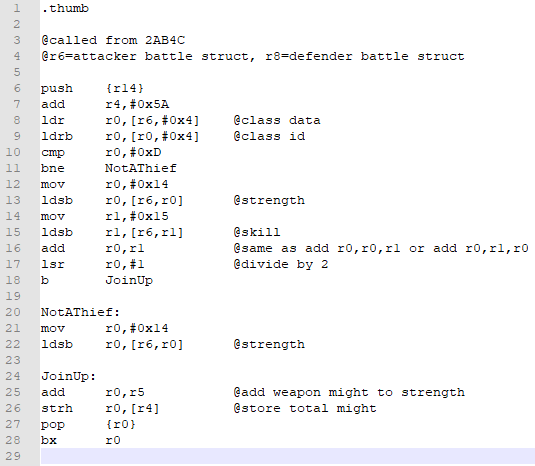
If your registers are a bit different, that’s not a huge deal. I try to start with r0 and work upwards as necessary, unless I know I need a particular value in a specific register. In our example, if you used r0-r3 as your scratch registers, that should be fine.
Now we’re going to save it. I save my assembly files as .asm, out of sheer habit. Notepad++ offers some syntax highlighting, which for me isn’t super useful, but it’s nice to see pretty colors.

Pretty colors
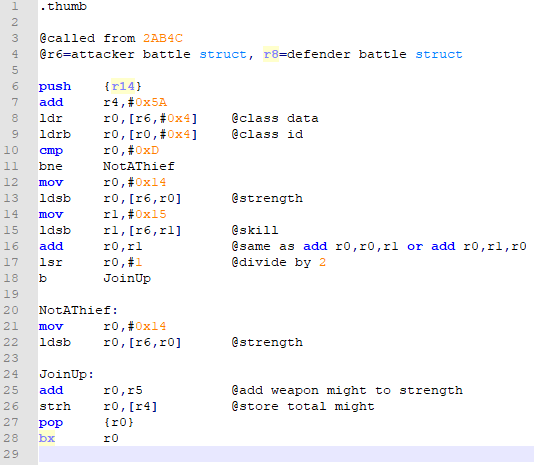
You could just leave it as a plain text file, if you’d like. Some people use a .s format, which I think allows you to define your own syntax highlighting, but I don’t actually know anything about that. Whatever you pick, the important part is saving the file.
NOTE: Organization is super duper important. I tend to make a new folder for each hack I work on:
https://i.imgur.com/HJo0IoM.png
Next, we’re going to turn your assembly code into a hex dump, using DevkitARM and Assemble ARM.bat. First, open up Assemble ARM.bat in your text editor and make sure the directory for DevkitARM\bin is correct.

The default is expecting the DevkitARM folder to be in the same folder as Assemble ARM.bat. I have a copy of the .bat in each project folder; for obvious reasons, I’m not going to have a copy of DevkitARM in each project folder as well. Thus, I put my DevkitARM in my C drive, and just copy and paste the .bat as needed.

(In case you’re wondering, devkitARM is part of a collection of tools for assembling different things, called DevkitPRO. It’s a pretty big file, and we only use the ARM assembler, so only that folder is hosted in the Unified Hacking Dropbox.)
Once you’ve gotten the start directory sorted out, take your .asm or .s file, and drag and drop it onto Assemble ARM.bat. You should get a command-line window that looks like this:
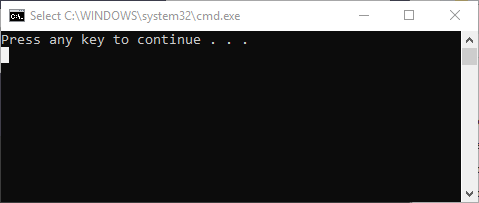
If you get an error saying “The system cannot find the path specified.”, double check the start directory path.
If you got a warning saying it added a newline, that’s fine; the file still assembles. To avoid seeing that message in the future, have a newline at the very end of the file. Don’t ask me why this is, because I don’t know.
If it did work, you should also get a .dmp file.

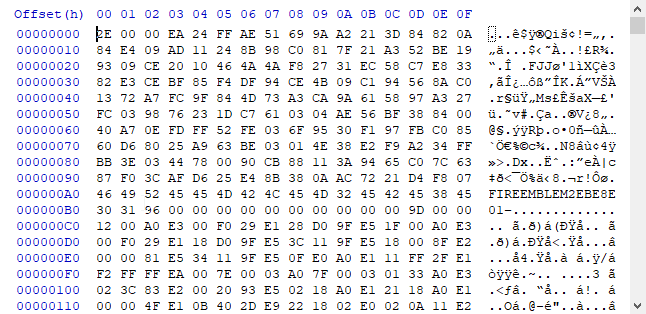
You can open a .dmp file in your hex editor. It may be useful to do this the first time to make sure it’s not empty.

Looks like it’s not. Last thing to do is add it to the buildfile. We’re going to use #incbin, which stands for "include binary (file), as follows:
MyThirdHack:
#incbin "MyThirdHack.dmp"
Time to put this thing in a ROM. If you have a makefile, you can use that. If you have no idea what a makefile is, double click Event Assembler.exe and select your rom (FE8), the buildfile (under Text), and the rom to assemble to (under ROM). Then hit Assemble. You should get a cheery message saying to please continue being awesome.
(Batch files/makefiles will be touched upon in a later section, since they can be quite useful.)
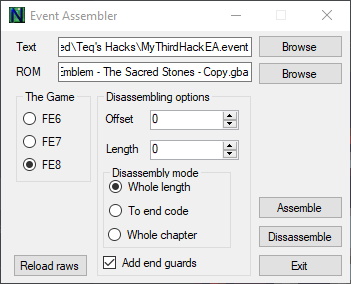
Now, we could check if the changes manifested in-game, but there’s one teensy issue: we don’t have a thief. We could change either Eirika or Seth into a thief with ramhacking, but there’s an easier way, in my opinion.
- Open up the .asm file and change the class check from 0xD (thief) to 0x2 (Eirika lord).
- Reassemble by dragging and dropping the .asm onto the .bat file.
- Reassemble the buildfile using EA.
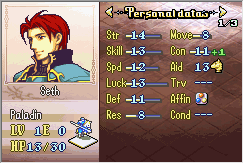
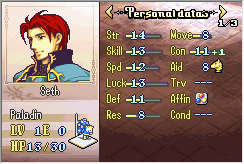
Eirika has 4 strength and 8 skill at base, and the rapier has 7 might. I’m expecting her attack power to be 7+(4+8)/2 = 13.
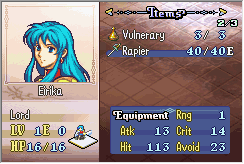
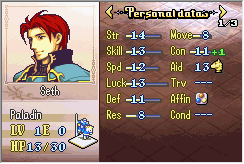
Sure enough, it works. Let’s just double check Seth. He has 14 strength and 13 skill, and the steel sword has 8 might. The average of strength and skill would be 13, since we round down, so if things work out properly, he should have 14+8=22 might.
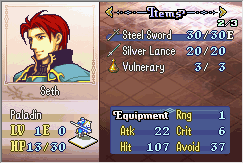
Hooray! Looks like our little hack works as planned. Or does it?
Nope. Recall in the beginning, we said there were two calculations that needed to be changed. This one, and one involving magic swords.
Oh, bugger.
Well, time to find this calculation. Any ideas, dear reader?
Answer
It’s possible that there’s some documentation on the relevant routine for FE8; I know there is in FE7. This would normally be the first thing to look for, but I personally believe I can find the routine faster than I can find pertinent documentation.
My method is to ramhack a magic sword (say, a Light Brand) onto Seth (since he already has the appropriate weapon rank, which saves me some time). Next, I would set a break on write to the attack short in the battle struct (the thing we just edited). Finally, attack an enemy from 2-range, and voila!
You could also suggest setting a break on read to the item abilities word at +0x4C, which would yield a similar result.
If you thought about setting a break on read to the item abilities in the item table, you won’t find it, alas. First, because you’ll have to navigate a ton of false positives, and second because that’s not even checked in the routine. Good try, though.
Setting another break on read to the strength byte in the battle struct would work as well.
Using whatever methods necessary, you should have found the relevant function in the vicinity of
Answer
0x2AE06
UNFINISHED
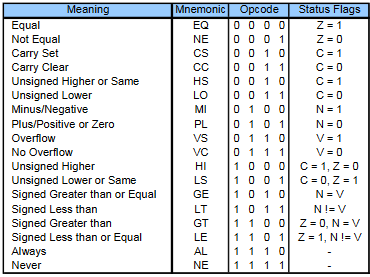








 ->
-> 
