So I’ve spent the last two months or so learning ASM and ModularStatScreen, with a LOT of help from the wonderful folks in the #hacking-help and #spell-academy discord channels. I thought writing up a guide to compile these notes might help other folks who’d like to do cool things with their stat screen but don’t feel brave enough to tackle MSS on their own.
Quick disclaimer, I’m far from an expert on this. I know a lot more than I did a few months ago, but please feel free to chime in with extra information or corrections and I’ll add to or modify the main post to accommodate them.
There’s WAY more to cover here than in my last few write ups, so let’s get cracking!
Installation
ModularStatScreen is included with the standard SkillSystem hack, and you can find MSS on GitHub here, or learn more about installing SkillSystem itself here, or learn more about using other elements of SkillSystem here. This guide will be assuming you’re building off of the SkillSystem setup, but if you aren’t using SkillSystem you can just skim past the bits that aren’t relevant to you. In all cases, the main install file you need to include is ModularStatScreen.event
Note that if you’re installing MSS without using some or all of SkillSystem, you’re going to need to custom tailor some of the files to avoid errors about things like undefined identifiers. There’s a thread talking about doing some of this stuff here, but what you need for your specific build will vary somewhat, so take it with a grain of salt.
What are all these files, there are a hecktonne
Good initial observation. I’ll be going into the code inside some of these files and discussing ways to alter it in more depth later, but I think a short overview covering the different things in here will help a lot with getting a basic understanding of what’s going on, hopefully make the hack in its entirety more approachable.
ASM Folder
In here are the files you’re probably the least likely to interact with. This contains extra ASM code that handles some of the MSS functionality that isn’t covered in the pages section, like the native page 4 RText or a fix to stop the left side of the stat screen from redrawing when you change pages. You don’t need to edit any of these unless you really know what you’re doing, but it’s good to know they’re here.
DisplayGrowthsOptions Folder
Shockingly this contains options for the display growths part of the hack. The thing you’re most likely to want to make changes to is GrowthColorsTable.event, which lets you set different thresholds for stat colours based on their growth values. The file itself has more details for how to do this.
Note that if you want an easy way to turn this off and just use the default colours, you’ll find a setting for that in the Config.event file of SkillSystem:
// If true, the stat colors for player units will reflect their growth in the stat.
#define USE_STAT_COLORS False
Pages Folder
This is likely where you’re going to spend 90% of your time working with ModularStatScreen, and I’ll be going through this in detail later on. This contains all of the code behind what is being drawn on each stat screen page and where, across a number of different cases; there are separate files to handle whether or not you’re using the Str/Mag split, leadership stars, biorhythm, or skills, which is why it looks like there are more files than there need to be.
For now the takeaway is just that there are versions of some pages that can handle different setups separately, and this is where you’ll go to modify the layouts of those pages.
Other Files
There are three extra “loose” files here. The two I’m going to ignore for now are ModularStatScreen.event and RText.event, which will each get their own section later; this is the main installation file, and the file handling all stat screen RText.
The only other file hanging out here is RemoveGlowy.png, which is used to remove the breathing glow effect from the top right of the vanilla stat screen.
Working with Pages
I thought a lot about how best to order all of these elements to talk about them in more detail in a way that’d be easy to follow, and I think this is the best place to start because you can visually see the things you’re changing, and can make some sense of what the code is doing in isolation. We’ll talk about how these are incorporated into your hack with ModularStatScreen.event later on, but for now we’re going to focus on messing with the page layouts, which is likely the thing you’re looking for most anyways.
I also want to point out that the more complicated the things you’re trying to do with MSS are, the more likely it becomes that you’re going to need to start getting comfortable with ASM. If you find that to be the case I strongly recommend you go through Teq’s introductory tutorial, it’s my vote for the best place to start.
Before we get to have fun making changes with page layouts, there’s something technical we need to set up first. If this next section sounds scary and you just want to move your stats around, bear with me, I promise it isn’t that bad and then you can move your stats to your heart’s content.
AssembleLynEvent.bat
I’m gonna talk briefly about what this is and how to use it, but I’m linking a bunch of external readings I’d highly recommend if you want to understand this in more detail. You need to install devkitPro to your machine, which you can find here, read about from the devkitPro wiki here, and read about for our purposes in Stan’s thread here. To be clear you don’t need to know how this works if you don’t care about it, but you need it installed regardless.
You also need lyn installed, which you can find and learn about in another of Stan’s threads
here. Again I’d really recommend you read through it to understand what you can, but functionally for this all you need is the download.
Let’s now take a look inside AssembleLynEvent.bat:
AssembleLynEvent.bat
@echo off

SET startDir="C:\devkitPro\devkitARM\bin\"
SET as="%startDir%arm-none-eabi-as"
SET LYN="C:\devkitPro\lyn.exe"

@rem Assemble into an elf
%as% -g -mcpu=arm7tdmi -mthumb-interwork %1 -o "%~n1.elf"

if exist "Definitions.s" (

	@rem Assemble definitions into a .elf if exists
	%as% -g -mcpu=arm7tdmi -mthumb-interwork "Definitions.s" -o "Definitions.elf"

	@rem Assebmle into a .lyn.event with definitions
	%LYN% "%~n1.elf" "Definitions.elf" > "%~n1.lyn.event"

	echo y | del "%~dp0Definitions.elf"
) else (
	@rem Assemble into a .lyn.event
	%LYN% "%~n1.elf" > "%~n1.lyn.event"
)

echo y | del "%~n1.elf"

pause
The very short version of what’s going on here is that you’re using devkitPro to assemble you .s files to .elf files, and then using lyn to get those into .event files that can be included into your buildfile to work with Event Assembler. If you’ve done Teq’s ASM tutorial you’ve seen something similar, where devkitARM is used to assemble .s files into .dmp files, which then get included in your buildfile with an #incbin.
“Okay but how is this relevant to using ModularStatScreen?” You’re going to be editing the nice readable scripts in the .s files, then dragging and dropping them onto AssembleLynEvent.bat, which will convert them into new versions of the corresponding .event files, which are included in ModularStatScreen.event for you already. This might sound hard, but your workflow will generally follow:
- Make a change to a page, say
mss_page2_original.s - Save the changed file, and drag it onto
AssembleLynEvent.bat - Rebuild your ROM to see how the change you made has affected the stat screen.
Not too bad, right? Importantly though, you need to make sure the directories being referenced in AssembleLynEvent.bat are correct, or compiling won’t work. These lines here:
    SET startDir="C:\devkitPro\devkitARM\bin\"
    SET as="%startDir%arm-none-eabi-as"
    SET LYN="C:\devkitPro\lyn.exe"
Just navigate to wherever these directories are in your machine, and paste your filepaths in instead of these ones.
I also want to note that it turns out that depending on what version of devkitPro you’re using you may get errors when you do the drag-and-drop compiling, in the form of:
Necessary\ModularStatScreen\pages\mss_page2_original.s:13: Error: bad expression -- ldr r0,=#0x8A02204
Turns out this isn’t that difficult to fix. It’s a problem being caused by using =# rather than just = when loading literals; to fix this, open up the relevant mss_defs.s file (there’s one in the pages folder, and one in the strmag folder, which we’ll talk about very soon I promise), and replace =# with = only in cases you’re referring to literals. If you don’t know what that means, just use the list of error messages as your guide and replace those cases.
Now we can finally get to making changes to our stat screen!
Macros and MSS Defs
I’m including this just before going through the pages for you to use as a reference while reading, so you can check out what each macro is doing as you encounter it. I wouldn’t recommend just reading through this section first, but come back here to check out how specific macros work as you’re going through the rest. I’m going to skip over “helper macros” like blh to as they aren’t very relevant to the purposes of this guide, and if they’re relevant to you you’re likely already comfortable enough with ASM to understand what they’re doing on your own.
Want to note that in all cases the x and y coordinates are written as tiles, where each tile is an 8 x 8 pixel square, counted from the top left corner of the screen.
Some of these are really self explanatory, but this can at least serve as a quick lookup for what options are available to you.
Start and End: page_start | leftpage_start | page_end
page_start:
Short macro that… starts the page. Not something you’re ever likely to call yourself, but this needs to be at the top of each page, before you start doing things to the screen itself. It loads relevant structures and unit data into appropriate registers.
leftpage_start:
Specific version of page_start used in mss_leftstatscreen.s, not much else remarkable to say about it. It gets its own start macro because you want it drawn on every page. Unlikely you’ll want to mess with this, but like page_start just make sure all the things you’re changing on the left page are beneath it.
page_end:
Ends the page. Pops back values that were pushed in page_start and returns to whatever was going on before page_start got called. Again, not something you’re likely to call yourself, but make sure this is after everything you’re doing to the start screen.
Text: draw_textID_at | draw_trv_text_at | draw_talk_text_at | draw_status_text_at
draw_textID_at:
draw_textID_at tile_x, tile_y, textID=0, width=3, colour=3, growth_func=-1
Draws a specified text ID at a specified location. You can also specify colour here, with Green, Yellow, Blue, Grey, and White being defined inputs by default.
I want to specifically shout out the amazing power of:
draw_textID_at 21, 13, 0x0001 @" "
This just draws a blank space to the screen. This reason this is so powerful is that it’ll draw a blank space on top of anything that’s above it in the code, and anything beneath it in the code will be drawn on top. For example, if you draw the text for move, then a blank, then the text for str, the next result will just draw str to the screen. Can be really handy to make kind of hacky but perfectly functional and simple solutions to problems you may encounter, so keep it in mind.
draw_trv_text_at:
draw_trv_text_at tile_x, tile_y, colour=Blue
Draws the Trv text, and also handles drawing the correct unit name or — after it.
draw_talk_text_at:
draw_talk_text_at tile_x, tile_y, colour=Blue
Draws the Talk text, and also handles drawing the correct unit name or — after it.
draw_status_text_at:
draw_status_text_at tile_x, tile_y, colour=Blue
Draws the Cond text, and also handles drawing the correct unit status after it.
Bars: draw_xyz_bar_at | draw_xyz_reduced_bar_at
draw_xyz_bar_at:
draw_xyz_bar_at bar_x, bar_y
Draws a stat bar at a specified location, where the bar is dictated by what stat value (str, mag, etc.) you indicate in the macro title. There are more generic helper functions associated with this that you likely won’t use for more general purposes, but if you’re working with custom bars they’re worth looking at. Note that move and con have unique macros, draw_move_bar_with_getter_at and draw_con_bar_with_getter_at, bar_x, bar_y
draw_xyz_reduced_bar_at:
draw_xyz_reduced_bar_at bar_x, bar_y
Very similar to draw_xyz_bar_at, this draws a reduced version of the bar that’s used by default for shortening up the speed and skill bars used when rescuing. Again, there are some helper functions associated with it that you’ll want to consult if you’re trying to make custom bars.
Numbers: draw_growth_at | draw_xyz_number_at | draw_charge_at
draw_growth_at:
draw_growth_at bar_x, bar_y
This is used to draw the growths when the stat screen is in growths mode rather than stats mode, toggled between using select by default. You’ll notice that you don’t actually specify the growth you want to draw in the macro itself; using this requires a few extra lines, which you can see in the default mss_page1.s files. You just need to load the appropriate stat getter ahead of time:
    ldr		r0,[sp,#0xC]
    ldr		r0,[r0,#4]		@str growth getter
    draw_growth_at 18, 3
This is an example of the three lines that are required for the strength growth, though again I’d recommend just using the default setup for these and only changing the x and y values if you want to move the growths around the screen.
draw_xyz_number_at:
draw_xyz_number_at tile_x, tile_y
This behaves very much like draw_xyz_bar_at, where you have a specific macro for each of the standard numbers that get drawn to the first page of the stat screen. Reference the draw_number_at helper macro if you’re interested in doing your own custom things with this beyond moving the existing numbers around.
draw_charge_at:
draw_charge_at num_x, num_y, colour=2
This is used for the laguz bars hack to draw the charge value at a specified location. Unused otherwise to the best of my knowledge.
Skills: draw_skill_icon_at | draw_skillname_at
draw_skill_icon_at:
draw_skill_icon_at tile_x, tile_y, number=0
Draws the current unit’s skill icon that corresponds to the provided number, if one exists. Similar to the growths macro this requires some extra work around the macro, though as with that case you should use the existing setup as your reference. Here’s an example for the second icon:
ldrb r0,[r6,#1]
cmp r0,#0
beq SkillsEnd
draw_skill_icon_at 24, 15
draw_skillname_at:
draw_skillname_at tile_x, tile_y, textID=0, width=14, colour=3, growth_func=-1
This is supposed to work like draw_textID_at, except for skillnames. It… doesn’t actually work out of the box. I spent a while writing a fixed version of this, which you can find on my ASM page here with instructions on how to install and use it.
Icons: draw_affinity_icon_at | draw_left_affinity_icon_at | draw_aid_icon_at | draw_icon_at
draw_affinity_icon_at:
draw_affinity_icon_at tile_x, tile_y
Draws the icon corresponding to the current unit’s affinity at a particular location.
draw_left_affinity_icon_at:
draw_left_affinity_icon_at tileX, tileY
Draws the icon corresponding to the current unit’s affinity on the left stat screen just to the right of the unit’s name.
draw_aid_icon_at:
draw_aid_icon_at tile_x, tile_y
Draws the aid icon appropriate for a unit’s class, if one exists, at the given location.
draw_icon_at:
draw_icon_at tile_x, tile_y, number=0
This is a good reference for trying to draw you own icons, but is currently only used to draw the icon for leadership stars. Check the appropriate files for reference, as making any changes to the behaviour here other than the location can get a bit more complicated.
Inventory Page: draw_stats_box | draw_items_text
draw_stats_box:
Draws the “Equipment” box seen on page 2 in vanilla, as it is in vanilla. You can make changes to the macro itself here to switch out which values you’d like drawn in which locations, but this kind of alteration is beyond the scope of this guide. You’ll need some ASM knowledge under your belt and also probably the Teq Doc open. It might be worth just drawing overtop of whatever is here depending on your needs; either way, I’m going to link my range to attack speed hack, as it might be a useful reference.
draw_items_text:
Draws the unit’s inventory.
Left Page: draw_character_name_at | draw_class_name_at | draw_lv_icon_at | draw_exp_icon_at | draw_hp_icon_at | draw_ui_slash_at | draw_level_at | draw_exp_at | draw_hp_at | draw_max_hp |
draw_character_name_at:
draw_character_name_at tile_x, tile_y
Draws the current unit’s name at a given location.
draw_class_name_at:
draw_class_name_at tile_x, tile_y
Draws the current unit’s class name at a given location.
draw_lv_icon_at:
draw_lv_icon_at tile_x, tile_y
Draws the current unit’s level at a given location.
draw_exp_icon_at:
draw_exp_icon_at tile_x, tile_y
Draws the EXP text at a given location.
draw_hp_icon_at:
draw_hp_icon_at tile_x, tile_y
Draws the HP text at a given location.
draw_ui_slash_at:
draw_ui_slash_at tile_x, tile_y
Draws the / between current health and max health at a given location.
draw_level_at:
draw_level_at tile_x, tile_y
Draws the current unit’s level at a given location.
draw_exp_at:
draw_exp_at tile_x, tile_y
Draws the current unit’s EXP value at a given location.
draw_hp_at:
draw_hp_at tile_x, tile_y
Draws the current unit’s current HP at a given location.
draw_max_hp:
Draws current unit’s maximum HP. Doesn’t accept a location at this point unfortunately.
Other: draw_weapon_rank_at | draw_gaiden_spells_at
draw_weapon_rank_at:
draw_weapon_rank_at tile_x, tile_y, weapon, id
Manually draw the specified weapon’s weapon rank information at a given location.
draw_gaiden_spells_at:
draw_gaiden_spells_at tile_x, tile_y, gaidenStatScreenRoutine
Used to draw your Gaiden spells if you’re using that hack. I’m not using Gaiden magic so really haven’t used this at all to provide much further explanation. If you’ve got anything you’d like to add, let me know!
Relevant Non-Macros: DrawSupports | DrawBWLNumbers
DrawSupports:
blh DrawSupports
This will draw the vanilla support layout to the vanilla location beneath the weapon ranks on page 2, though moving this command will let you draw it in the vanilla location on other pages instead.
DrawBWLNumbers:
blh DrawBWLNumbers
This will draw the vanilla battles / wins / losses statistics to the vanilla location near the bottom of the stat screen. Note that these won’t show at all until you’ve beaten the game, unless you apply the following patch generously provided by gamma:
PUSH
ORG $86fe4
  SHORT $46C0 $46C0
POP
Page 1
Taking a look in the pages folder, you can see there are a tonne of mss_page1 files. You should know which one you want to use based on your Config.event SkillSystem settings, and ModularStatScreen.event will handle using the appropriate file based on those settings, as we’ll see later. Your options are:
mss_page1.s, the standard vanilla versionmss_page1_skills.s, also includes skillsmss_page1_skills_biorhythm.s, also includes both skills and biorhythmmss_page1_skills_conmag.s, functions as a strmag split where con is replaced with magmss_page1_skills_leadership.s, includes both skills and leadership stars
Further, you’ve got strength / magic split versions of some of these in the strmag folder as well. If you’re using it, you’ll want to use these files instead for page 1, and the mss_defs.s file in this subfolder will be used exclusively by your strmag page 1.
I’ll be using the mss_page1_skills_leadership.s in the strmag folder for this discussion to maximize the stuff I can talk about, though again use whichever is appropriate for your case. Crack open the file and we’ll find quite a bit of stuff, probably more than the other three pages combined by default. You’ll immediately see why knowing some ASM will help you here, but as you’ll see it’s not necessary for the basic stuff. Let’s go through what this file is doing, and talk about some of the ways you can make changes as we go.
Unit Stats and Growths
Holding off on the growths part for a moment, the first exciting thing to make changes to that we’ll find is a group of lines near the top:
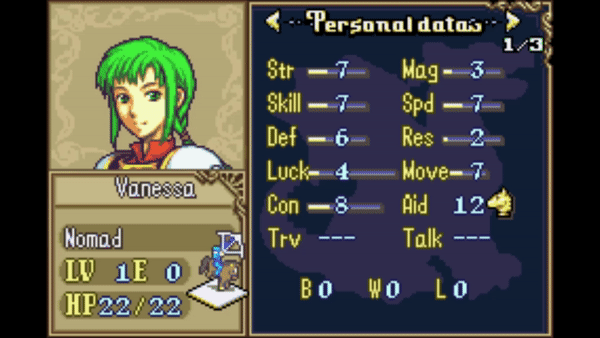
draw_textID_at 13, 3, textID=0x4fe, growth_func=2 @str
draw_textID_at 13, 5, textID=0x4ff, growth_func=3 @mag
draw_textID_at 13, 7, textID=0x4EC, growth_func=4 @skl
draw_textID_at 13, 9, textID=0x4ED, growth_func=5 @spd
draw_textID_at 13, 11, textID=0x4ee, growth_func=6 @luck
draw_textID_at 13, 13, textID=0x4ef, growth_func=7 @def
draw_textID_at 13, 15, textID=0x4f0, growth_func=8 @res
This is responsible for drawing the text associated with each stat value. You can move these around or reorder them just by changing the x and y coordinate values, no need to move around the code itself. The same holds for growths:
ShowGrowths:
ldr		r0,[sp,#0xC]
ldr		r0,[r0,#4]		@str growth getter
draw_growth_at 18, 3
ldr		r0,[sp,#0xC]
ldr		r0,[r0,#8]		@mag growth getter
draw_growth_at 18, 5
ldr		r0,[sp,#0xC]
ldr		r0,[r0,#12]		@skl growth getter
draw_growth_at 18, 7
ldr		r0,[sp,#0xC]
ldr		r0,[r0,#16]		@spd growth getter
draw_growth_at 18, 9
ldr		r0,[sp,#0xC]
ldr		r0,[r0,#20]		@luk growth getter
draw_growth_at 18, 11
ldr		r0,[sp,#0xC]
ldr		r0,[r0,#24]		@def growth getter
draw_growth_at 18, 13
ldr		r0,[sp,#0xC]
ldr		r0,[r0,#28]		@res growth getter
draw_growth_at 18, 15
ldr		r0,[sp,#0xC]
ldr		r0,[r0]			@hp growth getter (not displaying because there's no room atm)
draw_growth_at 18, 17
draw_textID_at 13, 17, textID=0x4E9, growth_func=1 @hp name
You can move these around as you like by again just changing the x and y coordinates you provide. Also worth noting that all of this code will only be reached if the stat screen is in show growths mode; this means you can overwrite whatever other text you want with your growth text within this structure, and when you’re not in growths mode nothing will be affected. Here’s an example of what I mean, where in normal mode I show Move and in growths mode I show the HP growth and text in the same location.
Example Gif and Script
draw_growth_at 26, 7
ldr		r0,[sp,#0xC]
ldr		r0,[r0]			@hp growth getter (not displaying because there's no room atm)
draw_growth_at 26, 9
draw_textID_at 21, 13, 0x0001 @" "
draw_textID_at 22, 13, 0x0001 @" "
draw_textID_at 23, 13, 0x0001 @" "
draw_textID_at 24, 13, 0x0001 @" "
draw_textID_at 21, 9, textID=0x4E9, growth_func=1 @hp name
There are a bunch of one off macros further down in the file for things like affinity icon or talk text that I’m not going to touch on specifically, but you can also move them around by changing their coordinates or remove them entirely. Check the macro references above if you want more details.
Skills
Before getting into changing the skill icons themselves, if you want to move this to a completely different page, there’s some “initialization” code that you’ll also want to make sure to copy over directly above the icons:
startSkills:

.set NoAltIconDraw, 1 @this is the piece that makes them use a separate sheet

mov r0,r8
ldr r1,=Skill_Getter
mov r14,r1
.short 0xF800

mov r6,r0
This loads up a buffer with the appropriate information for the currently selected unit. By default the section that draws the white text that says “Skill” is here too:
ldr r0,=SkillsTextIDLink
ldrh r0, [r0]
draw_textID_at 21, 13, colour=White @skills
Beneath all of that you’ll find the skill icons themselves. Each of these macro calls requires a few lines to iterate to the next skill slot beforehand, and to skip the rest if the current unit is out of skills.
ldrb r0,[r6]
cmp r0,#0
beq SkillsEnd
draw_skill_icon_at 21, 15

ldrb r0,[r6,#1]
cmp r0,#0
beq SkillsEnd
draw_skill_icon_at 24, 15

ldrb r0,[r6,#2]
cmp r0,#0
beq SkillsEnd
draw_skill_icon_at 27, 15
These are the first three skill slots. You can see the ldrb line counting up to indicate which skill it’s talking about, but generally all you’ll be doing here is either moving all of your skills to another page in which case you want to copy everything from the top of this section, or changing the locations of the skill icons, where you’d be changing the x and y coordinates.
Page 2
Unlike page 1 there’s only one default file available for page 2. page 2 isn’t as intricately interacted with or documented either, so more dramatic changes to what’s going on with its elements can be tricky to implement. Moving things around from page to page still works just fine, but the elements in vanilla page 2 are often less immediately customizable. This is super short:
MSS_page2:

page_start

draw_stats_box

draw_items_text

page_end
You can take a look at the macro references section for some details about the stats box macro, but editing these macros will definitely require knowledge of ASM as you can see from the lack of available variables. You can move these to other pages as I said, but they’ll be in their vanilla state and their vanilla location on whatever page you move them to.
Page 3
For page 3 you’ve got two versions to choose from:
mss_page3_original.s, the standard vanilla page 3mss_page3_newranks.s, modified to display only weapon ranks that the current unit is proficient with
In mss_page3_original.s, the more basic of the two, you’ll find this section:
draw_weapon_rank_at 1, 1, Anima, 0
draw_weapon_rank_at 1, 3, Light, 1
draw_weapon_rank_at 9, 1, Dark, 2
draw_weapon_rank_at 9, 3, Staff, 3
b       EndRanks
.ltorg

NotMag:
draw_weapon_rank_at 1, 1, Sword, 0
draw_weapon_rank_at 1, 3, Lance, 1
draw_weapon_rank_at 9, 1, Axe, 2
draw_weapon_rank_at 9, 3, Bow, 3
EndRanks:
These are split into two groups based on whether current unit uses magic or not. There are ways you can rewrite this ASM to just have one lump of all of them displaying at once, but if learning ASM is scary to you there’s nothing stopping you from just putting them all into one big list and copying it to both places if you want to always display them all. Otherwise these behave as you’d expect, a location and the specific rank you’d like to draw.
Taking a look at `mss_page3_newranks.s’ way of handling this, you’ll really want to learn some ASM to be able to read and modify this to draw where you’d like it. You can copy paste the entire thing onto another page, but having it draw anything other than columns or giving each entry a unique y coordinate will require some work on your part.
Page 4
Page 4 also has two versions:
mss_page4.s, empty page except for the Donate linemss_page4_runa.s, used for drawing Runa’s personal information setup
Like Page 2, the setup for the basic version of the file is really simple:
MSS_page4:

page_start

draw_textID_at 17, 9, 0xd4b, 16, Green

draw_gaiden_spells_at 13, 13, GaidenStatScreen @ GaidenStatScreen is a pointer to the routine, GaidenStatScreen.

page_end
The only fancy thing this page is doing is drawing Gaiden spells, if you have that hack installed and enabled in Config.event. Runa’s version of the page has a lot more going on, and making changes to most of the default setup of anything other than the draw_textID_at calls will require learning some ASM. You can change where the text is being drawn without that though. If we take a look at the “first like” section, we find this line:
ldr r1, =(tile_origin+(0x20*2*3)+(2*17))
which, if we check the format of some of our macros in mss_defs.s:
ldr r1, =(tile_origin+(0x20*2*\tile_y)+(2*\tile_x))
We find that there’s a value in there we can change up to slide these around manually. Anything beyond this kind of movement change though will need some ASM.
Left Page
The left page is just large enough that I’m not going to paste the whole thing in here, but it’s extremely clear to see what’s going on in it. It’s just a series of single macro calls, and you can move them around with the coordinates as usual.
Do note that anything else you move to this page will get drawn on every other stat screen page as well.
ModularStatScreen Main Event
ModularStatScreen.event is the main installer file for this hack overall, but you’re very unlikely to touch it unless you already know what you’re doing enough that you don’t really need to reference this guide. It’s grabbing all of the relevant files from across the other folders and including them into one easy to access location.
I will note that if you’re not using SkillSystem, you’re going to have to remove a bunch of things that don’t exist from here that are undefined, like most of the #ifdef checks. I removed all the ones I wasn’t using even with SkillSystem just to make the file more readable, but this is obviously optional.
Working with RText
The last big section of material to cover is all in the RText.event file, and deals with RText as you probably expect. There’s quite a lot in here, but it’s not as much as it looks initially. Sections for page 1 and page 4 are included with ModularStatScreen by default.
This file has a done of #ifdef checks that correspond to settings in Config.event like the pages do. You only need to concern yourself with editing the section that’s relevant to what you’re doing, and can ignore (or delete, for cleanliness) the rest. This is also a file you’ll need to remove quite a bit from if you aren’t using SkillSystem.
Let’s take a look at how to make some RText:
  #define RMenu(up,down,left,right,xcoord,ycoord,TID) "POIN up down left right;BYTE xcoord ycoord; SHORT TID; WORD 0 0;"
  #define RMenu(up,down,left,right,xcoord,ycoord,TID,Getter) "POIN up down left right; BYTE xcoord ycoord; SHORT TID; POIN 0 Getter|1"
  #define RMenu(up,down,left,right,xcoord,ycoord,SlotID,Looper,Getter) "POIN up down left right; BYTE xcoord ycoord; SHORT SlotID; POIN Looper|1 Getter|1"
These are three different definitions for RMenu, each of which can be used in different cases. You don’t need to understand the extra things on the right, but now we know what each of the terms represent in our labelled RMenu calls below. Let’s take a look at a simple one:
ST_Skl:
  RMenu(ST_Str,ST_Spd,ST_Name,ST_Trv,0x66,0x28,0x548))
This means that the Str RText is above this, Spd is below, the unit name is to the left, and Trv is to the right. Then we’ve got the coordinates of x = 0x66 and y = 0x28; in decimal, these are 102 and 40; when divided by 8, these are now 12.5 and 5. If we check where the Skl text is being drawn in page 1, we’ll find it at 13, 5. This is a good showcase of why it’s important to remember that tiles are each 8 pixels, because it’ll matter for converting a location in one of the pages into an RText location.
Lastly we’ve got a textID, which is just the textID of the description. Not bad! We can move this around, change what other RTexts it refers to when you move the cursor, and the description it uses.
What about skills? Here’s the “Skills” word RText, and the first three skill icon RTexts.
ST_Skills:
  RMenu(ST_Talk,ST_Skill1,ST_Res,0,0xA6,0x68,SS_SkillsRText)

ST_Skill1:
  rMenu(ST_Skills,ST_Skill4,ST_Mov,ST_Skill2,0xa6,0x78,0,RTextLoop,SkillDescGetter)

ST_Skill2:
  RMenu(ST_Skills,ST_Skill5,ST_Skill1,ST_Skill3,0xbe,0x78,1,RTextLoop,SkillDescGetter+4)

ST_Skill3:
  RMenu(ST_Skills,ST_Skill6,ST_Skill2,0,0xd6,0x78,2,RTextLoop,SkillDescGetter+8)
These are more complicated, as they’re using the more involved version of RMenu. After the coordinates you have an indicator of which skill icon you’re using, then the loop and description getter to find the one that matches the unit’s particular skill in the specified slot. Most of the time you’ll be messing with the front half of these, changing coordinates and what other RTexts this one points to; if you change them more dramatically, be careful to keep the ID and the SkillDescGetter increment consistent.
It’s also worth noting here that if ever an RText would refer to a nonexistent skill (ie. Skill1 has Skill4 listed as the "below’ connection by default, and the unit may not have 4 skills), the RText will instead move to ST_Skills, the RText for the Skill text itself. Just worth keeping in mind as you organize things.
Adding your own new RText is as easy as adding a new RMenu label and entry, following the format of the definition as these ones are. If you want to put it on a specific page, make sure it’s in the appropriate section as well; the RText for page 4 is labelled, and page 2 and 3 aren’t here at all by default but you can find them below.
Page 2 and 3 RText
While these aren’t included in RText.event in the initial installation, you can add them in without issue thanks to gamma figuring this out and sharing it. Just paste these into your RText file, and you can manipulate them the same was as any of the others.
Page 2 RText
#define ItemMenuRtextGetter 0x88A00
#define ItemMenuRtextLooper 0x88B40

ORG $A00D14 //sidebar
IT_Name:
  RMenu(0,IT_Class,0,InventoryRtext4,0x18,0x50,0x0,NameDescGetter)
IT_Class:
  RMenu(IT_Name,IT_Level,0,Inventory_Rng,0x6,0x68,0x6E8,ClassDescGetter)
IT_Level:
  RMenu(IT_Class,IT_HP,0,IT_Exp,0x6,0x78,0x542)
IT_Exp:
  RMenu(IT_Class,IT_HP,IT_Level,Inventory_Atk,0x26,0x78,0x543)
IT_HP:
  RMenu(IT_Level,0,0,Inventory_Hit,0x6,0x90,0x544)

ORG $A00DA0 //items start here
InventoryRtext1:
  RMenu(0,InventoryRtext2,IT_Name,0,0x68,0x18,0x00,ItemMenuRtextLooper,ItemMenuRtextGetter)
InventoryRtext2:
  RMenu(InventoryRtext1,InventoryRtext3,IT_Name,0,0x68,0x28,0x0001,ItemMenuRtextLooper,ItemMenuRtextGetter)
InventoryRtext3:
  RMenu(InventoryRtext2,InventoryRtext4,IT_Name,0,0x68,0x38,0x0002,ItemMenuRtextLooper,ItemMenuRtextGetter)
InventoryRtext4:
  RMenu(InventoryRtext3,InventoryRtext5,IT_Name,0,0x68,0x48,0x0003,ItemMenuRtextLooper,ItemMenuRtextGetter)
InventoryRtext5:
  RMenu(InventoryRtext4,Inventory_Atk,IT_Name,Inventory_Rng,0x68,0x58,0x0004,ItemMenuRtextLooper,ItemMenuRtextGetter)

ORG $A00E2C //bottom thing with atk/crit/etc
Inventory_Atk:
  RMenu(InventoryRtext5,Inventory_Hit,IT_Exp,Inventory_Crt,0x76,0x78,0x55C)
Inventory_Hit:
  RMenu(Inventory_Atk,0,IT_HP,Inventory_Avo,0x76,0x88,0x55D)
Inventory_Rng:
  RMenu(InventoryRtext5,Inventory_Crt,IT_Class,0,0xae,0x68,0x55E)
Inventory_Crt:
  RMenu(Inventory_Rng,Inventory_Avo,Inventory_Atk,0,0xae,0x78,0x55F)
Inventory_Avo:
  RMenu(Inventory_Crt,0,Inventory_Hit,0,0xae,0x88,0x560)
Page 3 RText
ORG 0xA00EB8
ST_Name3:
  RMenu(0,ST_Class3,0,0,0x18,0x50,0x0,NameDescGetter)
ST_Class3:
  RMenu(ST_Name3,ST_Level3,0,0,0x6,0x68,0x6E8,ClassDescGetter)
ST_Level3:
  RMenu(ST_Class3,ST_HP3,0,ST_Exp3,0x6,0x78,0x542)
ST_Exp3:
  RMenu(ST_Class3,ST_HP3,ST_Level3,0,0x26,0x78,0x543)
ST_HP3:
  RMenu(ST_Level3,0,0,0,0x6,0x88,0x544)
Credits
LOTS of credits on this one, want to acknowledge everyone who’s either helped me out with this stuff or provided material. MSS has been around a long time, so let me know if I’m missing anyone who should be named.
- Sme
- Snakey1
- Pikmin1211
- Tequila
- Runa
- Vesly
- Stan
- Huichelaar
- Zane
- Hypergammaspaces
Hopefully you found this guide useful! Don’t hesitate to reach out with any suggested additions or corrections below. Happy stat screening! ![]()