Zoramine's Bucket Of Many Random Things

Update on this page as a whole along with wips/things I’ve done recently at request/etcetcetc

I’ve added a FAQ for things that I either get asked alot or got asked once and had a good answer to. Along with memes. Gotta throw in a meme or two. Should answer most questions. If you have one, check there, see if its there. My answer probably won’t change for another 2-3 months.

I’ve added dates to everything along with as many contributors to each of my tilesets and mapping dumps as possible. If you contributed and don’t see your name listed, please let me know because my memory is that of a guppie. Be sure to read the top question of the FAQ to answer whether you should use anything, although if you’ve read this far, to spare you time, anything pre October 2019 is probably bad.

And now, actual stuff I’ve made recently without comments bc I’m tired and want to play Pokemon Platinum.


better map

12 Likes


Further progress. Next vers I post here will be another palette since I’m having fun with those too.

8 Likes


the more i post the lazier i get with comments, top is big city map made to emulate an actual big coastal/port city (GBAFE does a poor job of showing this) and the bottom is the finalized map from above.

17 Likes

The bottom map looks like FE5CH9 with extra steps, which ain’t a bad thing honestly.

Good call! The map’s got a general flow based on the map but with my own custom touches, such as my tileset’s fancy trees, the hill tiles used in the Judgral maps and other aesthetic stuff.

Totally not just because I hit that chapter and remembered how cool it looks.

1 Like

One with lots of images for Mountainmaking utilizing my tileset. Has a fair few differences than base Fields tileset so it’s worth creating. Second one soon.

Basic Mountains guide; Simple linear pathing

Mountains 2
Have a map either already have water, grass, etc or just have a blank grass canvas and draw a line on it, then make that line a helluva lot wider. Not too wide, otherwise you’ll end up like Post 72 on this thread.

Mountains 3
All of the tiles on the bottom are the ‘bottom pieces’ of Mountains, used as the start of the chain itself. In this case, since our base is 1x1 and not wider, we just use the 1x1 piece. The furthest right two pieces are used when the bottom is wider on both ends, while the center and far left are used when one side - the right or left, respectively - are wider.

Mountains 4
All pieces on top are Peak Caps; they’re used to signify a peak in the mountain and either end the chain or shift it to the left. The top pieces use the rougher shade of the bright side, while the bottom use the softer shade - I use the softer ones 99% of the time because this tileset has it muddled somewhat.

Mountains 5
Add in peak caps whenever you want the chain to start shifting left. The basic piece used at the top for the cap is used when the chain goes up directly, while the ‘diagonal’ ones are used to immediately jump down another. The bottom of the mountain chain is a good example of this.

Mountains 6
While it is unecessary, I added a second chain to demonstrate how to use the rightmost pieces, included in the second tutorial of sorts. That will explain some of the more hard to use pieces, including the peak caps that quickly turn back into the bright side of a mountain.

Mountains 7
All pieces on the far left now added are the primary ridge of the Mountain, get used to them.They’re used to connect peak caps and essentially form the ‘spine’ of the mountain.

Mountains 9
Rushed this image but that’s fine; Now I’ve connected all of the pieces together, When you don’t use the diagonal peak cap, the turning ridge is useful for neatly making the top of the peak continue. It’ll make sense later.

All of the shadowy bits on the bottom right are part of the shadowed side of the mountain; bottom two are used to push the shadow to the right, second row from the bottom used for the upper right edge of the shadow, third from the bottom used in straight lines and the top 3 being fringe that’re used for details.

Mountains 11
Here I’ve added the shadows in; whenever the shadow is pushed to the right, a right turning tile is used; when the shadow shifts to the left, I use tiles that shift to the left. For ease of readability I used the same straight upwards piece because lazy.

Mountains 12
Newest bottom row is of the blank filler tiles. I exclusively use the second from the left because it adds enough detail to the shadow that it works for me, although there are lesser shaded shadows and much more detailed ones for those interested.

Mountains 13
Same thing as the shadowed side, although in a different order; bottom row is when it shifts to the right, second row from the bottom is of connector pieces that go straight up OR straight left (much more used on the light side), third is connections that shift the bright side to the right and top are fringe details.

Mountains 14
All shifting left and right pieces have been added here (although I swapped to the rougher shade in the next image)

Mountains 15
Straight up and straight left pieces have been added.

Mountains 16
Now’s for the bright side filler pieces that aren’t on the edge of the light side. The furthest left is the roughest/darkest while the furthest right is the lightest. I recommend using second from the right because it’s a good connector no matter what other pieces you use - rougher pieces require certain connectors and lighter tiles are their own mess.

Mountains 17
and boom mountains

Mountains 1
Animation gif of creating mountains. For the above tutorial.


Also, coming soon to my fields tileset is W I D E bridges. That’s all for today, got finals this week and im looking for reasons to not think about it.

21 Likes

Can’t wait to see the W I D E bridges, good to know that the gba citizens advanced their research on bridges to create such a beaut.

Good luck on that finals!

In accordance to the royal decree of Zephiel, that one bad guy from FE8, and Nino, all bridges must be 1x1 tile. However, since most projects don’t take place within the realms of Magvel or Elibe, those rules aren’t in effect there.

Oh, and those bridges tookabout an hour to translate over because of issues I was having. Fun!


Have you ever disliked Bridge Maps? Me too! Chapter 13 of FE6 says hello. Took over 4 hours to make, although 1 hour of that was me panicking over nearly missing my Anthropology final. Then realizing my Computer Science final was due 2 days ago. Most of the fine details are perfectly accurate except the region right around and below the castle, which my brain failed to count the number of spaces out.

Top vers has no pole-like structures on the bottom of the bridges (very makeshift but they do their job) while the bottom has them. I think they add just enough flair to make them very good.

My Fields tileset’s page (linked in post #1) will be updated momentarily with the wide bridges and the makeshift poles.

6 Likes


Chapter 21 iirc of New Mystery turned into a GBA map because epic

20 Likes

Can’t remember if I asked already, but do you do animation commissions by chance?

Wow this is really cool! Great job.

A faithful recreation. Despite being so big, you’ve done an amazing job adding variety to the mountains.

First, I don’t do commissions, only requests. I don’t like taking money for something I do for fun.

Second, probably not an animation. You can feel free to DM it to me and I might do something; simpler edits are better than others ex. using a Labrys instead of a standard Axe on Fighter animations.

2 Likes

Work In Progress Camus the Sable. Map’s quite pretty, shame that the entire bottom half of the fucking map is useless. Added in cliff tiles and hill tiles wherever I could just to give some variety.

map

image (9)

14 Likes

TRIPLE SHOW THIS TIME

Camus the Sable, the painful map from above. Still not a fan of its desolate bottom half.
Camus the Sable
image (10)

Then, a map I got done in the same day, Sanctuary of Sorcery!


AND MORE IMPORTANTLY.

I HAVE CREATED

A FUNNY HAHA

Pictured: Ephraim leads Forde and Kyle on an assault on Renvall but Ephraim is legally blind and isn’t quite aware of the fact it’s not surrounded by water, it’s not in the Fields tileset and is in a fucking desert.

I love making fog palettes occasionally. Sometimes. Maybe.

24 Likes

not great
Originally this map was a Chapter 22 remake from Thracia, but I grew dissatisfied with it once I realized I messed up counting proportions (I manually count tiles to recreate them). I then decided to just make the map into my own thing, and I’m pretty happy with the result. Below I’ll be including two gifs, the former of the second to last version compared with the original and the latter being the prototype which shows how far off I was.

It’s dense as hell in terms of Forests, but anyone who will use it should cut down a large portion of them when porting it into their own project. It needs it. I just like aesthetic.

image (13)
image (5)

8 Likes

LAVA TUTORIAL

Lava Tutorial

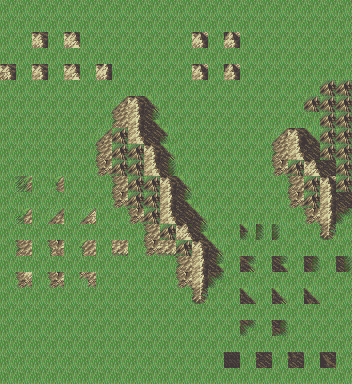
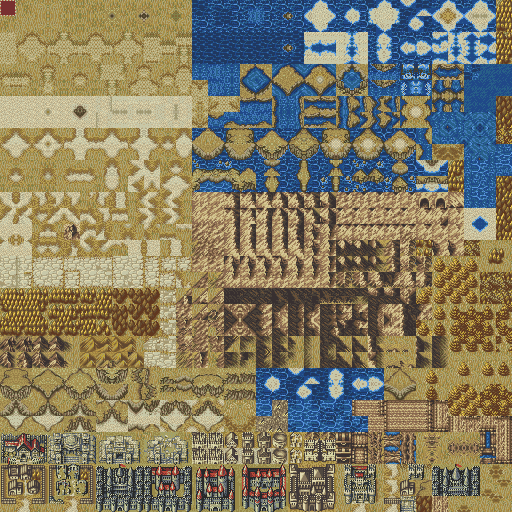
Images utilize my tileset for the Lava Cave, but it shouldn’t matter. I believe base has the exact same tiles as this.

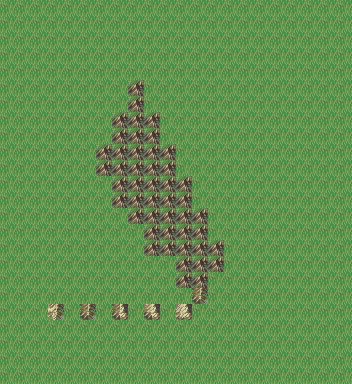
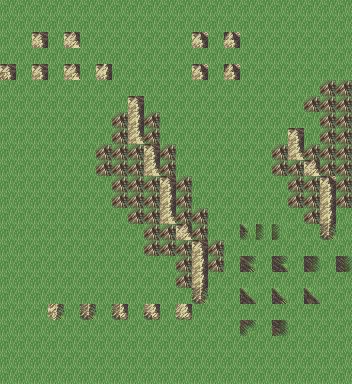
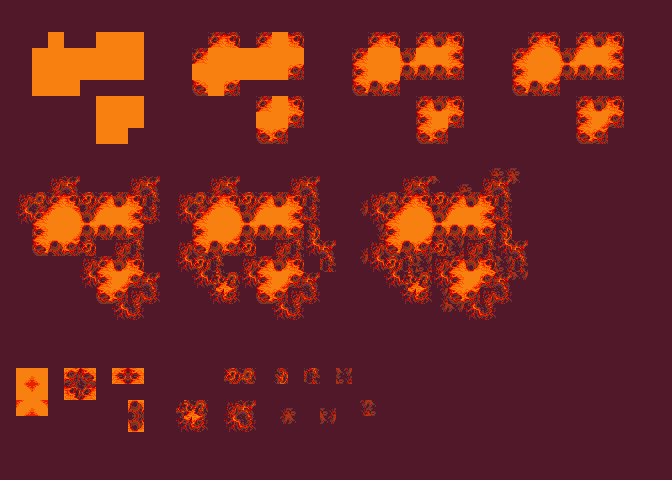
Bottom are all the tiles you need, each explained per node of progress above.

At the start, create orange boxes of roughly where you want the main body of the lava to be. Feel free to fill in a majority of the space that you utilize the lava on with this, but if possible make a 1 tile ‘rim’ between the cliffs surrounding the lava or the buildings surrounding the lava and the lava itself.

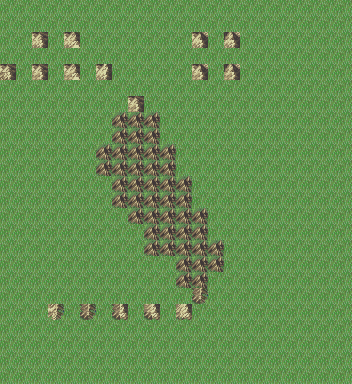
Use the 45 degree angle lava to cooled lava transitions second, similar to how one would do with Water and its 45 degree angle cliffs. In this case, as there isn’t a proper 1x lava tile, I had to widen it a bit to make it work here.

Next to the 45 degree tiles at the bottom are the left, right, top and bottom tiles. These are used on the ‘straight edges’ of the lava. Don’t be too concerned immediately with tilespamming unless you have a 5+ wide or tall sect of just those tiles, in which case try changing how you set it up.

With that done, we now move on to the simplest tiles, the ones in the far left. These are edges, used to patch up rough corners that otherwise look out of place. They’re hard to describe, but cliffs in the Fields tileset both in the water, on sand and on grass all have a similar transition tile. Look at the example for how best to use it.

Now comes rim edges. If you have only one body of lava, then this is about as far as you’ll need to go excluding the final step. Rim pieces are either in 1x1 tiles (top 4 pieces, namely the two that are next to each other) or 90 degree tiles used for connecting. You can create crescent shapes on the edge of your lava either by using three in a triangle (see the top left of each example), a half moon in the form of two, or simply using the 1x tiles at the edge to add flair.

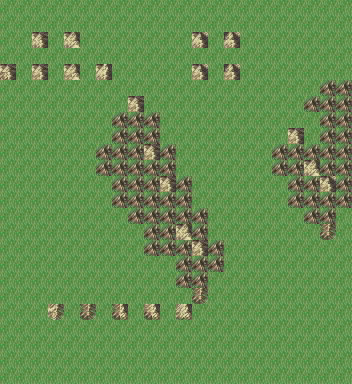
However. If you are like me and like being a tedious cunt, then you’ll probably wind up having one or more other pieces of lava next to each other. In this case, use angled tiles or the vertical lava trim to connect them, unless there is significant distance between them. In that case, I recommend either widening them or adding another lava chunk between them. I did my best in the examples to show this off, but there’s only so much I can do without an example (down below).

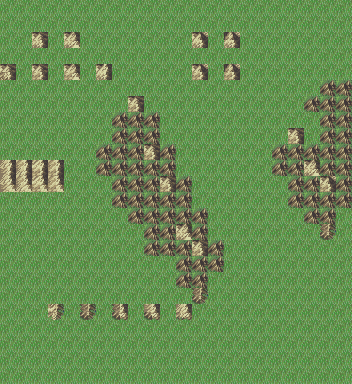
Lastly are the true flair, the tiny corner pieces. Fill in the interior of the lava that isn’t yet filled with these nice bits, added whenever you feel it makes sense. If you don’t use these, that’s completely understandable as they’re an unnecessary addition that’s perfectly fine without. For those that DO want to use it, however, make sure that its used either sparingly or on the rim tiles that connect to corners - of the 1x1 tiles, the second from the right is a great example where the top left AND bottom left both taper off, either making a great connector or being able to kinda flare out. Adding too many looks ugly, though.

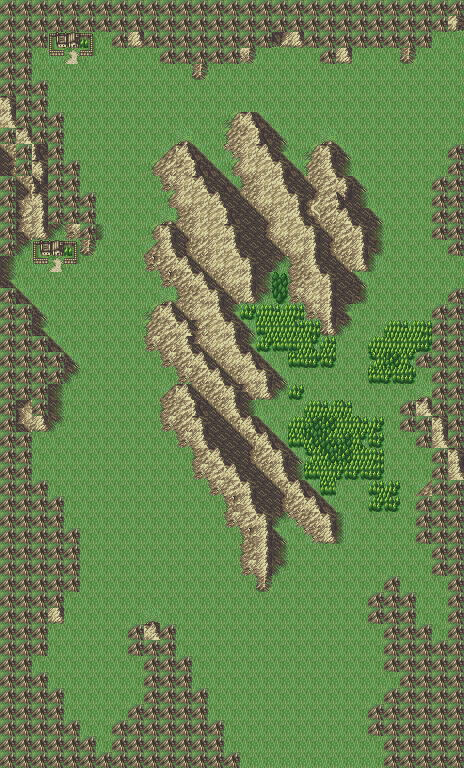
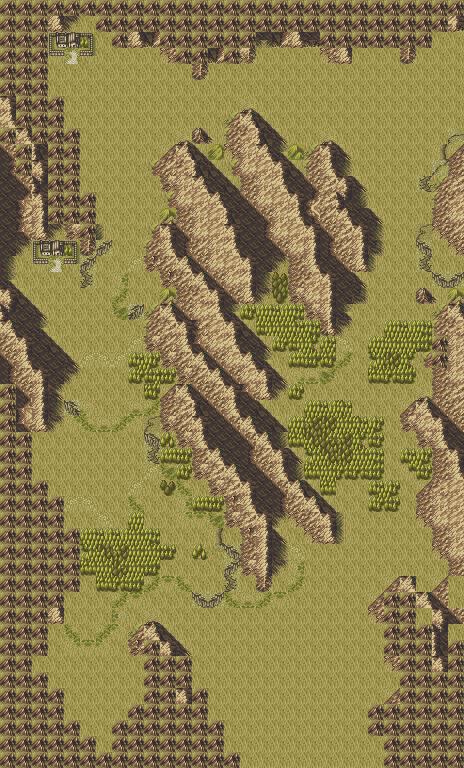
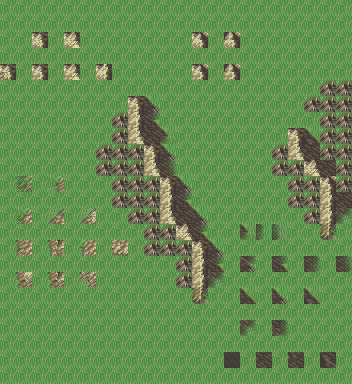
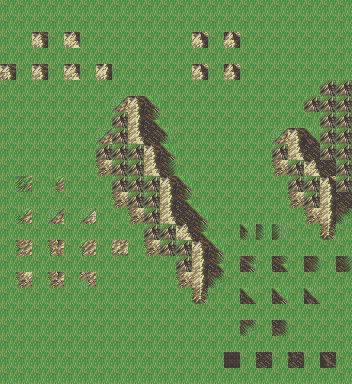
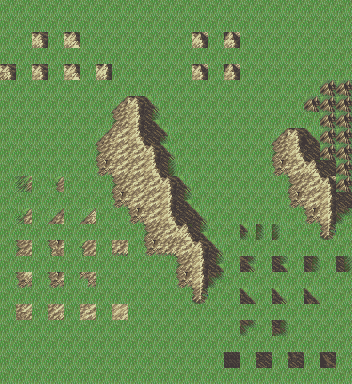
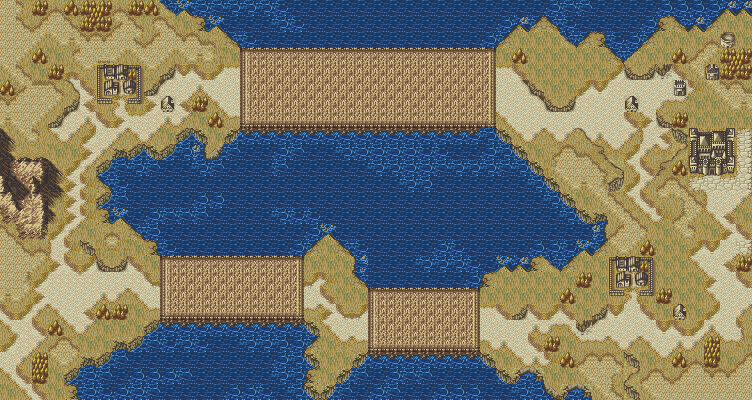
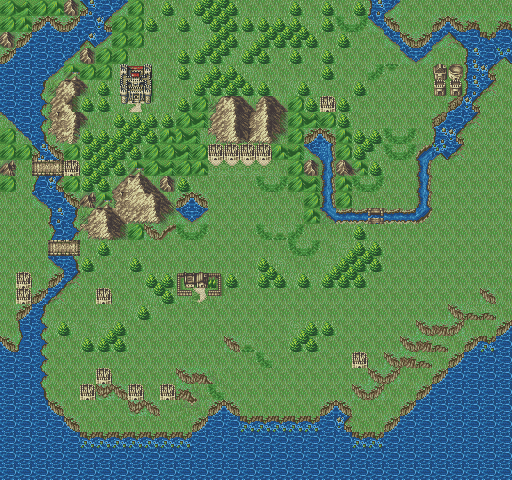
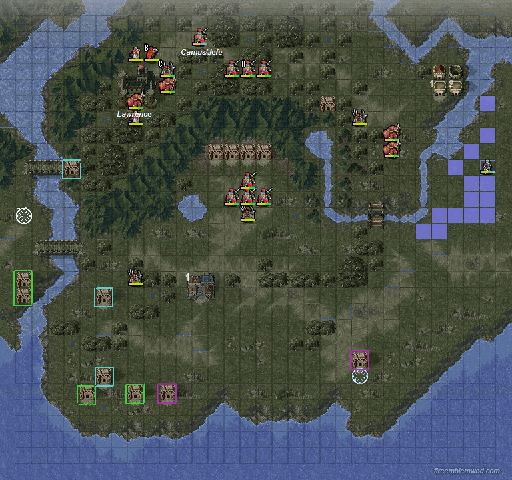
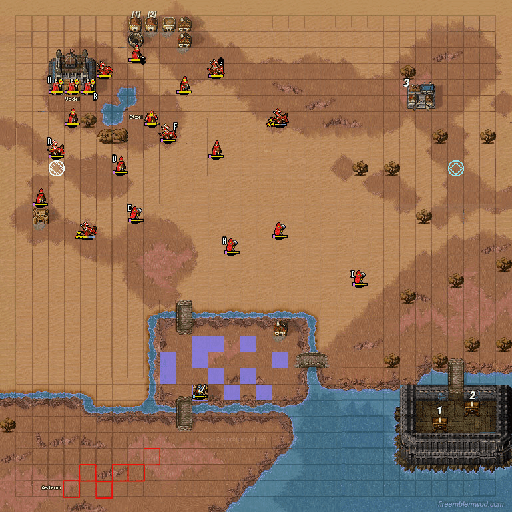
For an example map, post #63 is a great example, but I’ll repost it down here so you can get a feel.
image

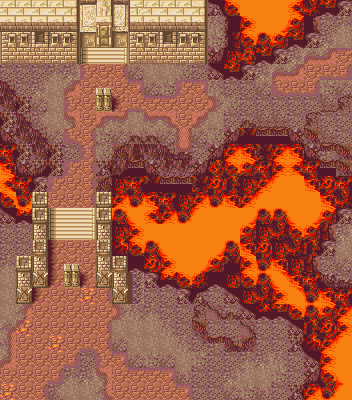
Don’t be intimidated by how shitty the map can be to work with at first glance. Like with practically everything else, if you can simplify it, it’s a lot easier to handle.

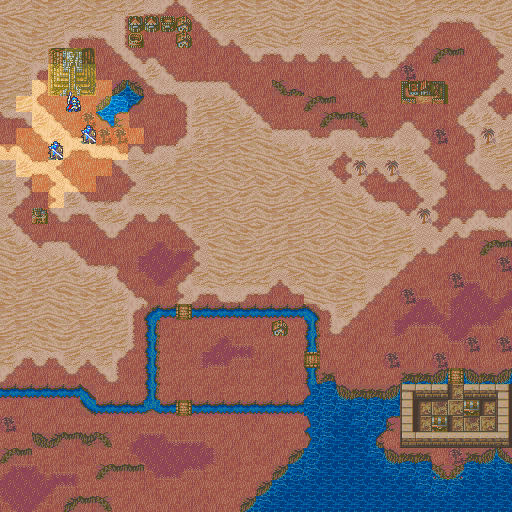
the ground on the other hand lmao its so bad

17 Likes

It do be gettin kinda hot in here doe

3 Likes

Finished Lava Fields

And here’s a finished version of a Lava Fields map I’ve been working on for a bit… Quite happy with the end result. Should be a great example of how to work with the Lava guide above.

14 Likes