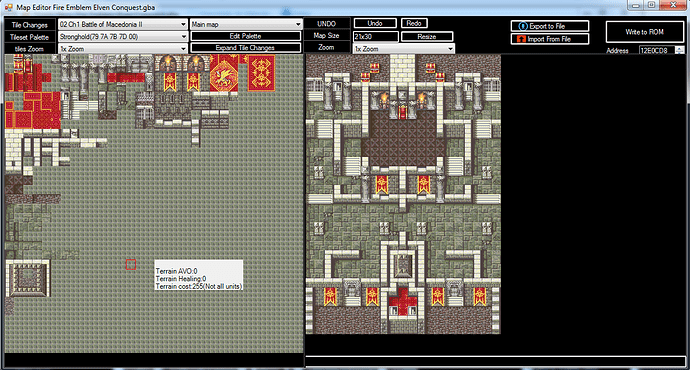
The Stronghold tileset is in both vanilla FE6 and FE8, representing grand castles home to critical plot twists in maps like The Neverending Dream and Father and Son. Despite this grand legacy, though, it rarely sees use in FEGBA hack projects. Even similarly grand palaces merely use the Castle tileset or similar, abandoning this tileset to the mists of unused assets.
And even the hack maps that do use the tileset often fail to understand how its floor tiles function. While I can’t force you to put Stronghold maps in all your hacks (well, I can try), I can at least teach people how to use it properly.
Part 1: Overview
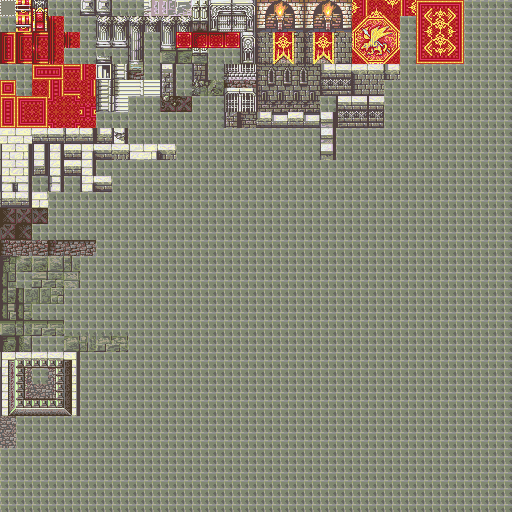
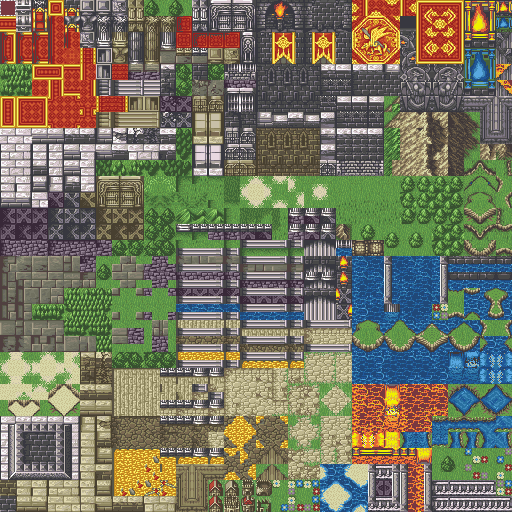
The Stronghold tileset looks something like one of these.
The former tileset is ripped from FE8, while the latter is from this epic tileset by Zoramine and N426. Now, both of these images are big and complicated, and feature a lot of stuff similar or identical to other tilesets. Let’s zero in on the part I want to explain here.

Here we go.
Now, this still looks complex. Unlike other FEGBA floors, which are generally simplistic with obvious shading, it’s hard to tell which tiles are shaded and where.
But it turns out that’s not really that complicated. There are just multiple variants on each tile, and the core of that tutorial is a guide for that here.

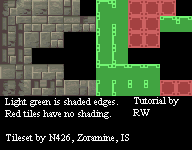
This image puts the tileset and a simplified version showing shading next to each other. The shading rules are as described; light green edges on tiles are the shaded edges, and the red tiles are ones with no shading on them at all.
In actual map usage, I recommend more or less randomly distributing these tiles in places where their shading fits. This creates a great “aged chaotic stonework” feeling.
Part 2: Community Tileset Variants
…But that’s probably not the version of the Stronghold you’re using, is it? If you’re a hardcore hacker:tm: using custom tilesets, you’re probably using Zoramine and N426’s Updated Stronghold.
I have some issues with this tileset myself (especially the weirdly thick walls), but the sheer density of features makes it a more useful tileset overall.
Anyway, the stone brick floor tiles of this tileset are slightly different from vanilla. I’ve put together a simple tutorial for that too, following the same rules as the one as in Part 1.
Part 3: Example Map
Time to see how this goes in action, shall we?
First of all, I’ll sketch out a map to work with. This will use the vanilla Stronghold tileset.
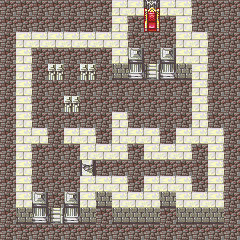
Now, we’re not using the interesting floors yet, so let’s block out the areas we want to fill with those.
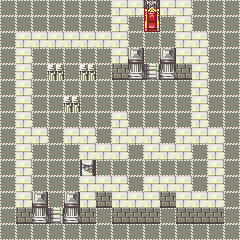
Yes, “all the floor on the map” is the area I want to fill with those.
First of all, we can use the tiles we have very few options for; in particular, these are the ones with both the entire left and top sides shaded, and the ones with only the top half of the left shaded.
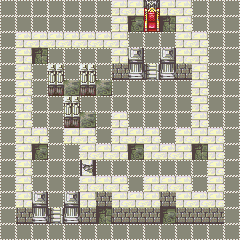
Yes, I also put in pillar bases. This tileset doesn’t actually have pillar bases on these cracked stone floor tiles, so I found an appropriate substitute.
And now is the more complicated bit. We have a lot of options for tiles with the left side shaded, so I’ll mark off the tiles those are needed for, and go through those distributing them randomly.
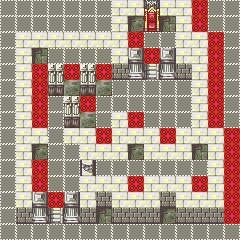
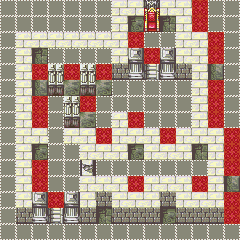
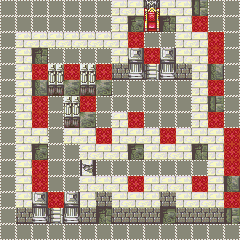
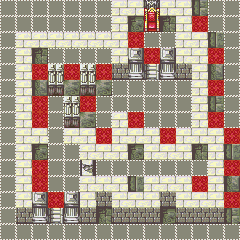
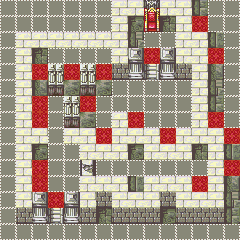
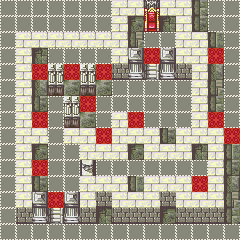
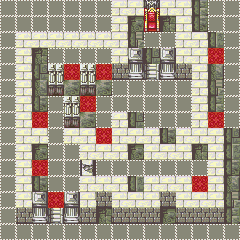
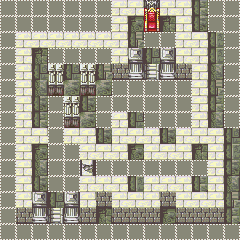
Next up is the same thing with tiles where the top half is shaded.
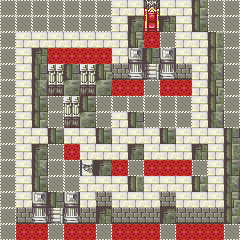
I also took this chance to fix a few tiles I missed earlier.
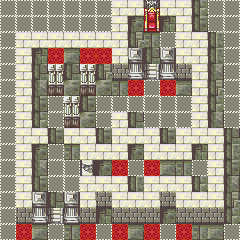
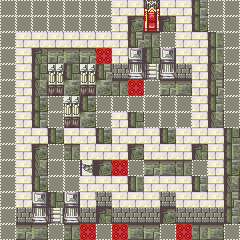
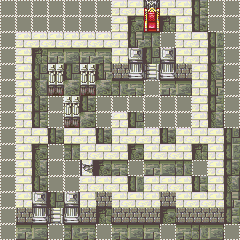
And the same thing one more time, with the unshaded tiles.
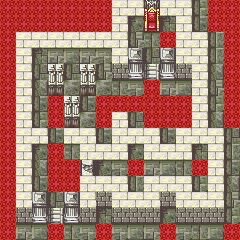
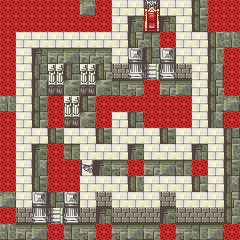
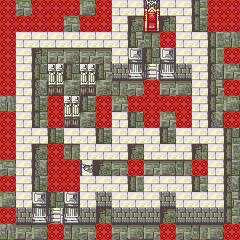
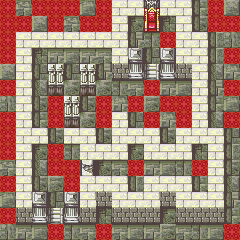
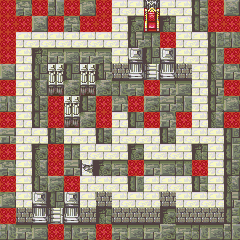
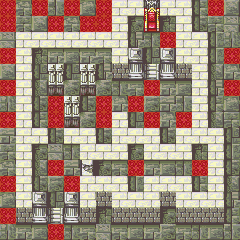
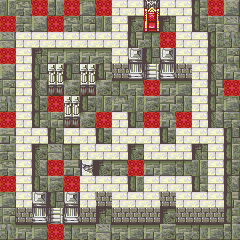
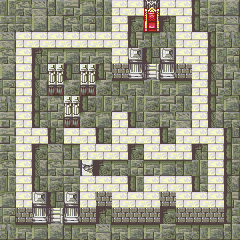
And here we are! Let’s just clean up the walls…
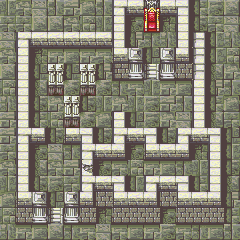
And done!
That’s the tutorial! Download the example map here, and the updated Stronghold tileset here.
Feel free to redistribute the images provided in Parts 1 and 2 of the tilesets parceled out into tutorial bits, as long as you credit me.
