I accidentally map editing >_>
Me and some other dude recently discovered a tile map making tool called Tiled. So naturally, I made an FE map inserter for it. And then I made an tutorial on how to use that inserter and making insertable maps in Tiled.
Required knowledge:
- How to use Nightmare.
- Offsets and pointers.
- Knowing the offset of some free space in the ROM.
Recommended:
- Basic hex editing knowledge.
- Arithmetic in hexadecimal, use your computers calculator for it.
Required tools:
- Tiled.
- Tiled map inserter and tilesets.
- Nightmare, Chapter Data editor and Event reference editors.
- ROM. Currently only FE7 tilesets exist, so only US FE7 ROM is supported. More support will be added in near future.
Making an insertable map:
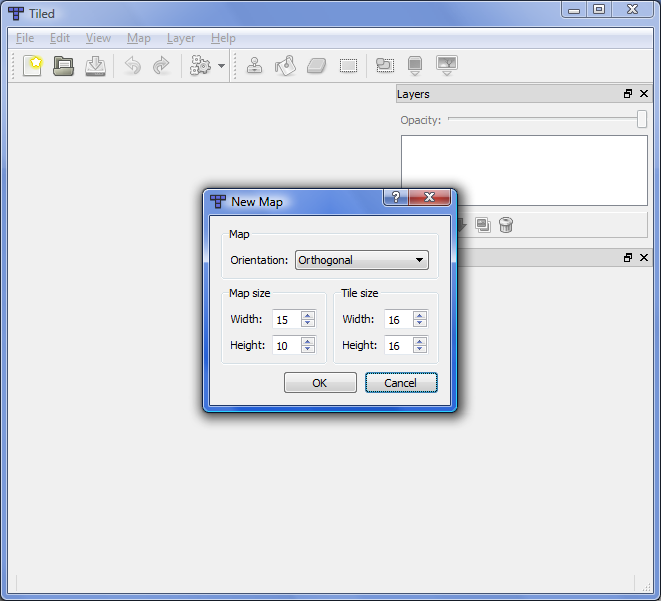
Start up Tiled and select New. Map size isn’t that important as Tiled can resize maps, but start with something reasonable. You can’t insert 1000x1000 tile maps to any GBA FE, so no point to make a map that size. The exact upper limit depends on the game and for FE7 it’s 43x36 IIRC. Make sure orientation is Orthogonal and Tile size is 16x16:
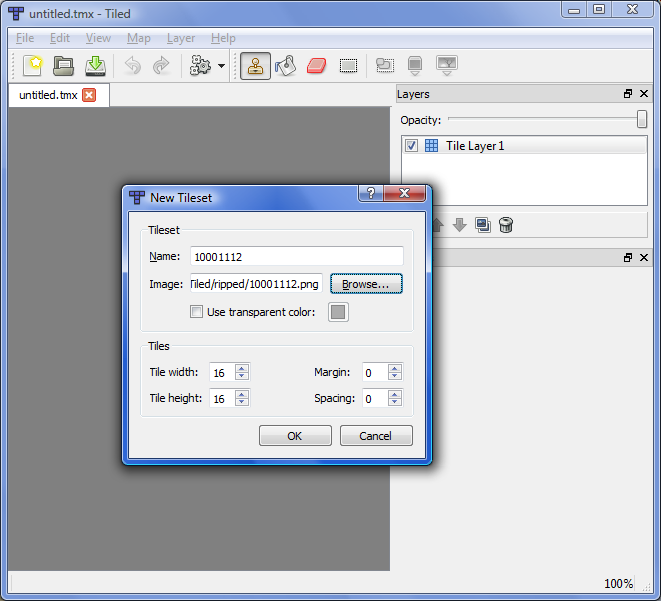
Next, pick a tileset. You can only choose one tileset per map, so choose carefully. You can’t change tileset later, either. Go to Map -> New Tileset. Click on the Browse… button and go to the folder where you put the tilesets that come with the inserter. Choose one of the tilesets in there. Do not use Mappy tilesets or reference tilesets as those won’t work and you won’t see the problem until you’ve inserted the map. Let the Tiled choose the name of the file to be the name of the tileset and make sure the Tile width and height are 16 and Margin and Spacing are both 0:
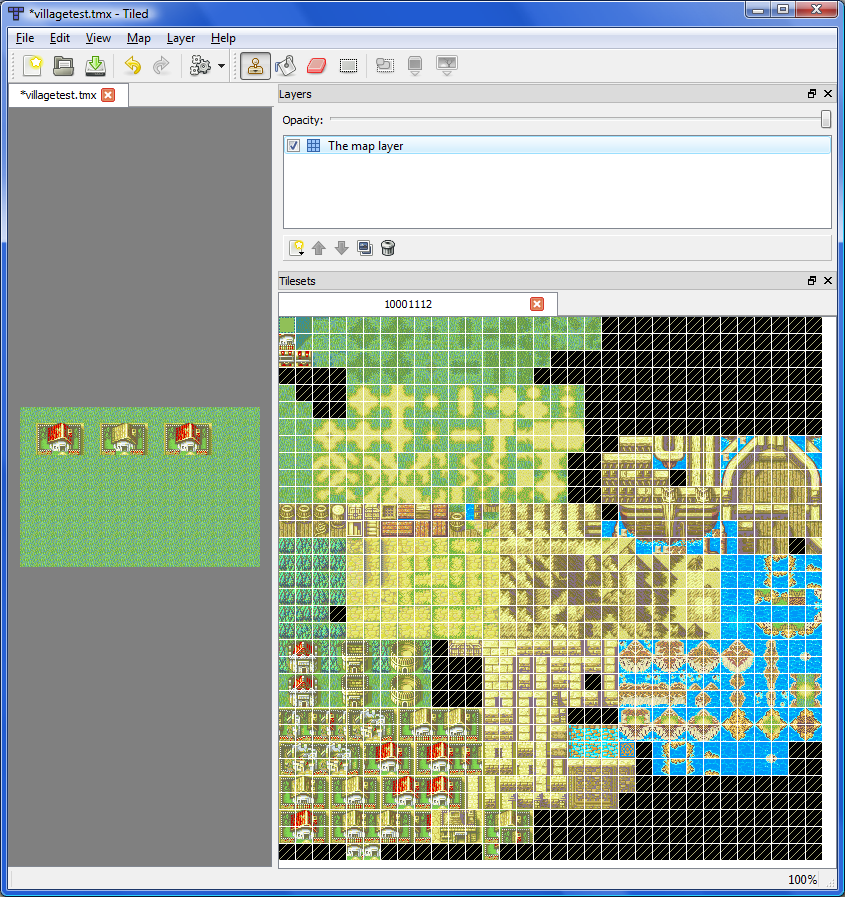
Now you make the map. It can be pure shit for all I care, you’re here to learn how to insert a map, not how to make a good map. If you want to learn how to make a good map, ask at Art and Spriting boards. Here’s what I came up with for this tutorial:
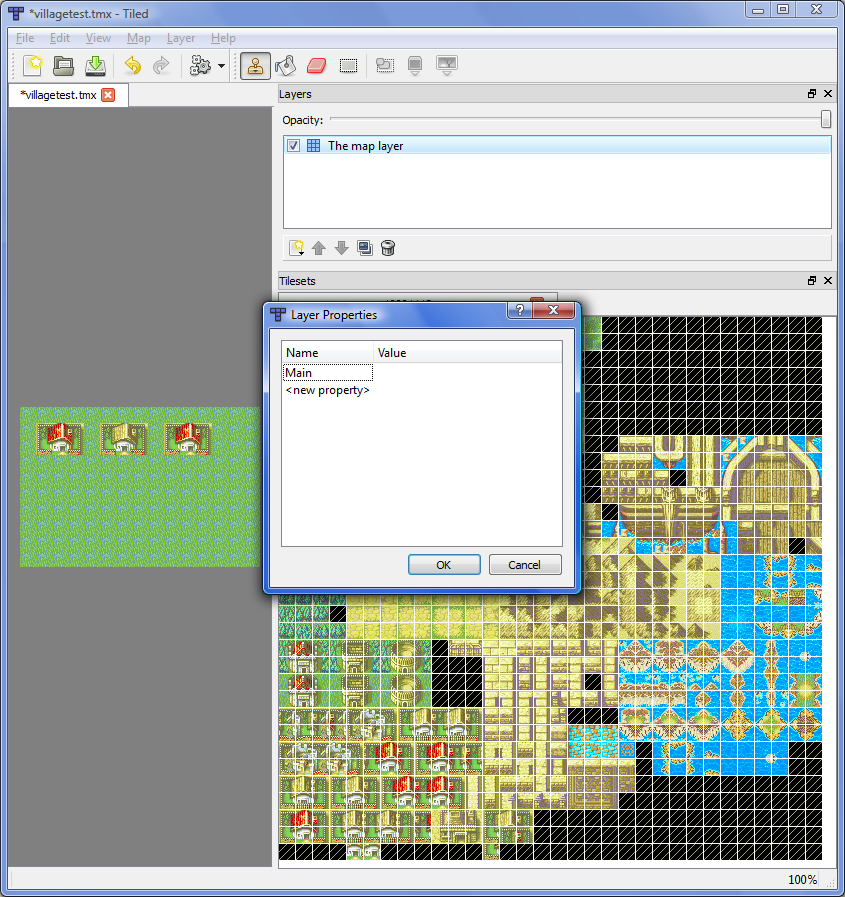
If the map isn’t going to contain any map changes, your map is now done and you can skip ahead to the insertion part. If your map does have map changes, then continue reading. First, right click on your only layers properties and add a new property called “Main”. This will tell the inserter which layer contains the actual map instead of map change:
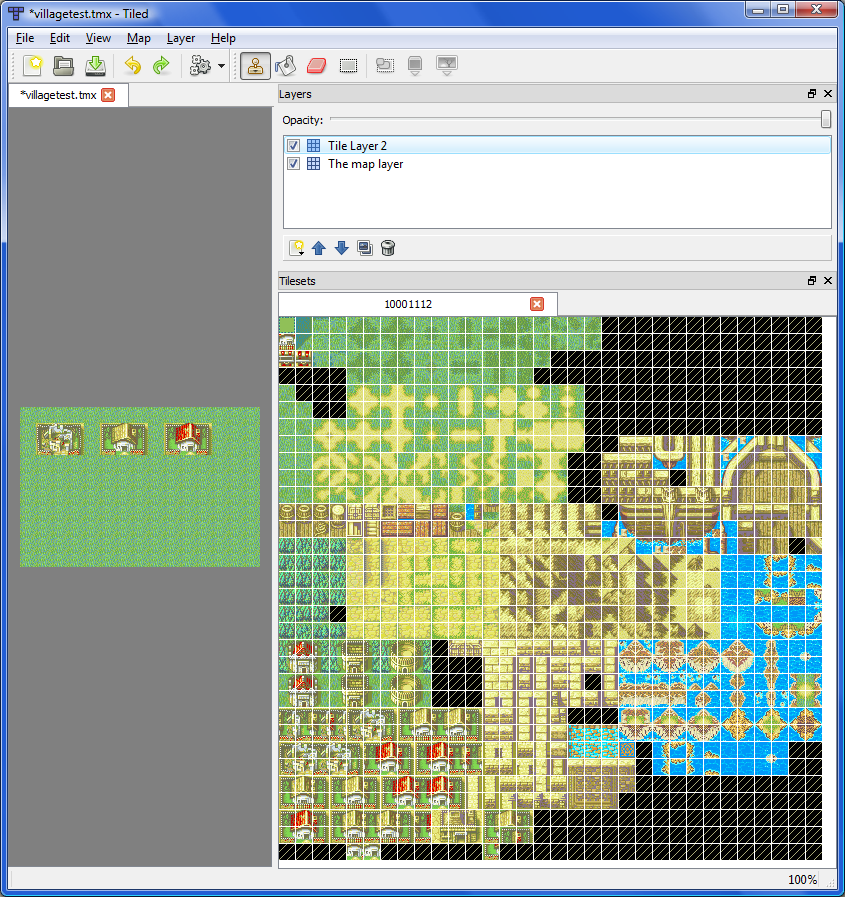
So now, we make the map changes. Every change needs to be on it’s own layer. One change can be something like a village gate closing, a village getting destroyed or a pathway appearing, so one change isn’t restricted to one tile. You make the change by first adding a new layer and then adding the changed tiles to that layer. If a tile doesn’t change, then you can leave that tile empty. And since empty tiles are transparent, you will see what the changed map will look like when you have the main layer visible:
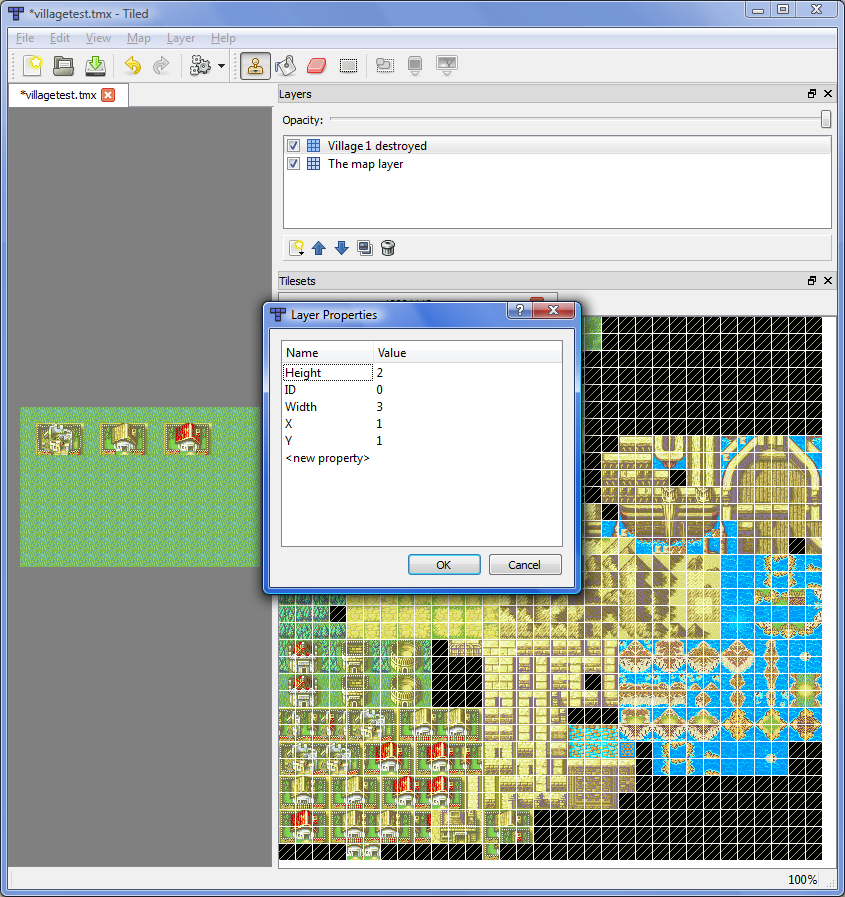
If you want to check that there isn’t any extra tiles on the map change, you can make the map layer transparent. Now that you have the changed tiles set, you need to add properties to tell the inserter which tiles are going to be used in the map change. You will do that by using layer properties. This time, however, you need to add actual values to the properties. The properties for map changes are:
ID: The ID of the map change. Must be unique for every map change for this map.
X: The X coordinate of the top-left corner of map change
Y: The Y coordinate of the top-left corner of map change
Width: The width of the map change
Height: The height of the map change
Each one of these are required for the map change to work. Also, all of these values must be between 0 and 255. Here’s what the properties of my destroyed village are:
You can add any properties of your own to anything you may want as they are ignored by the inserter. However, I may add more properties for a future version of the inserter, so be careful with them. Also, I recommend giving each map change a unique and descriptive name, it will make future editing easier.
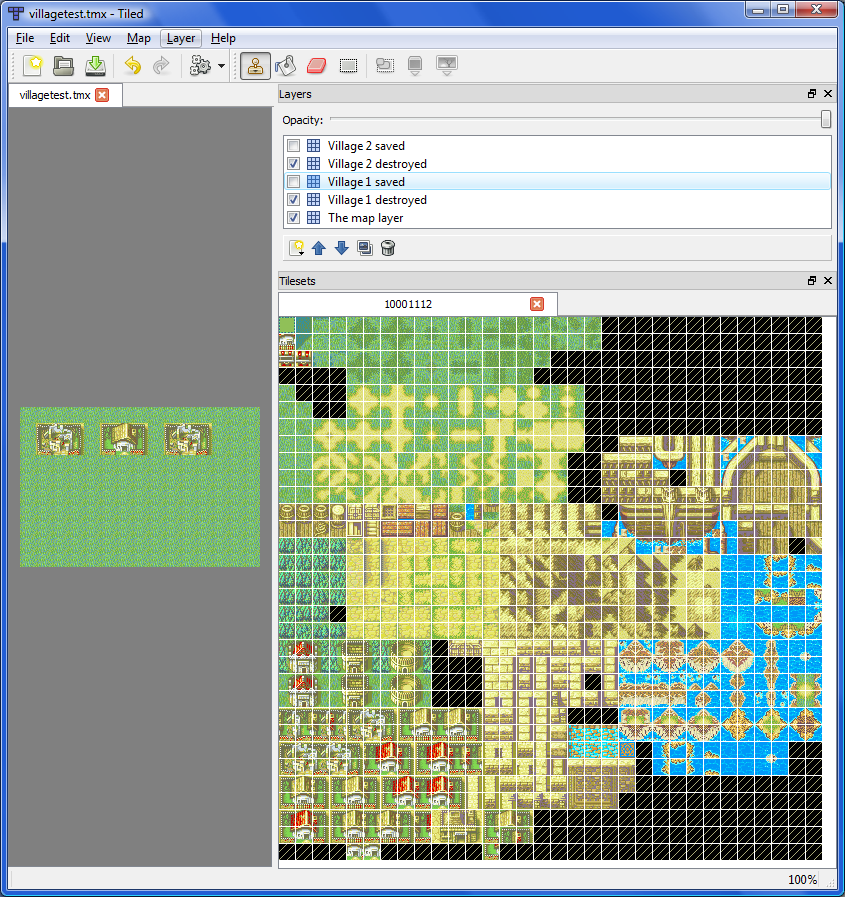
Repeat this for every map change you have and you are done. Be sure that every map change gas different ID, otherwise both the inserter and the ROM will get confused. Now, your map is done:
Inserting a map:
Save your progress and exit Tiled. Start up Tiled map inserter and you should see the following:
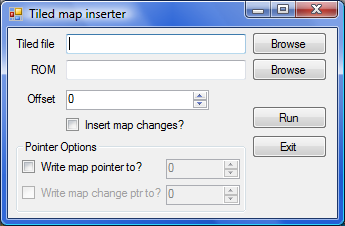
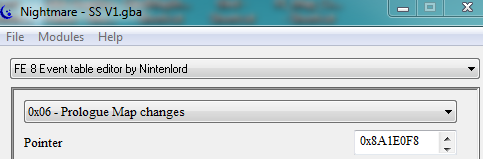
Pretty empty, so we’ll fill it up. Tiled file is the file you saved in Tiled, so choose it. The ROM is the ROM you wish to insert the map to and the Offset is the offset of some free space in the ROM. If your map has some map changes you wish to insert, check the Insert map changes? checkbox. Now, just because the map is in the ROM the game won’t automatically know where it is, so you’ll need to insert the pointers as well. You can do that with two ways, either you use Event reference editors to insert the pointers or you find out the offset of the pointers and let the inserter do it for you. Either way is fairly straightforward, so i won’t cover them. Here’s how it looks like when I insert my map to FE7 and replace Prologue map pointer and Ch2 map changes:

Now that you have the map inserted and the pointers set up, you need to tell the chapter to load correct map, tileset and map changes. For that, open the ROM in Chapter Data Editor. There’s plenty of data that makes the chapter, but we are only interested in these:
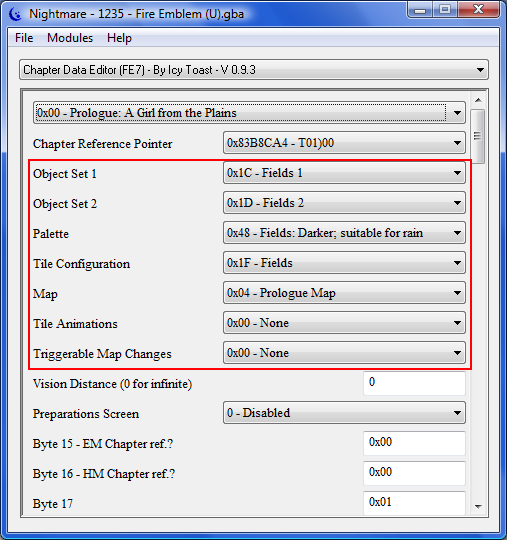
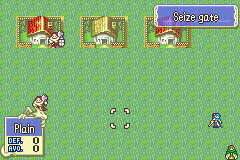
You remember how the tilesets name was something 10001112? The name comes from Chapter Data Editor. First two digits the Object Set 1, the next two are Object Set 2, Palette is the next two while the last two are Tile Configuration. So put that data into the module and you’ll get your map use correct tileset. Your tileset may also have some animations, in which case, choose the correct one, you can find it based on the name of the tileset and animation. Then, if your map had map changes, then you also choose the correct Triggerable Map Changes. Then save and exit Nightmare as usual and you are done. Now fire up the ROM and bask in the glory of your map:
The end:
Now, your map may be in the ROM, used by chapter and has correct tileset, but your map changes won’t trigger. This is because map changes can only be triggered by events. As for how to edit events, that isn’t part of this tutorial. There are plenty of event hacking tutorials on the web, most of them made by Arch/Supreme Overtroll (whom I taught myself, so he is good), that cover map changes:
Event Hacking for Dummies
General Archibald’s Bootcamp of Event Hacking
If you can master both map and event making, you will have a near-total mastery over making custom chapters in Fire Emblem, so I recommend start learning. You’ll have long way ahead of you, but it’ll be fun. Sometimes. >_>