Effortposts Around Chapters We Like (From Custom Campaigns)

Sister Thread: Effortposts Around Units We Like

Well, the units thread is going well, and Doing Thangs mentioned there should be one for maps, so there’s going to be one for maps.

I believe we should talk about custom campaigns more, partly to unpack and understand what makes them great in order to help us (or inform others to) build our own, partly just to gush about how great they are. In this thread, we are going to talk about our favourite chapters from custom campaigns, in detail. ‘We’ means ‘you’. Talk about whatever strikes your fancy, though be conscious to put major story spoilers under, well, a spoiler (and anything that’s going to be contingent on ‘I love the final chapter of such and such because of all these plotlines I’ll have to explain’ might not be a good fit, though a smaller character arc might well be). And yes, you can make multiple. There’s a lot of chapters out there.

One caveat: please offer both chapter number and name, if applicable. A lot of people will only remember one or the other. I’d also recommend at least one visual for the map itself.

TABLE OF CONTENTS

  1. 1-9: Thunder’s Call (Vision Quest) by Parrhesia
  2. 1/72: Battle of Kin (The Last Promise) by LeskLyfield
  3. E-2: Imprisoner of Magic (An Unexpected Caller) by Retina
  4. 9x: To a Dark Place (Absolution) by RandomWizard
  5. 10: Hollow Kingdom & 11: Maze of Gold (Souls of the Forest) by AlexMPG
  6. 14: Capricious Valkyrie (Shackled Power) by KrashBoomBang
  7. 7: Unyielding Conviction (Legacy of Sorrow) by AuraWolf
  8. 25: Within the Dark (DLATMOL) by ElPinguinot
  9. 3: Chevauchee (Drums of War) by RandomWizard
  10. 1-6: Law of the Land (Vision Quest) by MegaCowsaMan
  11. P: Comrades (Home by Winter) by ArcherBias
  12. 20: The Dream on Fire (Curse of Lagdou) by AlexMPG

1-9: Thunder’s Call (Vision Quest)

This is my favourite chapter in Fire Emblem.

So when I hit this map, I was feeling tense. I was ironmanning the run, and fresh off some damaging losses - a troubadour went down and took the Rescue staff with her (hilariously, dying in a dream sequence that wasn’t even her dream to begin with), and I’d lost mediocre earlygame mage Lera and, more importantly, the lockpick she’d happened to be carrying after a convoluted trade chain. Some of my key investment units had rolled poorly (not naming any names, Vagelis) and I felt like I was running on fumes.

You get three new units in this chapter. Titus and his retainer, Helga, who both come in swinging hard. Helga’s maybe the best unit in the game, a wyvern knight who lives up to the billing with big stats and a good energy. Just a fast, powerful bruiser that your squad is crying out for at that time. Titus, your secondary lord (it’s his thunder that is calling in the chapter) is no slouch either, a mage armour who, at least for me, hit a satisfying groove of leaning hard on his brave Prf before getting to a point where he can double on his own. I don’t remember where Titus gets his Prf, though. But he does come with Bolting, and that’s a particularly nice thing to have on a very tight map that’s very small as the crow flies where the timer is tight. I hoard siege tome uses to a fault, but I think I used it twice, here; the ‘a stitch in time saves nine’ principle was very much in effect.

As you can see, there’s a lot to do in the small space, and the timers are, while far from unforgiving, certainly present. Four chests to grab across two flanks. Otilie is the third unit, a nominal enemy thief who can be recruited by talking to her, and while in the macro sense she’s mostly a failsafe for if something terrible’s happened to Esfir (or, in my case, her lockpick), she’ll always be a sight for sore eyes here.

It looks simple on the surface, but the enemy put up a firm resistance, with all chest rooms fortified and a constant bombardment from behind walls. You really do feel like you’re breaking into a strongpoint. And the pressure of needing to move up is felt, believe me; you need to push and take fights before you feel ready to, making the best of a bad hand, and every action is key. You have 14 guys in a tiny fortress, and it’s proper knife-fight-in-a-phone-booth areas, and it’s exhilarating.

And there’s a preparedness and a deliberateness to the enemy placement. Magi on the flanks, archers in the chest bunkers, a bolting guy in the north. A promoted officer on each wing. Armour block the easy ways out of the starting area you’ve been funnelled into, and breaking out with the fragile wall will wind up making the eventual back reinforcements have a quicker path to you. This doesn’t feel like a bunch of units placed randomly or, at best, with a vague idea of overlapping ranges; this feels like they’ve been placed to stop you progressing, and when you know you’re on the clock, that’s real incentive to make the most of your every action.

Even the chest contents feel well thought-out. The north two, which the thieves make a break for, contain a wyrmslayer and a blue gem. These are nice. Very nice, in the latter case. But, critically, it’s the easier chests that contain the better stuff. A Restore staff - and, yes, a blue gem can buy many Restore staves, but if you use vanilla status then you really want to be sure the player has a Restore on-hand - and an irreplaceable early Earth Seal, that now the rest of the act can be designed around assuming an at least reasonably ambitious player has secured even if they didn’t 100% the map. The wyverns provide a little extra encouragement not to lag behind, but it’s really the thieves which push you forward.

Once you’ve secured the chests, you converge on the throne, and while you’ve basically won the map by that point, it doesn’t feel entirely like a free win. The officers on the flanks are tough, the wyverns are pushing up - again, faster if you saved time in the south by cracking open that wall - and aforementioned Bolting Guy in the throne-room is slowing your pace. But it knows not to drag it out too long; taken at the decent clip it heavily encourages, this chapter probably doesn’t go over 10 turns.

Small things: it’s a really nice palette, and it even fits the grey and teal colour scheme of the enemy faction. And it looks like a small, pokey fort, nevertheless one that an outlaw warband is going to have a hard time pushing into. I really like how you can either use doors or break through cracks in the central rooms, too.

Flaws with this mission:

  • I don’t recall and can’t find any indication Otilie was cropping up on the right flank (and thus Esfir should immediately go down the left), that might have been nice
  • The garrison commander’s name is… Garrison

That’s about it.

It’s tight, it’s well-crafted, it introduces and encourages you to lean on three new characters, and the rewards are tangible. You don’t want to push through a tough enemy dug into their fortifications, but you know you’re going to have to. It was hard, but going in without a lockpick and coming out having picked the place clean, you’d better believe I was feeling smug about it.

17 Likes

My answer is TLP’s Battle of Kin. In a way, it feels like the true endgame chapter of TLP, with the last four chapters afterwards being the closure of the story.

In essence, it is a 72-turn limit chapter featuring four seize spots, a day-night cycle, and unit-based reinforcements - a slight pay-off for having used certain units (if you don’t just deploy them for just the reinforcements).

This battle - while not exactly challenging (the turn count is rather lenient, and Holton’s 10 movement boss is a nice (albeit potentially scary) touch.

This chapter does several things right that I would love to do myself one day purely from a design standpoint - being rewarded beyond just stats, skills or their utility for investing in a unit - but by events and slight alterations in a chapter.

6 Likes

An Unexpected Caller - Endgame 2: Imprisoner of Magic

I’ve made no secret of my enjoyment of AUC, and a large part of that is how brilliantly the game conveys its tone and feel through relatively minimal storytelling. Its final three maps are the apex of this storytelling, and since I know Thangs plans to cover Endgame 1, I’ll cover Endgame 2 (as for Endgame 3, it’s peak enough that you should stop whatever you’re doing and play AUC right now).

E-2’s base map of choice is FE7’s Sands of Time, a rather infamous slog of a map thanks to it being cursed with the forced survive objective. AUC’s spin on the map instead makes it a kill boss map: specifically, the target is Kishuna, the magic seal unit in the middle of the map. However, Kishuna’s functionally immortal until you seize the throne, which starts occupied by Nergal. Kishuna’s iconic magic seal is in full effect, which both makes skipping around the map with staves harder and notably impacts a lot of combat (including the main lord Puzon’s, since much of his toolkit revolves around powerful magic swords).

What makes this map so strong is that it feels like both the culmination of AUC’s unique design and a celebration of GBA FE in general. Many of the map’s enemies are reprisals of prior bosses armed with tools evocative of their earlier appearances (incidentally a design choice used by a lot of endgame maps, both official and fanmade), and it’s always an enjoyable experience to refight familiar faces in a new context. The generics are also great to fight. Most of them sport many of AUC’s extremely unique weapons, such as the two berserkers with the Axe o’ the Titan and the The Iron Axe, or everyone’s favorite Kraken Hunter Sake Sake Sake archer, who is simultaneously the most and least threatening enemy on the map (and the reason AUC fans think 6/7 is the funniest thing ever). I won’t spoil this map’s recruits for those who haven’t played, but their inventories have some great deep cut vanilla references, like the FE7 MKDD Wind sword or the 60 use vulnerary that goes unused in base FE8 (I believe it was intended to be some manner of event distribution).

The music’s also worth special attention (though that can be said of most AUC maps). Most of ArcherBias’s remixed vanilla GBA boss themes get another chance to shine through the boss refights here, and the two new remixes, Dragon’s Gate II and Everything Into the Dark, are among his absolute best. Sullied Grace (from 3DS era Kirby) kicking in once Kishuna’s left defenseless adds a lot of hype and energy to what’s effectively walking up and slapping a joke boss, and the use of Fearless Adversary (one of Markyjoe’s original compositions) as the generic battle theme gives even nameless enemies a lot of weight, especially since the entire game prior doesn’t feature traditional player phase combat themes (also sullied grace and fearless adversary being used are both nods to iconic track usage from my hacks so i may be biased but shush).

AUC’s biggest strength is being able to breathe new life into what I once thought were unremarkable GBAFE maps, mechanics, and characters, and E-2 is one of the best reflections of that life. There’s many other maps I could’ve easily talked about as instant romhack classics (Ch. 2, 5, 8, and almost every map from Ch.11 onwards really could’ve been subjects of my effortpost), and if you take anything away from this, it’s that you should PLAY AUC RIGHT NOW GIVE UP YOUR RESPONSIBILITIES TAKE THE PUZONPILL TAKE THE TEODORPILL LIVE THE 6/7 LIFE

12 Likes

Chapter 9x: To a Dark Place (Absolution)

I’ve already written a longpost on another cool chapter from Absolution (by ZessDynamite), but that thread was then, and this is now. Besides, copy-pasting over that old post is just so… passé.

Instead, I’ll just do another new writeup.

image
(Splicing this image together from screenshots was actually really tedious.)

In Chapter 9x of Absolution (by ZessDynamite), your control is swapped to a new party, commanding characters who otherwise serve as some of the game’s major antagonists. These five come in as pre-promotes with carefully planned inventories, stats, and skills, tuned to take on the specific challenge in front of you.

The thing I find most interesting about this chapter is just its objective. Defend and Survive maps are often maligned in the FEU community, criticized as being too easy to win by just turtling up in a chokepoint instead of actually engaging with the map’s challenges. Chapter 9x, however, excellently forces you to play with the mechanical flow of defending, desperately stopping enemies charging into your position from overwhelming your whole group.

…What do you mean, “it’s not a Survive map”?

Lex_Talionis_2024-07-08_13.18.20.496502
(Please don’t comment on the playtime.)

This Rout map might well be the best Defend map I’ve ever played. (In close competition with Chapter 6 of Souls of the Forest and Chapter 12 of Iron Emblem, though I’d imagine those two will get posts of their own soon enough.) There’s no turn limit, and the end of the “timer” is signified by the flow of reinforcements stopping and the otherwise-stationary boss charging your position. Due to the party switch, you barely even have to worry about side objectives or experience point management. All that matters is you, the enemy, and the desperate task of survival.

Lex_Talionis_2024-07-08_13.31.29.551995Lex_Talionis_2024-07-08_13.31.23.835482

Not only do reinforcement waves charge you from the sides of the map, these enemies also have massive stats, outscaling your units one-for-one in addition to vastly outnumbering you. This whole team is designed such that raw combat isn’t enough to pick fights they can win. Instead, Chapter 9x gives this alternate party a whole new mechanical identity: abusing debuffs for fun and profit.

Lex_Talionis_2024-07-08_13.33.28.449453Lex_Talionis_2024-07-08_13.34.01.973972Lex_Talionis_2024-07-08_13.33.38.916701Lex_Talionis_2024-07-08_13.34.31.942234

This team takes down enemies through one specific combo: lowering their stats with all manner of debuff-inflicting spells, weapons, and skills, and then following up on the weakened foes to bring them down. The flashiest way to kill a debuffed enemy is this party’s main character, whose shiny new personal weapon is in a screenshot above - he can easily one-round even a lightly debuffed foe, often with ludicrous overkill. (This also sets him up to be more intimidating as an antagonist in the story, now that you’ve seen how strong he can get with the right setup.)

Lex_Talionis_2024-07-08_13.54.25.765880
(Not every day you double a Swordmaster.)

Aside from just the Lunar Lance, though, you have lots of weaker ways to turn matchups in your favor and combine units to kill enemies. Beyond that, this party’s toolkit and the fact that enemies come to you affords lots of little opportunities to optimize the flow of debuffing and killing foes, especially once you’ve got the hang of controlling this party - do you save one of Iris’s actions to toss out a Hex at a distant foe instead of healing a wounded ally? Do you risk baiting an enemy on Enemy Phase, possibly lowering their HP to the point where one action next turn can finish them, but also putting yourself in danger? Do you flee to a chokepoint where you can control the flow of enemies instead of letting them swarm you in the undefended courtyard?

Lex_Talionis_2024-07-08_13.42.18.853918
(You’ll need to find a way to deal with this fashionable guy sooner or later.)

The whole experience coheres into a fun, frenetic, and incredibly memorable experience, as well as hyping up the power of these characters as something your main party will one day get to wield and/or fight against. It’s also an interesting little detail to study in designing map flow, and just how a common FE objective can mean something wildly different from its usual purpose when backed by interesting map design.

Story-wise, this chapter is fine overall; it has some very nice character beats for the members of its party (who have all been introduced already in some form or another), and showcases their motivations a lot more clearly. I do have some slight quibbles with the specific setup of why the fight happens, but they’re clearly secondary to the growth of the characters involved, and even that is just a component of Chapter 9x’s greatest success: combining a unique fixed party composition, an unorthodox take on a common objective, and the buildup of its own villains into an incredible complement to an already great campaign.

9 Likes


Today i would like to two talk about two Souls of the forest maps I absolutely adore. Ch10 and 11, Hollow kingdom and Maze of gold. Well the builder screenshots of the maps i took are a little odd looking with regards to players and displaying reinforcements but these two maps are just straight up some of my favorite fire emblem gameplay. Hollow kingdom, the first picture has the player start in the bottom right and you have to seize at the throne.

Simple enough, but the throne room is chock full of scary enemies, along with a siege sage in the far side of the room and several 3-5 bow snipers to pepper you over the wall. Now, the approach i took initially my first run was forgoing the wall and just snaking around the whole thing picking it apart slowly, which is a fairly punishing experience being peppered by long range and taking on the tough merc and hero squad along side that. Now my second run, I was a bit braver and more knowledge about the games so I used a devil axe to break that wall on the throne room. Then using my canto+ cavs they killed the siege sage and positioned the massive prepromote general to soak up damage from the merc squad after they had started to move down. While my thieves headed south to get the chest room. What this map does for me so well is how largely player controlled the tempo of it is. You can take the long route and soak up siege for a bit or go ham and try to break through the formation straight on. The initial part of the map has a valk moving boss with a paladin squad that is note worthy, we also get the Barrier blade in this first formation. An unbreakable sword that halves damage received, which is a great tool to use in this map with scary enemies and ranged threats.

Now, Maze of Gold . The map that broke me on lunatic reverse, only to fill me with satisfaction once I " got it". In this split deploy you typically want your A team on the left with Rakel and a mobile squad on the right with Beryl.

You are immediately beset with a siege anima mage on the left side you really wanna kill turn 1. The snipers throughout the map have 3-5 bows that really pack a punch combined with the hordes of enemies in the narrow corridors. The left has an anti mage hero and a wyvern lord coming at you fast and scary. all the while a valuable thief is running from you asap. Now on the left you can see a general, he is stationary with a droppable the Shieldbearer. Which is basically the barrier blade on crack, 1-3 decent might, halves damage received and +5 to speed and defense. You really want to kill him as soon as possible so you can put that shieldbearer to use with either your lance paladin/cav or your general. Usually you take this out on turn 2 or 3 in my experience, and can use it well on the backhalf of the map. The hero and wyvern lord formation is really quite scary and its fun taking them down. using a sage to kill the wyvern but rescuing them out so they dont get instantly murdered by the mage effective sword the hero has. While the right side wants to move quickly and kill the snipers that are throughout the middle section. Killing them will relieve alot of pressure from your left hand squad. The right side has some funny enemies like a devil axe cav, which the devil axe in sotf is basically a 16 use mega stat increase hand axe. So you need a tanky swordie, say someone with the barrier blade to duke it out with them. At turn 10 bolting mages appear from all the stairs, if that wasnt an incentive to go fast idk what is. Both of these maps typically take me under 10 turns but both are absolutely filled with decision making and tight calls.

On replays i always adore getting to this section of the game, Overall i think the highlights are that Hollow kingdom really shows how open a maps design can be, in terms of progression through it and maze of gold is quite linear it takes tight corridors and combines it with sotfs ranged tools to make you really think on how to fight your way through. Both are an absolute blast in different ways

7 Likes

Chapter 14: Capricious Valkyrie (Shackled Power)

This is a pretty standard midgame seize map from Shackled Power, but it’s got a lot of really cool stuff going on with the lake in the middle. Prosel, the main lord and the guy who seizes, can waterwalk like a pirate, and also uniquely has the ability to shove other units. And for this map only, Peirhok the wyvern lord is playable as a guest unit with really good bases, so even if you aren’t using Eileen the early peg, you still have him to lean on. There’s also Cadence, another recruitable enemy peg in this map who flies over the water and can be recruited by either Prosel or Eileen. And if you’ve been using Clint the pirate or Bast the guerrilla, they can waterwalk too, so you overall have a lot of different options for moving around the lake.

In particular, the combination of Prosel’s waterwalk and shove makes for some super cool plays. It allows you to drop Prosel basically anywhere in the water and have him shove a flier to reach otherwise scary enemies from a safe distance, especially for taking out that fleet on the right. Making good use of these mobility tools really lets you approach this map from a different angle, while also not being the entire identity of the map since there’s the entire landlocked portions as well.

Going along the edges of the map is relatively standard, but you can’t just ignore it since there’s multiple valuable side objectives to acquire. In the bottom right is Vicks the recruitable sniper, the lieutenant chilling on a mountain has a stealable crook seal (thief/pirate/guerrilla promo item), there’s a unique armory that sells gold weapons up at the top, and there’s multiple villages that not only give you good items, but are linked to unlocking a gaiden chapter after this. On turn 6, a warrior miniboss and his two buddies spawn up at the top to go destroy the villages, so you have to be quick to catch them, as well as to steal the warrior’s energy ring.

The boss area is pretty interesting to approach, since Sicilis, the valkyrie boss for whom the chapter is named, has a purge tome and is guarded by three stationary generals. If you get close enough to her, she’ll also trigger some additional reinforcements to spawn, so you need to have a good plan for taking her out and seizing quickly while also not dying to purge, or letting her break it and equipping her with a better weapon. If you spread out accordingly though, you’ll be able to approach the throne area from both below and from the right, so you’re rewarded for really covering the whole map. That’s ultimately what I like most about this chapter, since it’s got two very distinct sections that encourage using different mobility types for each one. It would be one thing to have a map that’s just the lake and a map that’s just the land section rushing for villages, but this chapter merges both of them into a fun and memorable challenge.

8 Likes
Legacy of Sorrow - Chapter 7: Unyielding Conviction

LoSCh7LoSCh7_Reinforcements_Text

The objective is to seize the castle gate with Edgar, your lance infantry lord. In the context of the current demo, this is one of the later chapters, but in the context of the hack’s overall plan, this is still a somewhat early chapter.

LegacyOfSorrow-0

This is the first chapter of the hack to feature enemy ballisticians. They have less range and damage than vanilla ballistas, but they also have high accuracy and infinite durability. This combination of adjustments makes them obstacles that you have to advance through, sooner or later, rather than something that can be waited out. It also keeps them from being too punishing without completely removing them as a threat. Even though there’s only two of these guys present, they have a big impact on the chapter.

LoSCh7_MountedSquadAI

Another notable threat on the map is the mounted squad in the top left. The paladin boss, Gordon, and his lackeys change to charge AI on the range event highlighted above. While this AI change can happen somewhat close to your army, you at least have the rest of that turn and the following turn before these enemies can initiate combat on their terms. The cavaliers are pretty standard enemies (one has a Javelin and the other two have a Steel Lance), but Gordon can be challenging to deal with.

LegacyOfSorrow-9LegacyOfSorrow-10
(The first skill is Nullify, which protects him from effective damage)

If you haven’t already dealt with the second ballistician, having this guy and 3 cavaliers charge at you can incentivize you to hurry up.

Before I get to the player side of things, I wanted to quickly touch on the reinforcements, which are beneficial to the overall experience. The initial brigand will take a long time to get to the western village, so the turn 2 brigand helps put some early pressure on the player. The cavaliers and wyverns are far enough to not immediately wipe units in a usual clear of the chapter, and they also support the incoming brigand. Lastly, the pegasus knights give you one last problem before it’s just you and Jeffery, the hero boss.

LegacyOfSorrow-2LegacyOfSorrow-1

So, what does the player get to fight all of these enemies? Rose automatically joins and is forced deployed for this map. She’s slower than the first pegasus knight that joins, but she has B Lances, a Silver Lance, and a Horseslayer in her inventory, so she can provide extra firepower when needed. The enemy ballisticians don’t OHKO her, and there’s enough room to maneuver around them thanks to their reduced range. You also need her to recruit Clint, who is your first promoted unit. Even if you’ve already handled the first ballistician, he can basically lead the charge against the second one, though he needs to be careful around magical enemies. His bulk is especially useful for dealing with Gordon’s group.

LegacyOfSorrow-13LegacyOfSorrow-14

Besides the items your newest recruits bring, there’s two villages to visit. The left one rewards Thoron and the right one rewards Blessed Lance. While I don’t remember using these items much (if at all) in this chapter, they’re pretty useful to have for future chapters. The enemies in LoS usually have at least one matchup where they go down in one round, but they do a ton of damage if you’re not careful. The next chapter has multiple chokepoints, which consist of 1-2 range stationary enemies and nearby attack-in-range enemies, so you can probably see the benefit these two tools provide. But even without that, having these two additional options is nice to have.

Lastly, using the terrain to your advantage feels very rewarding on this map. Gordon’s squad is threatening, but you have 2 tile chokepoints to use. Putting Clint in one of those tiles is obvious, but between an armor knight, the miracle rune (the first unit that would die after using this is left at 1 HP), and more, you have a few different ways to form a solid barricade.

LegacyOfSorrow-12

On a more personal level, I wanted to mention this rescue drop I did. In this scenario, Jenna has 72 Avoid (LoS uses a non-vanilla Avoid formula; the 72 comes from 15 Lck * 2 + 12 Spd + 30 from Mountain terrain), so she has a decent chance at avoiding the two nearby shamans and the archer (47% displayed hit from him). There’s definitely cooler stuff you can do with all of the tools at your disposal (you have 7 mounted units and a rune system that I barely touched on at all), but I was proud of coming up with this particular strategy, even though I doubt it being that amazing in hindsight. Having the flexibility to experiment with something like this while still being a challenging map is great to have.

There’s a lot of FE chapters that have a single big thing that defines them. Sometimes that’s a unique gimmick, and sometimes that’s a huge focus on one particular mechanic. The following chapter in LoS is a great example of this, in fact. However, I don’t really see that as the case for this particular map. The chapter just has a few standard elements that are really, really well done. This consistent expertise with designing around Fire Emblem’s core mechanics and features is the main selling point of Legacy of Sorrow, and this chapter is one of, if not the, best example of it.

6 Likes

Dark Lord and the Maiden of Light - Chapter 25: Within the dark

[was hard to find a good screenshot of the map, but with it gimmick I thinks it good to keep it secret]

Map gimmick that change the usual flow of the game can be very tricky, especially when it’s something that hasn’t been done before, it can easily don’t works and feel unfair/not fun for the player. But in my opinion, this hack did it very well in this chapter, both in terms of surprise and how well it works

Aesthically, it looks like a similar map to the Night of Farewells from FE7: a water temple map, with small “islands” and hazardous bridge between them. The difference here being that it’s a defensive map, with a central island where you have to protect a green character (formerly big villain) for 10 turns, with green monsters to help, and you have multiple groups of your units separated on multiple place of the map

The previous chapter of the hack was also a defensive map, albeit classical and very hard. So this chapter feels at first like a breeze compared to the previous map

With your groups of units being separated by waters, you are incencitized by the game to take flyers, rescue/teleport staffs, to help navigate the map

But then, while everything is going relatively smooth and at turn 9 you are getting near victory…

Spoiler for the map gimmick

… The Water Temple disappears, turn into a volcanic inferno, and the objective change:
now you have until turn 20 to go kill the boss that appeared and take the throne.

I still remember my (amazed) shock when this happen while playing

There is a lot of siege tome foes to try to slow the advance of your army to the boss, lava tiles that will hurt if you stay on it, and if you take too long there is anti-turtle reinforcements that will come in your back

With the clock ticking, you will really feel in a rush that is a drastic change for the first half of the map

The chapter become quite hard from here, but if you prepared your army for the hazards of the previous map, it is less complicated to deal with those challenge. Notably, your flyers will have a big role in making victory more feasible

So in terms of level design, even if it’s not perfect, it’s really interesting to see those kinds of experiments in a chapter. Those kinds of surprise has a big impact when you play it

Also, it goes really well with what is happening in the story at this moment: lot of revelations and plot twist that are leaving the protagonists, like Freesia, very confused. Making the map reflect the mindset of your characters, both in aesthetics and in mechanics, is something I love to see

It’s the kind of storytelling that you can only see in a video game

6 Likes

Chapter 3: Chevauchee (Drums of War)


(First and foremost, I promise I’m not biased at all towards the creator of this thread. No favoritism whatsoever. Promise.)

In the past year-and-change, Parrhesia’s Drums of War has shot to prominence as one of the most popular hacks in FEU and its adjacent communities. It’s known for a compelling plot of political and personal intrigue, a cast of fun characters with fully-written supports, and some tightly tuned gameplay and map design. Unfortunately, there’s no effortpost thread for writing (yet), so it’s only the last of the three we’ll be focusing on today.

Chapter 3 is very early in Drums of War’s story, and is one of - if not the - best chapters in the game. It keeps its size very contained and manageable, with most of the chapter’s action taking place within the walls of the town, and packs that space with challenging enemy formations that are satisfying to take down. The three entrances to the town provide room for several different approaches to seizing the settlement, and the shops on the right provide an additional reward for pushing further and putting yourself closer to the riskiest parts of the map.

DoW v 2.21 - CURRENT PATCH.emulator-37DoW v 2.21 - CURRENT PATCH.emulator-38
(I may or may not be using the FEBuilder debugger to skip around and grab these screenshots.)

Above all else, though, Chapter 3 is defined by its unorthodox objective: to provoke one of the commanders of an overwhelming enemy force into charging you, then flee back whence you came into the wilderness. While this general level flow - darting out to complete an objective, then back to an escape point at the chapter’s starting position, facing time pressure all the while - isn’t entirely unheard of in ROM hacks and custom campaigns, it’s still very rare, and always makes for a memorable twist on moving through a map.

Even among its already-rare compatriots, Chapter 3’s specific objective at the far end of the map provides a pleasant array of methods with which to get the job done. All you need to do is provoke a commander, not kill them - just triggering a boss quote is enough. You can have a tanky unit like Baros the Paladin lure them into melee before fleeing to safety, get Helje the potential ransom Pegasus Knight to soar over the fence while taking her shot, or even commandeer an enemy ballista with which to snipe at your quarry from a safe distance.

DoW v 2.21 - CURRENT PATCH.emulator-21DoW v 2.21 - CURRENT PATCH.emulator-22

The turn after you provoke one of the main army commanders, yet another force shows up from behind - a small company of reinforcements emerging from right near your starting point, lead by a powerful mini-boss in his own right. As your army’s frantically fleeing back the way it came, they have this new guy to deal with.

Auclair and his men are a pretty reasonable threat on their own, but they’re almost guaranteed to catch your weak backline troops - after all, the good units are the ones who’ve needed to push on and survive baiting a boss. This can, admittedly, really blindside a player - if they don’t have anyone near the starting point to reasonably fend off Auclair, they might just die. Still, the core concept of this reinforcement squad showing up by the escape point and providing a final challenge to the fleeing party stands out as an addition to this already clever objective.

DoW v 2.21 - CURRENT PATCH.emulator-24DoW v 2.21 - CURRENT PATCH.emulator-23

On top of that, this chapter also contains comedy! (The word’s still out on if two milkmen are going here.) Deep into the town, a mini-boss Knight guards the gate of an Arena, something many GBA Fire Emblem veterans recognize as an incredible source of money and experience points. Drums of War has several Arenas throughout the game, but they’re also the source of a running joke - none of them are actually usable.

When you try to enter the arena here in Chapter 3, the gladiators don’t take kindly to your intrusion, and one emerges to fight you for real on the map. (After all, why would they? You’re invading a foreign country. They’re not going to let you participate in local bloodsporting events.) Like Auclair, this does have the unfortunate problem of potentially blindsiding a player, but this is made up for by just being really funny. It also introduces the unusable arena as a recurring concept, setting up the future iterations of it all the way to the end.

DoW v 2.21 - CURRENT PATCH.emulator-25DoW v 2.21 - CURRENT PATCH.emulator-29

My favorite thing about Chapter 3, though? The way it justifies this whole unorthodox setup in the plot. After an arduous journey just to reach the front lines of the Confederation’s invasion force, your party is immediately sent on a near-suicide mission by a callous general, trying to distract part of a much larger army so his main body of troops can win the battle. Provoking a powerful enemy into pursuing you is usually a stupid move tactically, but taking that risk is the whole point of the chapter - the broader schemes of war, which don’t value your life, don’t give you a choice in that matter. That callous attitude towards sacrificing the lives of Roxelana’s company is the whole point of Act 1’s story, and this chapter uses gameplay to directly convey that and build up towards the main character’s pivotal decision just a few chapters later.

DoW v 2.21 - CURRENT PATCH.emulator-32DoW v 2.21 - CURRENT PATCH.emulator-34

One of Drums of War’s big mechanical gimmicks is the boss ransom system - after each chapter, you’re given the opportunity to either recruit one of the chapter’s bosses, or to turn them in for cold, hard cash. In Chapter 3, you get Lucetta the Monk. I don’t have the word count to talk about her as a unit here (though maybe my friend @bpat does over in Parr’s other effortpost thread), but rest assured that she’ll be a compelling addition to the team if you take her.

When she’s not in the party, though, she’s a neat little threat at the very start of the chapter, wielding a horse and armor-effective tome that punishes charging ahead with mounted units from behind the safety of an armored squadron. Using a named miniboss to accentuate her role in this encounter makes the specifics of that fight memorable, even as you keep on pushing into the town. She’s a fun addition story-wise too; as I discussed earlier, this chapter and the one shortly after are a particularly tense, serious section of plot. Damn near every word out of Lucetta’s mouth, comic relief character that she is, defuses the tension of the chapter just a little and helps you prepare for the danger and moral grayness to come.

DoW v 2.21 - CURRENT PATCH.emulator-36
(This is, apparently, the only time the word “absolution” appears in all of DoW’s script.)

My previous post in this thread, about Chapter 9x from Absolution (by ZessDynamite), was also focused on the nature of a chapter’s objective and how it shapes play. Chevauchee and To a Dark Place take almost opposite approaches to that same concept, though; the Absolution (by ZessDynamite) chapter turns a staid and well-understood Fire Emblem objective into something very different with clever party composition and enemy design, while the Drums of War chapter uses well-executed but basic foes and its own unique take on unit balance to manage a very new and ingenious objective.

When you, dear reader, continue designing your own chapters, there’s lots of potential inspiration to take from both schools of thought (and from more conventional FE objectives and map flows, too). In any case, even if you don’t plan on making any hacks of your own, chapters like these just might change how you think about the nature of map objectives as a whole - and even if they don’t, they’ll still be pretty darn fun to read and play.

14 Likes

Yes! This is what I was looking for.

Chapter 1-5: Law of the Land (Vision Quest)

This is the most excellent, tightly knit escape chapter I’ve played. It creates a certain thrill other escape maps in the main series of FE can’t recreate. Let’s start with the map design itself.

First, the chapter is split into 3 pathways, with the one on the right being the “Easy” route, the middle being the “Normal” route, and the left being “Hard” route.

The Hard route contains a Wizard Bow, which attacks resistance, which is good since your only Resistance hitting unit until 1-9 is Lera. Speaking of Lera, there is also a Thunder tome as well, along with a Speed Wing. Your supposed to use your flier Natsuko with a Chest key to grab either one of the items, but you would have to play extremely carefully.

The Normal Route just contains some enemies, along with a tough wyvern to watch out for. The Easy route has less enemies then the Normal route, but lots of trees to slow down your army.

What makes this map so much fun to replay is the amount of decisions to make. You could go the Easy route if your army is beat up, or if you want to finish the map sooner, you could go the Normal route and gain more experience, or, if your feeling risky, you could go the Hard route and gain all that juicy loot, but it’s not really recommended, since four cavaliers spawn at the top of the map not too long after the chapter starts. You could even split if you want to!

The map compels you to choose or mix and match based on what the player desires out of the map. If there is one thing a player enjoys, it’s making decisions!

I’ve taken notes from this map, on how to make a linear map, compelling and interesting.

6 Likes

Prologue: Comrades (Home By Winter)

This is the strongest opening in any hack I’ve ever played, and it’s not remotely close.
hbw.PATCH.20240828065444.emulator-2

tall map

For those unaware, Home By Winter is a hack on psuedo-hiatus by jellyunicorn. It’s a extremely tight Berwick-inspired hack revolving around powerful bond supports, abysmal growth rates, and some other new mechanics. The maps in this hack are very bombastic, often containing one or more tricks to them that elevate them beyond standard fare, and the introduction is no different. Prologue is set in the immediate aftermath of a battle gone horrendously wrong, in which your battered army has to push their way out of an unexpected pincer. The brutal snowstorm and tense music (specifically, Jhen Mohran from MH) does a fantastic job at setting the tone for the stinger.

As for the map itself, it clearly divides itself into two sections:

The Escape

hbw.PATCH.20240828065444.emulator-0hbw.PATCH.20240828065444.emulator-3
These lucky four are Caehn, Aslena, Adalyn, and Bruyne. Aslena is the Jagen on the left, while the others are somewhat standard faire for this game in stats and toolkits (Caehn being a touch better thanks to lord bias.) They start about halfways down the map, surrounded on both sides, and their objective is to escape to the south, specifically on the tile guarded by the highlighted enemy in the rightmost image.

The design here is already off to a very strong start, as this opening section is built to tutorialize HBW’s new approach to supports. Units in this game have supports at base granting a robust array of boosts, and these three form a support triangle.
hbw.PATCH.20240828065444.emulator-9

With smart positioning, you can hit a number of otherwise out-of-reach benchmarks against these enemies. It’s both extremely satisfying and very tight, making the strengths of the system immediately apparent and meaningful. Additionally, Aslena also supports the three junior cavaliers, which provides incentive to quickly regroup.
hbw.PATCH.20240828065444.emulator-10hbw.PATCH.20240828065444.emulator-11

This is all incredibly fun and well-designed, but the final piece of Prologue that truly elevates its incredible atmosphere for me is found on the other side of the coin.

The Massacre

hbw.PATCH.20240828065444.emulator-1hbw.PATCH.20240828065444.emulator-8

These five riders (who are all named a variant of Dan) are high-level fighters in Aslena’s squadron. They’re also impossible to save from the consequences of the failed attack. This map manages to make the platoon’s failure feel incredibly tangible by forcing you, the player, to suffer the consequences in gameplay. You are given full control of them in their final stand, but there’s nothing you can really do to prevent a massacre. All five are at critical health thanks to the preceding skirmish, and they’ve been surrounded by high damage lancers and siege magic. To put it bluntly, they’re fucked, and you get to live that.

(Take note of the objective all but admitting that only the bottom four units are going to survive.)
hbw.PATCH.20240828065444.emulator-12

PLAY HBW

My conclusion? You gotta try this hack out. It’s not very long at the moment, but it’s absolutely worth experiencing. While the intro is the map I chose to rant about, there’s several other fantastic maps in this game that I could’ve also written about. Sea of Spirits is a fun town map with a unique style of progression, Cornered Rat is another fantastic Escape with a secondary condition and tense first turn. The game’s just good, and its introduction is a fantastic showcase of the type of creativity you will see for the rest of your time playing it.

10 Likes


Ch 20: The Dream on fire from Curse of Lagdou is a great blend of objectives wrapped up in an under 10 turns ribbon. The objective of the map is to Escort 3 civilians. They come out of the inn in the top left one at a time every 2 turns and head towards the bottom right. Of course, 5 move pincushions aren’t well protected when the map is crawling with reinforcements and gorgon eggs that hatch over time if not taken care of. Reinforcements come from every angle, you push in and have to hold your ground. The non villager greens put up a fight but will go down sooner rather then later. So, you are encouraged to fan out initially, getting the villages and killing gorgon eggs, then are faced with the question. How do I end this map so I don’t get overwhelmed by enemies?

Rescue dropping the villagers to the bottom right is the bread and butter of this map. Ideally with the help of a flier or two, one guaranteed in Syrene being recruited on this map. The walls here can be flown over and in setting up a rescue chain it speeds up the map significantly. You have to play a balancing act between how much you commit to combat and positional movement. I’m no LTC wizard but I felt proud getting a 6 turn on this map last I played. Realistically you can hold out through the maps reinforcements and not ferry the villagers perfectly but the game set ups the opportunity for it and it’s simply just a great time. It rewards use of the rescue mechanic that I personally always find adds a lot of fun to maps for me.

Finally, I wont delve into the story because of spoilers but the title of the chapter is more then earned. Because it’s fire. Anyway go play Curse of Lagdou if you haven’t.

7 Likes

I know this isn’t the longest essay out here, but I can remember the first time playing storge’s final chapter “Finale : Father and Daughter” really well.

My review goes into the emotional and storytelling side more than the gamplay one. (I don’t think the gameplay is as good as the experience of being invested in the story while playing this chapter.) So here is spoilers.

Spoilers

I think it manages to feel really epic even though we are talking about a very short game here you can beat in an evening or two.

The premise of the chapter is that: The protagonist is lethally wounded by the main villain, but in the nearby town is a high ranking church member capable of healing that wound, such the secondary protagonist, the main protagonists daughter, needs to reach the castle gate while the main villain throws all of his remaining forces against the players army.

What makes this premise powerful is that the entire game up to that point was about the father and daughter reconnecting and such them having reached the point where the daughter wants to save her father makes this chapter feel personal.

It also does the thing where the daughter gains a promotion, a regular promotion, considering the game is about common people the “Legendary promotion” being replaced with a “Regular promotion to Hero” is a logical way to play with the “Just a bunch of people, no royals or something” nature of the army.

In gameplay this also means that the main character is removed from the party, considering they are a supplier that isn’t a loss from a gameplay perspective but that means you are unable to loose firepower like that, which is important to make sure you aren’t now lacking your ace.

Honestly, in my second playthrough I did with my mother the chapter felt a little too long, and I also think the hero promotion could have given A rank Axes so the Tomahawk in the previous chapter can be a “Legendary weapon mimick” for her, as there is now a chance that you won’t give her a new Axe, especially since an important pick up in the game is a 1-2 range sword, so she might not even need an hand axe. That second playthrough the map also felt a bit too long, considering this game has a gimmick of “You can buy your army however you want” and the usual “Permadeath” the timer needs wiggle room. You may have a slow army, you may have a mostly dead army. But still, the map is more so peak in terms of the narrative than the actual gameplay.

But still, listening to live and learn from sonic adventure 2 while your group fights the clock does feel epic. I really hope more fire emblem games do finales like this, finales that aren’t about fighting yet another god, but epic in a personal manner, but considering this finale is build around the relationship of two “Lord” units this exact thing won’t fit in every game, especially if none of the lords are a supplier. But I think the sentiment stands.

In general I think this shows the power of commiting to the “commoners tale”. The heroes are just people in the wrong place at the wrong time but that doesn’t stop them from defying the odds, from fighting a villain they don’t know, because gretchen needs to get to that town before her father dies. And honestly, sometimes fire emblem is about enjoying a good story via gameplay while listening to good music and looking at good animations even if that gameplay isn’t the best.

Also I think a lot of final chapters have a lot worse gameplay than this lmao, like I am no big fan of the “Wall of stats” bosses. Like FE8’s final chapter first half is peak but the demon king half is pretty weak lol.

3 Likes

Chapter 23-3: Dark Lord (Dark Lord and the Maiden of Light)

It’s got a chunk of the game’s title in its name. So surely it must be good, right?

As I mentioned in my previous effortpost about the game, Dark Lord and the Maiden of Light is a hack that enjoys getting playful with familiar franchise tropes, and one can make a valid argument that its story’s core essence involves toying with an almost ubiquitous FE plot point and twisting it in a uniquely interesting way. The hack is very apt at creating a framework of expectations through different types of coding in visuals, gameplay, and story… and then leveraging that coding to amplify the impact of its story beats. Nowhere else in the game does this come out brighter than in Chapter 23-3—the game’s final chapter—which I find to be one of the most fascinating and engaging chapters I have ever seen in a romhack.

I can’t talk about this map in any way without spoiling enormous parts of the endgame lol

Part 1: Paint Me A Picture

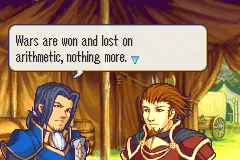
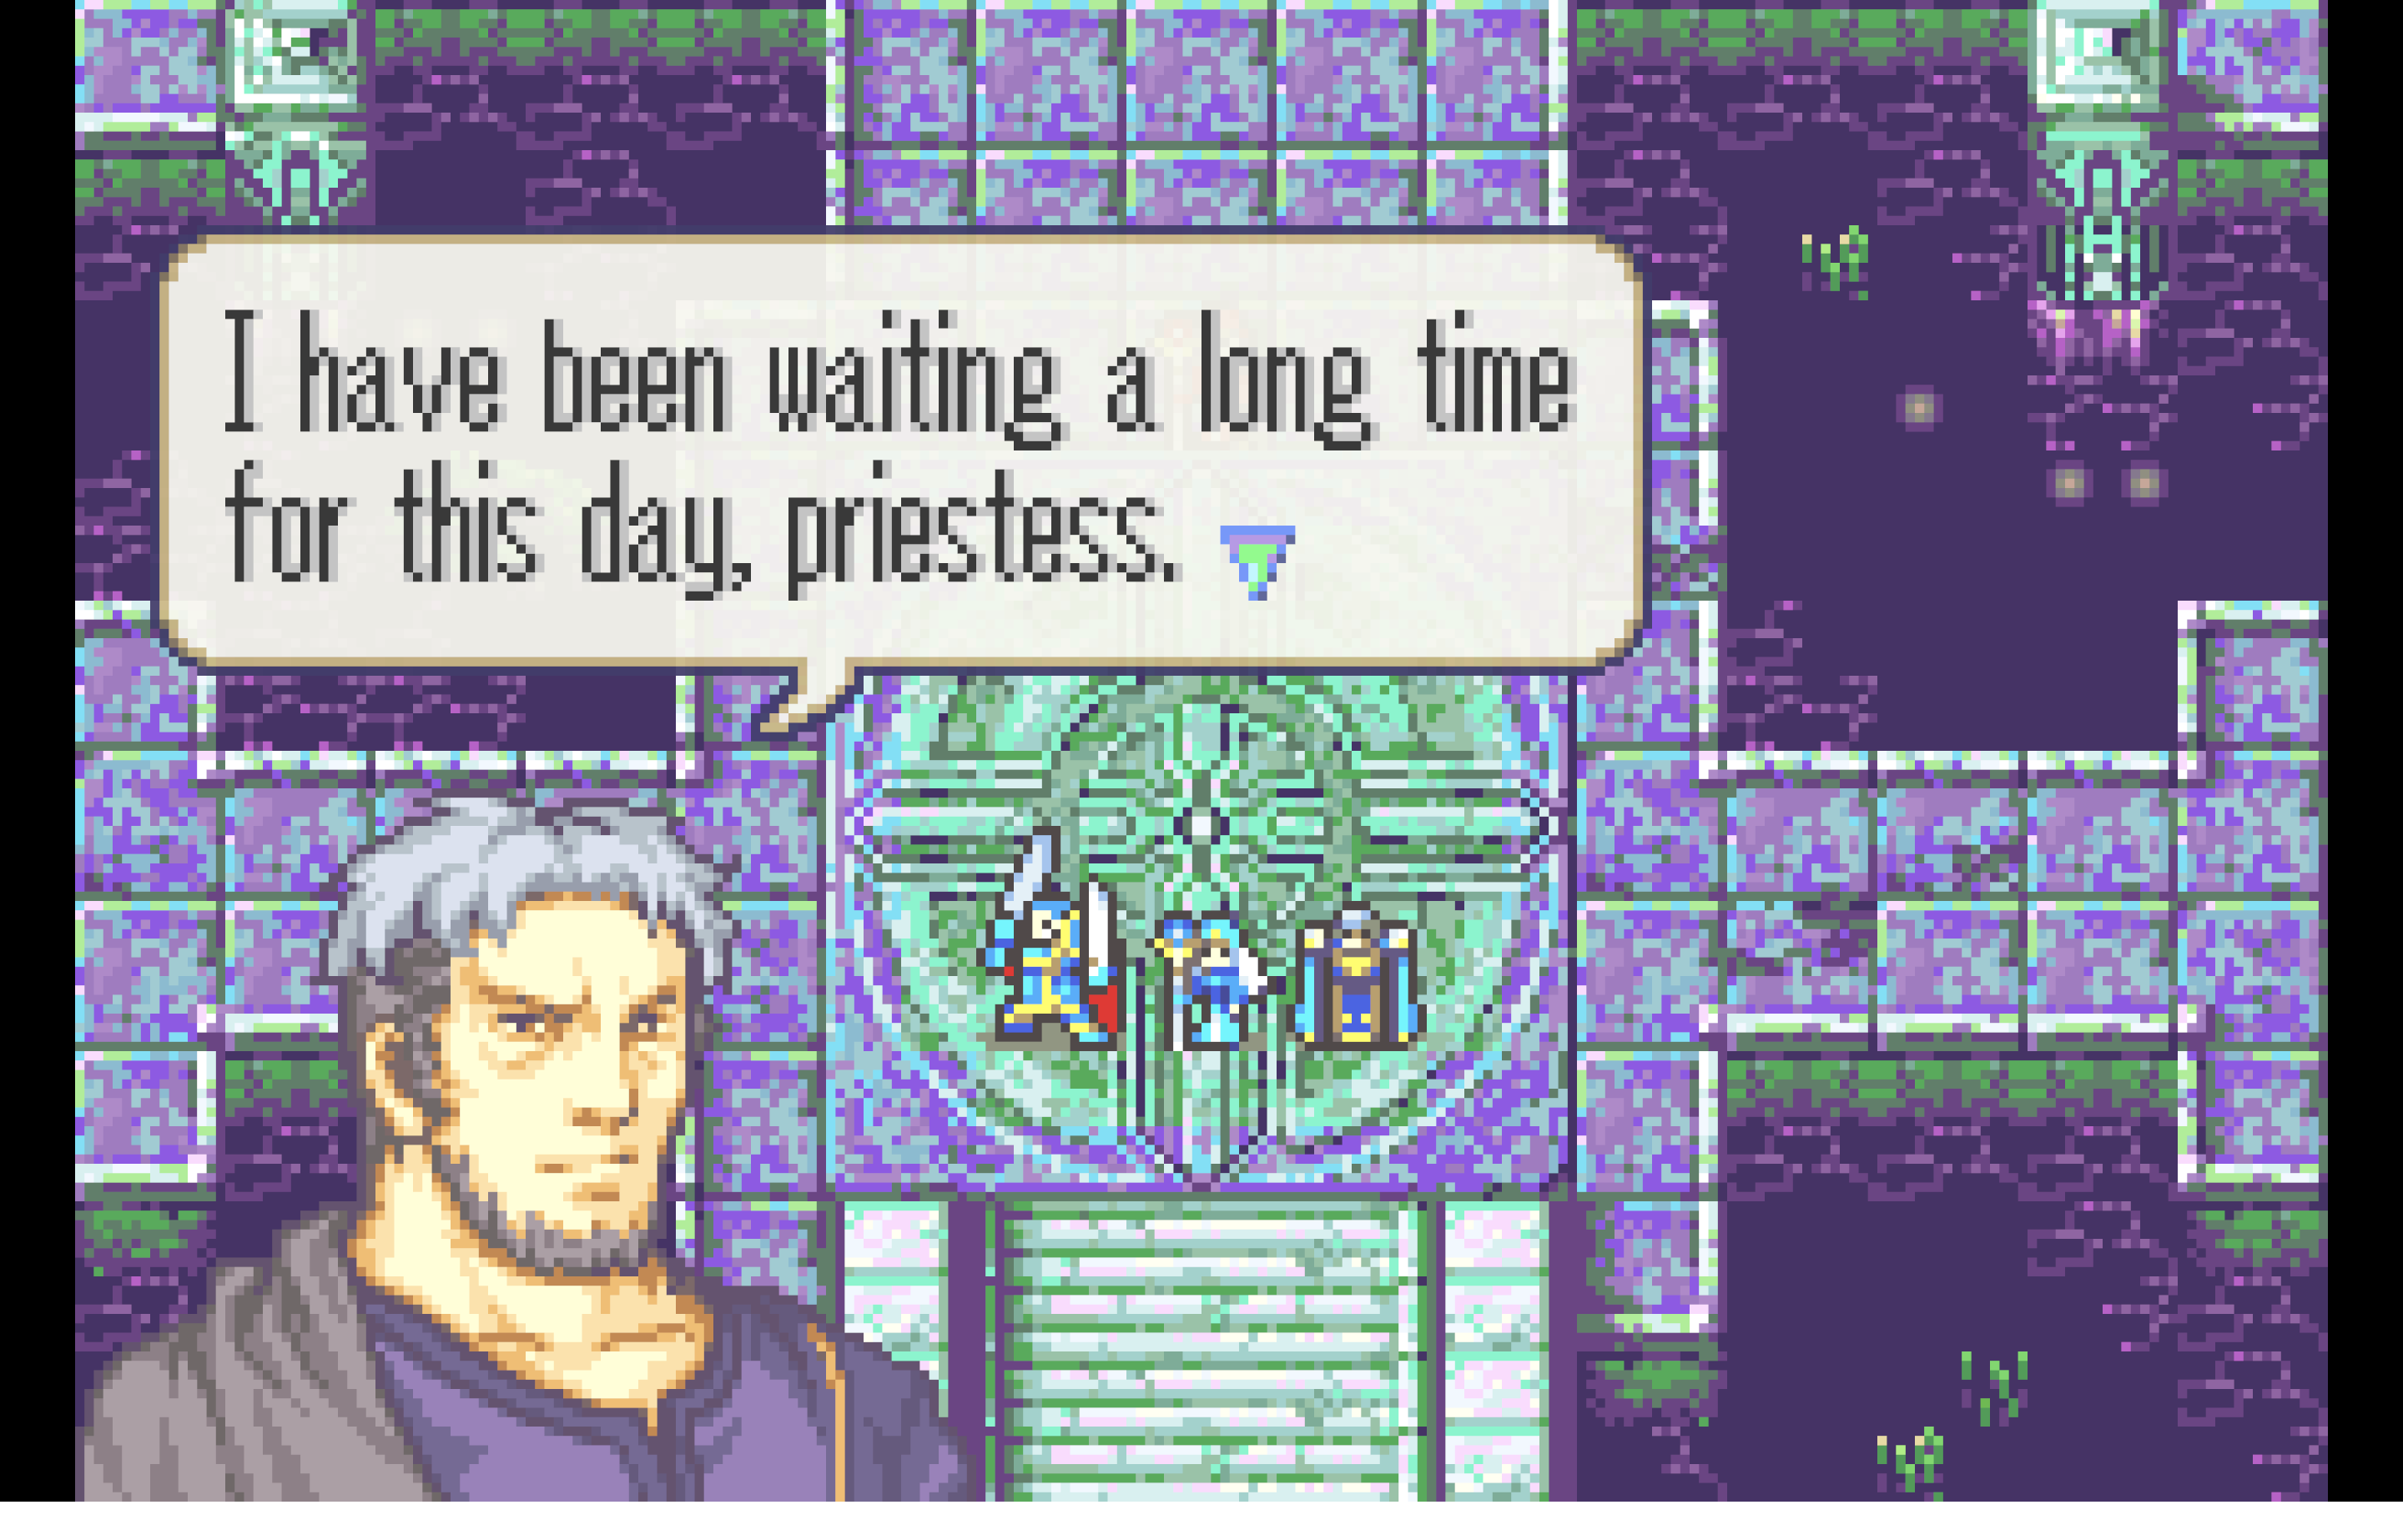
The story context for the chapter is very much like what you’d see in a mainline FE game: the cult of Ahribaal has resurrected an ancient evil god known as Zahhak the Unspoken One, and the heroes have rushed down into his tomb to duke it out. Along the way, the group kills the ghosts of some of his followers, and the lord Orion slays the spirit of the Unspoken One’s most devout companion. He comments that something feels off about that particular spirit’s demeanor before taking his weapon, a profane blade, as his own.

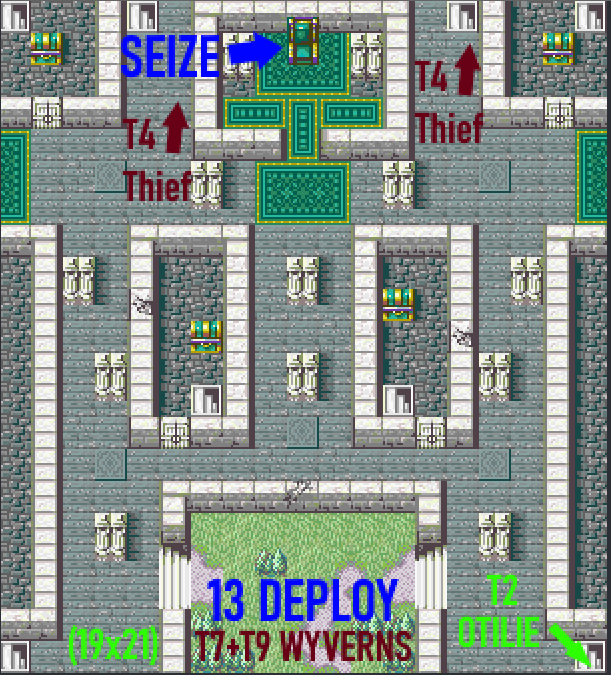
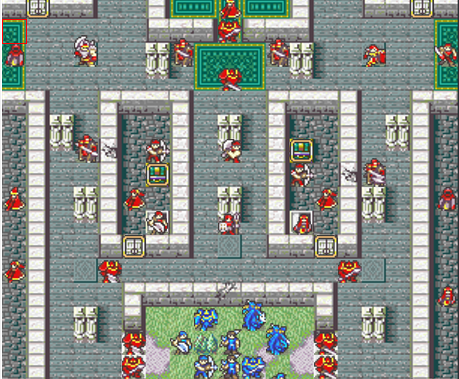
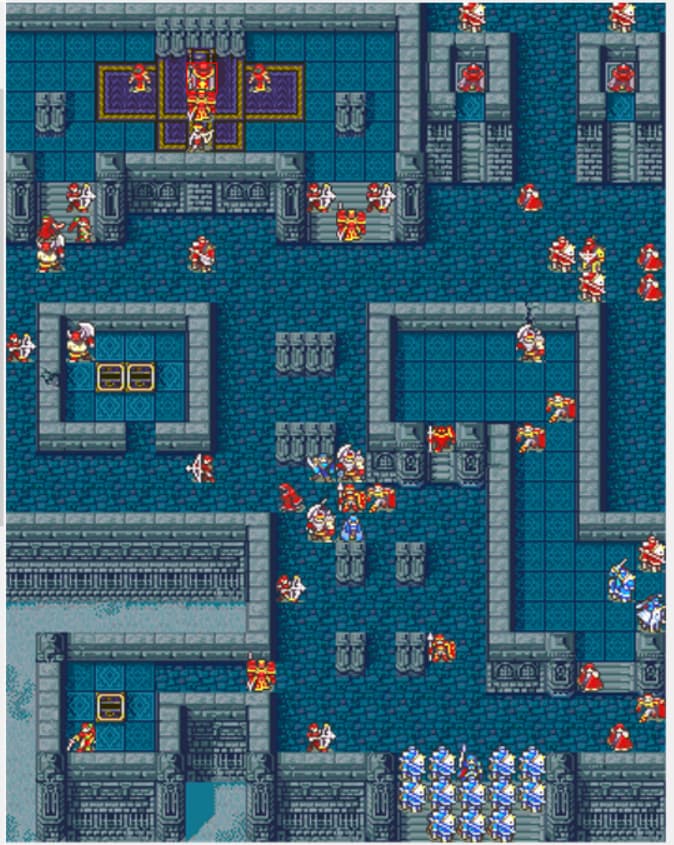
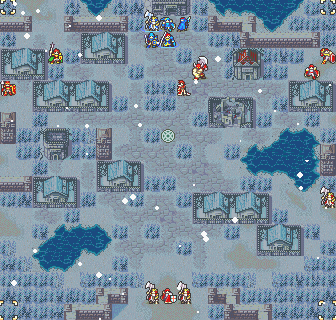
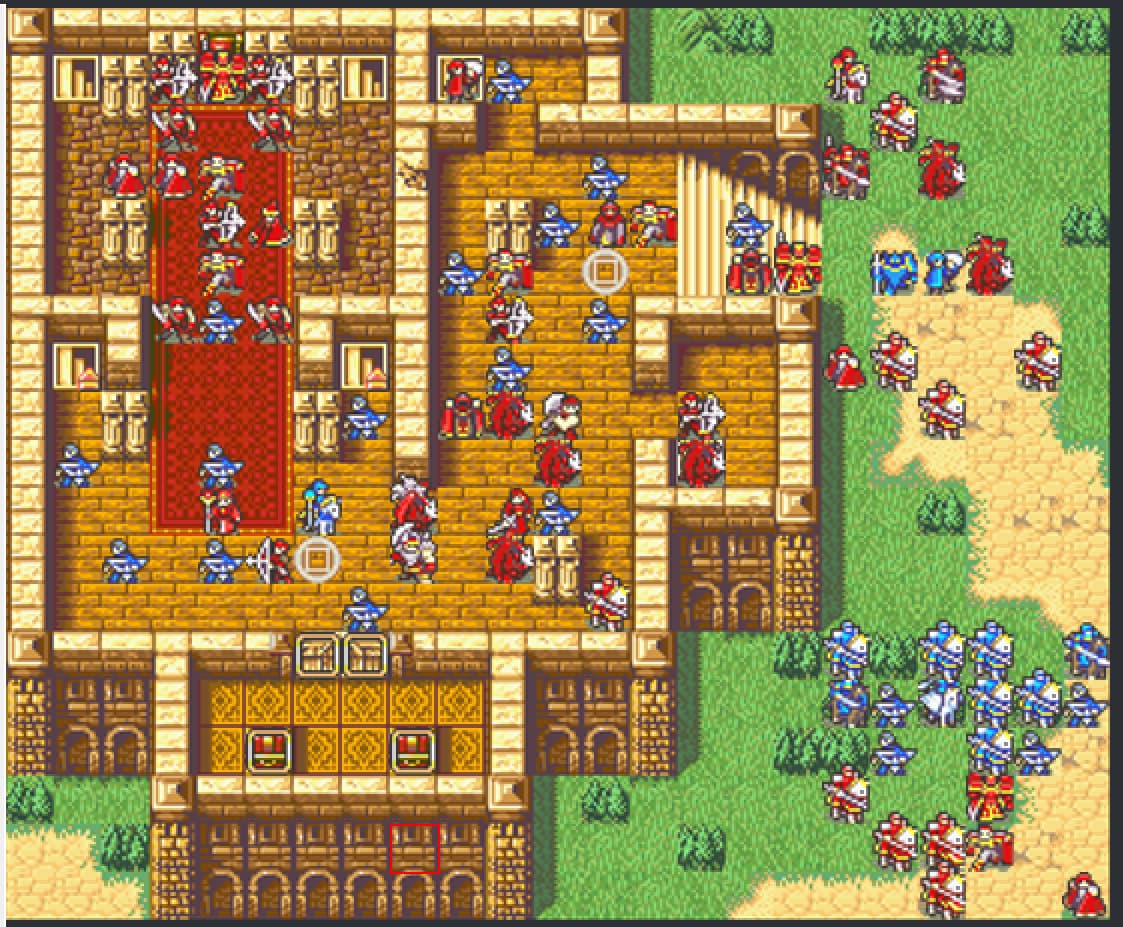
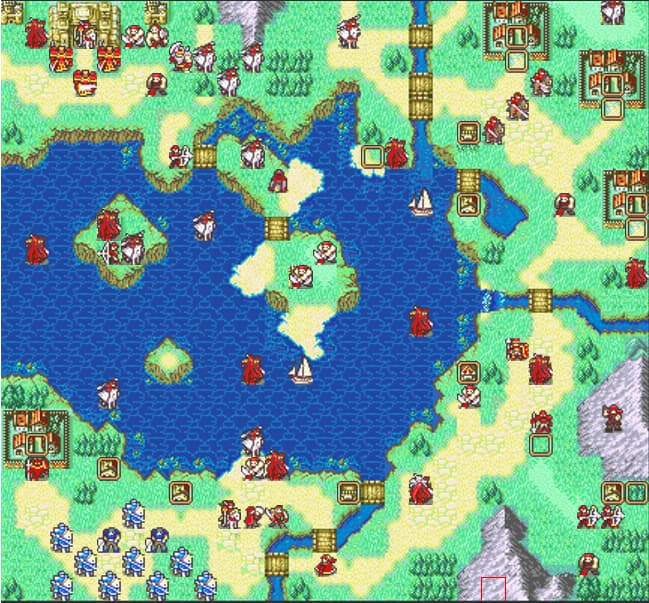
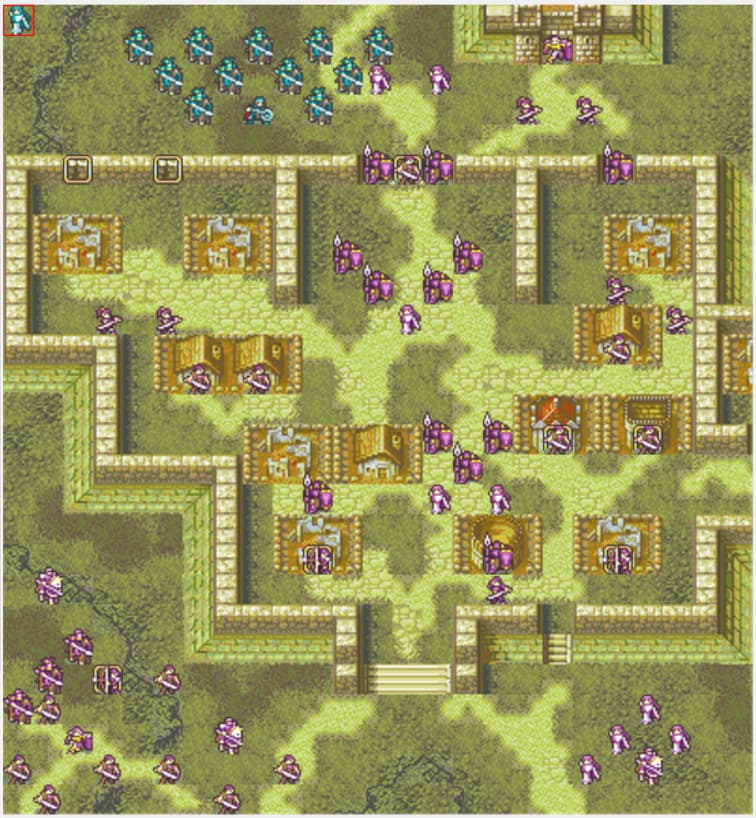
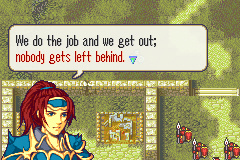
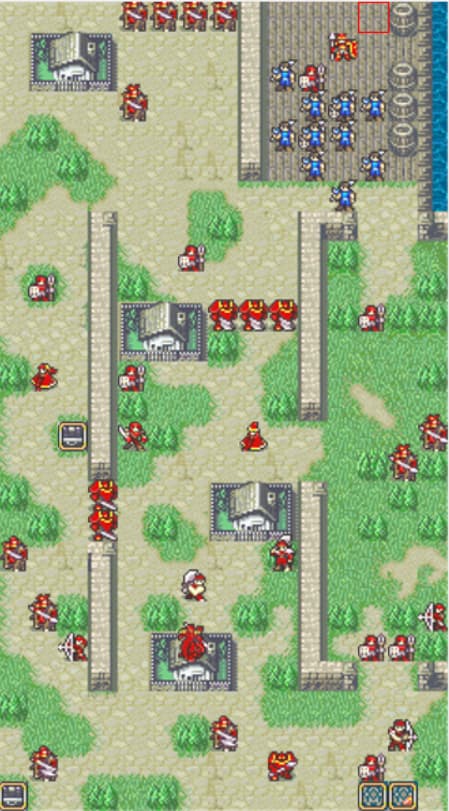
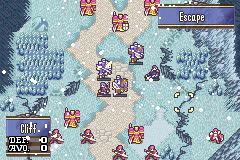
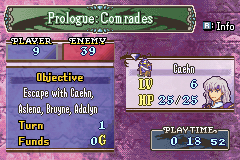
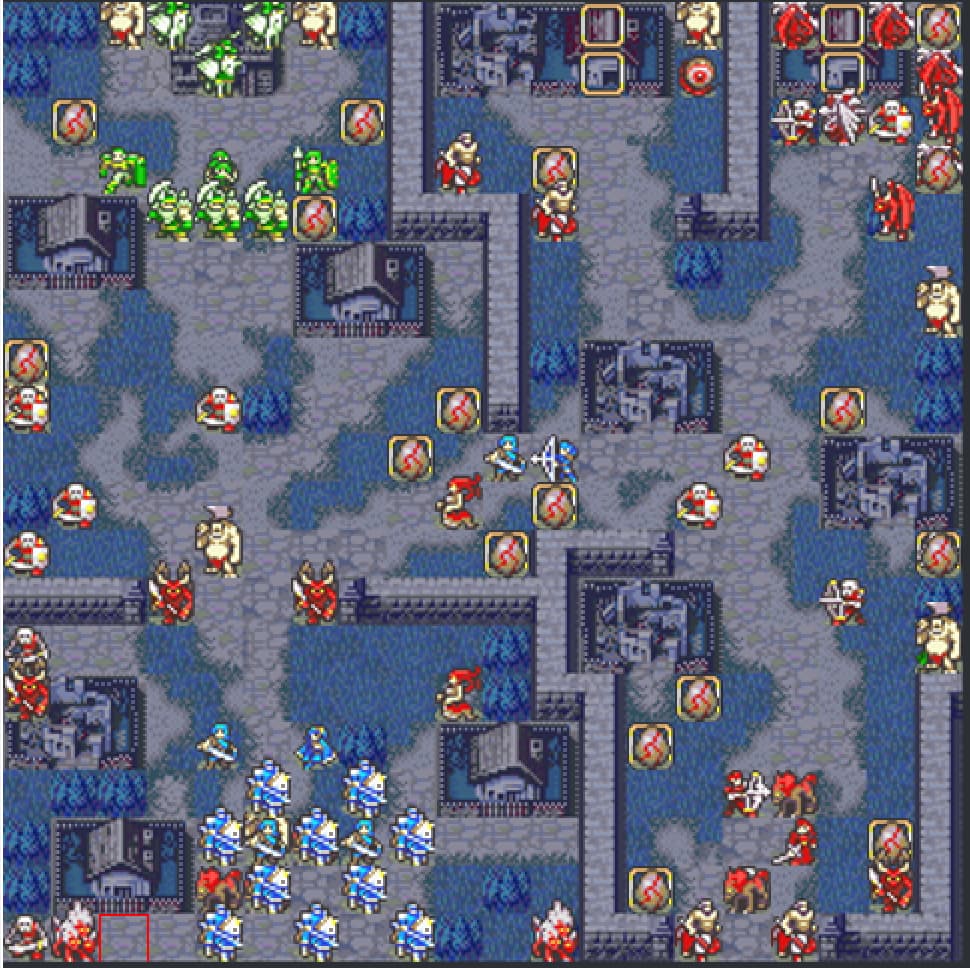
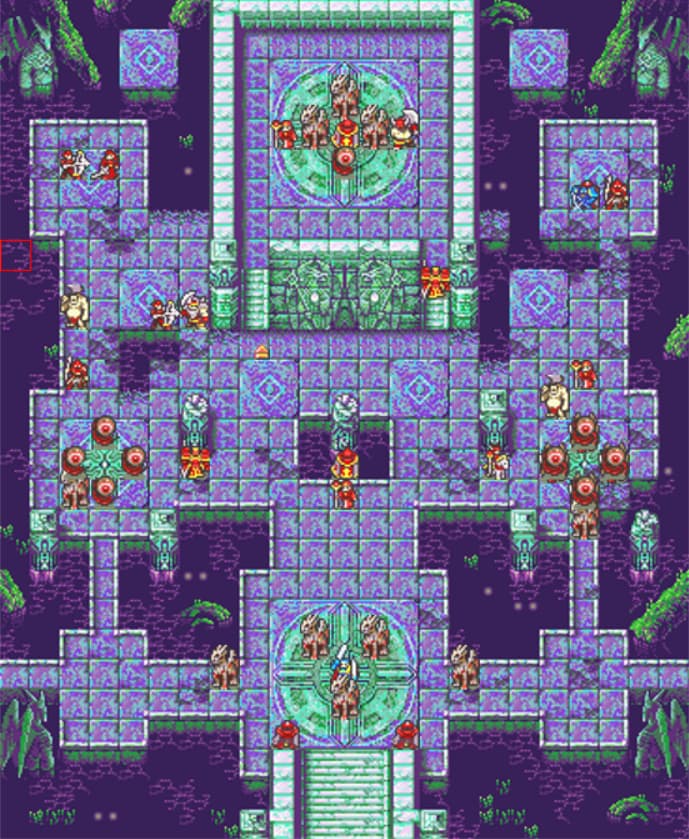
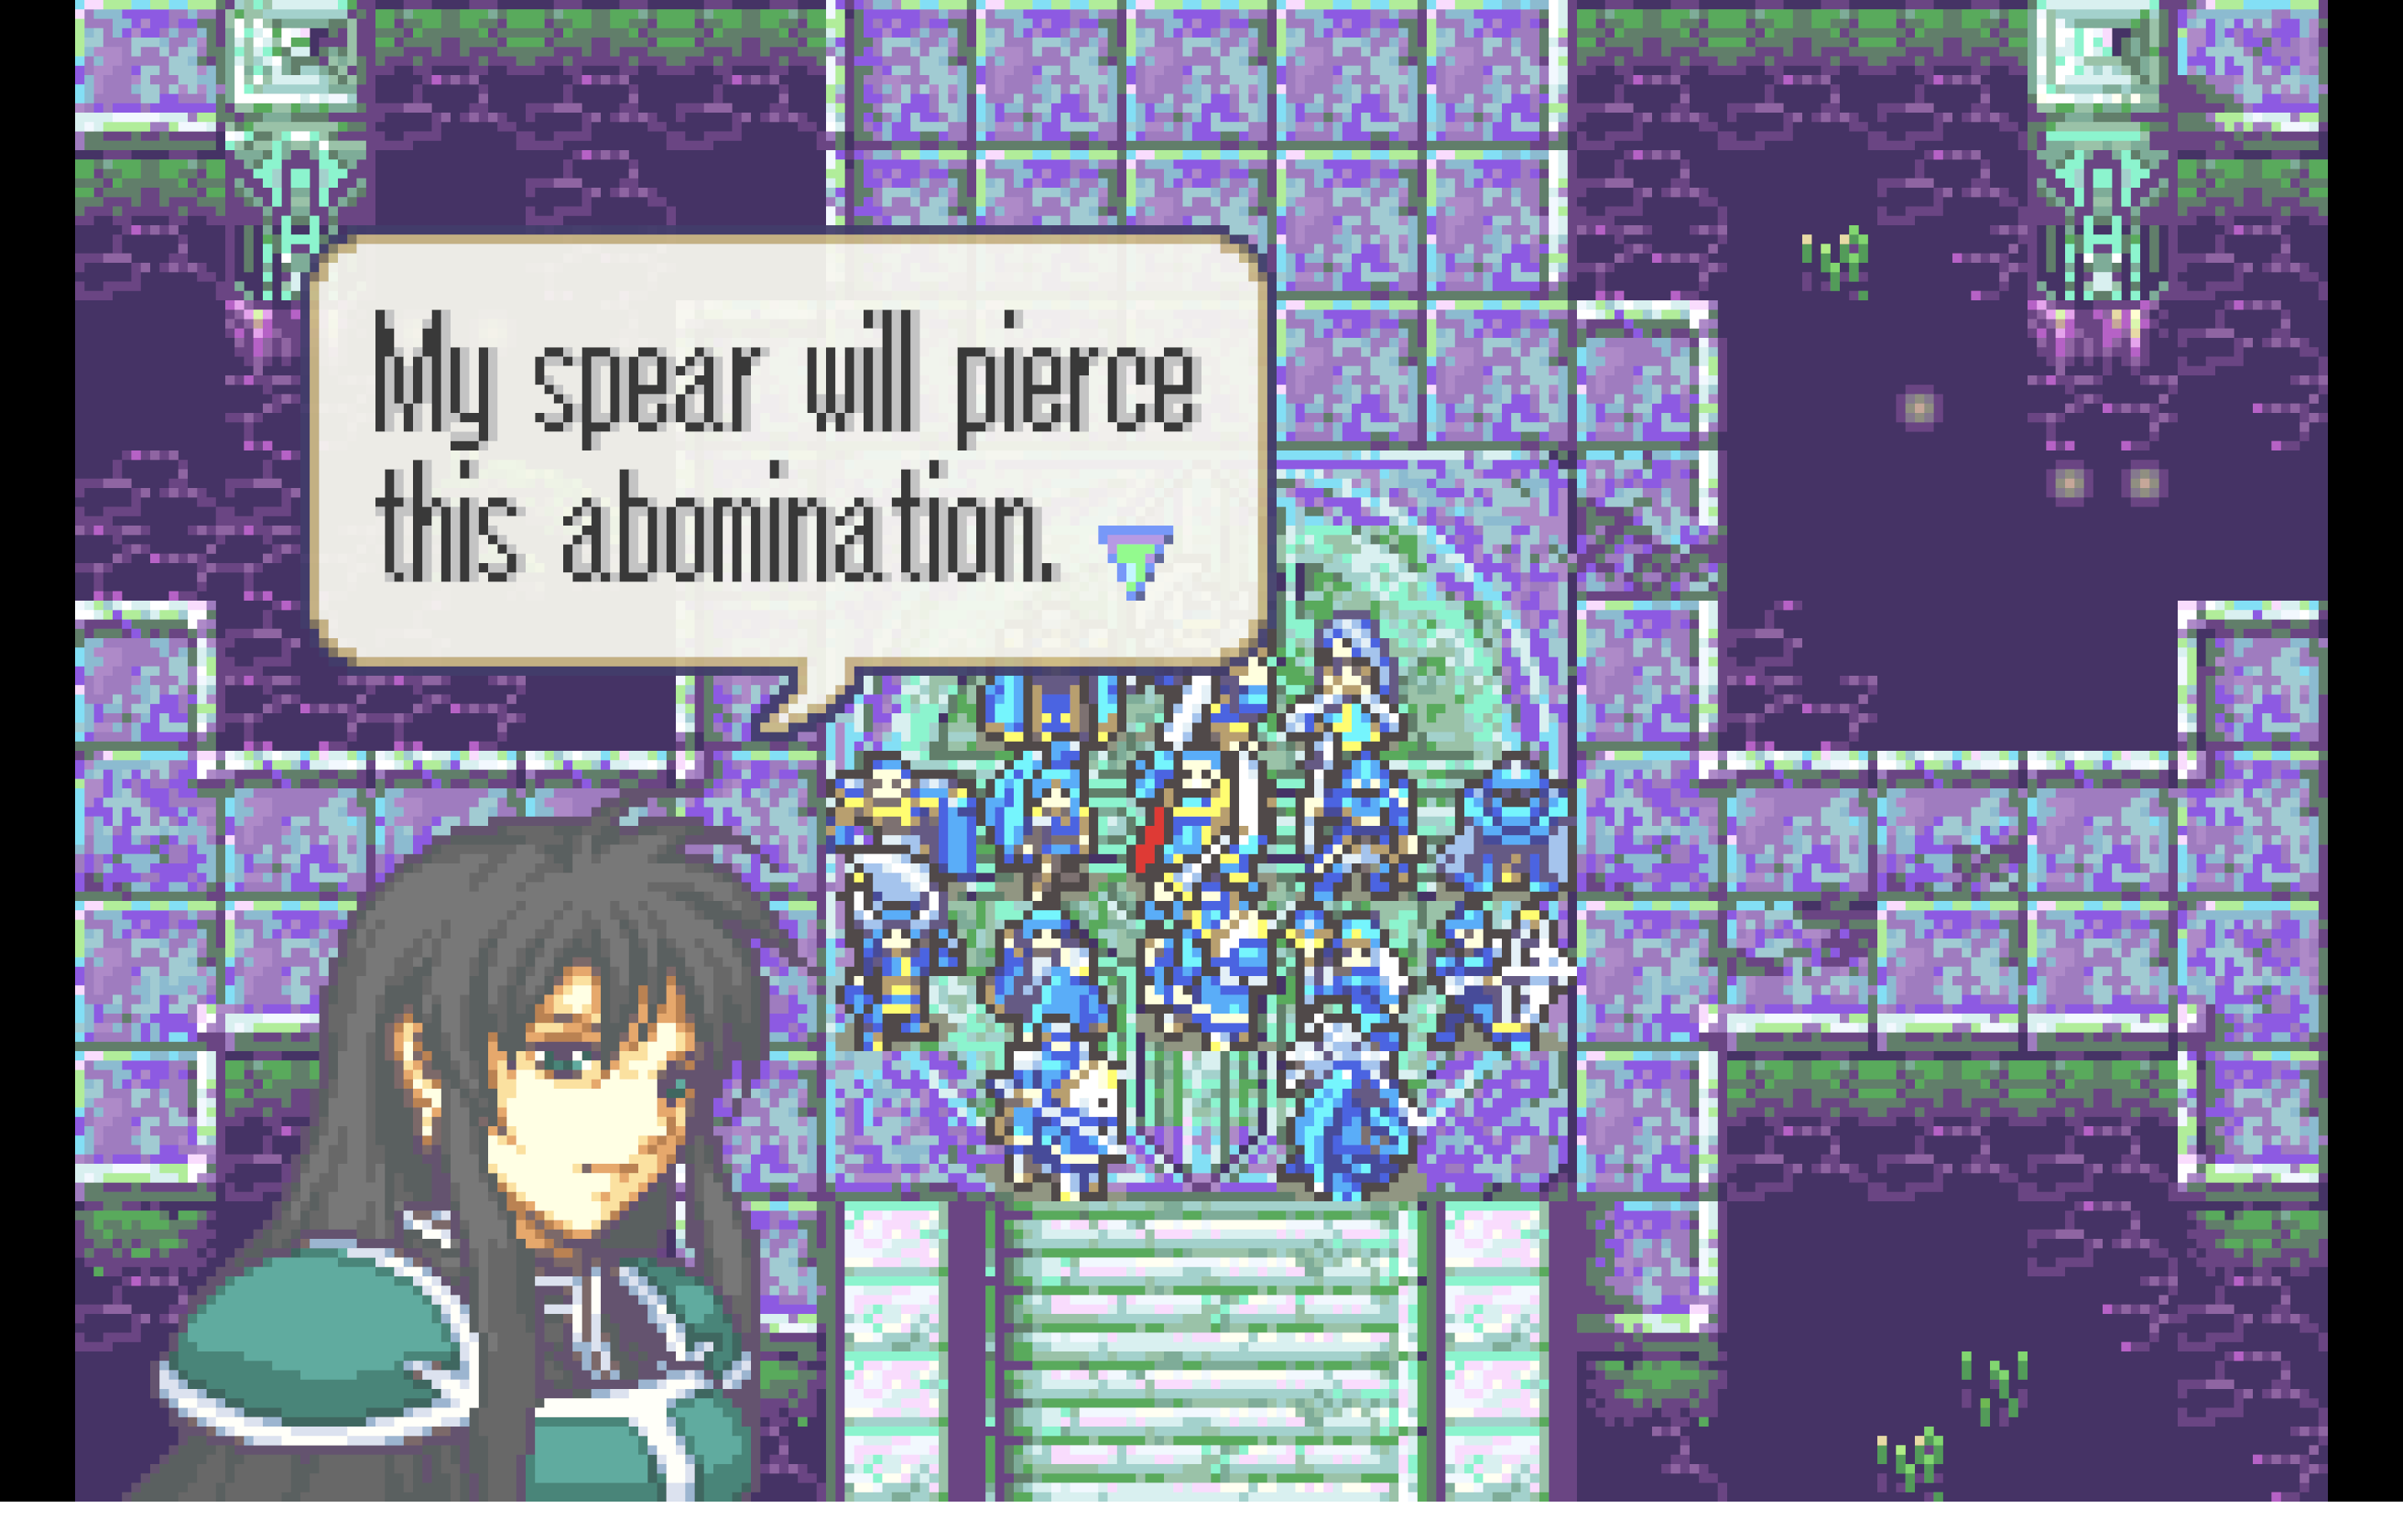
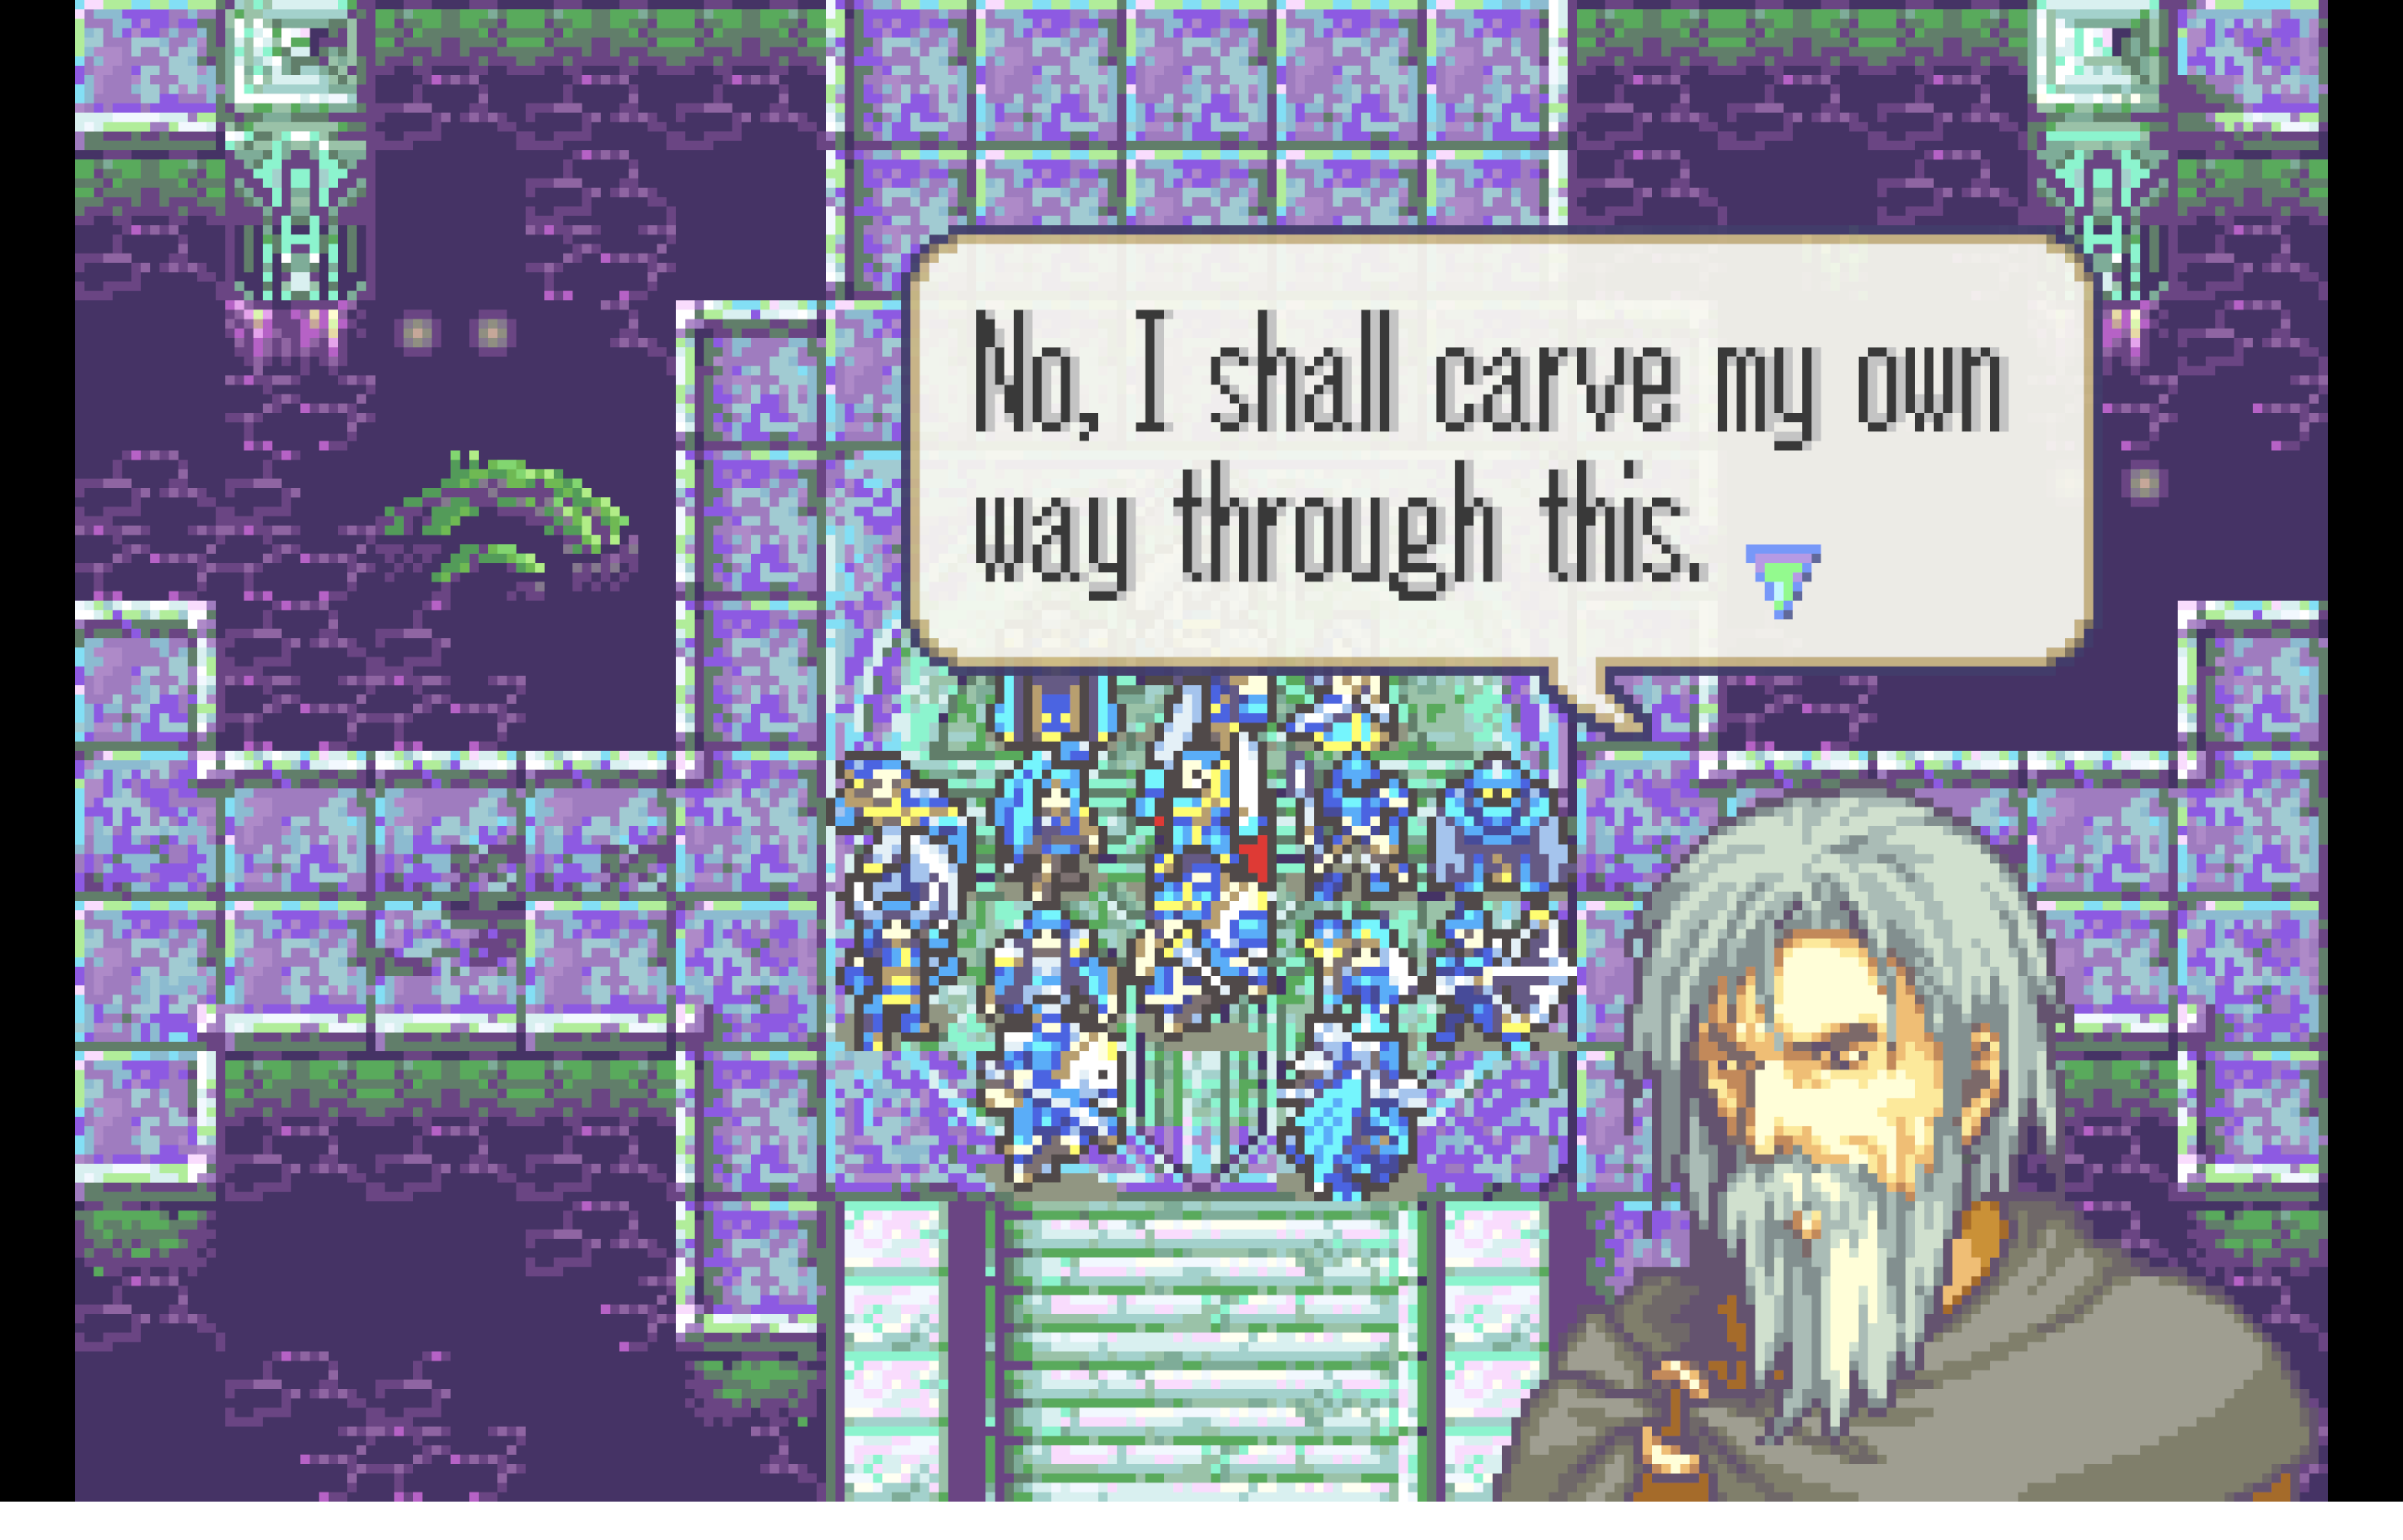
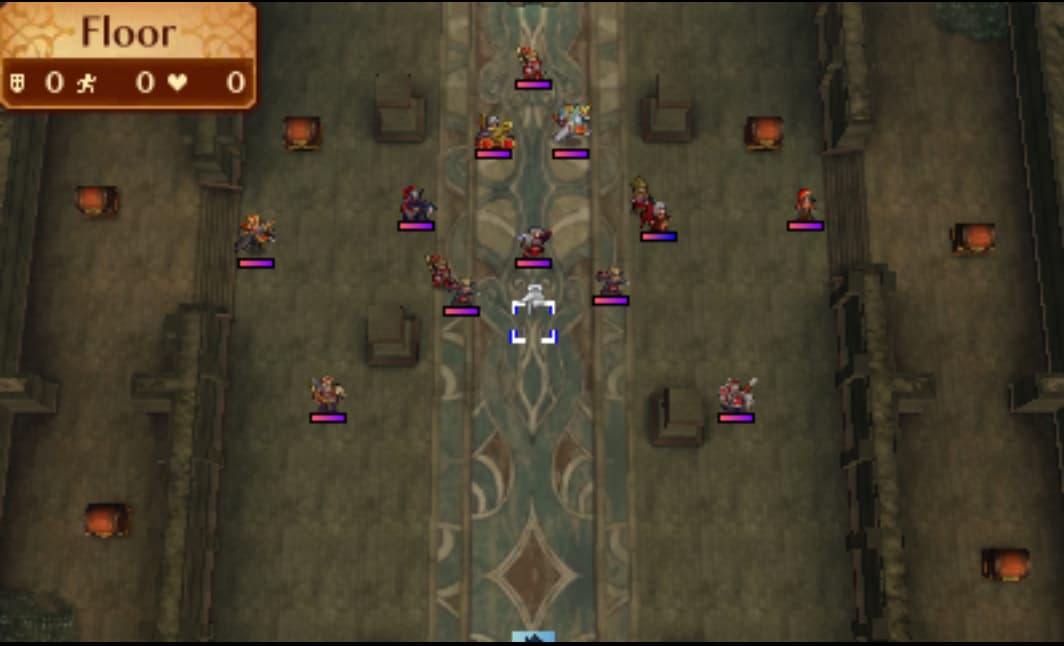
As they reach the bottom of the tomb, the Unspoken One himself—along with the cult’s leader Gamliel—appears before the group… and the final showdown begins. The map itself is a ruined underground temple, the same tileset as FE8’s final map. And as the characters say their start-of-map final battle quotes one by one and the player begins issuing commands to their units, a GBA midi cover of Twilight of the Gods starts playing in the background. It sets up an atmosphere that is climactic in an acutely familiar way for anyone who’s played a couple Fire Emblem games before (in other words, almost anyone who’s ever touched a hack).


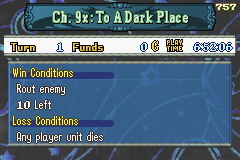
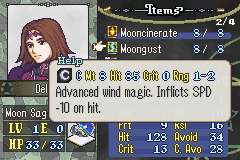
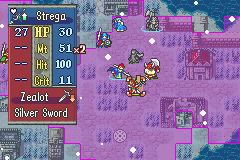
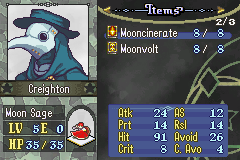
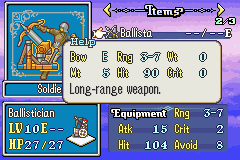
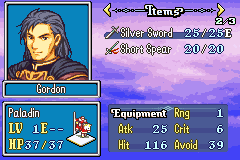
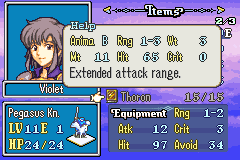
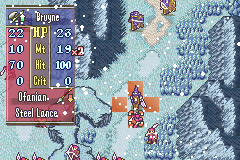
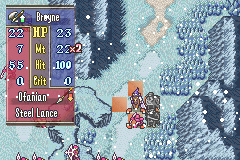
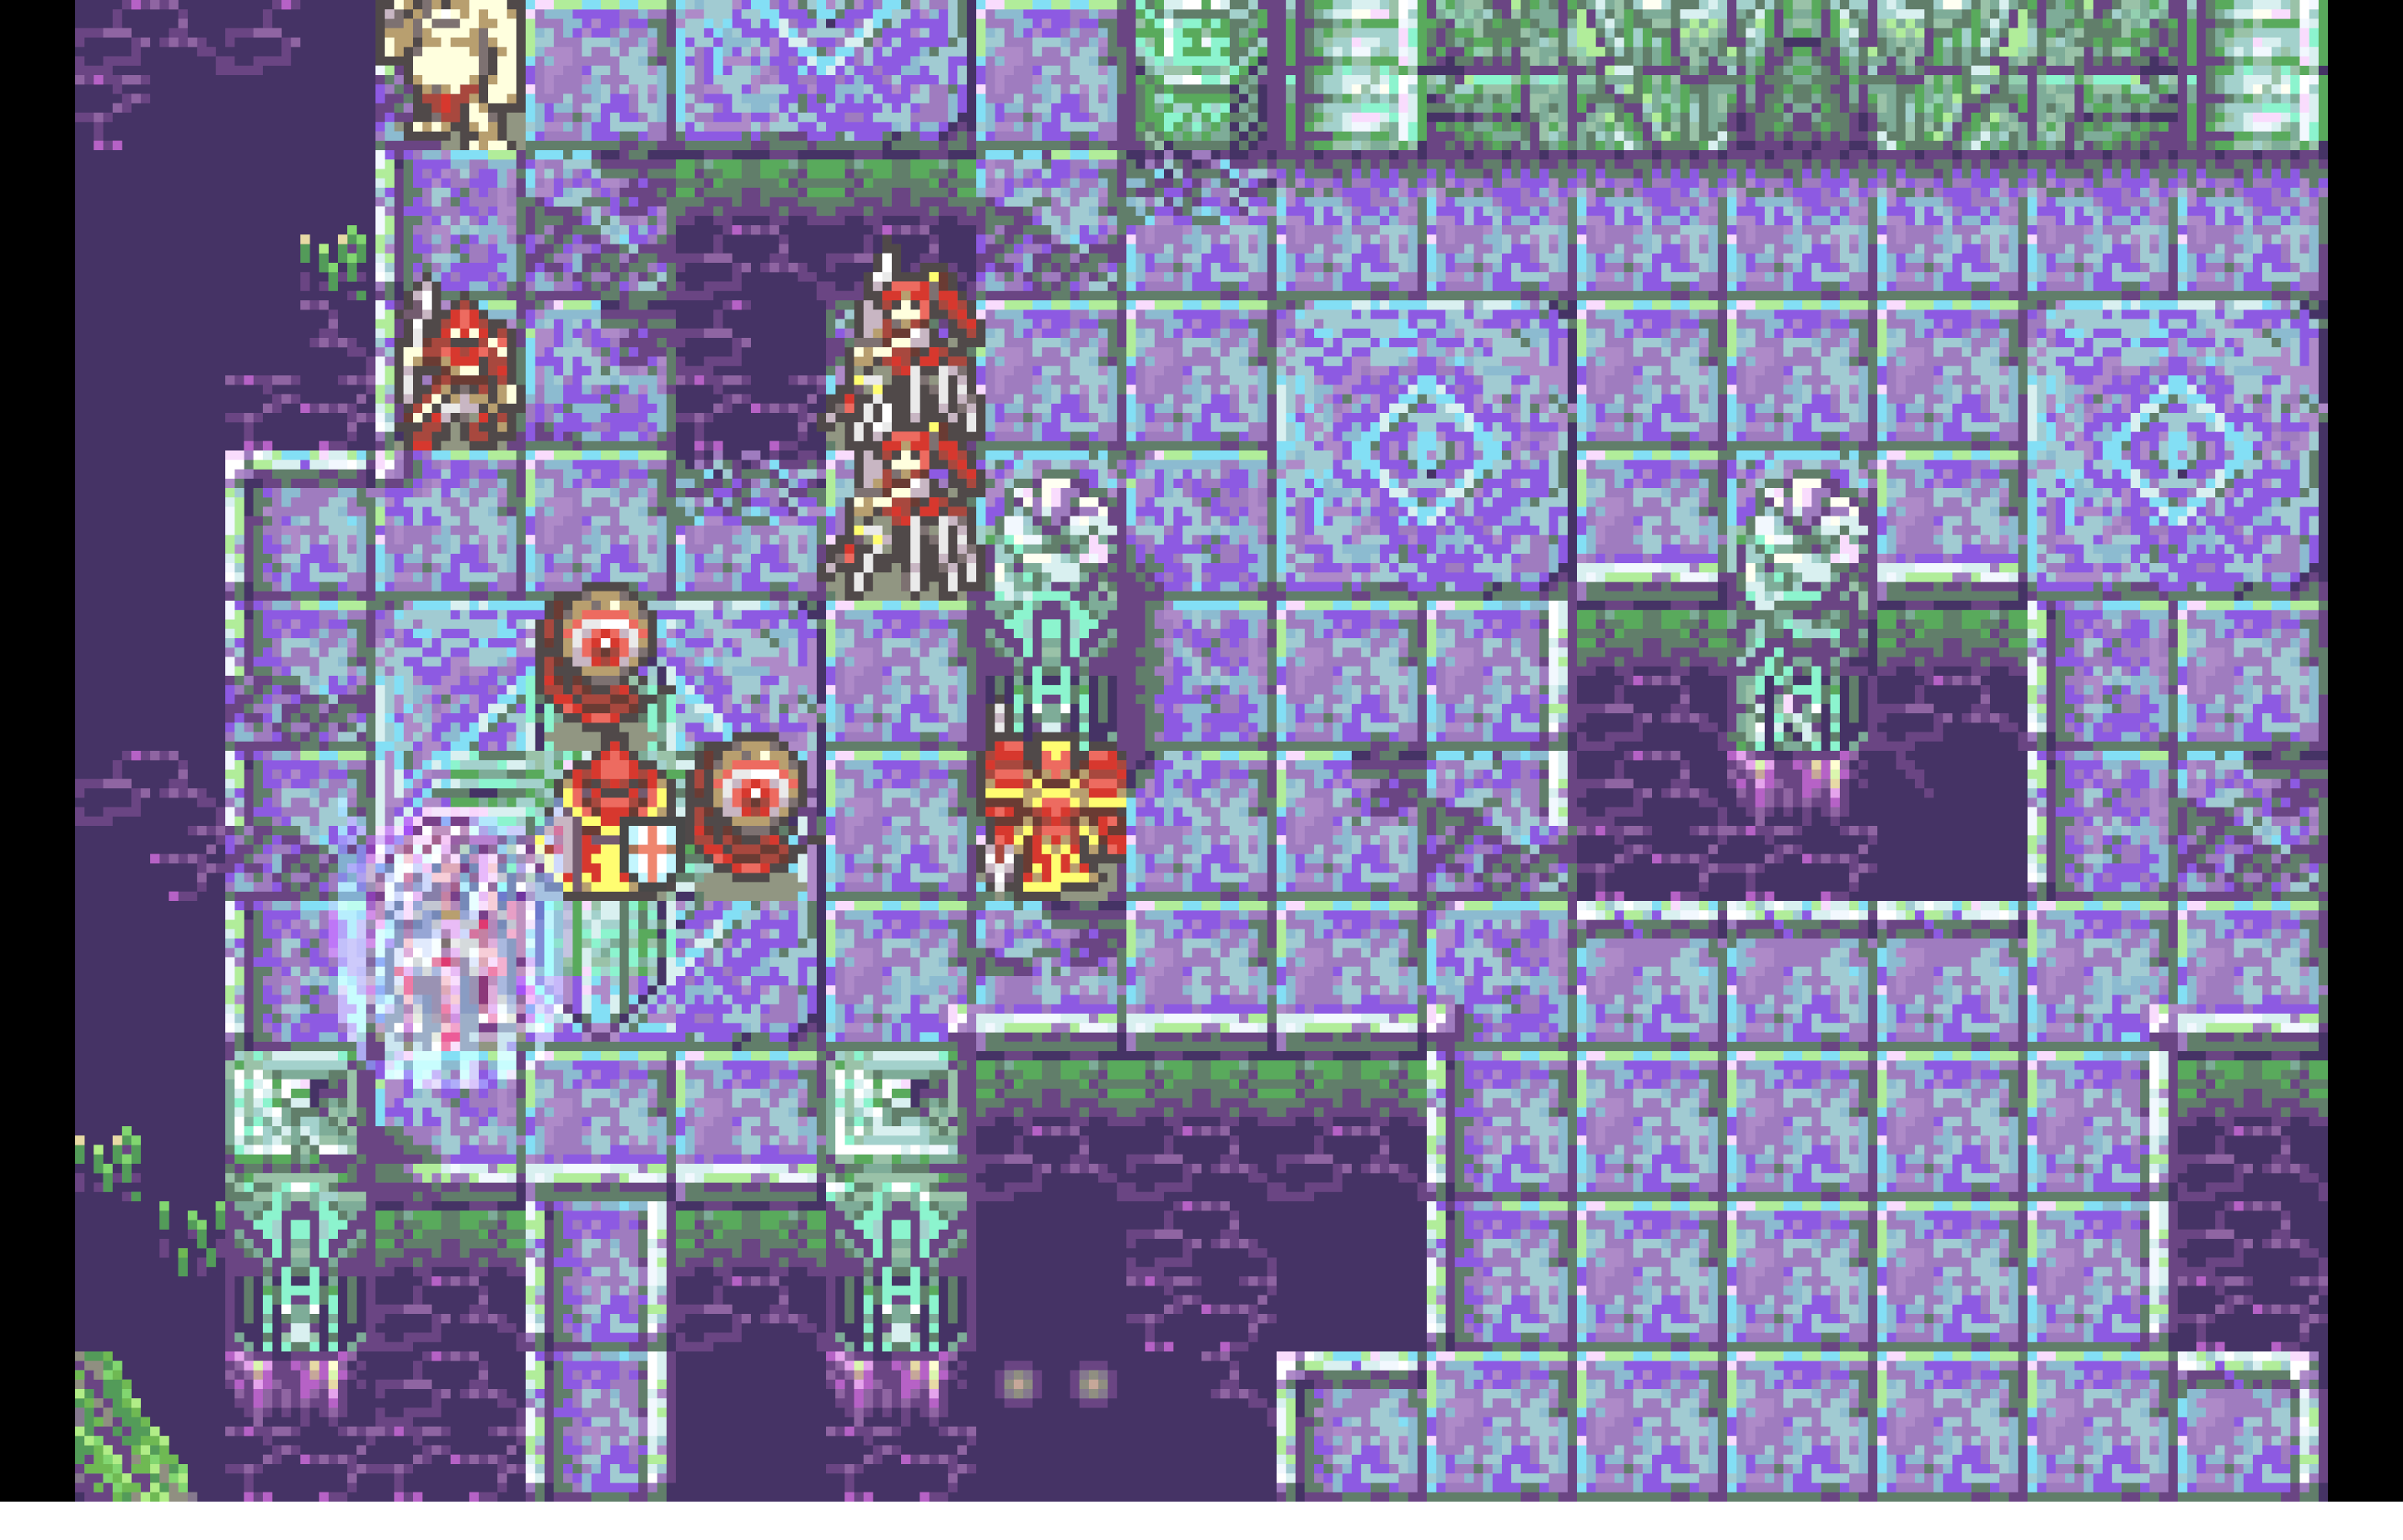
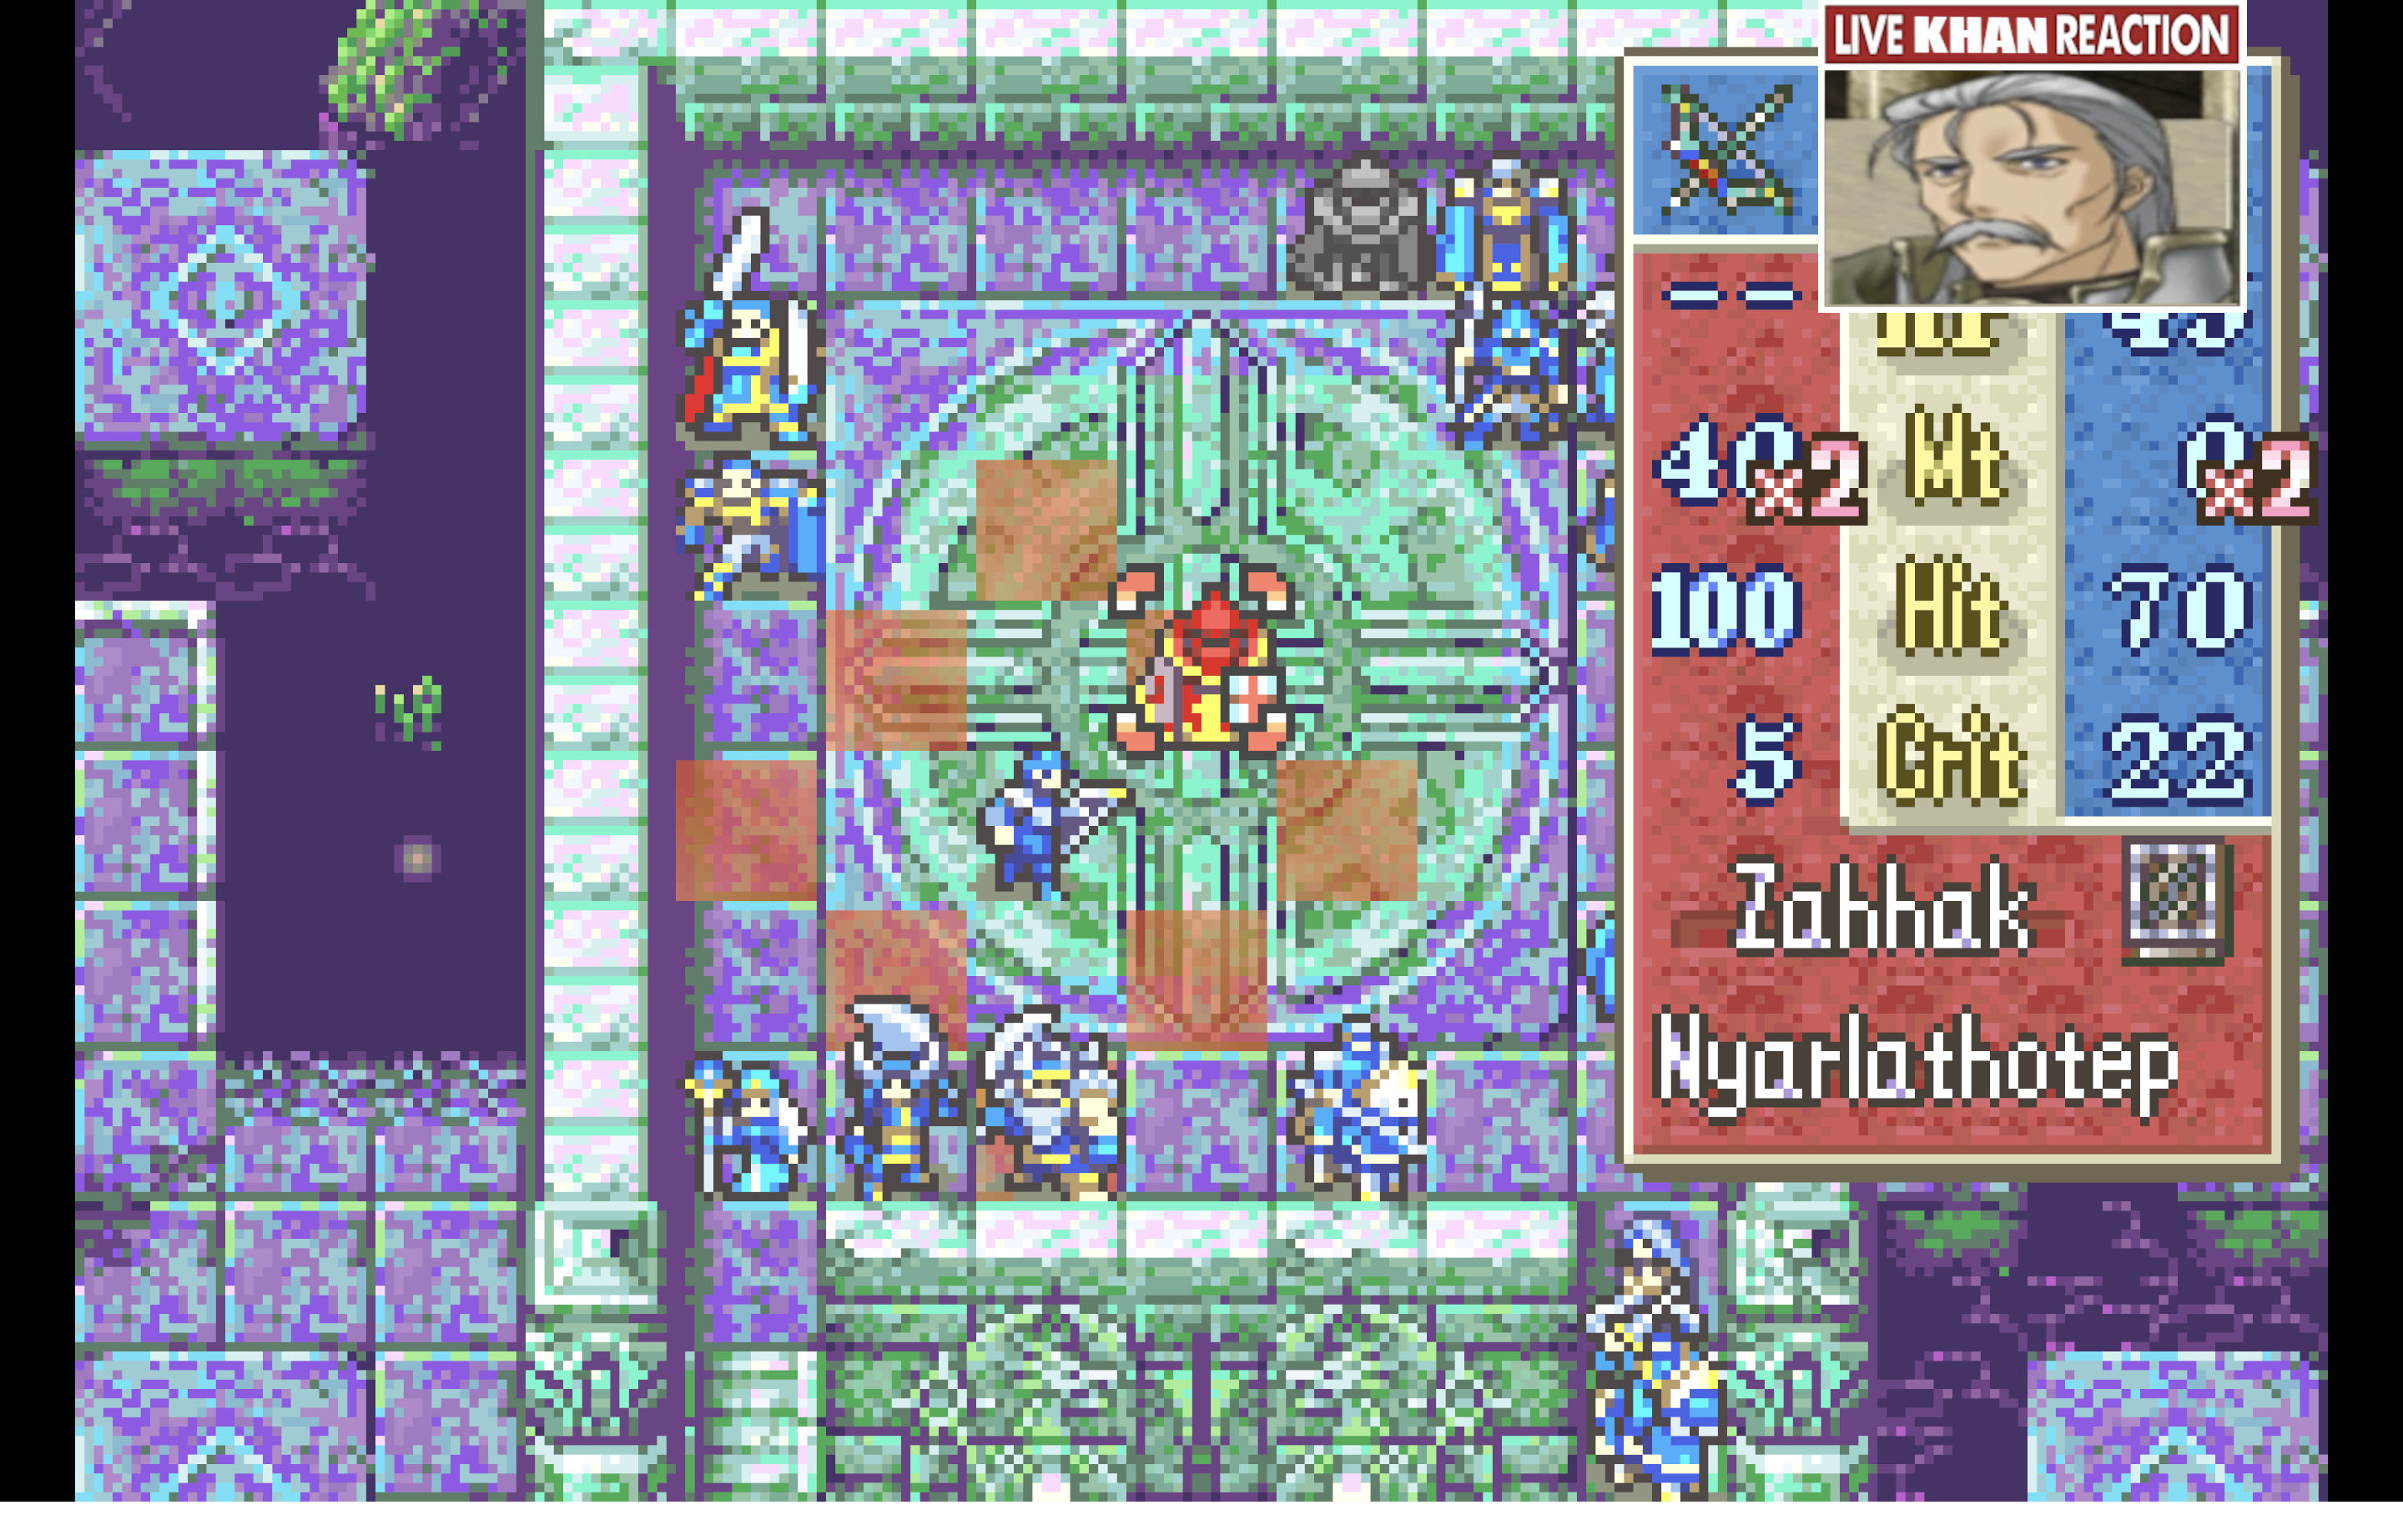
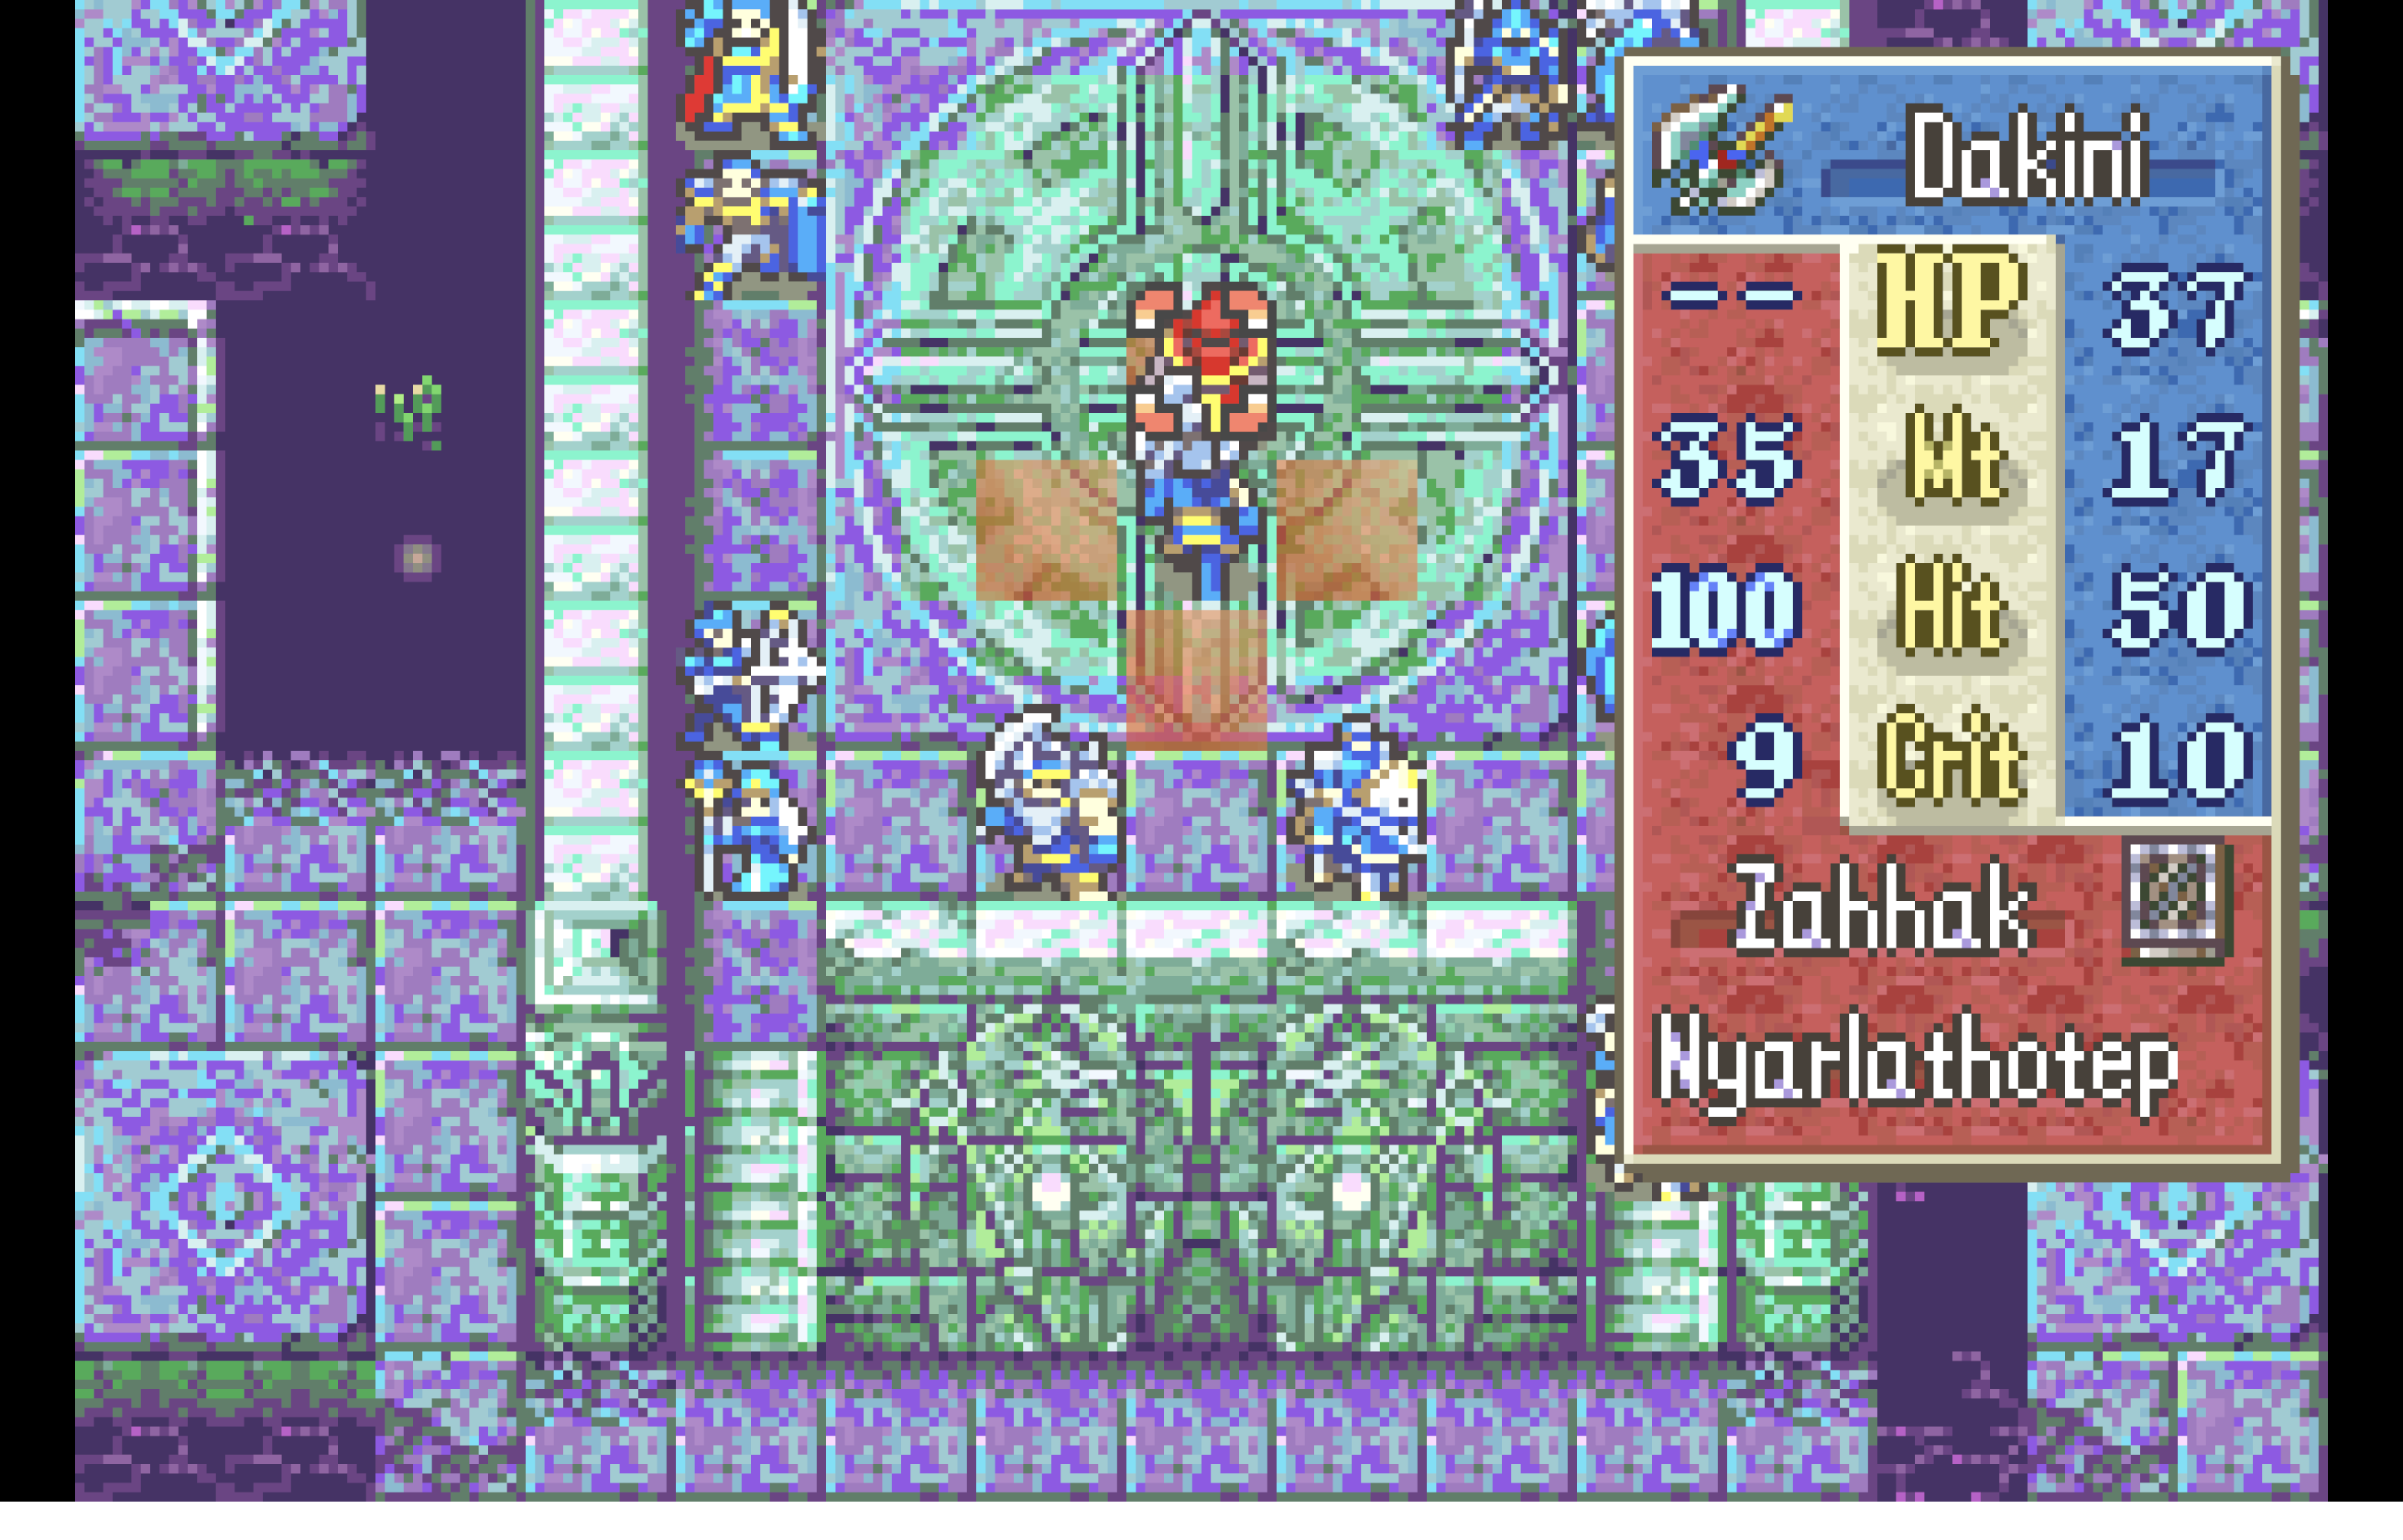
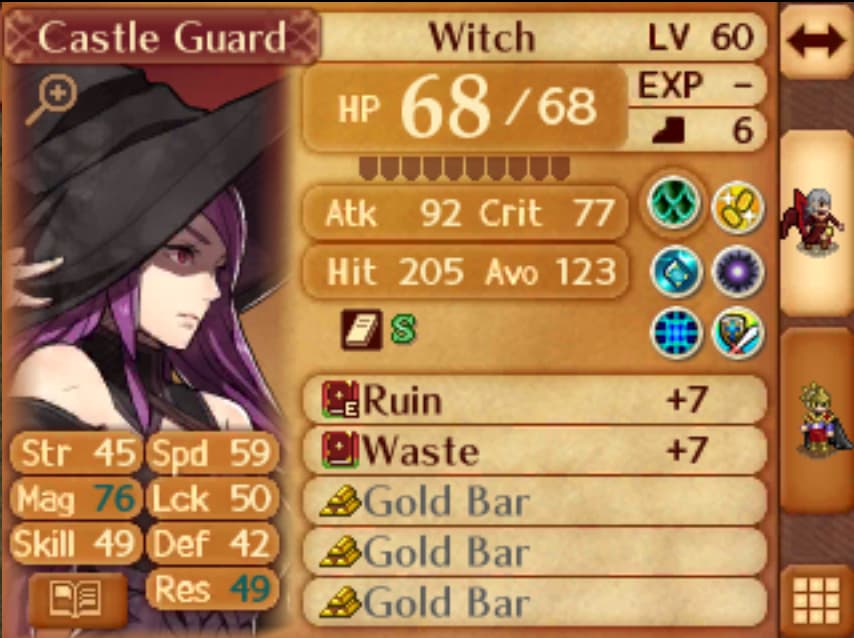
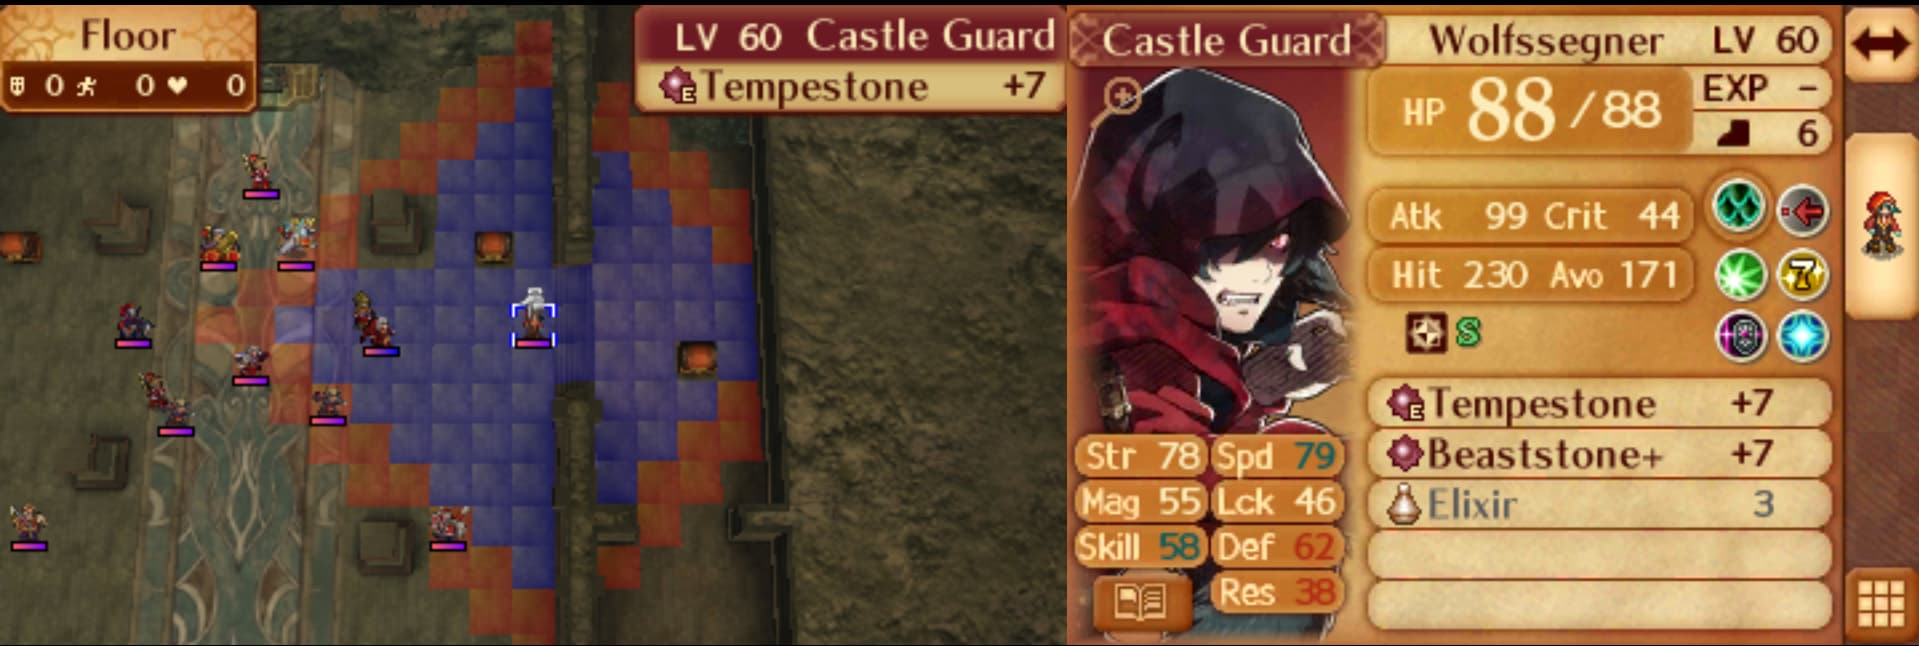
In terms of gameplay it’s a pretty grueling map, and for one big reason: the Unspoken One himself. True to the form of a literal god, the Unspoken One hits very hard and his defenses are impossibly high. It’s to the point where many of your units might be straight up useless against him, and the only hope of actually damaging him are the weapons that deal 3X effective damage to him: the legendary weapons that dragon priestess Freesia (basically the in-universe equivalent of Dragon Jesus) designed specifically to kill him. He is not a “fun” boss to fight in the traditional arcade/sportsy definition of the word.

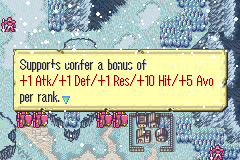
Now, even I will admit that these defenses could’ve been toned down a teeny tiny bit, because even with the legendary weapons you’ll need units with high Strength/Mag in order to do any semblance of damage. Lance and bow users especially struggle as their legendary weapons have lower might than the other weapons. But I think it’s still a really cool and respectable element of the fight that helps it capture the vibe of a battle between god and mortal—accurately reflecting the narrative hype that the story has been building around the Unspoken One from the start. It forces you to put your most powerful tools and units on the table if you want a chance to land any meaningful hits at all, let alone win. And hell if that doesn’t capture the atmosphere of standing up to a deity far beyond your caliber. (It doesn’t matter anyways since it’s the last map, so you might as well quit hoarding and use all your legendary weapons)

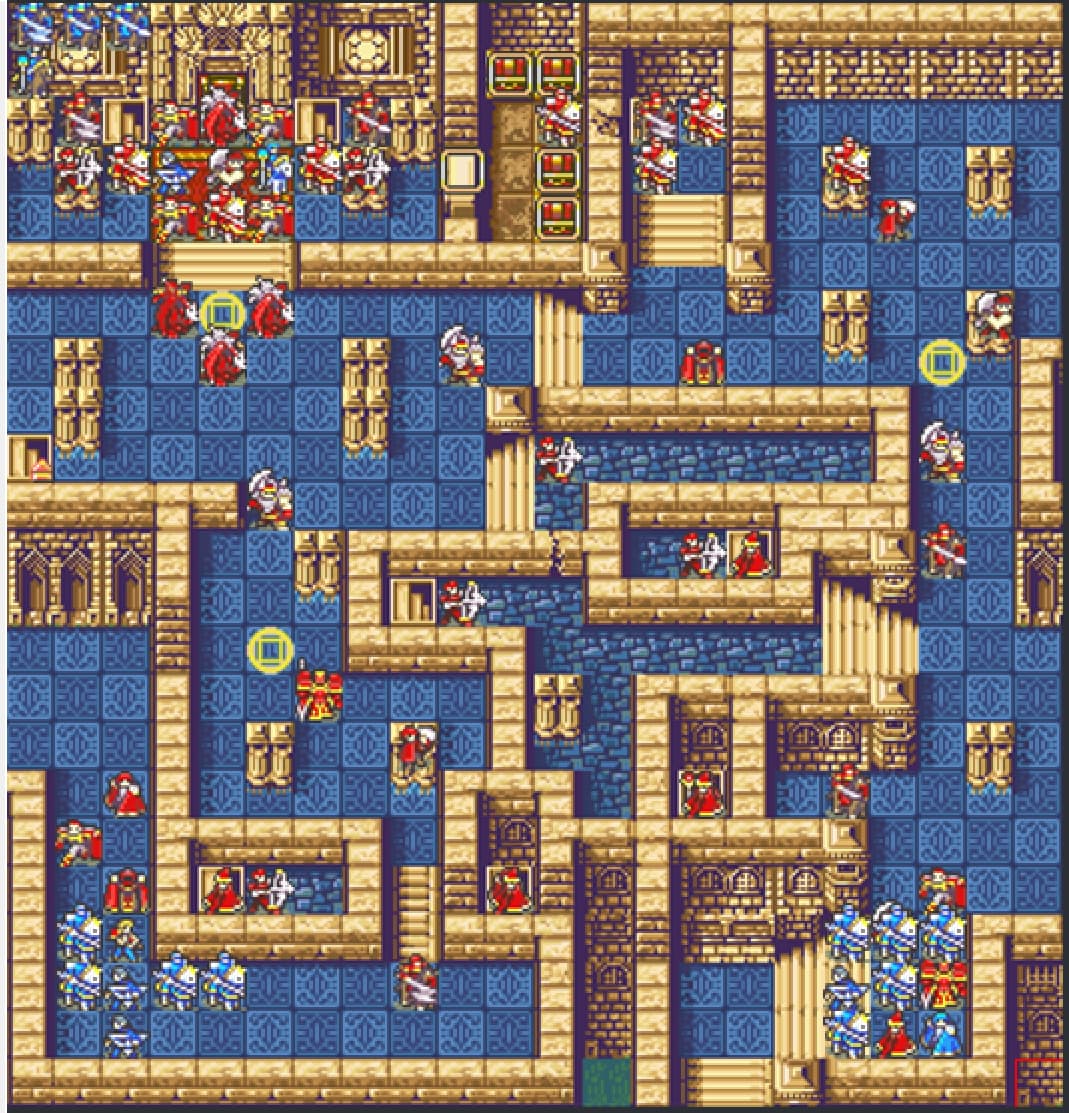
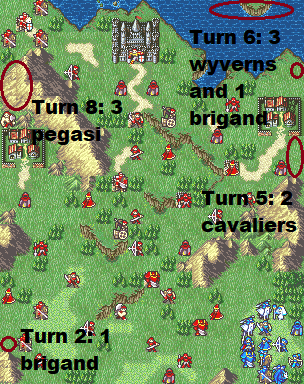
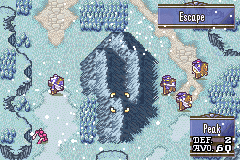
In most scenarios, this kind of setup would immediately lead to a static slog in which your units huddle around a stationary boss chipping away at him. But this is not the case with Zahhak (at first): one turn after you get a hit in on him, he warps away to another part of the temple before summoning more monsters to throw at you. He does this multiple times throughout the chapter, which distinctly integrates him into the map’s formations and gives him lasting presence and influence on the map. It’s a really nice shift from the usual one-roundable bosses who often don’t feel like they have any impact on their maps, and it fits his story setup like a glove. It also meshes with his oppressive statline to create a very interesting gameplay effect where every hit you land on him feels like something you have to push for. Because of this, I found this stage of his fight to be strangely reminiscent of Shadow of the Colossus’s core gameplay loop, where every stab into a Colossus’s back takes a lot of effort and precision on the player’s part to pull off successfully… which in turn makes each stab feel more weighty and dramatic, as it should be when fighting a titan far above your weight class.

Most FE bosses last maybe one or two turns and then fizzle out in an embarrassingly anti-climactic manner. They are barely part of the map at all, more often than not. But thanks to his map’s mechanics, the Unspoken One is a lasting presence on the battlefield who you have to be extremely mindful of in order to avoid casualties. And while he eventually stops teleporting around after a while—admittedly a potential weakness in the execution, as it does devolve into a static slugfest at that point—I like the premise and core idea behind the mechanics enough that I’m still willing to talk about it here.

Part 2: Cracks in the Glass

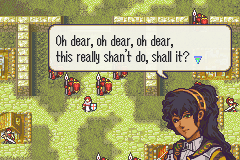
There’s far more than just this to say about the chapter, though. As you progress through the waves of monsters and cultists, strange things start to pop up for those who have the eyes to search for them. It all begins with the cult leader, Gamliel: there’s a cutscene prior to the map where the Unspoken One remarks that the modern lexicon of facts has been rewritten into fiction, and he promises to tell Gamliel the true nature of the world.

And if you fight Gamliel with Freesia on the map, she can immediately see in his eyes that he is no longer certain of what the real truth is. He was always one of the most faithful and devout characters in the game, but whatever the Unspoken One told him offscreen has completely shattered his worldview. And seeing such a passionately pious man’s faith waver is a clear indication that something is going wrong.

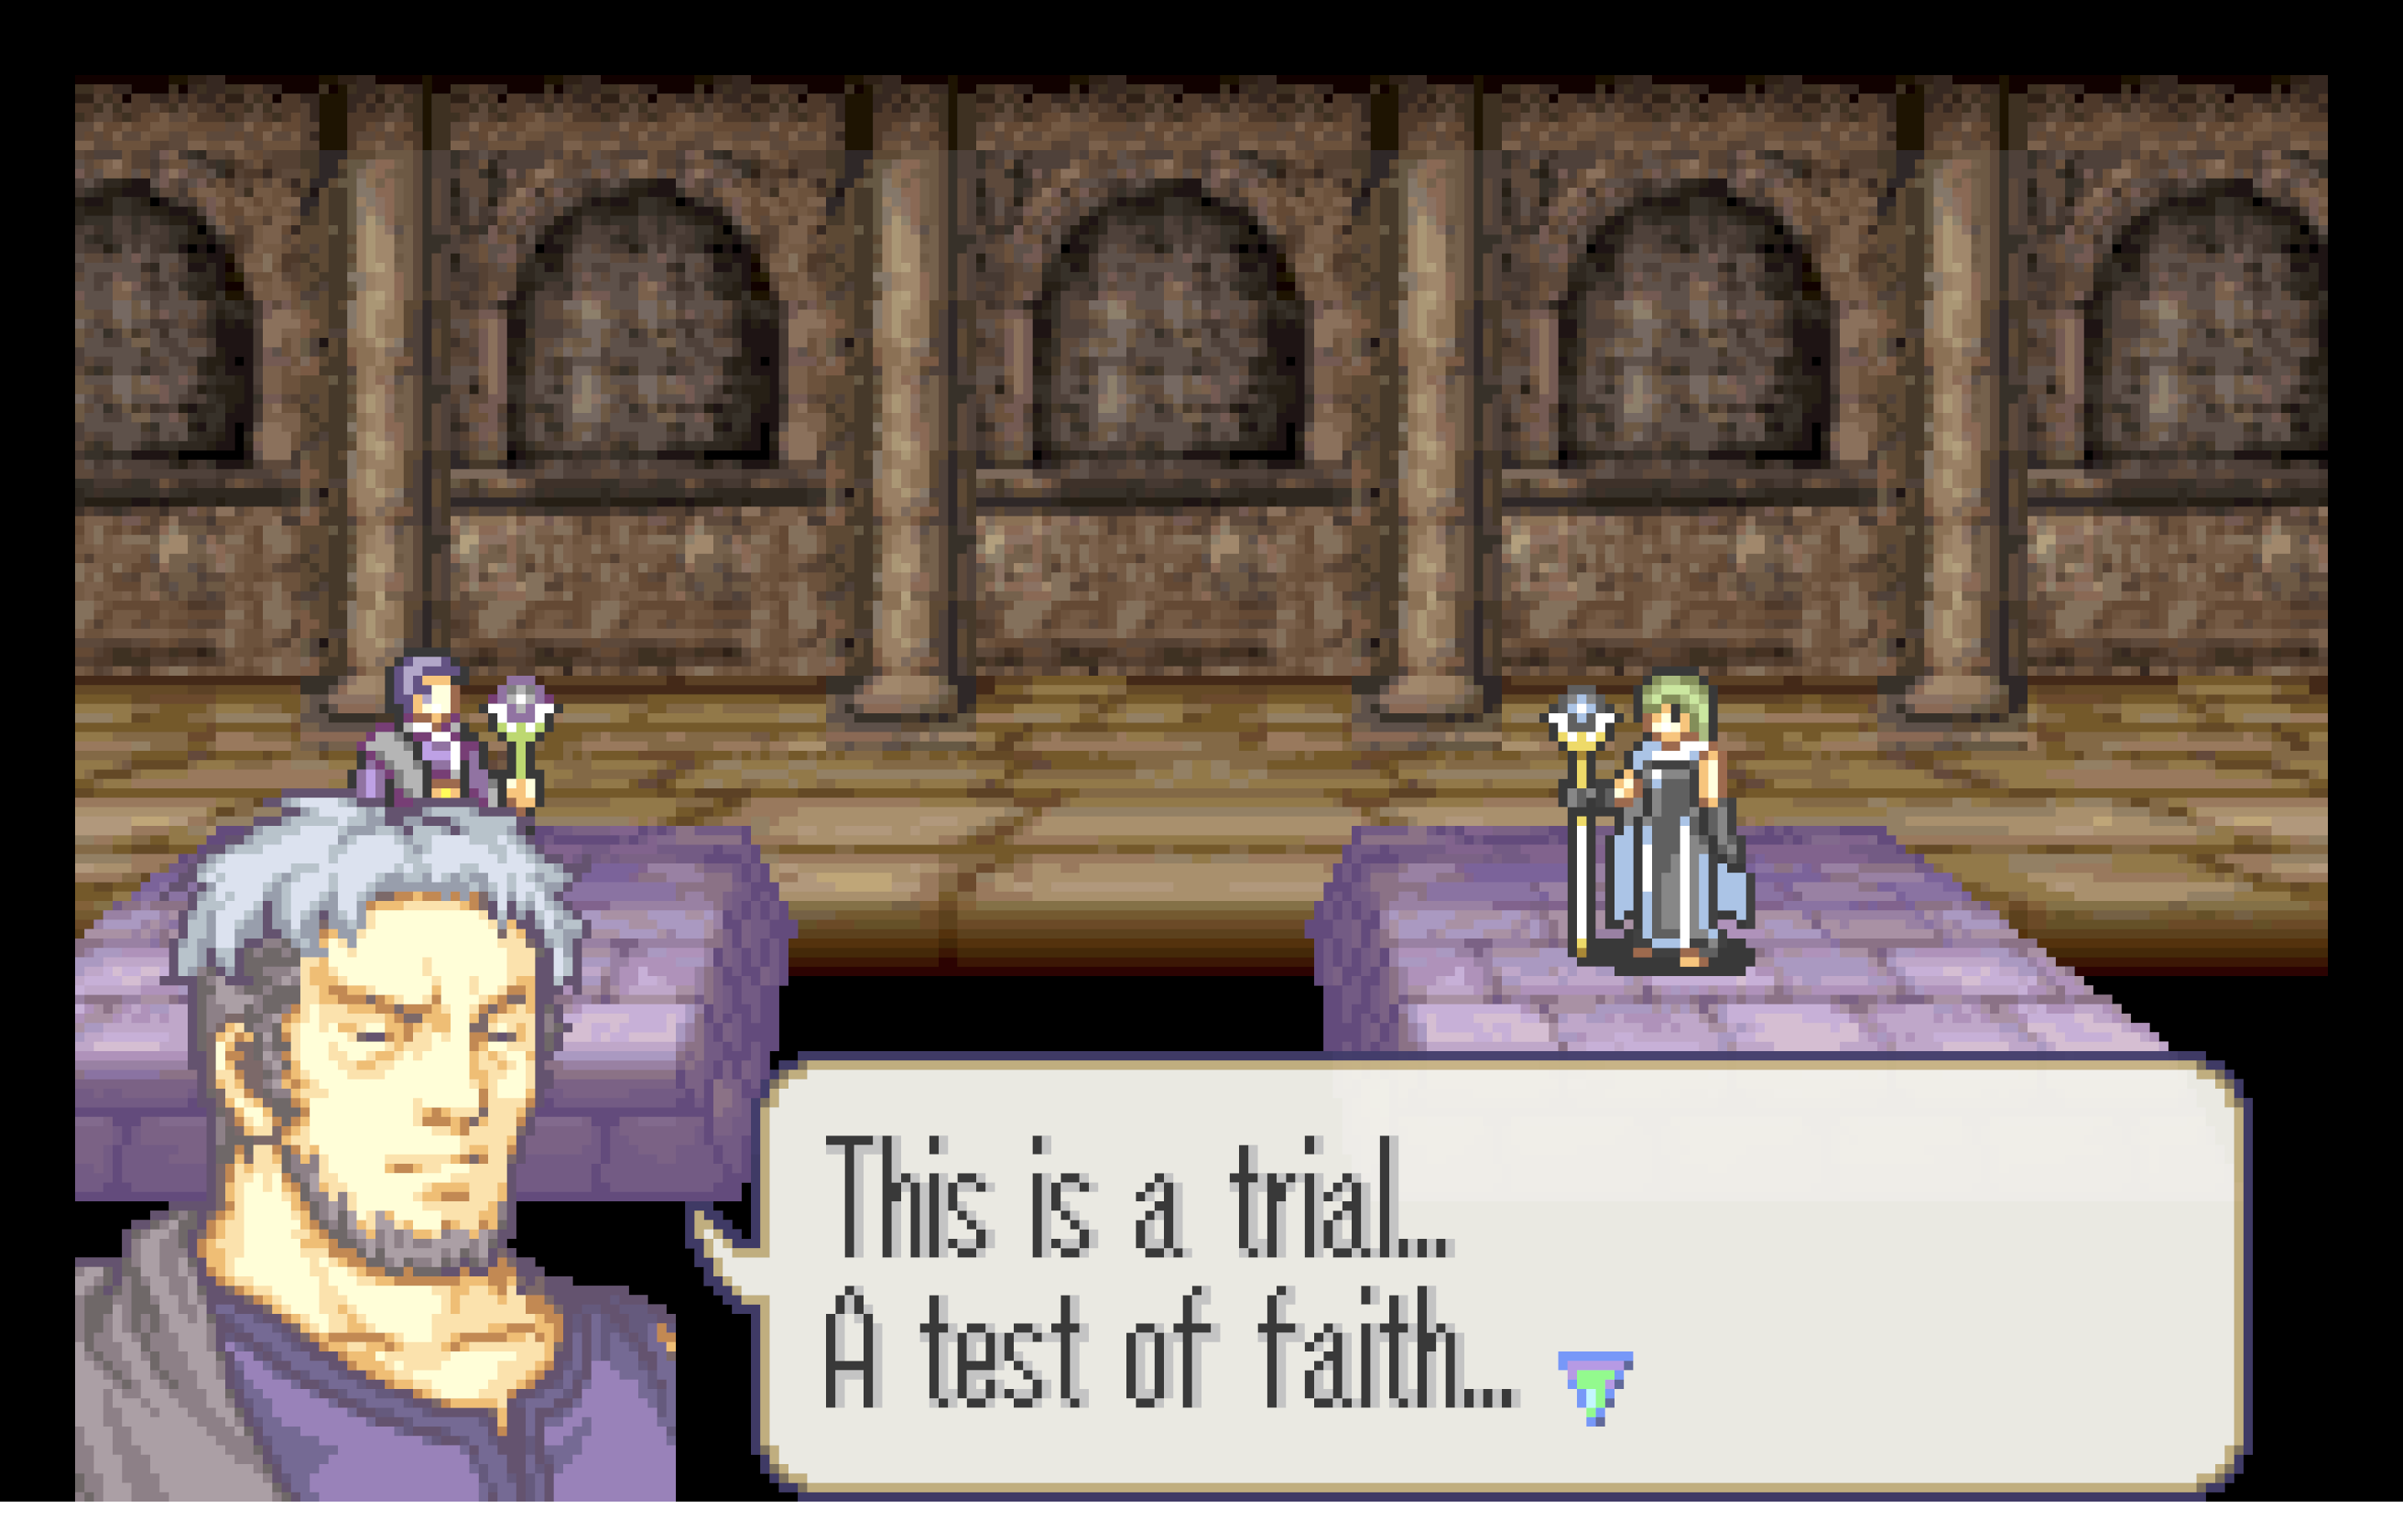
Freesia: Ah, I see. You’ve put up a great front until now. But I see it. Your faith has faltered.

Gamliel: This is a trial… A test of faith… I’ve come so far… I will not lose heart in front of you, snake!

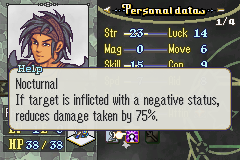
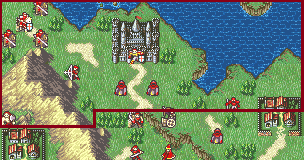
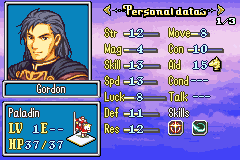
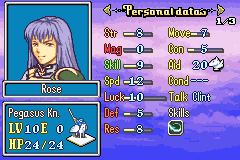
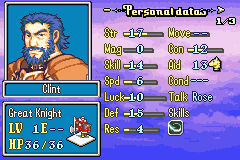
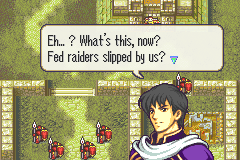
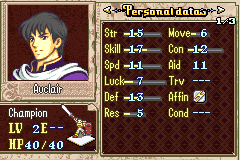
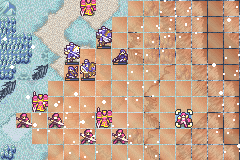
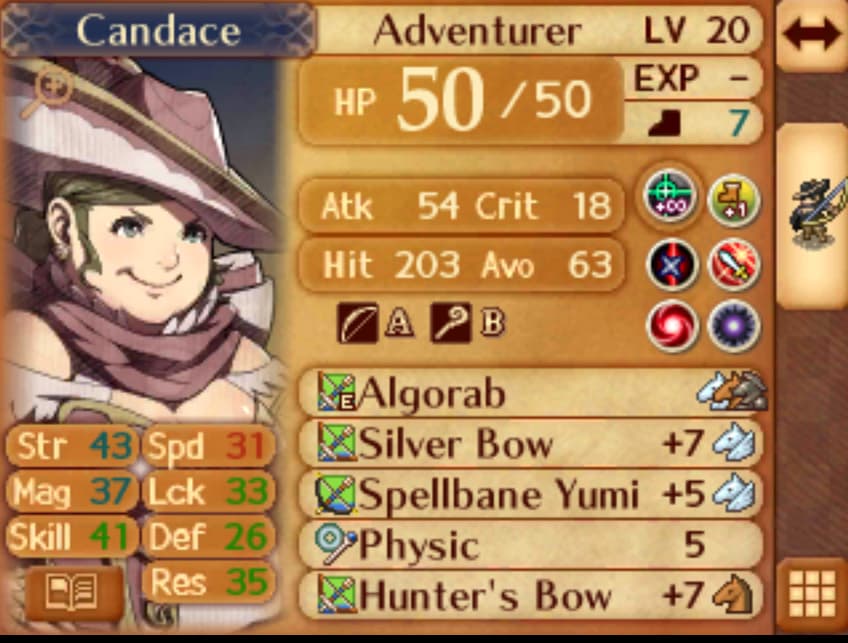
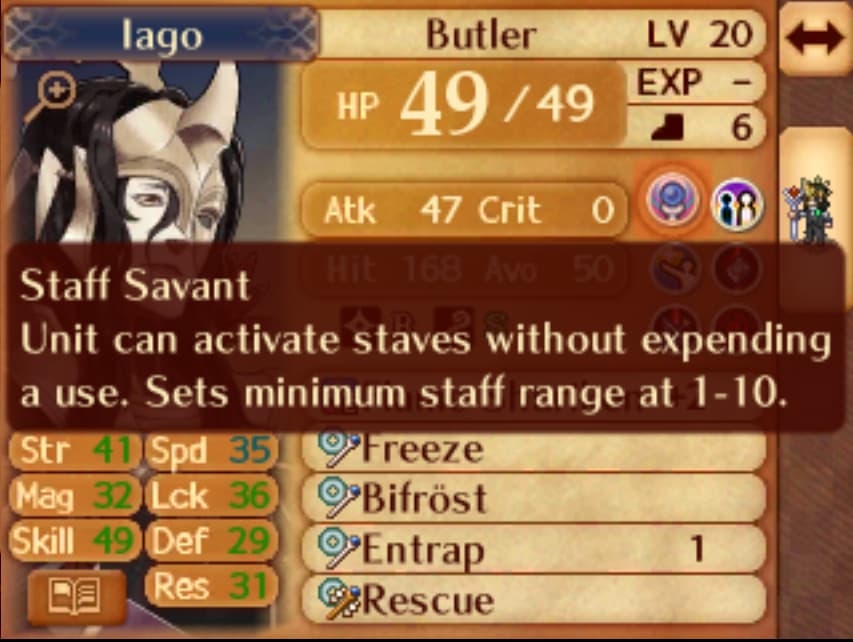
There’s a few more subtle clues, like the fact that some smaller plot threads have yet to be wrapped up, or the fact that you are still missing some of the legendary weapons. There’s even a clue on one of the images above that I didn’t mention, that you may have noticed! (I don’t think it was an intentional clue on the dev’s part, though it’s still something I noticed and found strange as a first-time player.) But it’s really the biggest development that ties the chapter’s concepts together into one cohesive image.

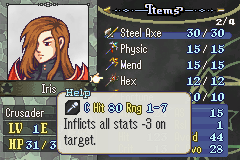
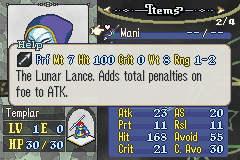
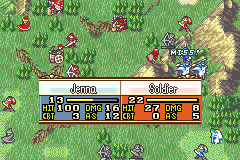
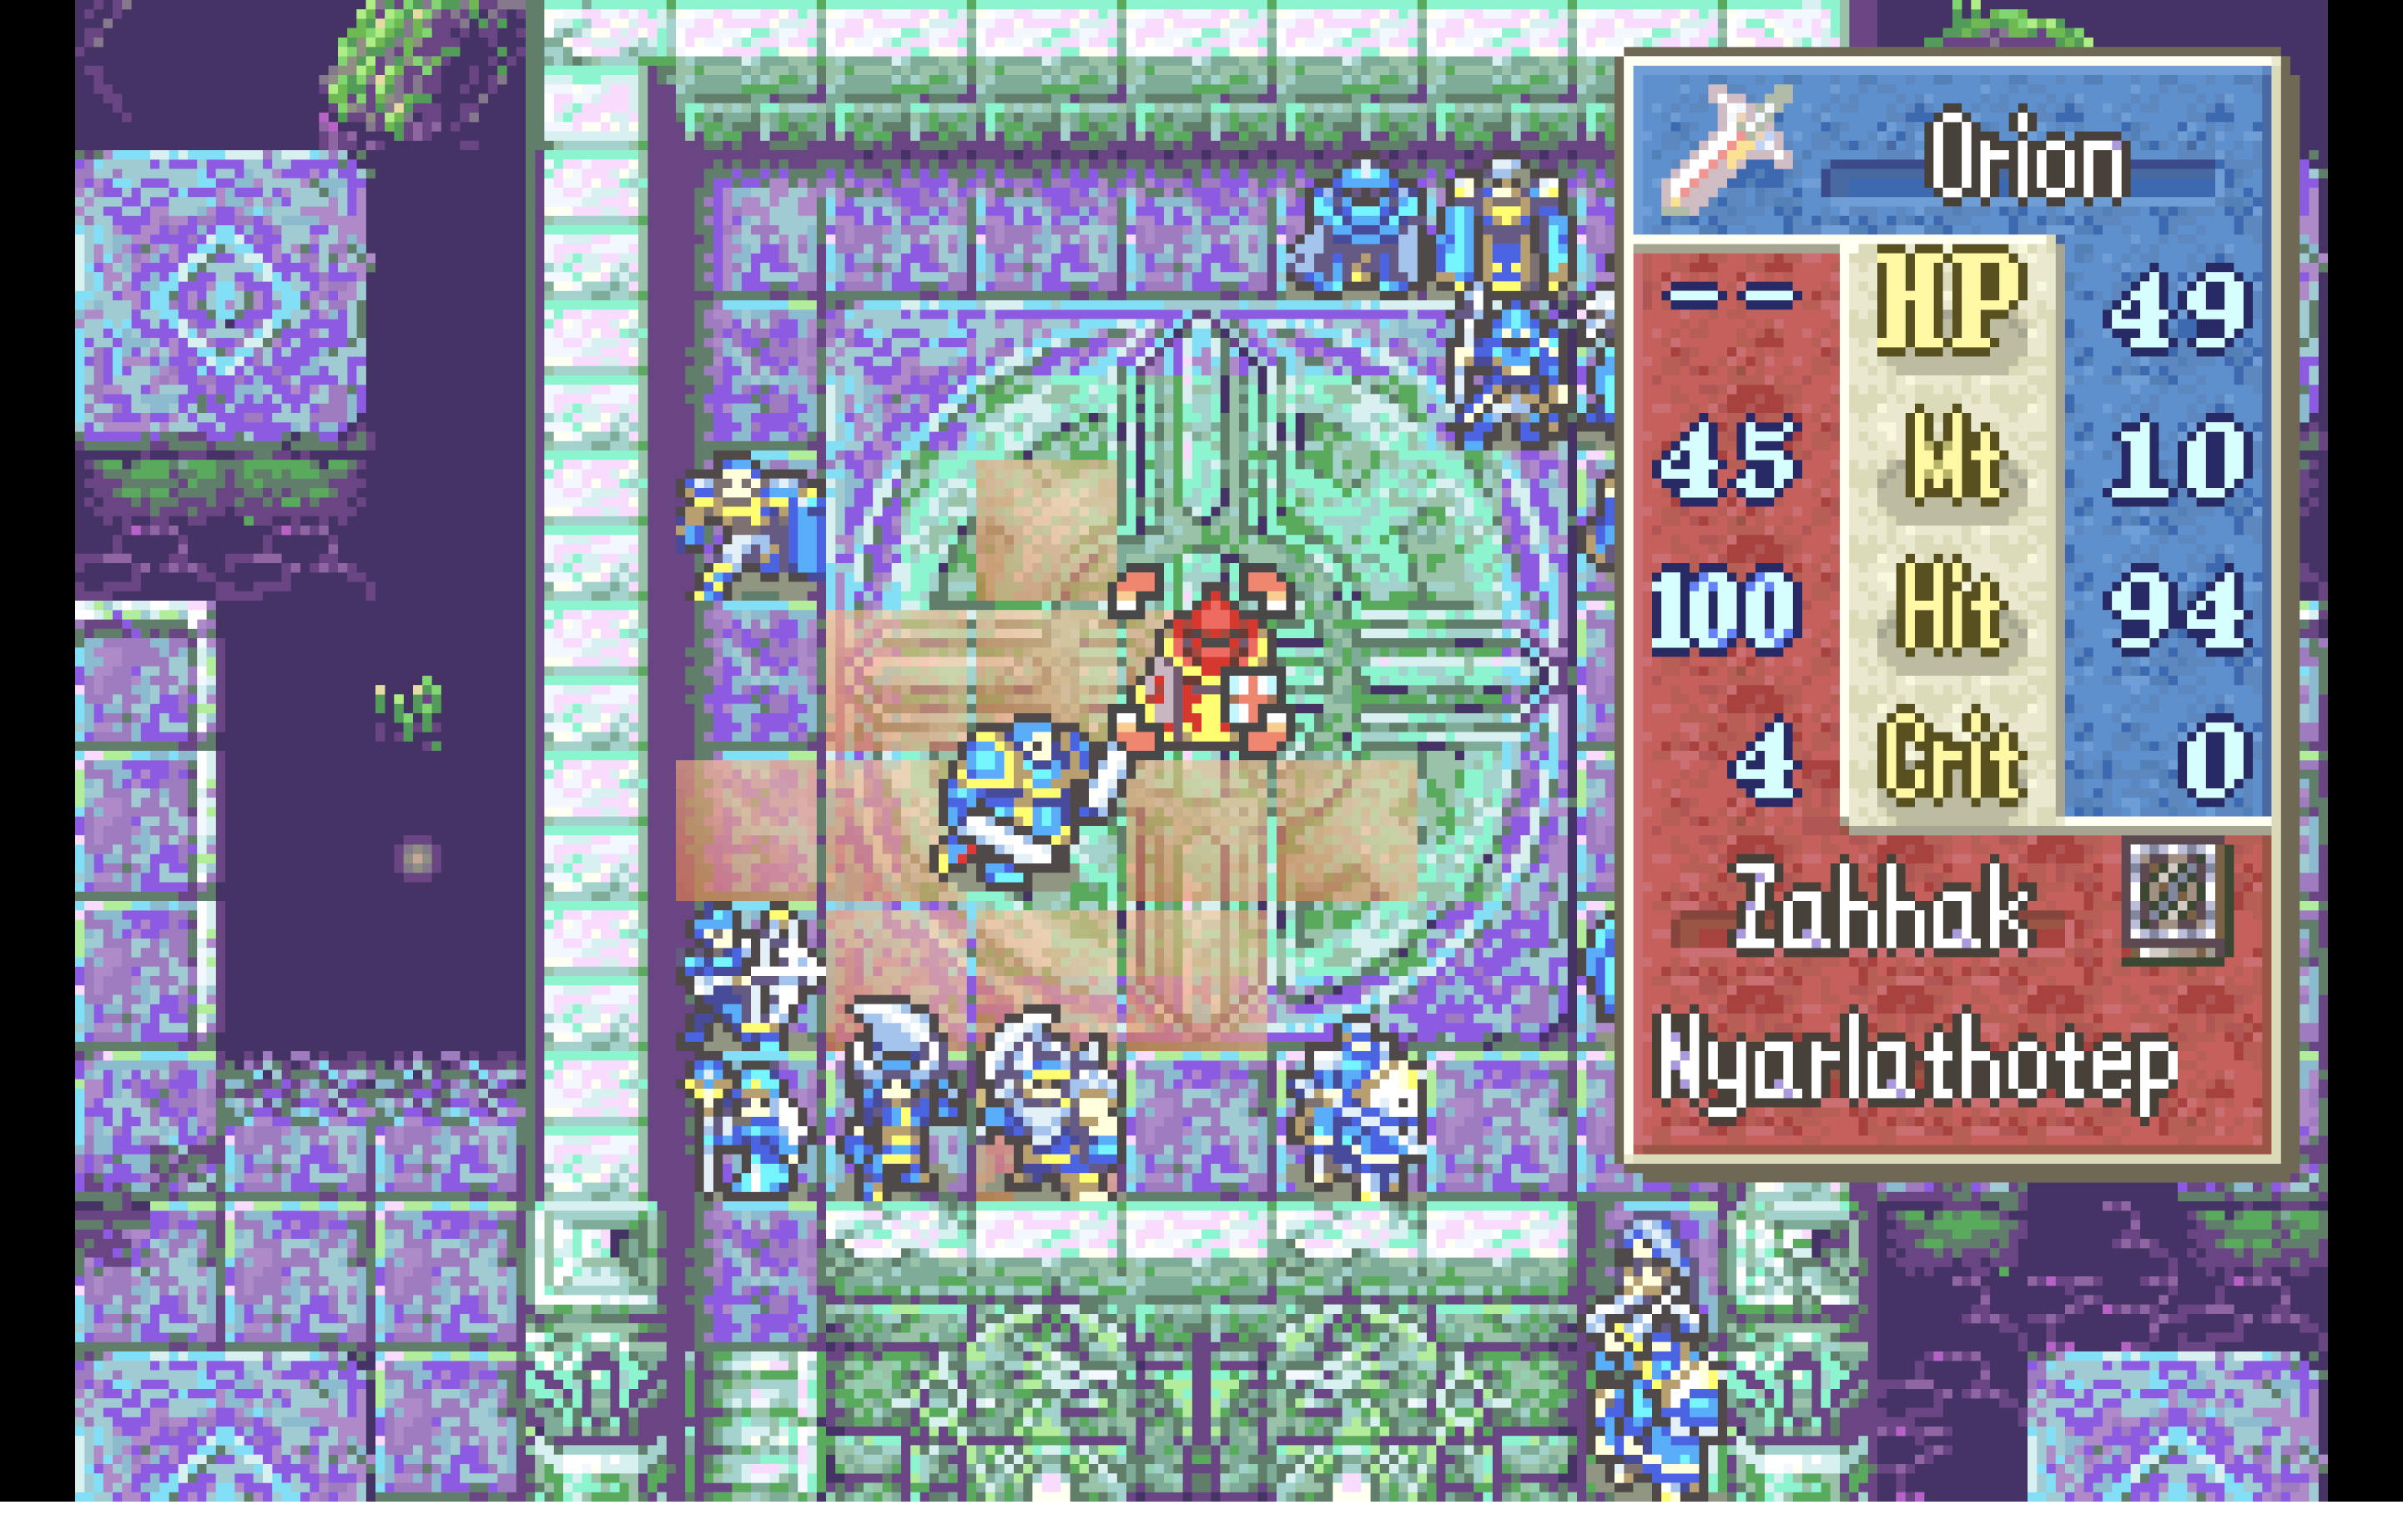
Remember how the Unspoken One can only be harmed through weapons that Freesia designed to kill him? Aside from the legendary weapons, there’s one more weapon that deals effective damage to him: the profane blade that the Unspoken One’s right hand man once wielded, which is now in Orion’s hands. In fact, it’s one of the more reliably effective weapons against him: the Patastra can often barely scratch him, the Nodens does absolutely nothing given its piss low Might, the Mada hits hard but has shaky hit rates and has a ~45% chance to whiff it, and the Dunbaalze’s weight means that its users are likely to get weighed down and doubled in retaliation in many cases. The profane blade avoids many of these problems, and while its mileage might vary depending on the quality of a given playthrough’s Orion, it often manages to chip away at the boss’s HP a reliable rate. Not only that, but it’s unbreakable too, for people who still stubbornly insist on hoarding weapon uses despite the fact that it’s the literal final map.


And while it’s technically not the BEST weapon for the job (that would be the Goldbrandt), you really want to get in as many hits in on the Unspoken One before he teleports away and spawns the next batch of monsters, and a “pretty reliable” option is as good as any.

This is all cool and good, but it also brings up another huge question: why would the Unspoken One’s most loyal follower be holding a weapon that would deal such harm to him, when the only weapons that can actually penetrate his defenses are Freesia’s weapons? Given that the legendary weapons are effective against him because Freesia explicitly designed them to slay him, the profane blade’s damage bonus comes off a bit odd… but there’s only one way to find out, isn’t there? There’s no better way to piece together the puzzle than to ask the man himself.

All these little elements have to be leading up to something big, right? Well, here’s where the cracks in the veil begin to show themselves: if Orion attacks the Unspoken One with the profane blade, the Unspoken One’s demeanor shifts completely from what it was like before. Gone is the steely, brooding “dark evil god” archetype that you’ve seen already in every FE, FE-like, and JRPG, replaced by an entity with very human emotions: rage, offense, and even a bit of hurt.

“That sword does not belong to you,” Zahhak tells Orion. “You will all die, but your death will be the most painful!”

This was a uniquely satisfying glimmer for me—possibly one of the most memorable narrative setups I’ve ever experienced in any work of interactive fiction. It felt like the mechanics of the map were tuned towards leveraging its gameplay and the gaps in its story to push me to use the profane blade against Zahhak, and in doing so it gently eased me into uncovering a huge breakthrough in the story. The effort it took to get into position to line up a successful hit against him, and the gravity and climax behind each combat with him as a result, also fed directly into this effect.

This whole setup cultivates a feeling of unraveling a clue to a mystery on your own—and this is an effect that’s more difficult to replicate with less interactive forms of presentation, like cutscenes. Of course, cutscene reveals can still bring about a reaction of shock, revelation, or “I knew it”… but weaving the discovery into the gameplay and locking it behind the player’s agency leans harder into the idea that you the player were the one to discover it. So when Orion starts to realize that things are starting to go off script from the usual fare, the audience understands how he feels just as well too.

Now, hiding vital story clues like this in missable stuff like a battle conversation would normally be a huge risk; after all, a player who misses this dialogue will lack an important piece of context for the beating heart of the story’s final act. But because completing 23-3 necessitates using a combination of the legendary weapons, with the profane blade often being the second most reliable option to fight Zahhak, it is quite unlikely that a player will miss it—so the feeling of “discovering” something vital is retained without the actual vital content being particularly easy to miss.

Part 3: Curtain Call

It’s beyond here where DLATMOL embraces its core identity and begins to divert hard from this tried-and-true trope by having its Medeus archetype receive some actual characterization beyond being a mysterious ancient evil god. Everything in this chapter, from the dialogue to the distinctly recognizable endgame BGM to the boss’s stats and oppressive presence on the map to the gameplay forcing you to use the legendary weapons to proceed at all, leans into familiar tropes to retain that classic “final map” vibe and make Zahhak come off like a very by-the-book endgame Medeus archetype. But through this gradual trickle of divergences in the formula that don’t quite add up, it slowly drifts apart from that all-too-familiar script until it’s suddenly incredibly apparent that there’s much more to Zahhak than meets the eye. All of this plants seeds that bloom in the last arc of the game, where all the newly unearthed and unanswered questions get answered and the things that didn’t add up suddenly do—and while I think that there are some parts of it that are more hit or miss (like the new villains), it also builds upon everything that’s established about Zahhak’s character in this chapter in a really splendid and memorable way, and I don’t think DLATMOL’s story would function properly without the chapters that come after this.

Oh, right. I forgot that I’d said this a moment ago…

Nowhere else in the game does this come out brighter than in Chapter 23-3—the game’s final chapter—which I find to be one of the most fascinating and engaging chapters I have ever seen in a romhack.

Yeah, I, uh. may have lied about it being the final chapter. If you read the above effortpost on DLATMOL 25, well… the existence of that chapter at all (and all chapters after 23-3) is technically a big spoiler. Chapter 23-3 is designed to come off like a final map in every way, down to having fake final map quotes for every character. And the fact that the game isn’t over yet is a big twist in of itself. sure, the hack post says that DLATMOL is 27 chapters, but that’s also easily interpreted as the 23 numbered chapters plus the 4 gaidens.

Either way, even if it’s definitely not perfect in a number of ways (I hear An Unexpected Caller tries to execute its mechanics in a more polished form, though I haven’t actually tried it myself) I really love this chapter, and I look forward to it whenever I give DLATMOL another go. It’s a testament to the critical importance of designing your maps in a way that is narratively engaging, and it’s a demonstration of how executing sufficiently engaging vibes can still make a chapter feel really fun and awesome to play even if it’s not necessarily in the traditional arcade-style sense of “fun”.

But while this chapter is cool and neat in a vacuum, it is also made significantly more interesting through the role it plays in the grander scheme of things. It serves as a foundation for Zahhak’s future characterization; the setup done here, and the sleight of hand regarding this “final” map, goes a long way in making the remainder of his writing function as crisply as it does. The fact that this isn’t the last map ultimately works to the game’s advantage as well, giving the story time to further flesh out Zahhak and thoroughly explore how he diverts from his archetypal first impression. And I couldn’t be happier about it: while I think his story is much more compelling seen with your own eyes than summarized on an effortpost, there is an argument that Zahhak the Unspoken One is one of the most memorable and ambitious characters I’ve seen in any romhack, and I think a lot of what makes him tick lies within the essence of this map.

Anyways, due to the inherently spoiler-heavy nature of this post, I honestly don’t think I would’ve written this post at all if the DLATMOL 25 effortpost wasn’t already in the thread. But if for some reason you’re reading this and haven’t picked up DLATMOL yet… know that there’s a fair number of other little details and puzzle pieces in this chapter that I deliberately omitted from this effortpost, all waiting for you to discover them on your own. There is no crueler curse that one can inflict upon a player than robbing them of that sense of adventure and curiosity that’s built within an interactive medium—and the world of Brauma has more than enough mysteries for you to solve. This is one of the game’s biggest secrets, but it’s far from its last… and far from its greatest.

Was drafting this inspired by Zahhak winning the romhack CYL thing? maybe

10 Likes

1-2: The Scourges. From Tales of Valor

valorgif

I’m not gonna beat around the bush like my other effortpost. Scourges is a cool ass chapter for one reason. It’s objective. Payload
valorgif2

Use your units reposition skills to maneuver it to the escape point. If the cart hits 0 hp, it’s game over. If 12 turns pass, it’s game over.

People dislike “”“”“”““escort missions””“”“”“” in videogames because it reduces agency from your player character(s), turning the focus from clearing through enemies to protecting a shitty little guy. When the players are far more agile than the objective, it can turn into a slog, or like they’re chaining you down. At the same time, if the objective can fend for themselves, it begs the question of why they’re even there, why you can’t control them, or why even have the game over condition in the first place.

I’m really not of this opinion. As long as it doesn’t directly fall into the traps common to escort missions, a change of pace in gameplay is always appreciated. In Fire Emblem, just through normal gameplay, you’ll find yourself huddling squishy units behind your tanks because they contribute something unique (high damage magic, healing/utility staves, open chests). Protecting units is a vital part of the turn to turn gameplay in FE already. I’m actually quite a big fan of Sophia’s opening chapter, where you need to protect her to get a really valuable guiding ring at map end. It just turns the “protect” part of FE’s gameplay from the micro level (protect squishies to make your army stronger) to the macro level (protect squishies to make your army stronger permanently). In 1-2, the idea behind this is that instead of protecting units for strength, or for items, you do it just because the game wants you to. Escort the cart, or don’t play the game.

I’ve got 1,000 hours in TF2, probably more since last time I checked, so I’m well aware of the nuance and dynamism of a payload map. It transfers from TF2 to FE comedically well. I’m hesitant to say it does it even better. I should preface this discussion of why I love payload as an objective in TF2

  1. You need to prioritise the objective for the entire map. It separates itself from other objectives where you team death match the enemy for a couple minutes before stealing the intel/capping their point/etc.
  2. It centralizes conflict into a few key areas, around the payload and around areas that attack the payload. It makes conflicts more “team focused” this way
  3. It makes sure that players will always be “doing something”. You can be killing enemies and gaining ground, but if you’re terrible at the game or at low HP, you can take some time pushing the cart (this is why it heals you!!)
  4. Prevents steamrolls by tying the map-end to something that takes some time to do.

Further reading.

In FE, all of these attributes translate very, very well. Pushing the cart and gaining ground are pressing matters that any unit can do, and every unit SHOULD do. Sitting around and lazily picking off units your team weakened is NOT an option. You can easily cycle in and out of danger to keep them alive (remember, Tales of Valour has permadeath!). If they’re low on HP or just straight up terrible, they can spend some time pushing the cart while your new powerstaff healer patches them up. It’s too early in the game to steamroll, but if you’ve been funneling all of your cool Tales of Valor inventory items onto Barus (@Ysor), he won’t trivialize the map. Because you have full control of all of your army, opposed to TF2, where you don’t, it makes all of the team fights and puzzle solving so much more satisfying. It especially helps that gaining ground is just so natural. It’s easy to take for granted, but aside from the cart, pushing forward and gaining ground is an incredibly vanilla thing to expect from a map. This isn’t the case with the Defend objective, for example.

This form of payload even has some advantages over TF2. For one, in TF2, pushing the payload can be a bit boring at times. PvP interactions with opponents are obviously more engaging than being a cartbitch, so sitting there pushing it can be lame. Especially if you’re playing a slow class like Heavy or Engie, but it’s not the case in 1-2. In here, the payload is not on a specified track, only moving to the exact tile your units push it to. Not only are some units better at pushing the cart as others, but most of them push the cart differently somehow. Infantry gets shove, magi get Swap, cavaliers get reposition, armors get smite. The question of how to push the cart is not one of HP and enemies nearby, but also of the current cart position, allied positioning, unit order priority, AND cart defense. It also certainly helps that poor little Riskel is merely a unit in my army and not an individual with feelings, and doesn’t mind pushing the cart for 11 turns straight.

Oh, in this chapter, the cart can be damaged. In the interest of being fair, this is a mechanic I dislike. The cart is way too helpless to move out of the way, and way too difficult to properly block it, unless you’re already killing any enemy within it’s range. Getting the cart damaged will lose you some items, which feels really, really awful if you just forget about 1 enemy and get damaged. If you overextend in TF2, you simply die and are forced to reposition. It doesn’t bring much to the table mechanics-wise.

…Enough about the objective. How’s the actual map?

I’ll be a little harsher here. There are two primary routes in the map, one north and one south. There’s fog of war in this chapter (can you believe it took me this long to mention it?), which means you’re unable to see enemies too far ahead. 1-2 does a cool little thing where it briefly reveals enemies via this lightning cutscene, so if you’re really struggling, you can just pay a little attention. The biggest difference between them is positioning, as both have unique loot (marked as yellow). There’s nothing stopping you from dipping into the other route to get it’s loot, and it’s absolutely encouraged. Both routes are pretty linear, just as a side effect of the payload objective. Unlike TF2, FE is unable to have any sort of vertical geometry, so maps must be winding down linear paths. This is probably the biggest flaw with this game mode, but you still have to work around the terrain you’re given. It’s hardly a knock against the map.

What is a knock against the map are flying Mogalls (marked green). They can linger on mountain tiles when you have no fliers, and swoop in to attack your cart. There’s very little counterplay, aside from moving the cart out of the way.

But… payload is so much fun it’s so easy to forgive.

In conclusion

Scourges does something really avant-garde for map design and pays off in spades. Not many objectives force you to engage with it in a way like Scourges does. Through just a few rules and honestly just 1 or 2 event scripts, it makes an incredibly compelling map design. I hope others are able to improve on the design of Scourges, or make something as cool.

Standing Map Anims TOV2172025.gba_119@77 Carriage_016A2738 Moving Map Anims TOV2172025.gba_134@87 Carriage_0147C0A0

Man, this custom horseless carriage asset looks so good. I wonder who’s the handsome devil who made it?

9 Likes

I finally had the chance to sit down and read this post, and I honestly can’t express how incredible it is to see someone dive into 1-2 like this.

Thank you so much for the thoughtful analysis! It was a blast revisiting those memories and remembering how much fun I had making that chapter. It means even more to hear that the vision behind the payload objective came through clearly.

I’m excited to keep refining that concept in future projects, so stay tuned!

4 Likes

you better, punk :flexed_biceps::flexed_biceps:

1 Like

Deicide (Fire Emblem Fates+)

Fire Emblem Fates+ is an enhancement hack of FE Fates that adds 25-30 new characters, around 70 new items, new classes, and, importantly for this topic, 21 new chapters (all optional, but it is paced out that every 3-4 chapters you’ll get a new map and a new unit or two. In Revelations, this pace increases around the last 7 maps of the game, where you’ll get a new map every other story map at least.

These maps largely follow the structure of Awakening’s spotpass maps, giving you an additional map with each unrecruitable major story character, then letting you recruit them. Fittingly, the map we are talking about today is another holdover from Awakening, a reimagining of the DLC map Apotheosis. For those not familiar, Apotheosis was the final challenge in terms of Awakening DLC. You fought 5 waves of increasingly difficult units with ridiculous stats and full skill sets, including the Lunatic+ skills Hawkeye, Luna+, Pavise+, and Aegis+.

Deicide takes this format, and cranks it up to a ridiculous degree


Deicide takes all the BS that Fates’s system is capable of, and throws it all at you from the very start. This is wave 1 of 5, and you are immediately greeted with a Mire Galeforce Dark Knight, an impossibly dodgy Wolfskin, ridiculously strong mages with brave tomes, a 68 might axe, the list goes on and on. Oh, and all of these units have dragonskin, because why not, and the map takes place of Rev26, a map that has not enough terrain to slow down the incredibly powerful units bearing down on you. And is that Twilight of the Gods playing? You’re cooked.

So, you might rightfully be thinking “What the hell? This seems completely impossible!”, and you would be wrong. Fates+ is full of tools to…well, nothing makes this map not hard, but it will at least make it possible. Here are a few of my favorites,

Unit Spoilers


Garon is a monstrous unit with three personal classes, the powerful magic DPS Blight Dragon, the not-quite-unkillable but still very powerful Empty Vessel, and the well-rounded Nohrian King.


Anthony has access to the unique Faceless class (as a reference to his boss fight) which has fantastic stats and one of the best weapons in the game, the brave, always-doubling Ravager.


Fates+ also buffs most capturable bosses, giving them new personal skills and allowing them to reclass. However, this unit, who’s name I am blanking on for the moment, has a unique model, and therefore is not allowed to reclass by the game. As compensation, she was given the incredible skill Hawkeye, allowing her to always hit the pesky 200 avoid wolfskin and kitsune that terrorize waves 1, 3, and 4. The Algorab is a unique bow that physical units get access to by equipping shadowgift, and it’s a 15 might magic effective weapon that turns even mediocre units like Candace into chip damagers.

And…finally


Infinite uses staves, including the revival staff. Seems overkill, is in fact required to even stand a chance against wave 4.

While it could be argued that Deicide is a departure from FE gameplay, it requires a deep understanding of Fates and Fates+'s classes, units, and skills to format a team that can even damage these enemies, and like a Souls game, each optimization lets you get a little further into the map, lets you kill one additional enemy, let’s you finally survive an enemy phase. It’s satisfying in the way that a Pokemon Nuzlocke is, playing the map forces you to develop game knowledge, which makes you better at building units for the map.

It also recontextualizes the rest of the game into a journey of sorts, no map is as hard as Deicide, but all of them give you scattered tools for dealing with the map. Each new weapon and new unit increases your options a little further, and experimentation will be required in order to beat the map.

All around, it’s a fun time, especially if you enjoy brutal difficulty. Oh, and if you don’t, the map actually scales to your difficulty, on normal, enemies have the same skills and weapons, but have stats comparable to your normal capped units. Overall, I liked this map enough to theorycraft it for weeks, each update to the game got me to evaluate the new tools being added and make teams to test the new content. After a few successful runs, I got to the point where I could even meme around and bring some absolute losers (such as a lv1 dark mage) and still win. It is, in all likelihood, my favorite FE map, and one I revisit with some frequency.

Would I reccomend trying it yourself? Yeah, I would. Just…god help you if you get to wave 4.

3 Likes