Legacy of Sorrow - Chapter 7: Unyielding Conviction

The objective is to seize the castle gate with Edgar, your lance infantry lord. In the context of the current demo, this is one of the later chapters, but in the context of the hack’s overall plan, this is still a somewhat early chapter.
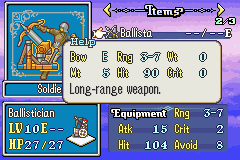
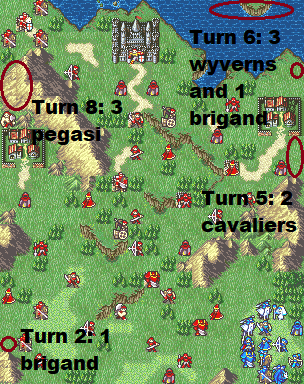
This is the first chapter of the hack to feature enemy ballisticians. They have less range and damage than vanilla ballistas, but they also have high accuracy and infinite durability. This combination of adjustments makes them obstacles that you have to advance through, sooner or later, rather than something that can be waited out. It also keeps them from being too punishing without completely removing them as a threat. Even though there’s only two of these guys present, they have a big impact on the chapter.
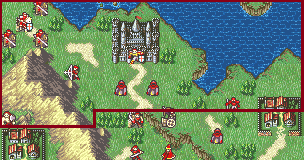
Another notable threat on the map is the mounted squad in the top left. The paladin boss, Gordon, and his lackeys change to charge AI on the range event highlighted above. While this AI change can happen somewhat close to your army, you at least have the rest of that turn and the following turn before these enemies can initiate combat on their terms. The cavaliers are pretty standard enemies (one has a Javelin and the other two have a Steel Lance), but Gordon can be challenging to deal with.
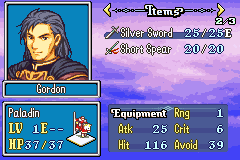
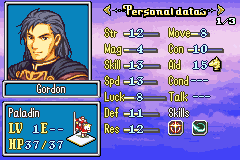
(The first skill is Nullify, which protects him from effective damage)
If you haven’t already dealt with the second ballistician, having this guy and 3 cavaliers charge at you can incentivize you to hurry up.
Before I get to the player side of things, I wanted to quickly touch on the reinforcements, which are beneficial to the overall experience. The initial brigand will take a long time to get to the western village, so the turn 2 brigand helps put some early pressure on the player. The cavaliers and wyverns are far enough to not immediately wipe units in a usual clear of the chapter, and they also support the incoming brigand. Lastly, the pegasus knights give you one last problem before it’s just you and Jeffery, the hero boss.
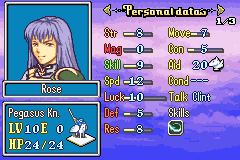
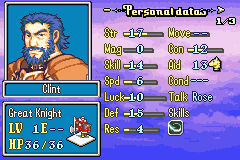
So, what does the player get to fight all of these enemies? Rose automatically joins and is forced deployed for this map. She’s slower than the first pegasus knight that joins, but she has B Lances, a Silver Lance, and a Horseslayer in her inventory, so she can provide extra firepower when needed. The enemy ballisticians don’t OHKO her, and there’s enough room to maneuver around them thanks to their reduced range. You also need her to recruit Clint, who is your first promoted unit. Even if you’ve already handled the first ballistician, he can basically lead the charge against the second one, though he needs to be careful around magical enemies. His bulk is especially useful for dealing with Gordon’s group.
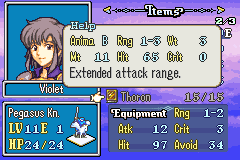

Besides the items your newest recruits bring, there’s two villages to visit. The left one rewards Thoron and the right one rewards Blessed Lance. While I don’t remember using these items much (if at all) in this chapter, they’re pretty useful to have for future chapters. The enemies in LoS usually have at least one matchup where they go down in one round, but they do a ton of damage if you’re not careful. The next chapter has multiple chokepoints, which consist of 1-2 range stationary enemies and nearby attack-in-range enemies, so you can probably see the benefit these two tools provide. But even without that, having these two additional options is nice to have.
Lastly, using the terrain to your advantage feels very rewarding on this map. Gordon’s squad is threatening, but you have 2 tile chokepoints to use. Putting Clint in one of those tiles is obvious, but between an armor knight, the miracle rune (the first unit that would die after using this is left at 1 HP), and more, you have a few different ways to form a solid barricade.
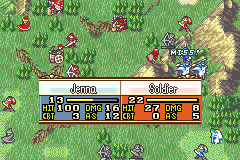
On a more personal level, I wanted to mention this rescue drop I did. In this scenario, Jenna has 72 Avoid (LoS uses a non-vanilla Avoid formula; the 72 comes from 15 Lck * 2 + 12 Spd + 30 from Mountain terrain), so she has a decent chance at avoiding the two nearby shamans and the archer (47% displayed hit from him). There’s definitely cooler stuff you can do with all of the tools at your disposal (you have 7 mounted units and a rune system that I barely touched on at all), but I was proud of coming up with this particular strategy, even though I doubt it being that amazing in hindsight. Having the flexibility to experiment with something like this while still being a challenging map is great to have.
There’s a lot of FE chapters that have a single big thing that defines them. Sometimes that’s a unique gimmick, and sometimes that’s a huge focus on one particular mechanic. The following chapter in LoS is a great example of this, in fact. However, I don’t really see that as the case for this particular map. The chapter just has a few standard elements that are really, really well done. This consistent expertise with designing around Fire Emblem’s core mechanics and features is the main selling point of Legacy of Sorrow, and this chapter is one of, if not the, best example of it.