Today I will be teaching you how to make a COMPLETELY custom game intro for FE8. As in, the sequence before the title screen appears.
To do this, I will be using @Mokha’s Custom Opening Anim ASM, which he recently released.
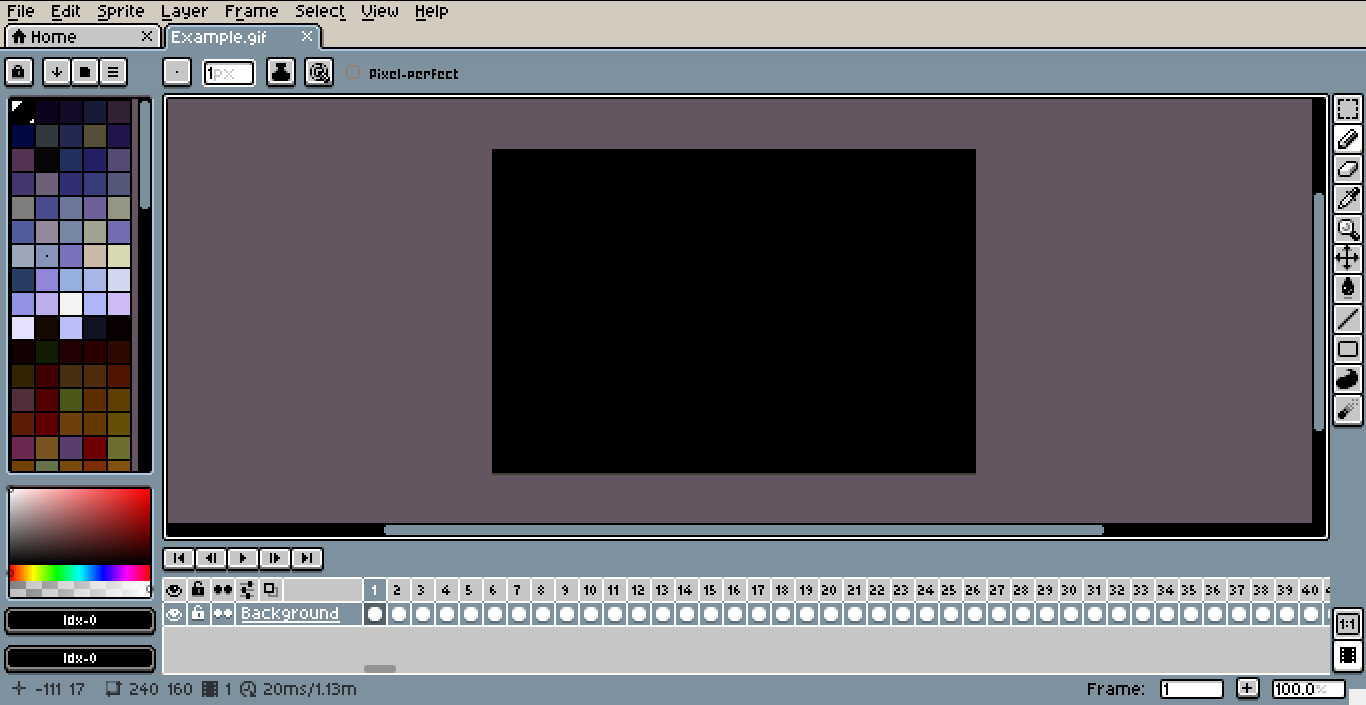
Here’s Mokha’s example of how it can look:
For this tutorial, YOU WILL NEED:
- Mokha’s ASM, already linked above.
- FEBuilder GBA (Unless you plan on using Buildfiles).
- Skill Animation Creator, linked HERE.
- The mGBA emulator, linked HERE. And no. VBA doesn’t work for this.
- Notepad++. For editing code. You can get it for free at their website.
- Aseprite. A sprite editor. You can get it at their website or on Steam. If you can’t buy Aseprite, you will need another program that is able to export a GIF’s frames as separate PNGs with sequential file names.
- ImageMagick. For bulk-processing images. You can get it at their website. Get the version most suited for your device and OS.
- ChatGPT. We’re only gonna use it to generate code more easily. You need to create an account in order to send and download files from ChatGPT. If you’re good with coding, you may not need to use ChatGPT, and you could make a Python script. Though, I don’t know how to do that.
- And lastly, these Batch files, made with ChatGPT, and a song file, linked HERE.
(I know it’s a lot of programs, but bear with me).
Now that we have everything’s ready, let’s start making the Game Opening:
Step 1: Recording
mGBA can be used to directly record videos and GIFs from the game with perfect fidelity. We will use this to make the custom Game Opening
Open mGBA, and go to File, and Load ROM, and open an FE6 English translated ROM (This is what we will be using for this example).
![]()
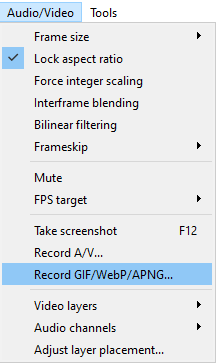
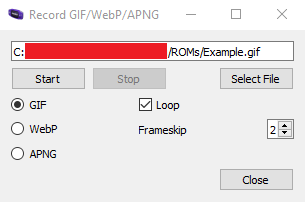
After running the game, go to Audio/Video, and start recording a GIF. Select where you want to save the GIF, and then press Start to start the recording, and then Stop to finish the recording. Keep recording until the Title Screen appears.
I recommend pausing emulation, and reseting the game right before recording, so that you start the gif from the very first frame.
Step 2: Separating frames
With this next step, we will be using Aseprite. I don’t know which other alternative programs you could use. But Aseprite is definately the best for the job.
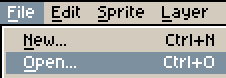
Go to File, Open, and locate the GIF that you recorded with mGBA
Your page window should look something like this:
At the bottom of the screen, you will see all the frames of the GIF in order. You may trim some frames at the start or at the end, for a better intro. Specifically, I recommend deleting any frames of the title screen up until before it fades from the black screen.
With my GIF, I ended with a total of 3756 frames. But we’ll deal with that later.
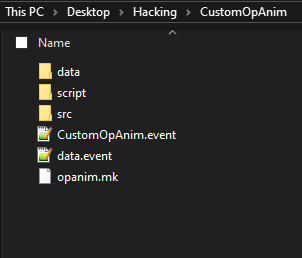
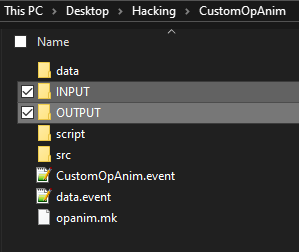
Before we continue, extract the zip file containing Mokha’s ASM into a secure folder. Additionally, you wanna create 2 new folders: Input, and Output
(You can name them however you want, but this is for the example. Make SURE your folder names do NOT have any spaces, as this can mess with some code reading the folders later).
Now, back to Aseprite:
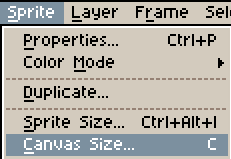
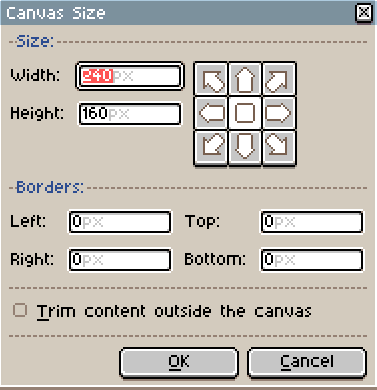
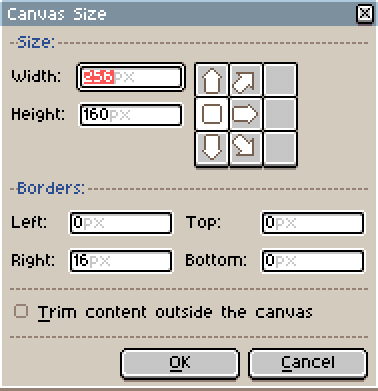
You want to make sure your left and right click colors are both full black (#000000). Then, go to Sprite, Canvas Size.
Here, you want to Resize your canvas to 256x160, centering the image to the Left, so that there is a black bar on the right.
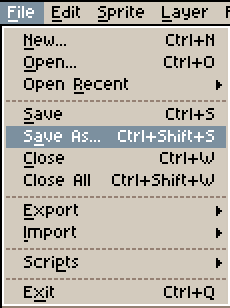
After this, you can now Export your GIF. Go to File, Save as, and save it NOT as a GIF file, but as a PNG file, named frame_0000.png. And make sure you save it to your INPUT folder you created earlier.
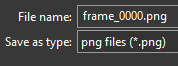
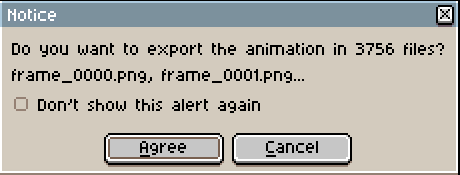
Doing this will make Aseprite give you a pop-up. Click “Agree” to export ALL the frames of the GIF as individual PNG files.
This process can take a few minutes. Just wait patiently until Aseprite is done saving all the frames.
And of course… before you export, if you want to do more complex Game Openings, you can mix and match footage from multiple sources to your liking. Just make sure it’s saved as a GIF with the correct proportions before exporting.
Step 3: Bulk color reduction
Now, we’re gonna use this relatively unknown program, called ImageMagick, to reduce the colors of ALL the images completely automatically. Since doing it by hand would be a nightmare.
Make sure you DIDN’T install ImageMagick in Program Files. Instead, it’s better to have the folder on your desktop, or other easy-to-access folder.
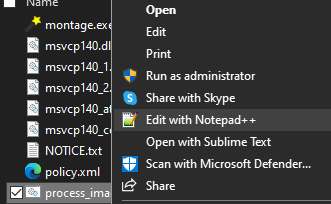
Now, you want to download the Batch files from the last link I provided in the list. You’re gonna want to drag process_images.bat into the main ImageMagick folder, and delete_garbage.bat into Mokha’s CustomOpAnim folder.
After that, make sure you have Notepad++ installed already (You may also just use regular Notepad ONLY if you know what you’re doing. Otherwise, just use Notepad++).
Go to process_images.bat, right-click it, and open it with Notepad++.
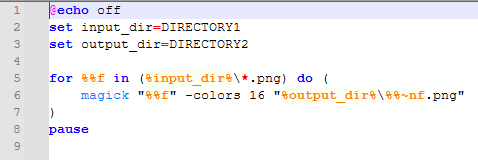
Here, you want to replace DIRECTORY1 with the filepath of your INPUT folder, and DIRECTORY2 with the filepath of your OUTPUT folder. To get the filepath, simply go to the folder, and click on the bar on the top of the File Explorer window.

After that, save your changes. And then run the batch file by double-clicking it. This will make it so ALL the images in INPUT are converted to 16 colors, and then put the converted result in OUTPUT. Please be patient, as this can also take a few minutes to complete.
It’s important to note that the whole animation DOESN’T need to stick to ONE 16 color palette. Rather, EVERY SINGLE FRAME can have a unique 16 color palette.
After this, you can also edit delete_garbage.bat. This Batch file is simply for Quality Of Life. You can edit it with Notepad and replace DIRECTORY2 with the filepath for OUTPUT. This will help us later.
Step 4: Animation Script
For this next step, we’re gonna be using ChatGPT. Now DON’T WORRY: There will be no stolen art here. We are marely using AI to generate code that would otherwise be extremely tedious to write manually. Make sure you have an account, so that you can download files from ChatGPT.
Because the GIF we made previously is over 3700 frames long, it’s WAY to heavy to install into FE8. So we’re gonna have to cut the framerate a bit. Instead of running at 60 FPS, the intro for this example will run at 15 FPS.
60 : 4 = 15. So we divide 3756 (Total number of frames) by 4, and it gives us, 939. Ideally, you want your animation to not exceed 1000 frames. Otherwise, it can be impossible to install.
According to the Skill Anim Creator topic here on FEU, the format for Skill Animations (Which is what we’re using for the Game Opening) is very simple:
[Number of Frames] [File Name]
So, we’re gonna ask ChatGPT to generate a script that folows this format, making it so it only displays every 4th frame, with 4/60s of a second for each frame:
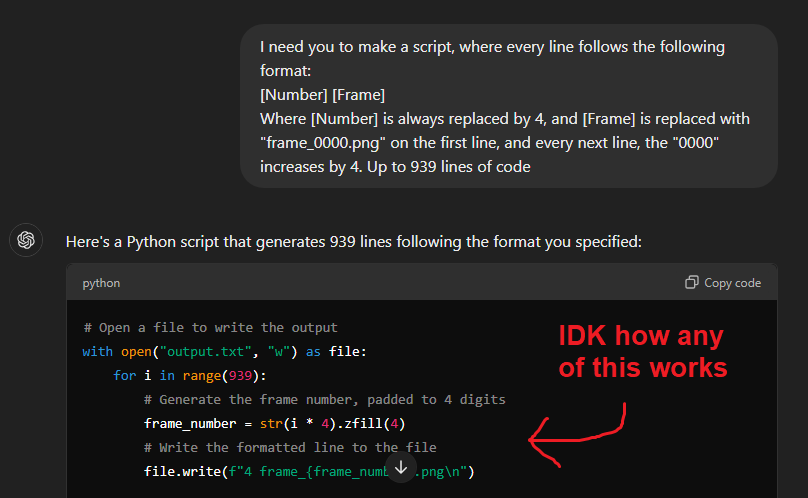
Sometimes it will give you a Python code instead of making the script itself. If you’re good with Python, you should be good. But if not, we can easily fix this:
And the newly generated script should look something like this:
4 frame_0000.png
4 frame_0004.png
4 frame_0008.png
4 frame_0012.png
...
Of course, depending on your plans for your own Opening, you might wanna do something more specific. But this is for the example.
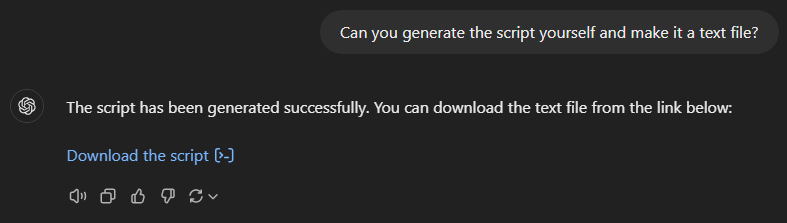
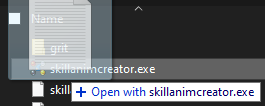
After this, you want to put the downloaded script into your OUTPUT folder. And then, in another window, open the skillanimcreator folder. Then, drag the text file onto skillanimcreator.exe.
This will generate a bunch of Bin files, and a new Event file. This, again, can take a few minutes.
Now, IF you mess up, or you want to re-do the process, this is where delete_garbage.bat will come in handy. Simply double-click it, and it will delete all the Bin files and the Event file in your OUTPUT folder, without deleting the original text script, or the images.
You will also have to copy skillanimtemplate.dmp from the skillanimcreator folder into your OUTPUT folder. This is necessary. This file will ALSO not be deleted by delete_garbage.bat.
Step 5: Data management
We are ALMOST done! In this next step, all we need to do is go to the main CustomOpAnim folder, and open data.event with Notepad++.

The 3rd line of this code is pointing to Mokha’s included example of a Game Opening animation. But we want to use the new one we worked so hard to make. Right? So, simple replace the text in between the quotation marks with OUTPUT/[script].event. Where [script] is replaced with the filename of the generated event file. In this case, it’s “output_script”. Then Save.

And now… we’re almost ready for instalation.
Step 6: FEBuilder settings and installation
Go to FEBuilder GBA, and open a clean FE8 ROM. This should ALSO work for already modified ROMs, but this is just for testing.
Before doing anything, go to Settings, Options in FEBuilder, and then go to the Function tab.
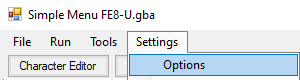
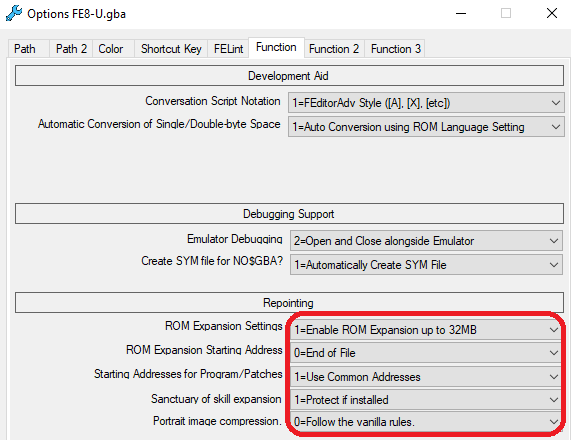
You want to make SURE that all the settings in the Repointing section are set to what is shown in the image. These settings were suggested by @Vesly
After that, you want to go to Advanced Editors, and Insert with EA.
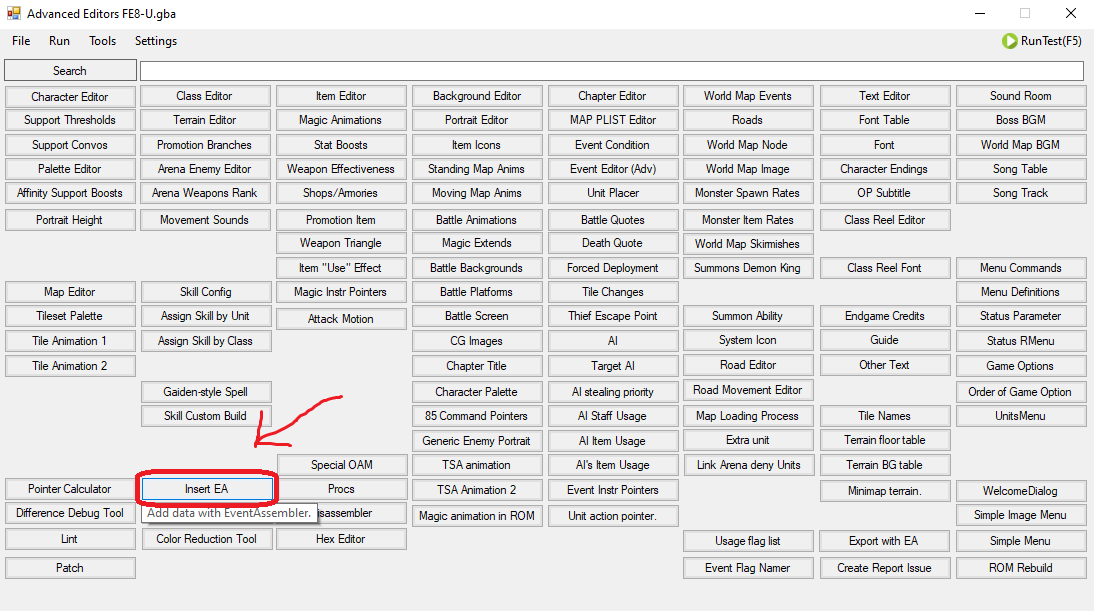
Here, you want to Select File, navigate to Mokha’s folder, and open CustomOpAnim.event.
Or if you’re using Buildfiles, just #include this file somewhere in your code.
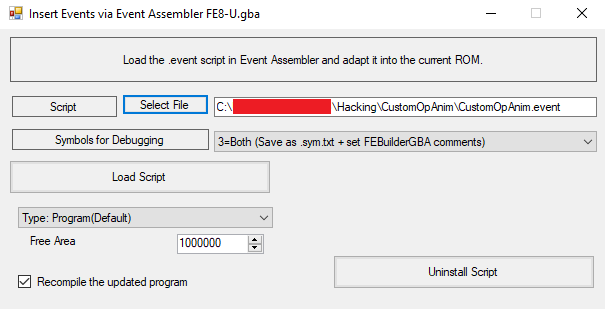
If you are using FEBuilder, select the file like mentioned before, and just click on Load Script.
And we’re done!
Now, be mindful. This can take A WHILE to install. For me, it takes about 10 minutes. I don’t know if it’s because the animation is long, or because my computer is really old and slow.
Thanks for reading my tutorial! If you have any issues, feel free to leave a comment, and I will try to help to the best of my ability.
Extra step: Music!
If you REALLY want to recreate the FE6 Opening to the fullest, I included a song as a .s file alongside the Batch files in my Google Drive link. This is a remix of Prelude, from FE6. Simply import it over The Valiant in the song track editor, using NIMAP2. Remember that your Custom Game Opening will ALWAYS use the music set in Song ID 01.
And lastly: special thanks to @Mokha for creating this wonderfu ASM, and to both him and @Vesly for helping me figure out how the code works.