Hey guys, first poster here. Caught wind of FEGBA hacking at the end of September, messed around with FEBuilder for about a month, and then started learning the buildfile method as it caters to how I like working much better. As you’d expect, I’ve had a tonne of questions; documentation available across the internet is pretty good but understandably spotty given that all of it needs to be user generated, so I keep bothering the extremely kind and helpful folks in the Discord when I get stuck or can’t find documentation for a process I’m trying to figure out.
One such occasion was for inserting class map sprites, and while @Clendo 's explanation was short and clear and wonderful, it left me fairly surprised that it didn’t exist anywhere that I could find it without needing to ask. Perhaps the vast majority of the community views this as trivial (probably), or perhaps I just couldn’t find the appropriate place to look (probably; Arch’s guide is great, but not what I was looking for as I wanted to use EA rather than GBAGE). In any case, I figured the least I could do to return the favour is to try to limit the amount of questions other new users like myself need to bother others asking, and make this little guide to help the next guy in my shoes. Note that before going through this guide, I highly recommend reading and implementing Clendo’s fantastic guide on repointing and expanding tables first; this guide will walk you through the process of inserting new animations once your tables are comfortably able to expand.
Now I love teaching, but I’m a slow learner; if you spot an error in here or an instance of poor clarity, please let me know! Just trying to help, very far from claiming to be an expert in the field so to speak.
In any case, the tutorial:
Getting the images
These images can come from a lot of places, commonly other FEGBA games or the community repo. For this example I’ll be grabbing the Nomad map sprites from FE7, as I’ve ported that class over to FE8 for use in my hack. FEBuilder is really useful for this, as you can just export the images directly; this is not a guide about how to make custom sprites for yourself, but I’d really recommend trying to upload your custom sprites through builder first to make sure they work properly. Helps with debugging.
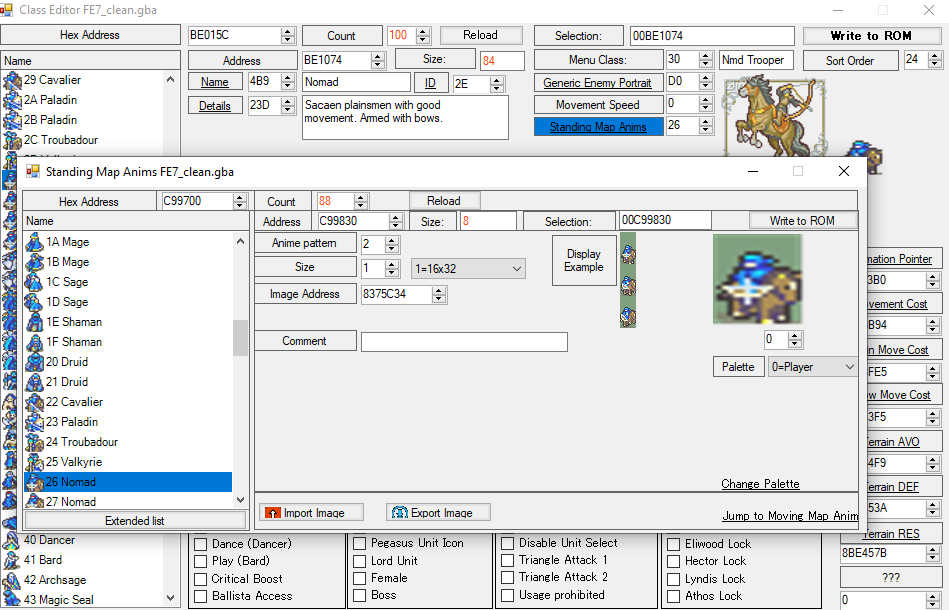
You can grab the walking sprites by clicking going to “ID” and then exporting the image, and the standing sprites from the self explanatory “Standing Map Anims” section.
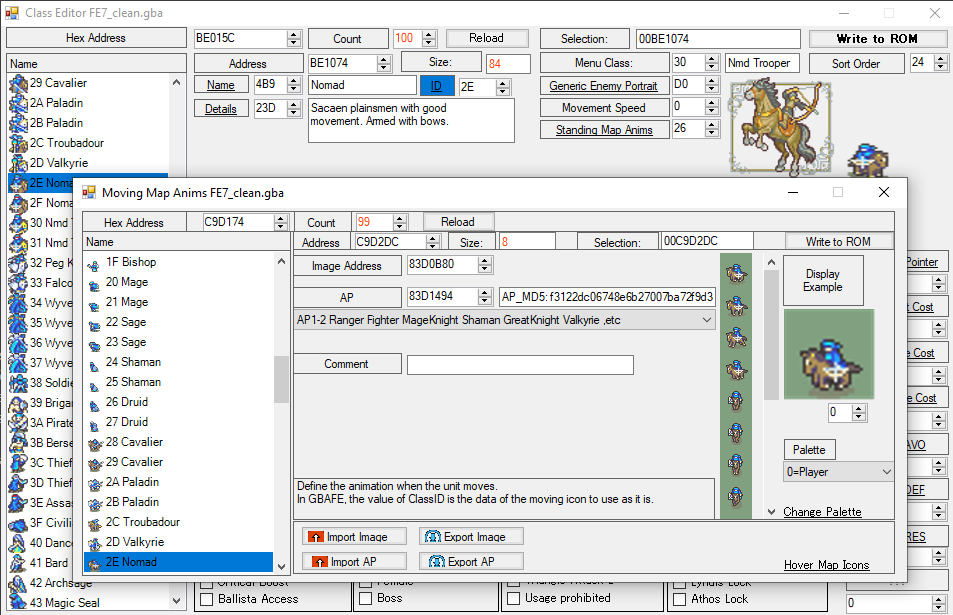
While you’re in here, you can also export the AP if one exists for your sprite; this is some under the hood data used for processing, and while it rarely matters, it tends to be better to be safe rather than sorry when you can help it.
Including the images
Put the .png files and the .bin file from the AP (if you have one) in a folder, and make a text file (I call mine SpriteInstaller.event, but you do you). In said text file, you’re going to put a few repeating lines following this structure:
ALIGN 4
YourAnimationLabel:
#incext Png2Dmp "YourFilename.png" --lz77
which in my case for the Nomad looks like this:
ALIGN 4
NomadMapMoving:
#incext Png2Dmp "MovingMap.png" --lz77

ALIGN 4
NomadMapStanding:
#incext Png2Dmp "StandingMap.png" --lz77

ALIGN 4
NomadAP:
#incbin "MovingMapAP.romtcs.ap.bin"
What his does is pretty simple; you ALIGN 4 because this is a FEGBA hack and that’s a thing you do, then you provide a nice, easy-to-remember label for the animation, and then you use lz77 compression on the .png files before turning them into .dmps interally to be read. Altneratively, if you already have the images in .dmp form, you can include it directly as is done here for the AP file.
Make sure to then include your SpriteInstaller.event into your buildfile somehow, however you like.
Pointing to the images
Next up are a series of .csv changes to the tables responsible for connecting these animations to your class. The first two by default should be “Misc map sprite editor.csv” and “Standing map sprite editor.csv”.
In the Misc editor, you’ll have a column for “Animation” and a column for “Another Pointer” (hilariously, the AP column). Scroll though the list on the left to find the class who’s sprite you’re replacing, or simply add your new class to the bottom. In the Animation column, put the label you made earlier for the moving map sprite; do the same for the AP in the adjacent column. Mine now looks like this:
![]()
In the Standing editor, you’ll be met with more columns; three of these are “unknown”, but the important two are “Size” and “Pointer to graphics”. Replace the pointer to graphics as before; size will have specific values depending on the dimensions of your sprite. I’ll include the list here, but in general you can look at existing sprite entries for reference. Again, the Nomad example is as follows:
![]()
Sizes:
0x00 16x16 - ie. Average infantry
0x01 16x32 - ie. Cavalier
0x02 32x32 - ie. General
The last .csv table to change is the table for classes itself, “FE8 Class Editor” by default. Scroll down to your class and across to the “Map Sprite# (standing)” column, and type in the next available entry.
What's the next available entry?
I’m glad you asked! There’s probably a better way to find this piece of information for yourself, but because I started off using FEBuilder and I find it an invaluable tool for finding things, I’ll be using that. Open up your hack in FEBuilder and take a look at the Standing Map Anims section, scrolling right to the bottom.
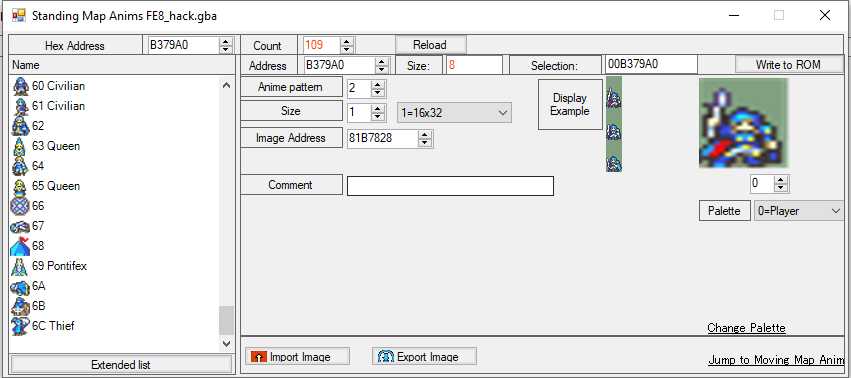
The last vanilla entry in FE8 is at location 6A, so we’ll just move on from there. If you’ve already made changes that have shifted your values somehow, just use whatever the next available entry would be. As you can see, I have used 6B for the Nomad, and later used 6C for a female thief. Note down what the next entry would be, and return to the class excel sheet to enter it in.
Credits
@Clendo for actually teaching me how to do this super concisely (please check out his sweet project here, and the #hacking_help discord channel and its participants in general for dealing with all my rookie questions in a really friendly fashion.
And there you go, class map sprite animations added! If you’re new to this, I hope you found this guide helpful; if you’re a veteran, I hope I didn’t make any crucial mistakes (though if I did, please let me know so I can correct them) and didn’t get sick of my overuse of the semicolon. Thanks for reading, and happy hacking. 
Edit: Apologies to Clendo for not tagging him initially, only learned that was a thing I could do today lol
Edit Edit: Wow crap I didn’t realize changing the title would bump this mb