How do I edit maps?
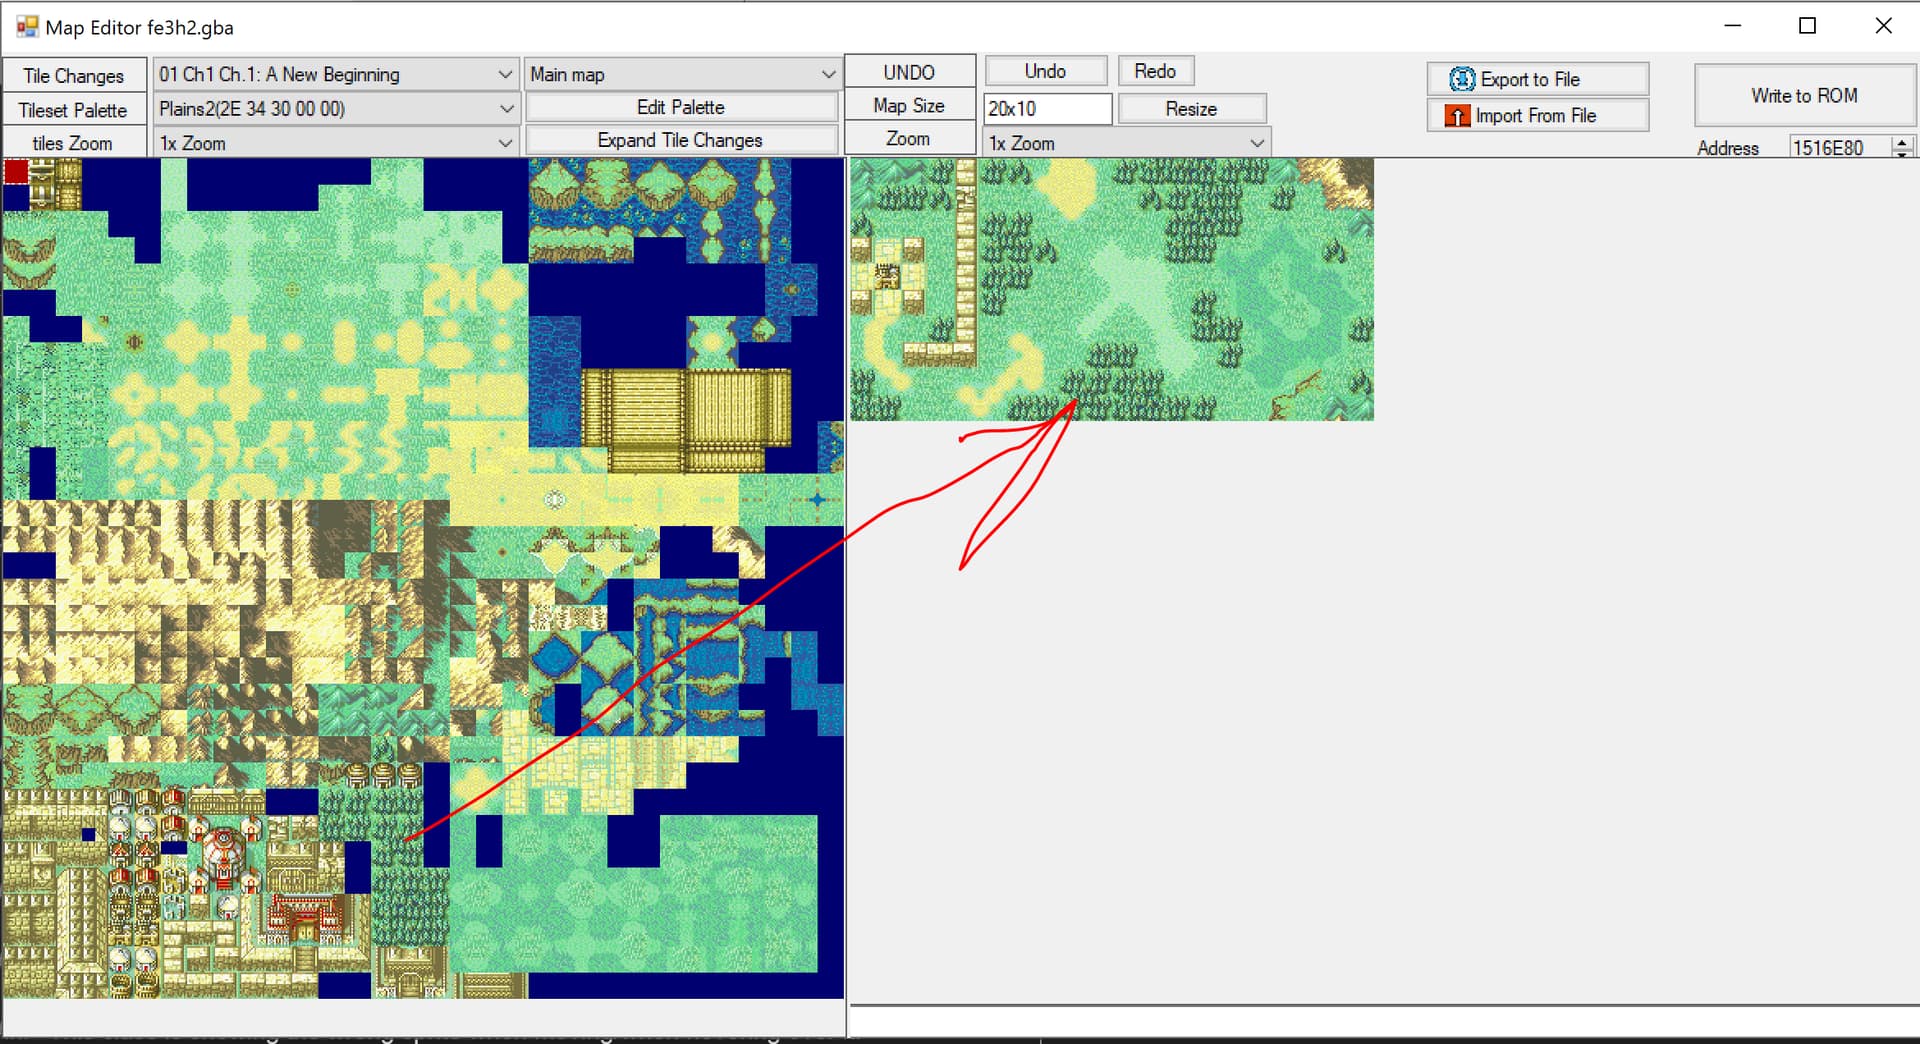
Select the chapter you want to edit in the list on the main screen, then go to the Map Editor:

Click a tile in the tileset on the left, then click on your map on the right to place it:
To change the tileset you’re using to a different one in the ROM, click the “Tileset Palette” dropdown:

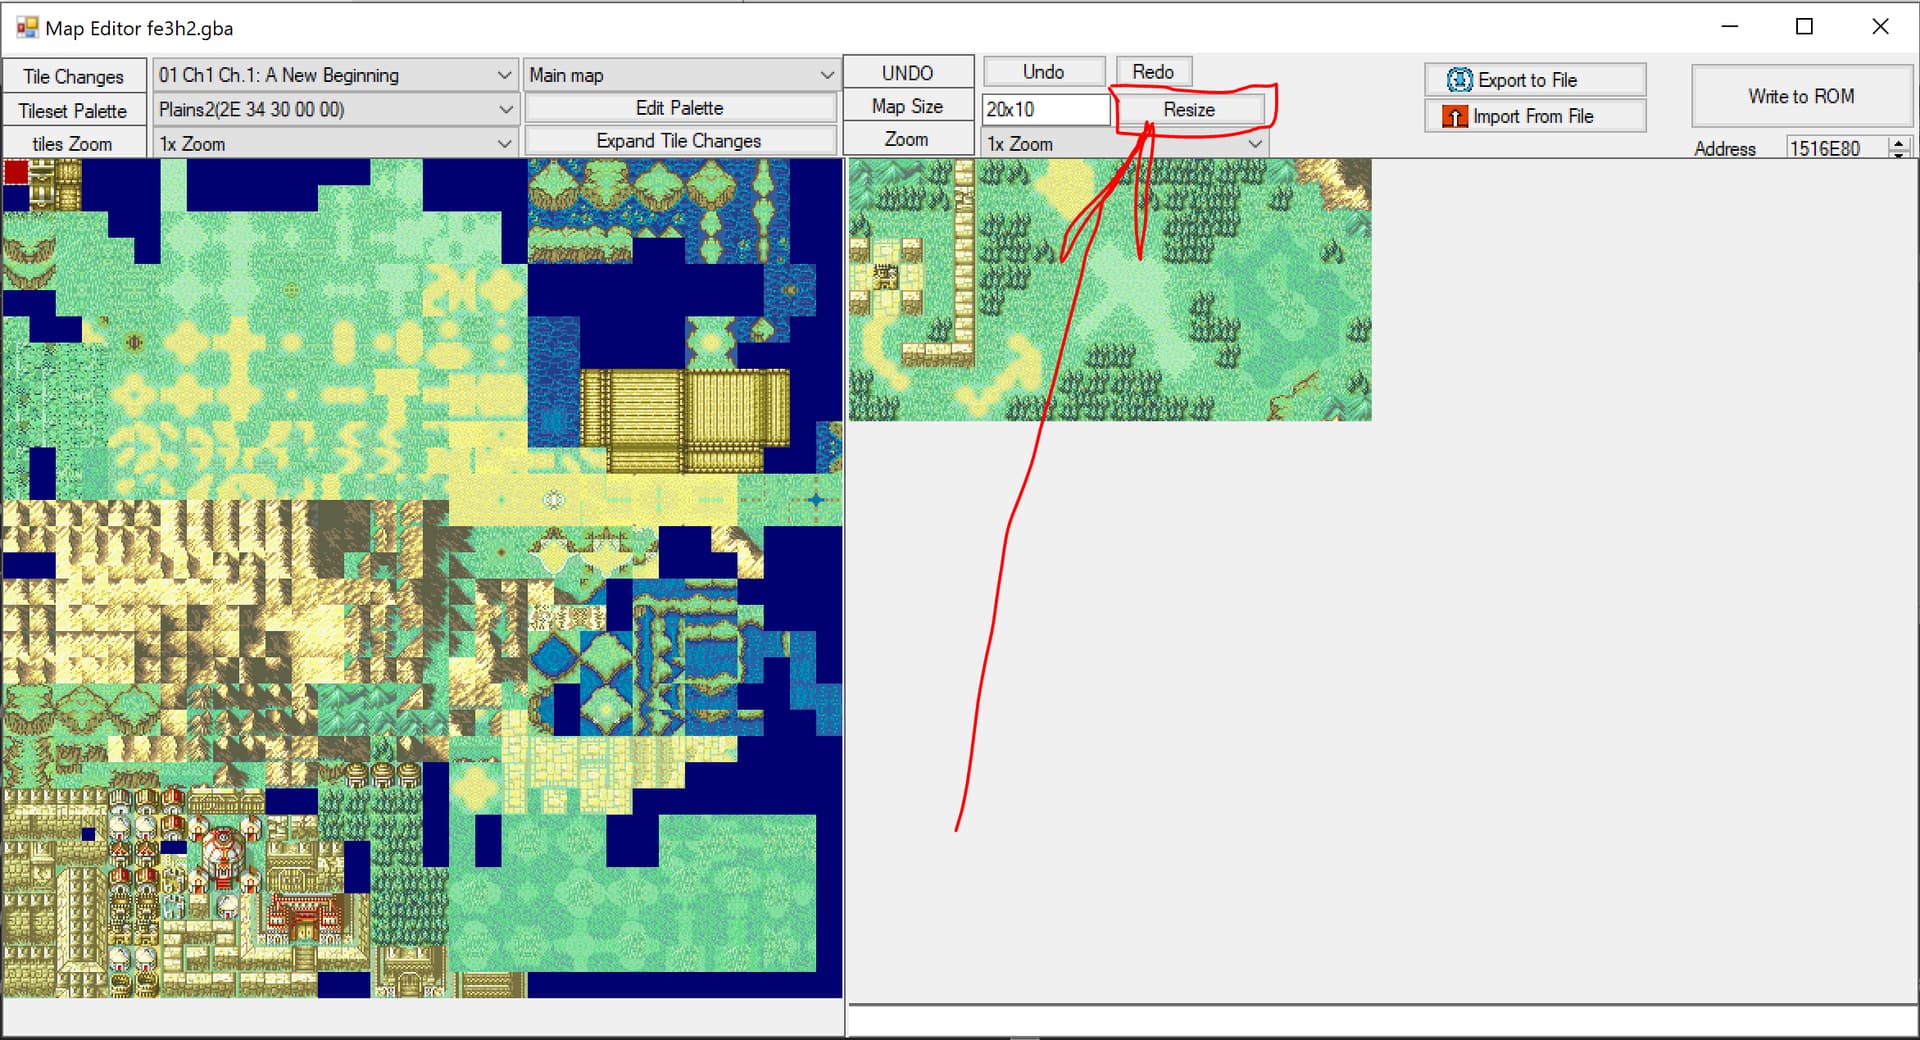
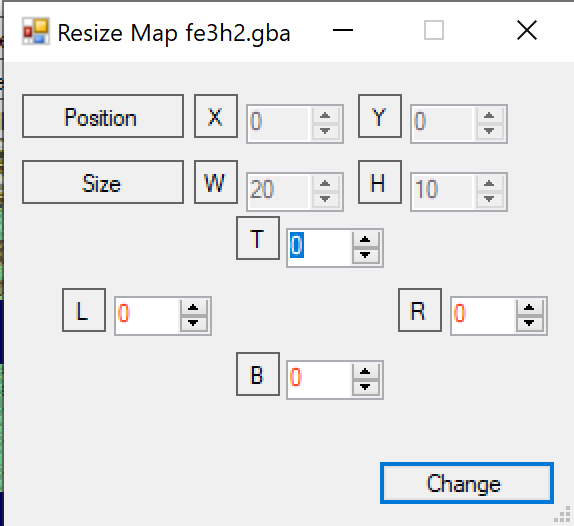
To change the size of your map, click Resize, then input how much to change it by. Note that you can add or remove space from the top, bottom, left, or right. To shrink, set a negative number for the change:
Some people prefer doing their map editing in programs outside of FEBuilder. I won’t go into those here, but if you use one of them, you can insert the resulting map configuration file by clicking Import From File. Note that this must be an insertable tile map configuration, such as a .tmx file, that matches the tileset, not just an image of the map.

How do I edit player/enemy unit placements on maps?
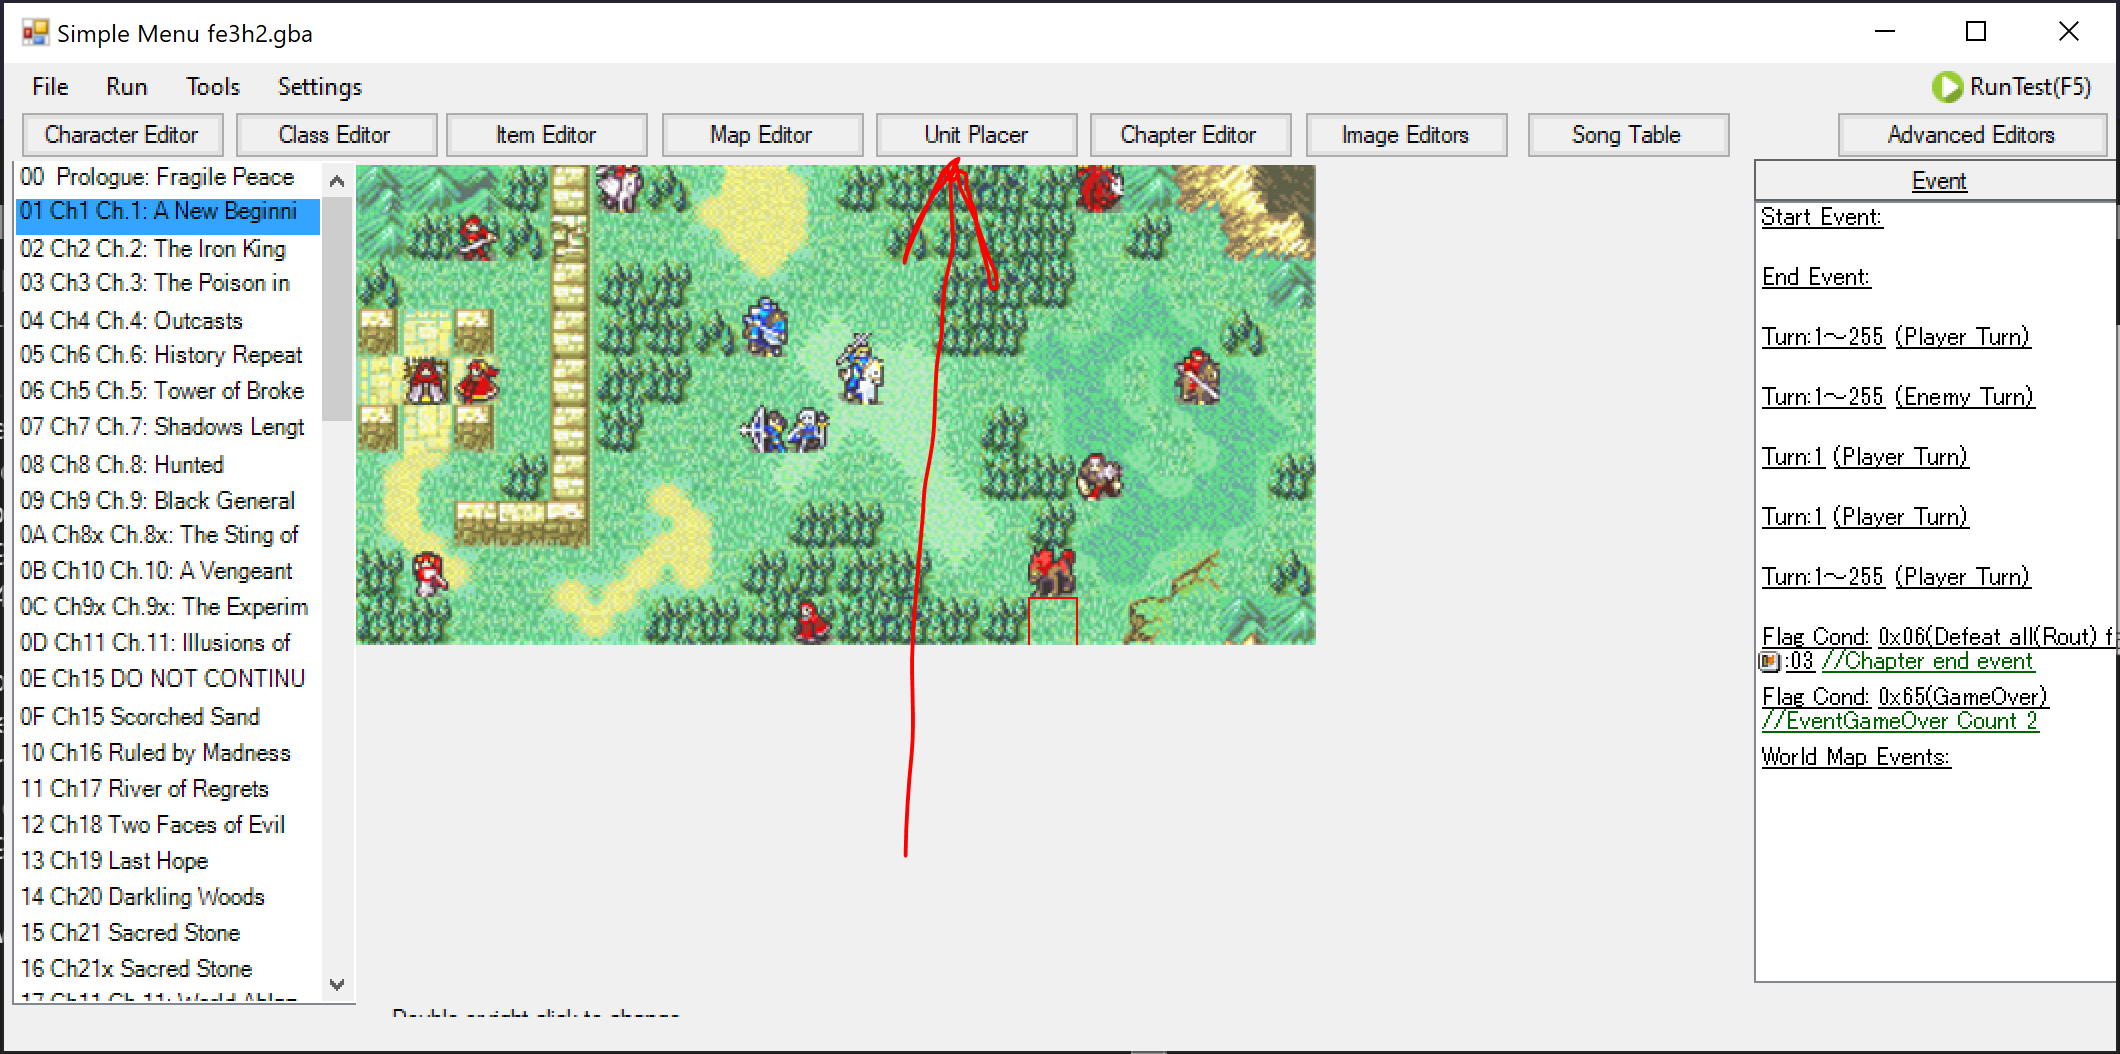
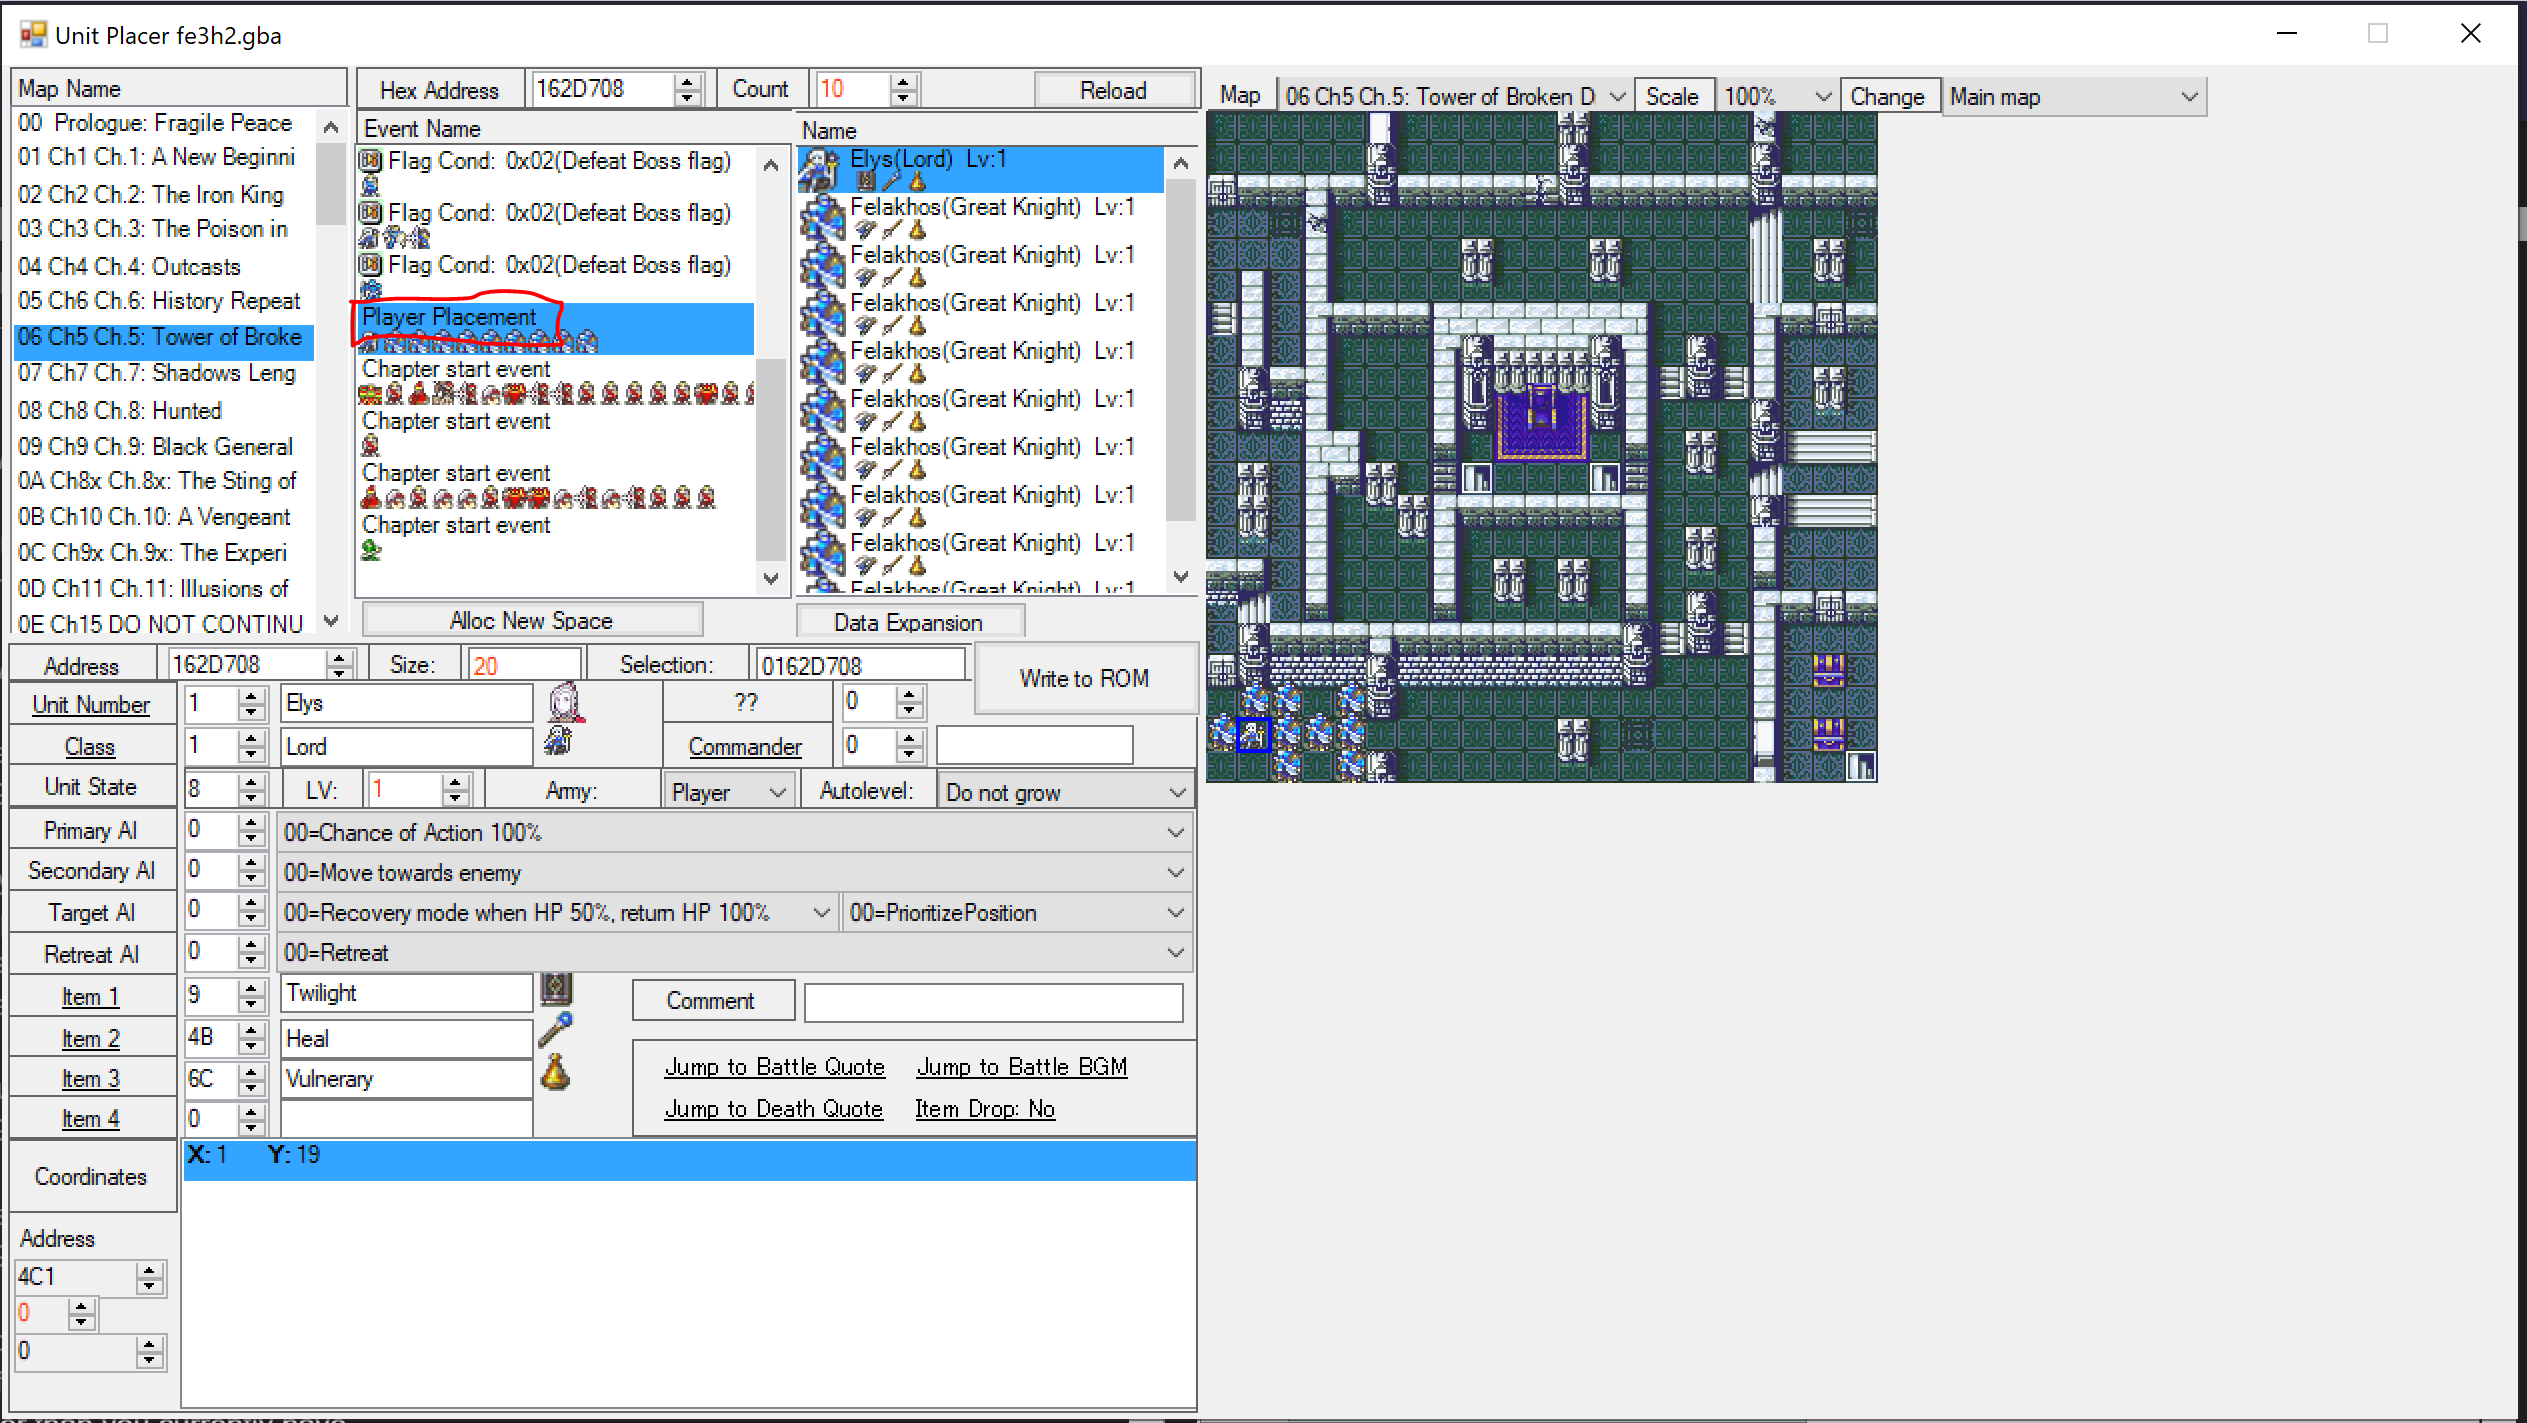
Unit Placer: (Alternatively, click on one of the units shown on the map)
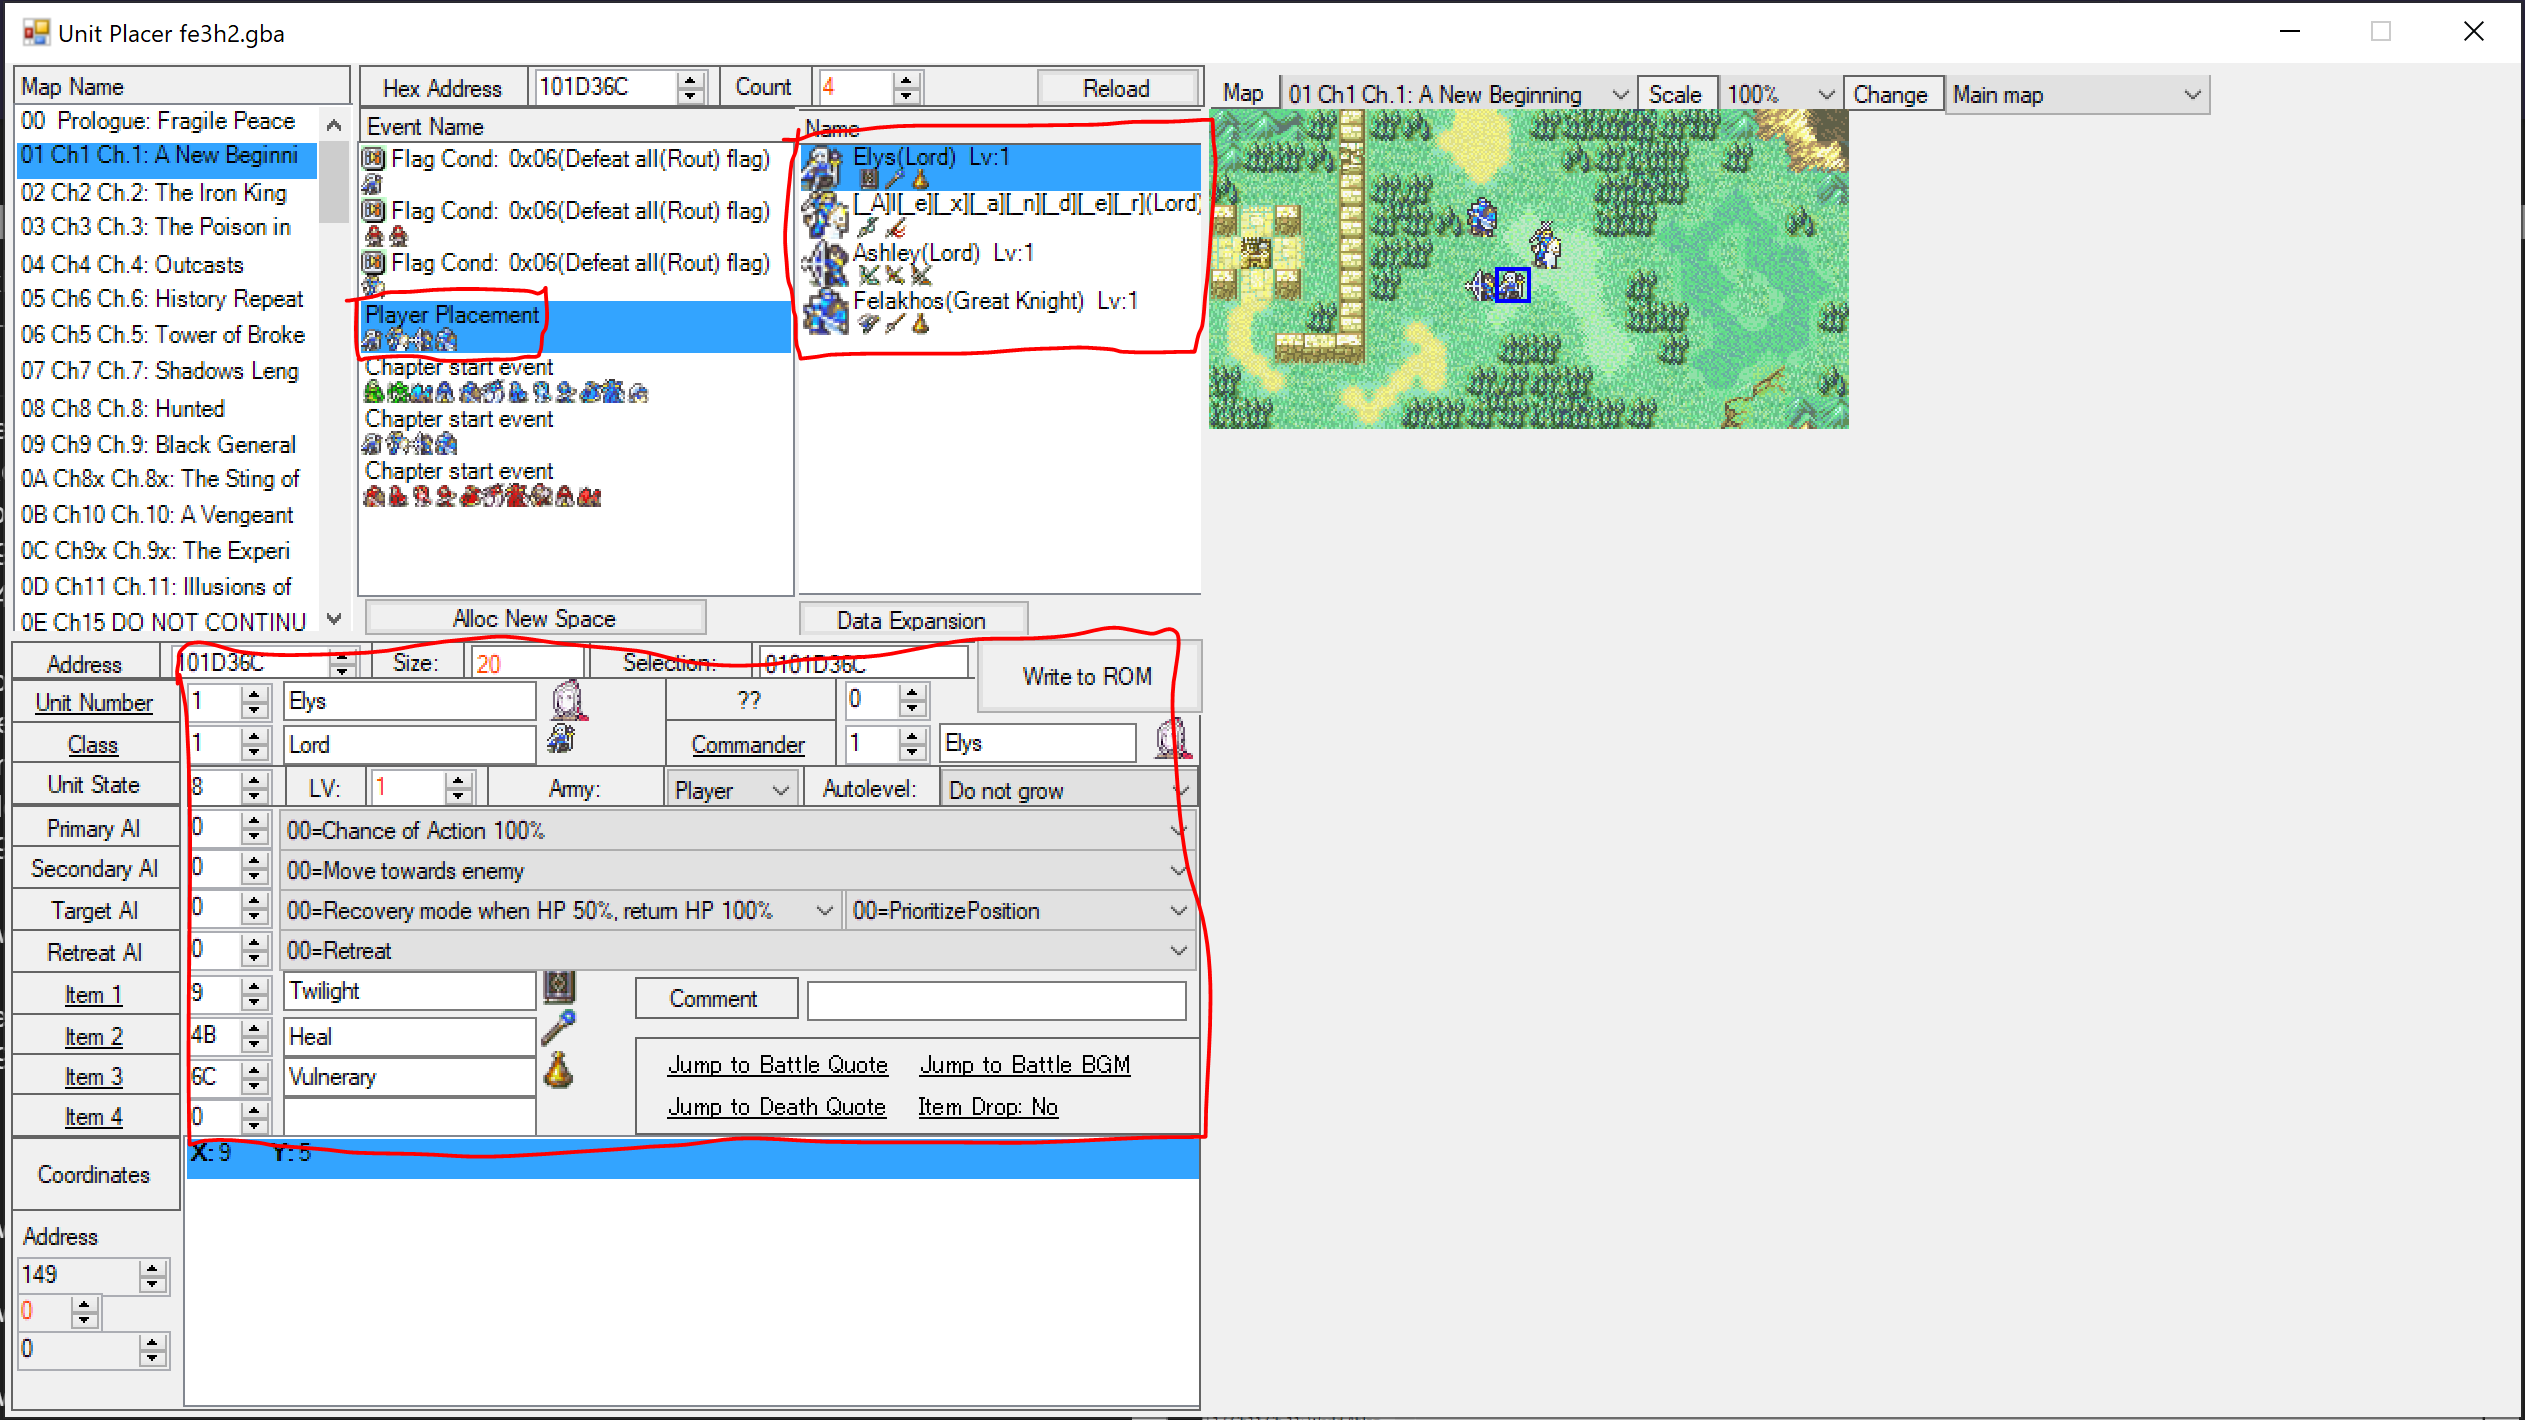
In the Unit Placer, you can find all the unit groups that exist in the chapter. Select the one you want to edit, and you can see all the units in that group and edit their level, class, allegiance, starting inventory, and placement. (Units who are already in the player’s party will use their current level, class, and inventory instead.) Note that you can move units around on the map by simply clicking on them on the map, then clicking where you want them to go – you don’t have to enter the coordinates manually.
To add new units to a group, click Data Expansion, and expand the list to the total number of units you want. This can also be used to remove units, by “expanding” to a size smaller than you currently have. A new unit group defined here will not automatically appear in the chapter. You must then load it in an Event. See here for a discussion of loading enemy reinforcements, and here for more in-depth details on how the different unit load commands work and which you should use when.
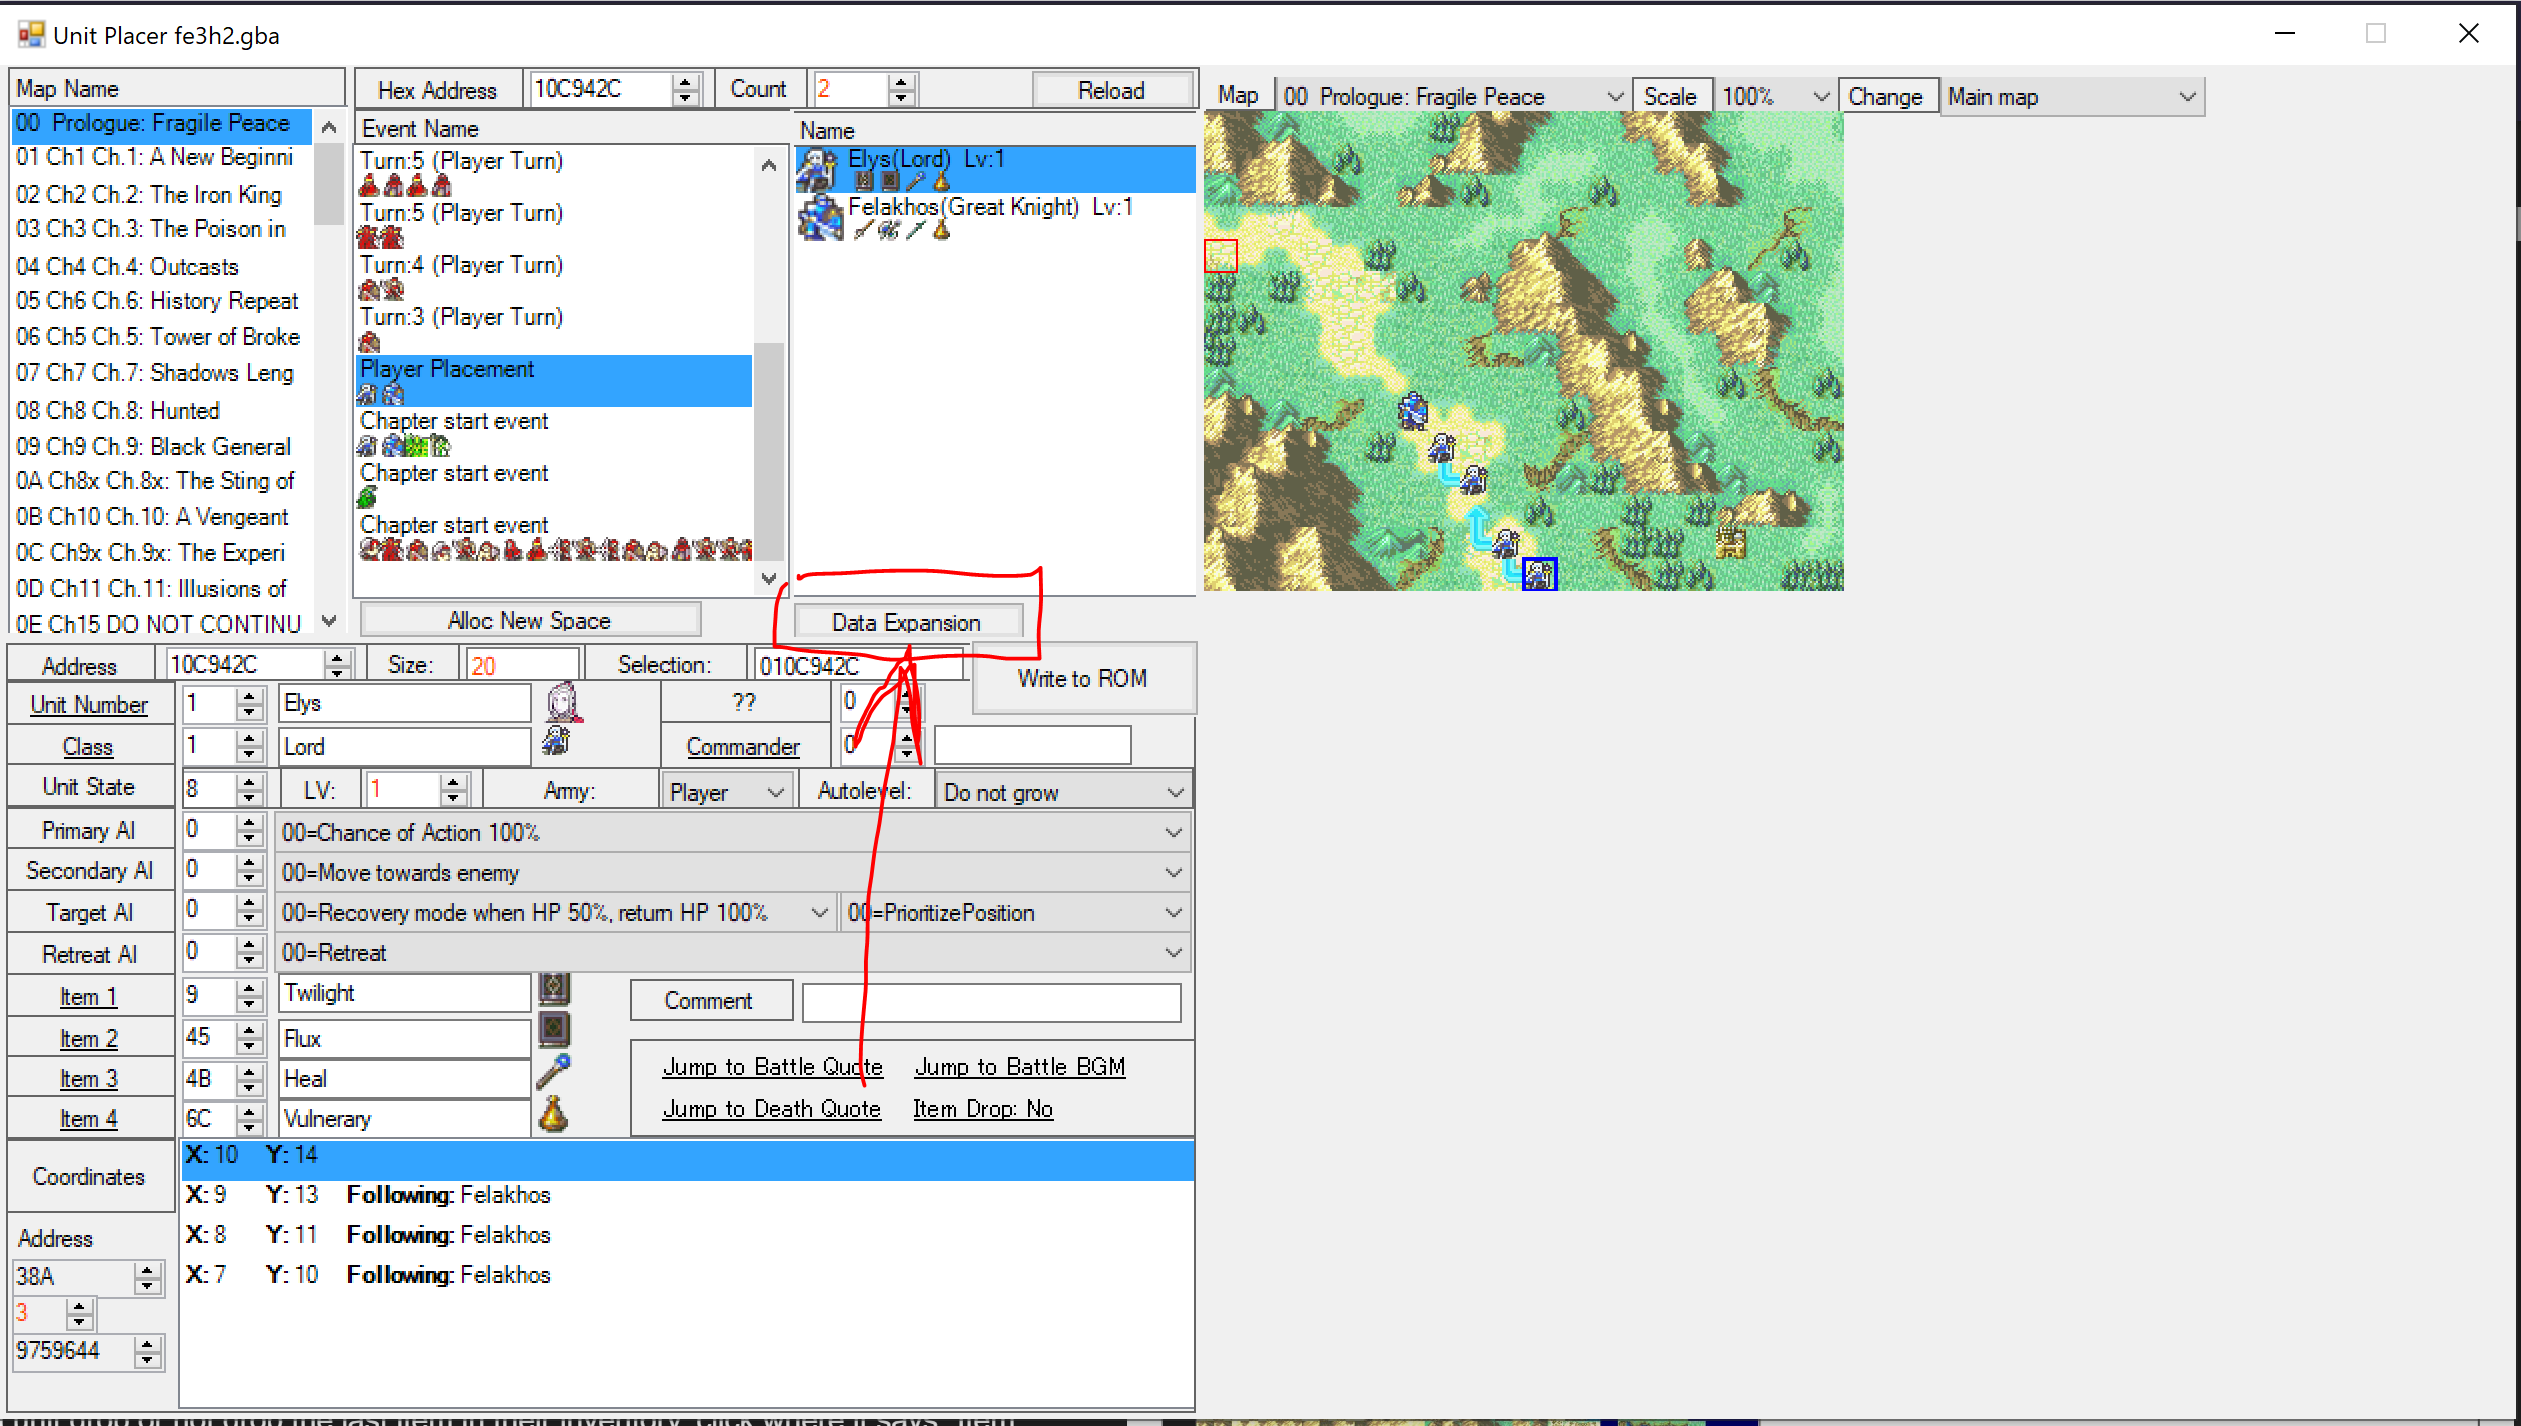
Note: Units can be set to move as they appear, instead of simply manifesting on their starting square. To do this, and to edit units already set to do this, there’s a list of coordinate positions at the bottom of the Unit Placer. The bottom coordinate in the list is the one they end at. Select the entry in the coordinate list you want to edit before moving the unit on the map. You can add new entries in this movement specification by selecting a row in the coordinate list and hitting enter, and delete them by selecting a row and hitting delete/backspace.

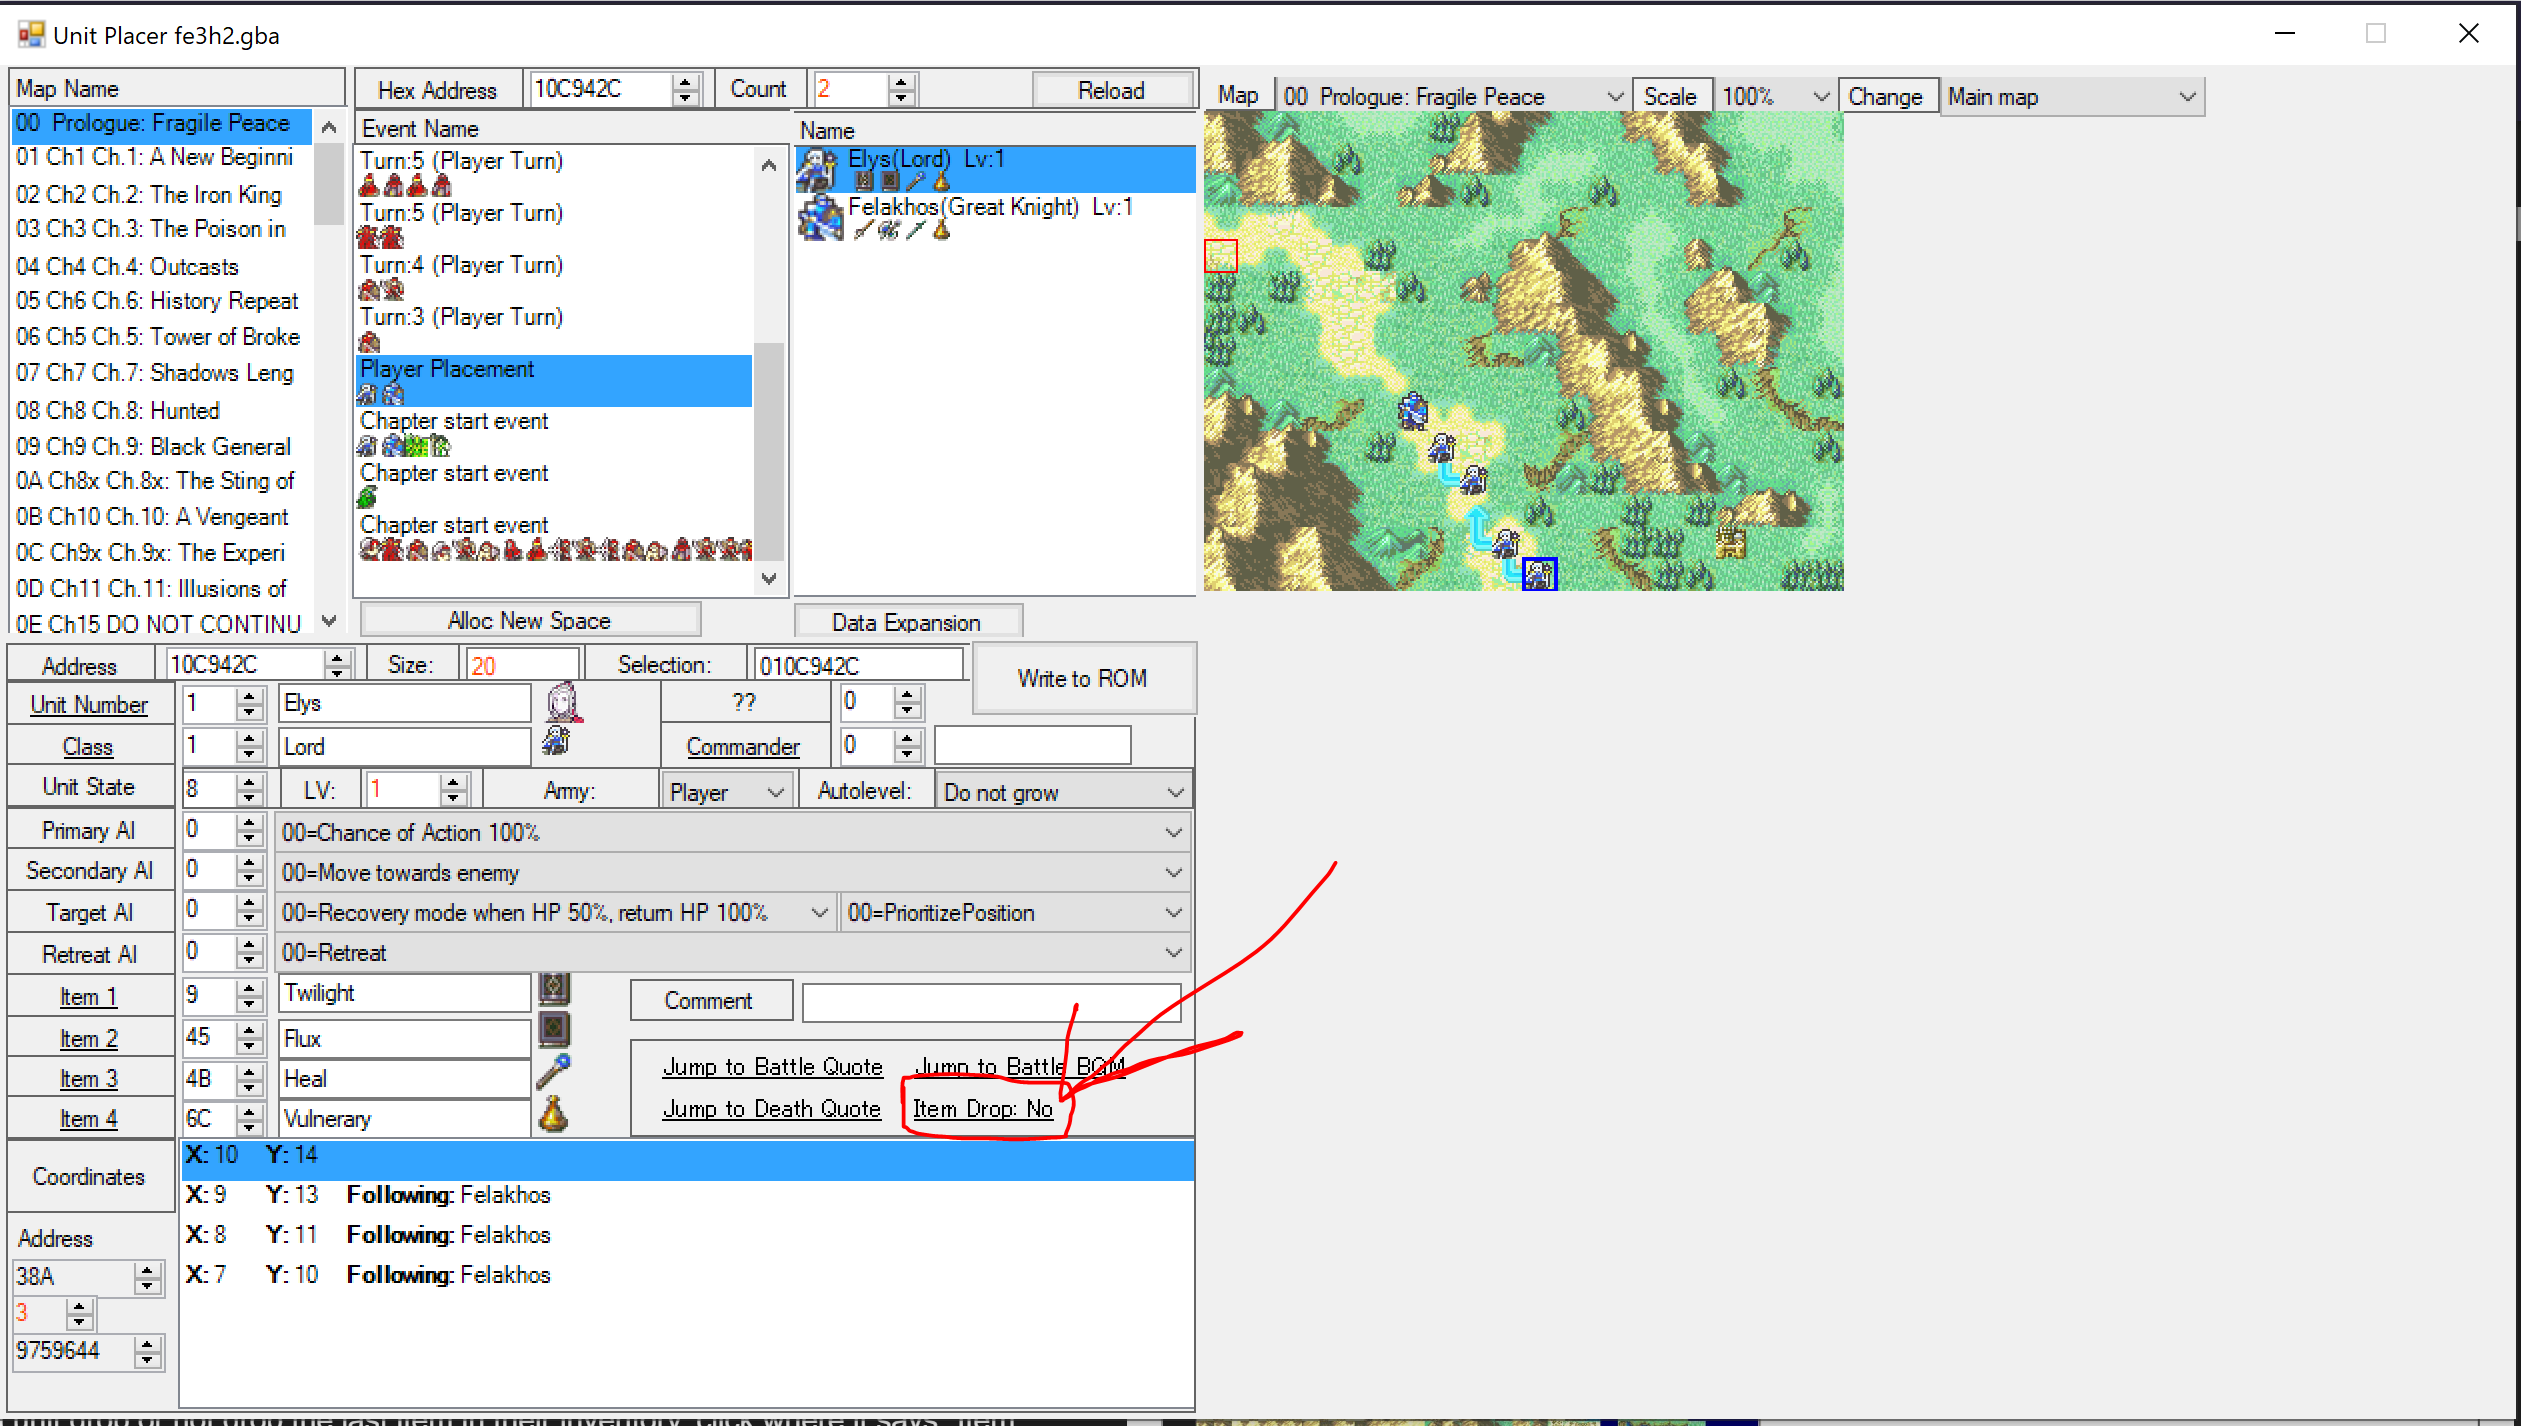
How do I make an enemy drop an item?
To make a unit drop or not drop the last item in their inventory, click where it says “Item Drop”.
How do I set the player’s starting position with the preps screen?
The player’s available positions during preps are determined by the size and placements of the unit group labeled Player Placement in the Unit Placer. For this purpose, it does not actually matter what units are specified in this group, only how many and where – you’ll notice the vanilla game likes to just spam duplicates of Seth. Force-deployed units will be forced in the positions of the first units in the list.
How do I change which units are force-deployed?
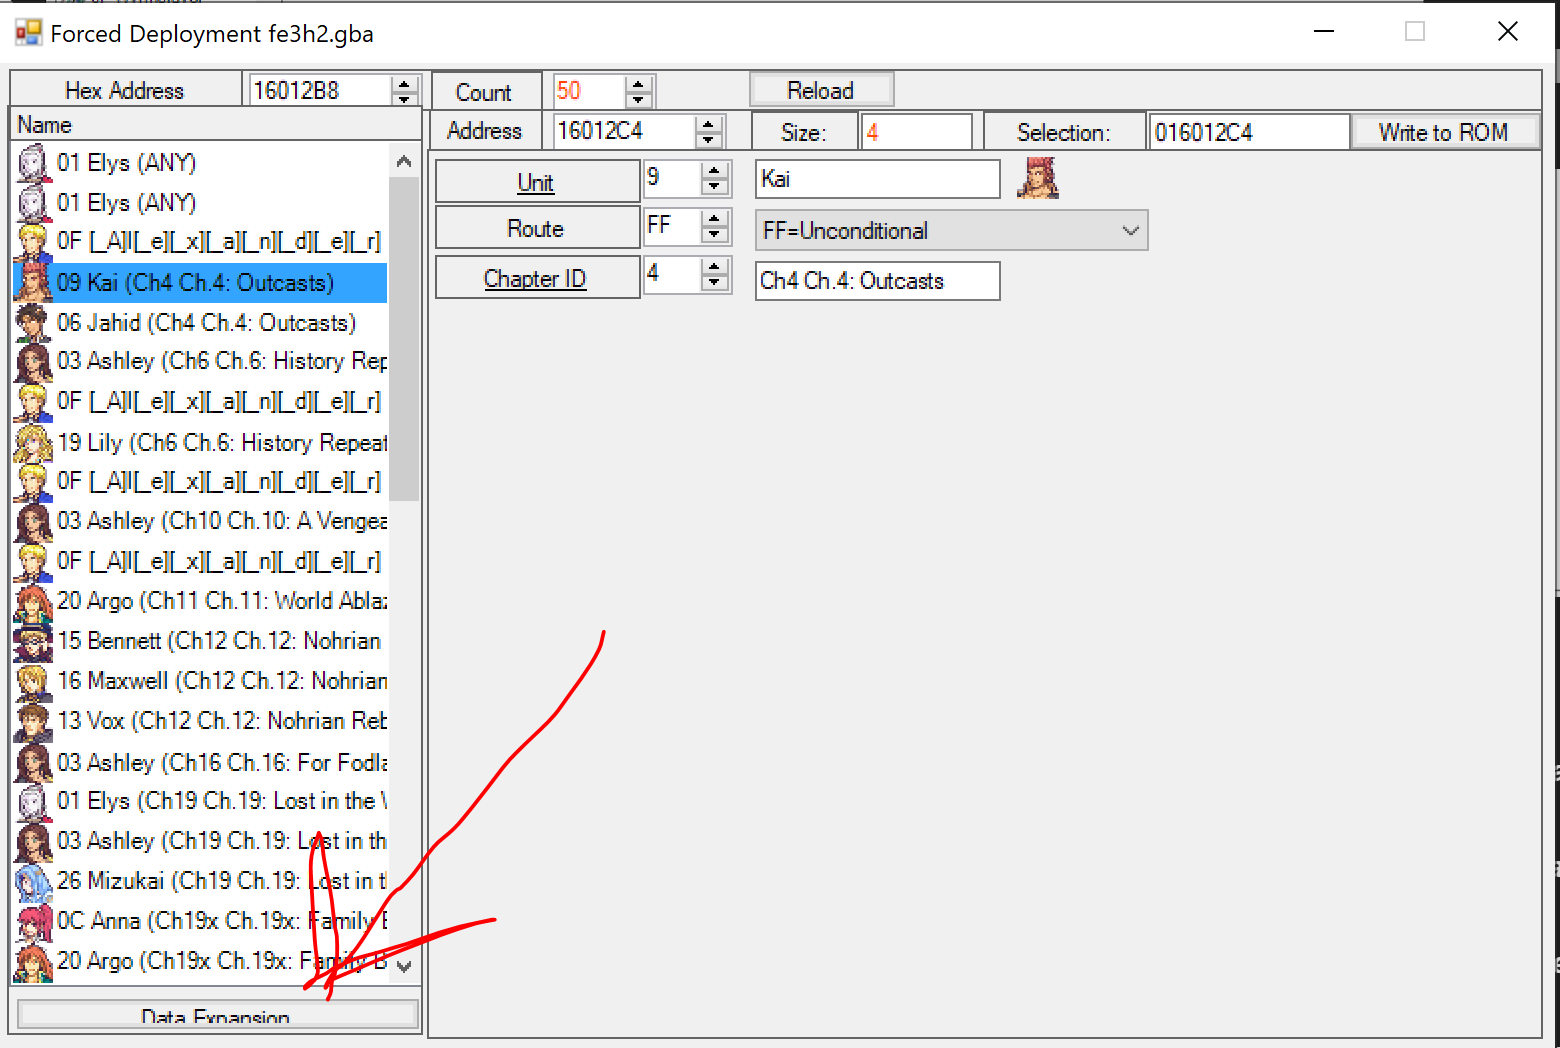
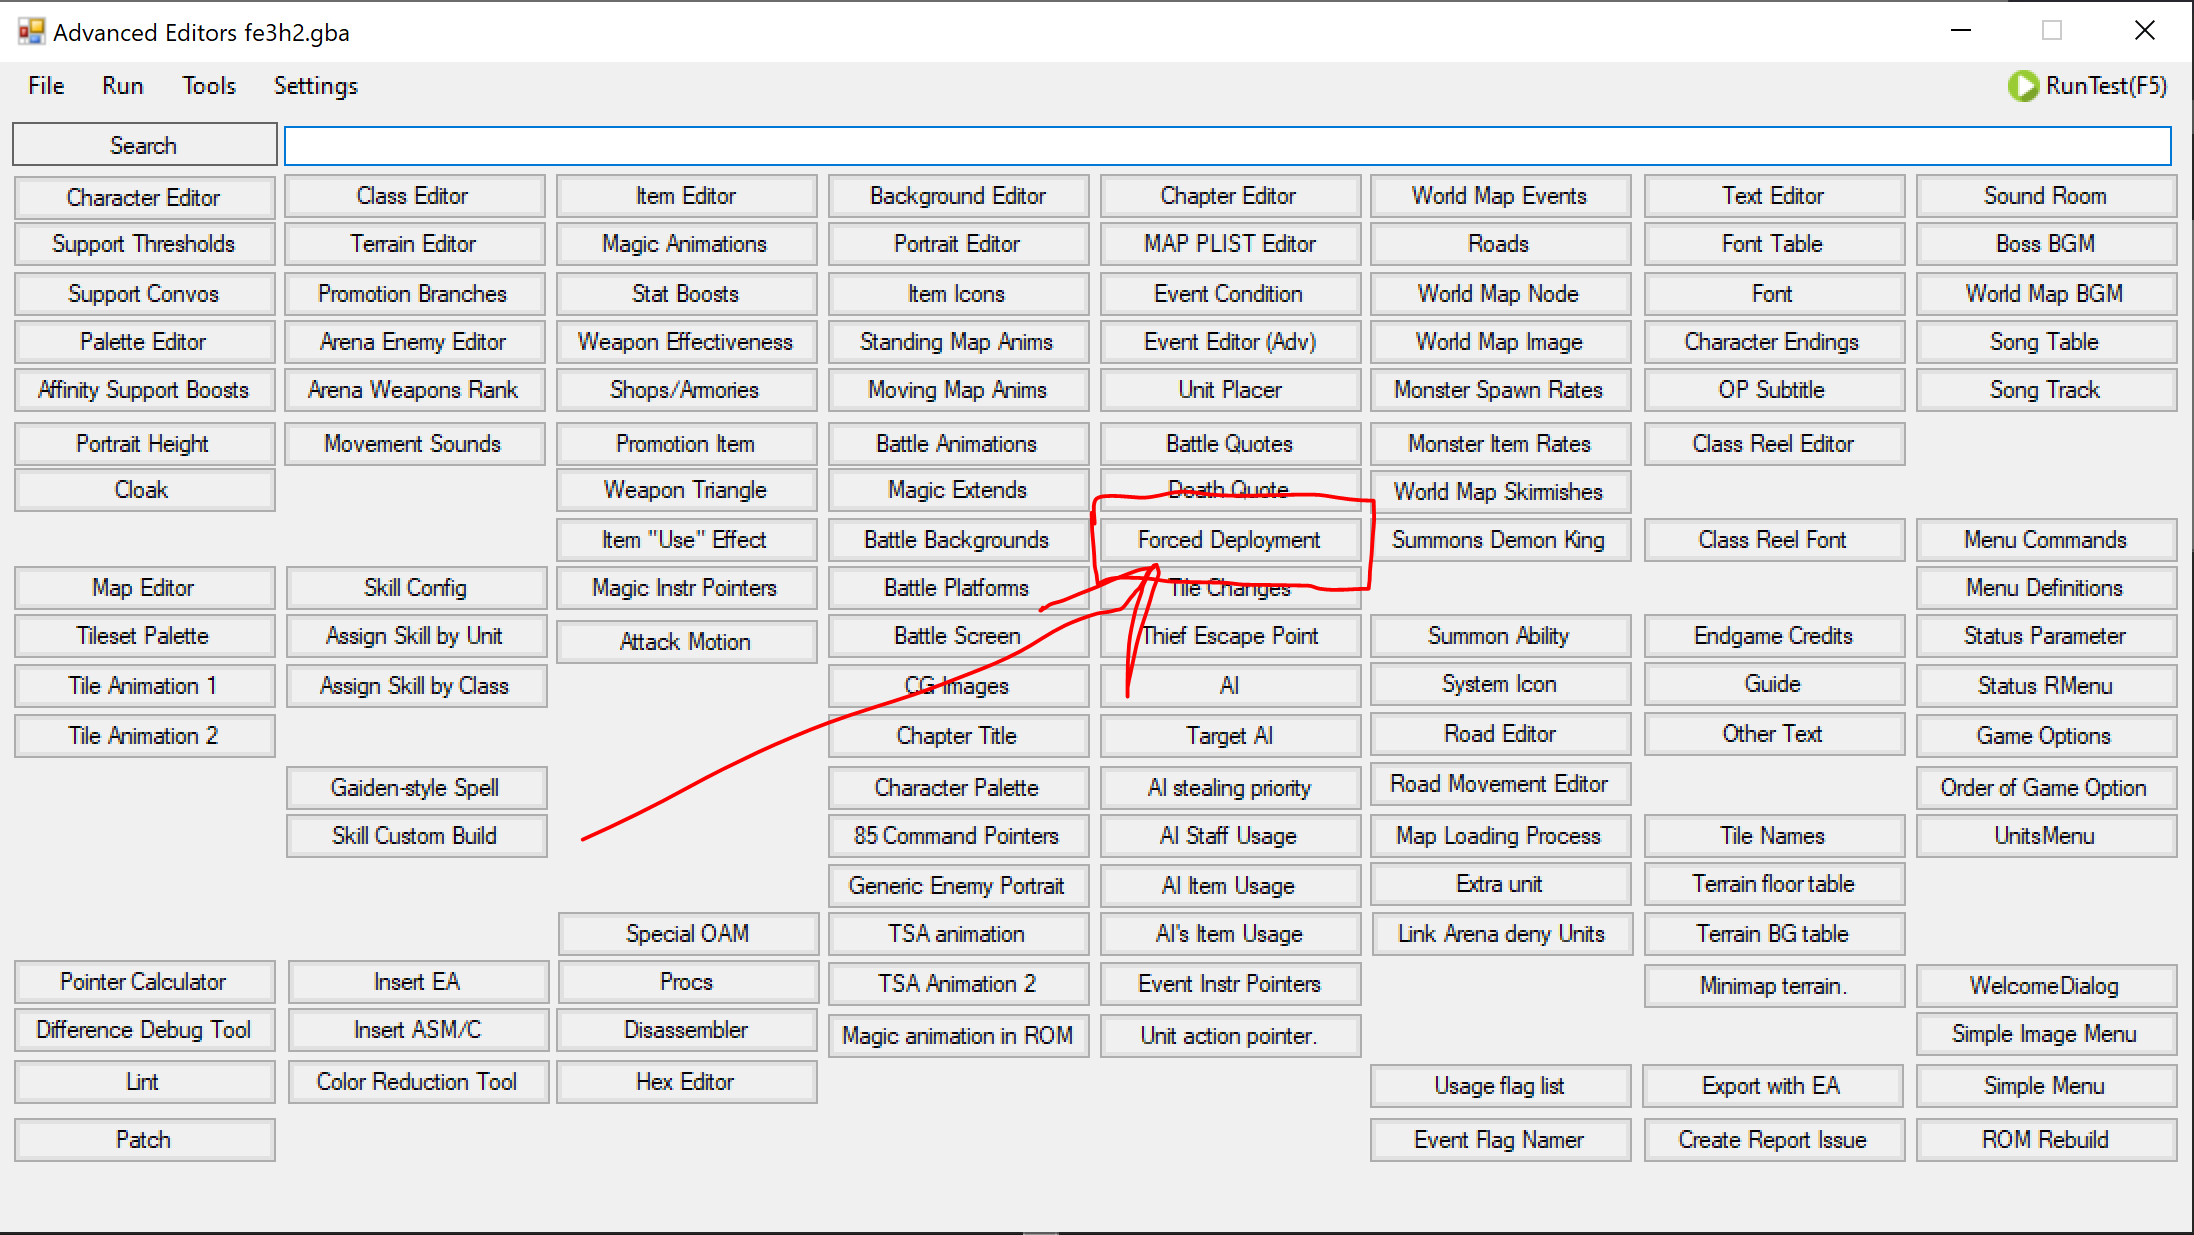
Forced Deployment editor, under Advanced Editors.
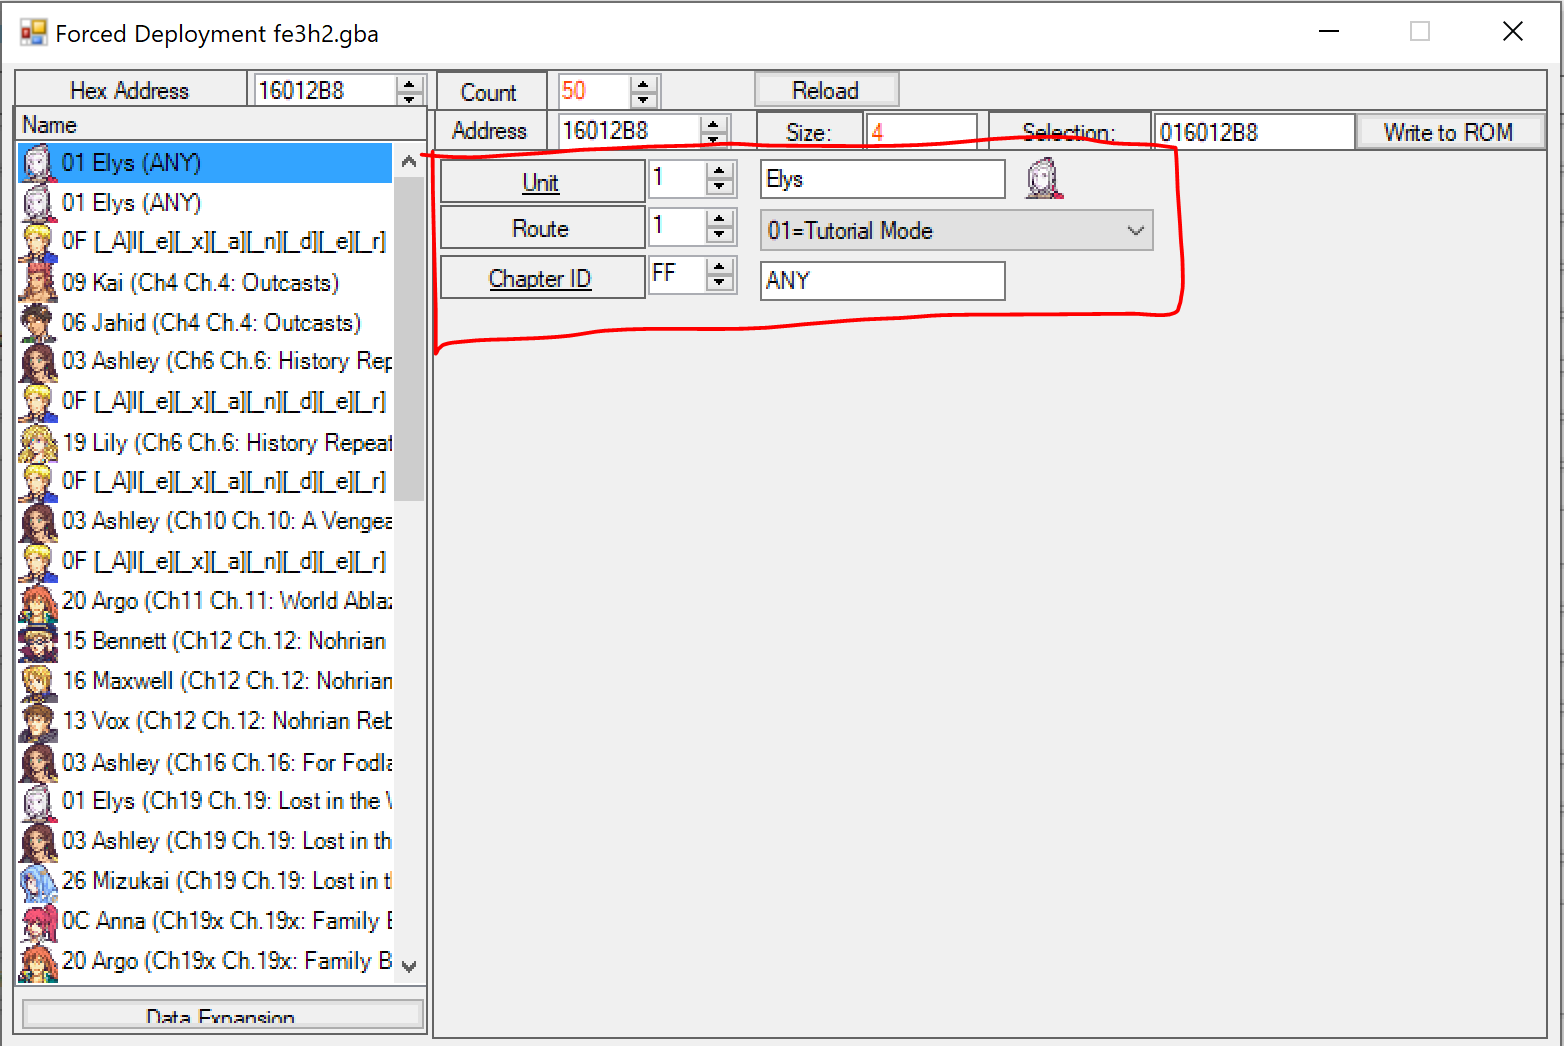
Each entry in the list contains a unit, a route specification (“tutorial mode” is pre-routesplit), and a chapter specification. Setting the chapter ID to FF means the unit will be forced in ALL chapters so long as you’re in the specified route. Setting the route to FF=Unconditional means the unit will be forced in the specified chapter regardless of route.
Ex. This unit is forced in every pre-routesplit chapter:
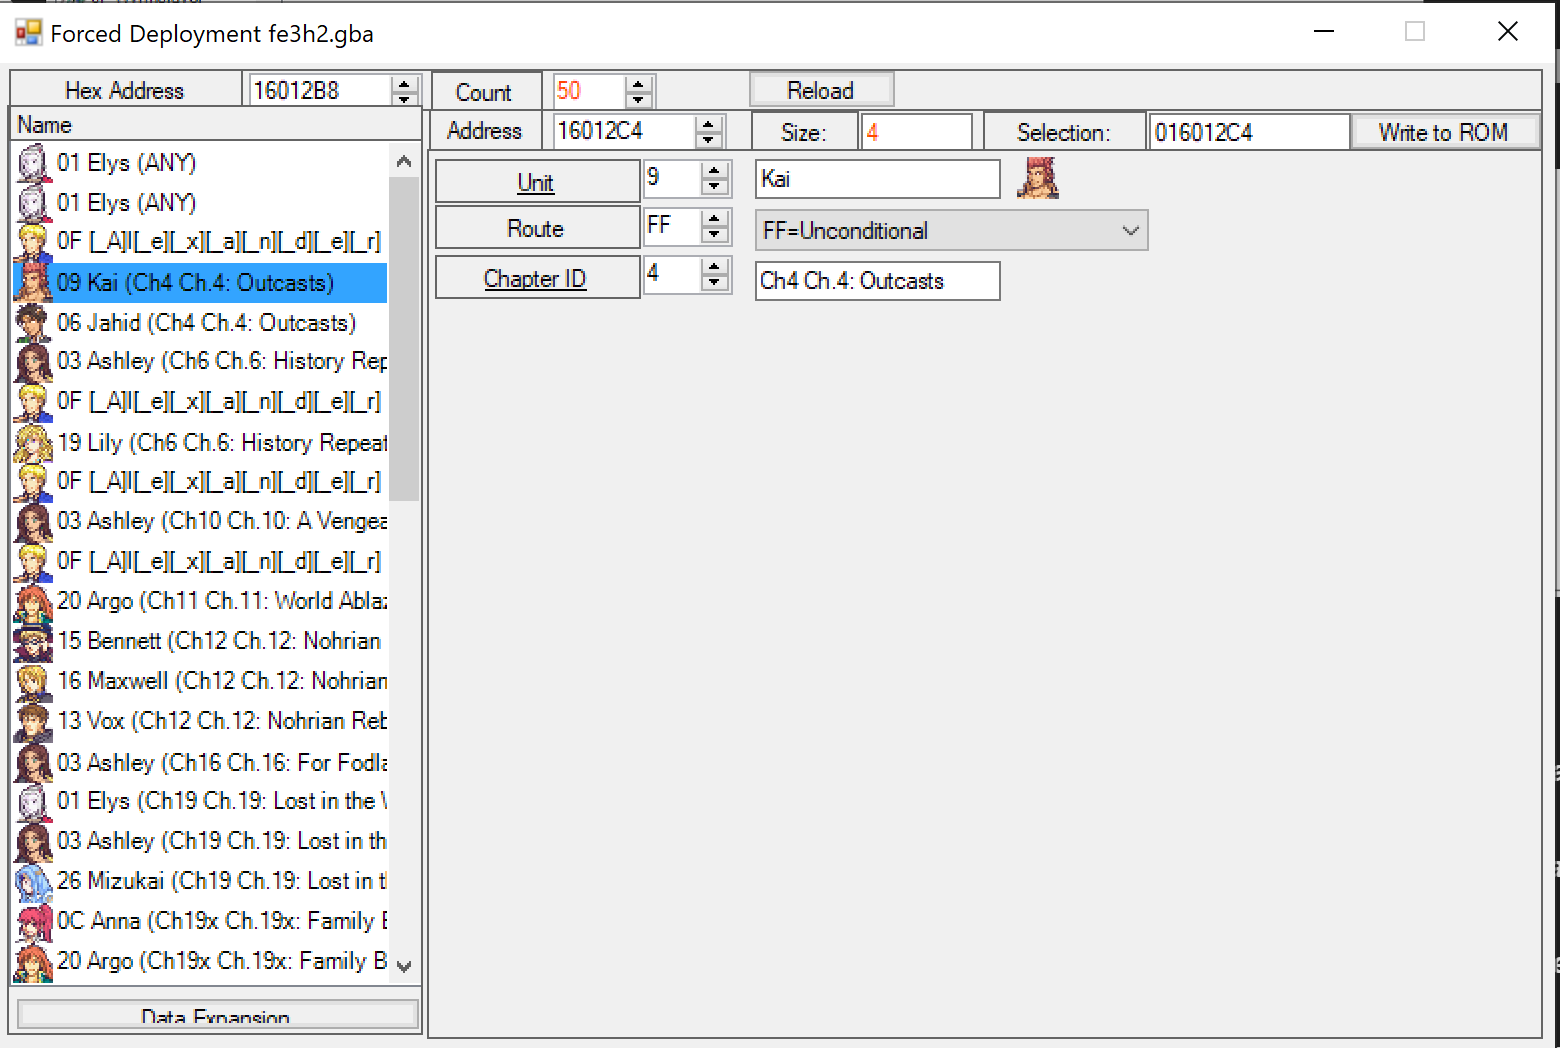
While this unit is forced only in Chapter 4:
To add more entries to the list, click Data Expansion, and expand the list to the total number of entries you want. This can also be used to remove entries, by “expanding” to a size smaller than you currently have.