OK fine let's learn how to make skills [Skill Creation Tutorial]

excuse this terribly organized preface, maybe an actual wizard could help me talk about this better lol


Good morning, beautiful members of FEU! This is legendary hack creator Runa of Runa Does a Thing (and Saves the World) [featuring Dante from the Devil May Cry series] and Last Heavenly Throne fame here. Let’s talk about skills.

Everyone and their mother nowadays uses skills. Why? Because all the quality of life patches come jacked in with it and FEBuilder users are too (edit: intimidated, hope this is better chair) to use Skill Custom Build so they get stuck with leadership stars, str/mag split, but most importantly, skills! The amount of talk people have about editing skills is so prevalent, yet so many people are off-put by the “haha learn asm” that they’re forever stuck with bothering 7743 to create patches for the skills they want to edit. That works in some regards, but what happens when it doesn’t? What happens if you want to edit a skill in a way that isn’t just a simple value change? Or heck, what if you want to enter the brave new world of creating a new skill? (honestly, I’m shocked there isn’t more people creating custom skills than there is) A new skill can make a memorable character, as people are more likely to remember a character with a fancy, new, never-before-seen skill. Or even remember the hack with all the cool skills that, in all honesty, don’t really do much because most skills are sort of meh (but the balance and usefulness of skills is an entirely different topic that won’t be covered here, wizard’s creed mothertrucker)

This tutorial aims to teach assembly in a way useful for editing and creating skills, because nobody’s done a tutorial like this yet and that shocks me :OOO

Now, before you ask, I’m not a wizard. I still have to look up opcodes to know what they do most of the time, and I’ve barely even done anything ASM outside of a few small projects. So, if you’re hoping to gain a better understanding of assembly as a whole, you’re better looking elsewhere. This is exclusively for adding and changing skills. (Heck, it’s probably only going to cover pre-battle skills, as 1. those are the majority of skills, and 2. pre-battle skills are the only skills i’ve gotten to work.) I might also cover proc skills too but proc skills are lame so that’s only a maybe. If you do have any requests for specific things, I might try to cover them too lol

By the way, this tutorial won’t go into the basics of ASM. If you wanna learn how a lot of this stuff works, I’d recommend taking a read of Teq’s awesome tutorial (that I’m basing this one off of), found right here!


Table of Contents (haha i’m ripping you off teq)

  • Necessary programs and shiz
  • But what is a skill system? [vsauce music]
  • Project 1: Blow is a 2001 American biographical crime film, directed by Ted Demme, about American cocaine smuggler George Jung.
  • Project 2: This skill only gives me Defense and Resistance because I’m a shut-in lol
  • Other future projects? I don’t know, these are the two I’m doing right now
28 Likes

Necessary Programs and Shiz


So, you made it past my horribly-organized preface, which means you actually want to learn how to make skills. Hats off to you for giving 7743 a little bit of a break by not bothering him to make your skills instead. Or maybe you’re a buildfile user, which means you’re probably one of the coolest kids on the block. :sunglasses:
If you want to make skills, you’re gonna need the tools of the trade. Some of the necessary tools include:

  • A PC running Windows (sorry to anybody who uses one of those Chinese toy phones that sings Butterfly by smile.dk, unfortunately you won’t be able to make skills with that :sob:)
  • An FE8U ROM. If you’re on here, you probably already have one.
  • A text editor. Notepad can work, but the one I use is Notepad++ for that sick assembly language colouring
  • devkitARM
  • Assemble ARM.bat, this comes with Skill System buried in Engine Hacks/Skill System
  • The skill system buildfile (aaaaand I just lost two thirds of my audience by saying you need a buildfile)

Okay, let me just clear something up by saying buildfile. You can make and edit custom skills using an FEBuilder project. 7743 has created a method of skill editing known as Skill Custom Build (found here), and while I haven’t messed with it much, what I do know is that all of this tutorial should be compatible with this method. Of course, I will always advocate for buildfiles, because if you make a mistake, you won’t have to redo your entire Skill Custom Build, and while you’re learning this I would 100% recommend using the Skillsystem-master buildfile. I will not be going into how to use Skill Custom Build in this tutorial; that is your prerogative. (And sorry Chair, people probably aren’t too lazy to use it, it’s probably just a lack of documentation on how to use it rather than laziness)

Here’s a list of other things that are nice to have when creating skills:

  • A hex editor for reading .dmp/.bin files, I use HxD but feel free to use another one if you wish, they all practically do the same thing
  • NO$GBA debugger, you can find it here
  • Nightmare modules are great for referencing, and Project 2 will involve them so it’s best to have a few on hand. (Skill System comes with a few)
  • Patience, 99% of the time you won’t get it right on your first try. You’re probably gonna get frustrated doing this, especially when you’re just starting
8 Likes

But what is a skill system? (and this is where a wizard calls me out for being wrong)


image
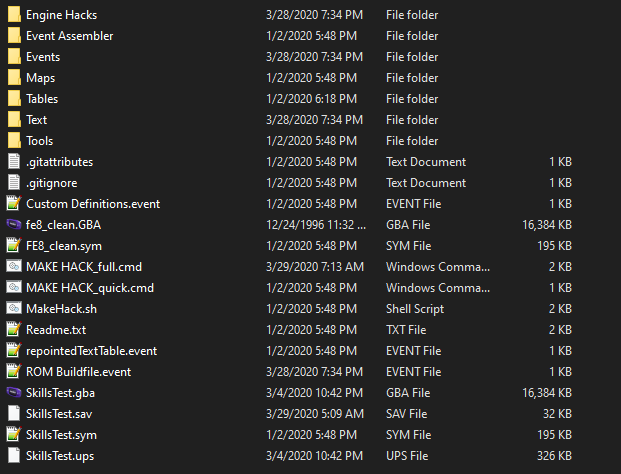
Skill System is a suite of changes to FE8, most famous for the actual system of skills itself. The Skill System buildfile comes with:

  • The buildfile and its assembler, found in the root folder
  • Event Assembler (god bless)
  • A test boss rush map in .tmx form, along with tmx2ea to allow for easy editing (Maps folder), along with its actual events (Events folder)
  • A collection of tables, most of which are used in various engine hacks (Tables folder)
  • A text assembler, along with a text buildfile required for the new engine hacks (Text folder)
  • A set of tools used in assembling the buildfile (Tools folder)
  • And most importantly, the Engine Hacks folder (organized by @Sme for our convenience god bless)

Now, I won’t be getting into how to actually use a buildfile. @Snakey1 is creating an amazing buildfile tutorial here, and I couldn’t go five minutes into explaining how a buildfile works without making an elitist statement:

But the main folder we’ll be focusing on is the Skill System folder, found in Engine Hacks.
When you open up Skill System’s folder (as of April 9th, 2020), it will look like this:
image
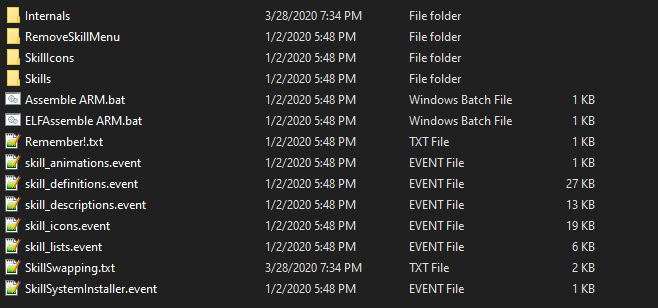
Each of these event files designates a certain thing for a skill:

  • skill_animations.event contains the skill animation table, important for proc skills
  • skill_definitions.event lets you change the definitions of skills, and by extent, which 254 skills you deem worthy for your hack (changing a skill’s definition to 255 will “disable” it by making it always come up as false when checked for)
  • skill_descriptions.event assigns each skill ID a text ID for its description when R is pressed
  • skill_icons.event does the same thing as descriptions, except with icons
  • skill_lists.event lets us create new skill lists that can be given to characters and classes to use when leveling up (we won’t be touching this most likely, but it’s important for bigger hacks)
  • SkillSystemInstaller.event includes every one of these event files into the buildfile
  • Remember!.txt and SkillSwapping.txt are messages by Darrman, Sme, and Leonarth giving commentary on editing/adding skills

As for the folders, we won’t be touching the RemoveSkillMenu folder: there’s no reason for us to and the assembly in there is super spooky. The Internals folder contains everything that makes Skill System work: we most likely won’t be touching anything in there either. The SkillIcons folder is exactly what it says on the tin, we’ll touch on that when we make a skill. And finally, the Skills folder contains almost every single skill in Skill System. (some of the stragglers, i.e. Rally and stat boosting skills are in ./Necessary/StatGetters)


Anatomy of a Skill

A skill is a set of ASM instructions, usually attached to a calculation loop that triggers whenever something happens. (PreBattleCalcLoop will trigger during combat forecast, HPRestorationLoop triggers at start of turn) Before we get to editing and creating new skills, let’s get used to how a skill actually looks. Open up the Skills folder and head to PreBattleSkills. There are a lot of skills here, but the one we’re looking for is Fiery Blood. Why Fiery Blood? It’s a simple skill that’s easy to understand, is why. Open up the .s file in your text editor to open the skill and see its instructions. It’ll look like this (as of April 9th, 2020):


Now, if this is your first time looking at ASM, this is probably intimidating as hell. But don’t worry, I’m here to help you break down what this skill is actually doing. Not only that, but the generous creator of this skill (who remains unknown) left some comments so we can understand what’s going on. So let’s do an analysis of what this skill does.


First off, let’s actually understand what Fiery Blood does. Fiery Blood is a skill that gives +4 damage if the unit’s HP is not full. Looking at the skill, you’ll notice the lines at the top.

.thumb
.equ FieryBloodID, SkillTester+4

.thumb is just to let the game know that this code is THUMB code, not ARM code. You can learn about the difference between the two in Teq’s guide, linked in the first post.
Meanwhile, .equ FieryBloodID, SkillTester+4 has a very important function, but we’ll mention what exactly this does later.

After this, we’re introduced to something that’s common to all Pre-Battle skills: this set of lines:

push {r4-r7, lr}
mov r4, r0 @ atkr
mov r5, r1 @ dfdr

All this does is push the registers r4 to r7, along with LR (r14). Then, the values of r4 and r5 are moved to r0 and r1. The values stored in r4 and r5 are the attacker and defenders’ character structures, which will be used to check the conditional, and later give the bonuses. A detailed deconstruction of the character structure can be found here, courtesy of Teq.

After that, we get to the HP conditional of this skill, nicely marked so by its creator.

@ hp not at full
ldrb r0, [r4, #0x12] @ max hp
ldrb r1, [r4, #0x13] @ curr hp
cmp r0, r1
ble End @ skip if max hp <= curr hp

You might be able to figure out what this does from the comments, but I’ll cover it anyways to be complete. The value located at r4+0x12 (the unit’s maximum HP) is moved into r0, and the value at r4+0x13 (the unit’s current HP) is moved into r1. Then, the value in r1 is subtracted from the value in r0 (r1 - r0). This comparison will set any of four flags, which are then checked in the branch opcode. Again, if you don’t understand the flags or the comparison, I would recommend taking a look at Teq’s guide to assembly in the first post, but you don’t have to. BLE (branch if less than or equal to) actually checks whether certain flags or set, but I’m not gonna get into that because flags always rack my brain. It basically moves to the end of the instructions, giving no bonuses, if the maximum HP is less than or equal to the current HP.

Moving on from that, we get to a common operation in every skill: checking whether the unit actually has the skill. You don’t need to know much about it, but you should make the skill ID in the function whatever the skill you’re working on is. The reason why attacker data is done here is because Pre-Battle skills are actually checked twice: during the second time, r4 and r5 are switched so that both units are checked.

@ has FieryBlood
ldr r0, SkillTester
mov lr, r0
mov r0, r4 @ attacker data
ldr r1, FieryBloodID
.short 0xf800
cmp r0, #0
beq End

Then, we get to the actual bonuses of the skill. This is pretty simple: move the value 0x5a to r1, load in the halfword value at r4+r1 (unit’s attack), add 4, and then store it back at the same place. The reason why we don’t just load r4+0x5a is because we’re not really supposed to do super high values in the additive part of the loading.

@ add 4 damage
mov r1, #0x5a
ldrh r0, [r4, r1] @ atk
add r0, #4
strh r0, [r4,r1]

Finally, we get to the End: label. We push the registers back, and that is it. After the pushing though, we do have some extra things to put at the end of the assembly file.

End:
pop {r4-r7, r15}
.align
.ltorg
SkillTester:
@ POIN SkillTester
@ WORD FieryBloodID

I’m not actually sure what .align exactly does, but you should put it there. Maybe a wizard can tell me. .ltorg creates a literal pool at the end of your assembly, in case you need to call a value that could end up changing as you work on it. This is important, because in a buildfile, the values we use always change. After the .ltorg, we place a label to SkillTester, for a very important reason: we need to place these values somewhere. The comments afterwards indicate a very important thing: these are where the values of SkillTester and FieryBloodID will be put. This is exactly why the .equ FieryBloodID, SkillTester+4 is so important: it tells us where FieryBlood is, as a pointer is 4 bytes, FieryBloodID will be located 4 bytes after SkillTester. Now, you might be wondering, “That’s great Runa, but where are these values stored anyways?”

I’m glad you asked! Return to the PreBattleSkills folder and open PreBattleSkills.event. You’ll want to CTRL+F for FieryBlood, and find this:

ALIGN 4
FieryBlood:
#incbin “FieryBlood/FieryBlood.dmp”
POIN SkillTester
WORD FieryBloodID

Notice how the comments in the assembly instructions are exactly how it looks in the actual event file. Of course, if you look closely, you’ll notice that the .s file is not used, but rather the .dmp file is. You get the .dmp file by running the .s file through Assemble ARM.bat, as that program turns the .s file into hex code, which can then be inserted into the rom easily. (This can be a source of frustration if you make a fix to a faulty skill, and forget to run Assemble ARM.bat, as you may think the fix doesn’t work when in reality you just forgot to update the .dmp file.)

Of course, you can’t just include the skill here to have it work, but we’ll get into how to make a skill actually work in Skill System in our first project. I hope this can help you understand how a skill in Skill System actually functions! :OOO

8 Likes

Project 1: Blow is a 2001 American biographical crime film, directed by Ted Demme about American cocaine smuggler George Jung.


I guess it’s time we actually get to the meat of what we’re here for: you want to edit and create new custom skills. And by getting to the meat, I mean that we’re not actually going to do that. I think it’s better if we go slowly into creating skills, and the easiest way to stick your feet into the pool is by editing an existing skill.

So, let’s start by going into our Skill System buildfile and opening up the Skill System folder (found under Engine Hacks). We’ll want to go into Skills, finding the PreBattleSkills folder and opening that up. Finally, we’ll want to open up the BlowSkills folder. The inside of that folder should look like this (as of April 26th, 2020):

image

We’re going to want to open up the BlowCheck.s file (not the OldBlowCheck, that’s only kept there for legacy purposes). Now, once you open this up, you’re going to get a long text file filled with assembly code, which might be intimidating for some. But don’t worry: the only reason it’s long and intimidating is because of the amount of Blow skills there are. As of writing this, there are ten skills that use the Blow skill check. Instead of making each skill have a different text file, they’re all shoved in with a loop to avoid needing the attacker check ten times. As long as we understand that, editing the assembly file will be much easier.

For reference’s sake, a Blow skill is any skill that only activates when the unit attacks, as opposed to when the unit defends against an enemy’s attack.

Our first goal will be the following: change the amount of resistance that Warding Blow gives. We want to have Warding Blow give the same amount of resistance as Armoured Blow does defense. This is just a simple value change; as long as we can find the value, we can easily change it.

Where is this value?

image

All we need to do is just change this value to 10. Change the value to 10. Bam, save it and run the .s file through Assemble ARM. Compile your buildfile, and load up your game. If you’ve done everything correctly, in combat the resistance gain should be +10 instead of +20.

SkillsTest-0 SkillsTest-1
SkillsTest-2

Of course, the description of the skill will still be unedited and say +20 Resistance. You’ll need to update that yourself; we’ll learn more on how to do that when we complete our second goal.

(wip)

reserved for “three houses bad” -pikmin

6 Likes

reserved for thanking runa for making this guide.

10 Likes

Nice. Good luck with the guide!

And thanks for the minimal elitism.

6 Likes

In fact, neither I, nor my mother, uses skills.

But I do love learning, and think this is a neat concept, Runa!

4 Likes

Calc loops were moved to Engine Hacks/Necessary fairly recently (commit was like 2 months ago but the merge was more recent than that)

.align 4-aligns, .ltorg / .pool should do this automatically personally I put an .align after the literal pool in case a non-word literal ends up in there but I also put .align at the start of the file where it does literally nothing so you’re probably safe not doing that

2 Likes

thanks for the warning, i don’t use the reorganize in my project lol

2 Likes

An instance to make an FEH style skill system without ASM.

3 Likes

reserved for witty comment about skill that gives troubadours 7 move

4 Likes

is pablo escabar in this hack?

2 Likes

While we’re making a skill system guide, can we advocate for using lyn and build into .lyn.event files instead of dmps? imo we should teach new people the difference between the assembling methods then continue in the tutorial with assembling with lyn.

Anyway, nice going, and I look forward to more progress!

3 Likes

Thanks for making this guide. It is helpful, especially at making things less intimidating.

1 Like

This is great but how do I do this in fe7?

2 Likes

it’s easy! just follow this simple tutorial

UmsBlTgse5

23 Likes

How do I dislike a post

5 Likes

Ok, so with a build file. I’m not sure how they work exactly yet but is this able to edit skills Ina. Build file and transfer those skills into fe builder? Because I’d still rather use fe builder