[Indie] [Steam] Gravitas: Noblesse Oblige

Content Rating: 16+ (References to alcohol, strong language)
Hello everyone, my name is Ryan or Whimsy, and I am very excited to share this project with you!

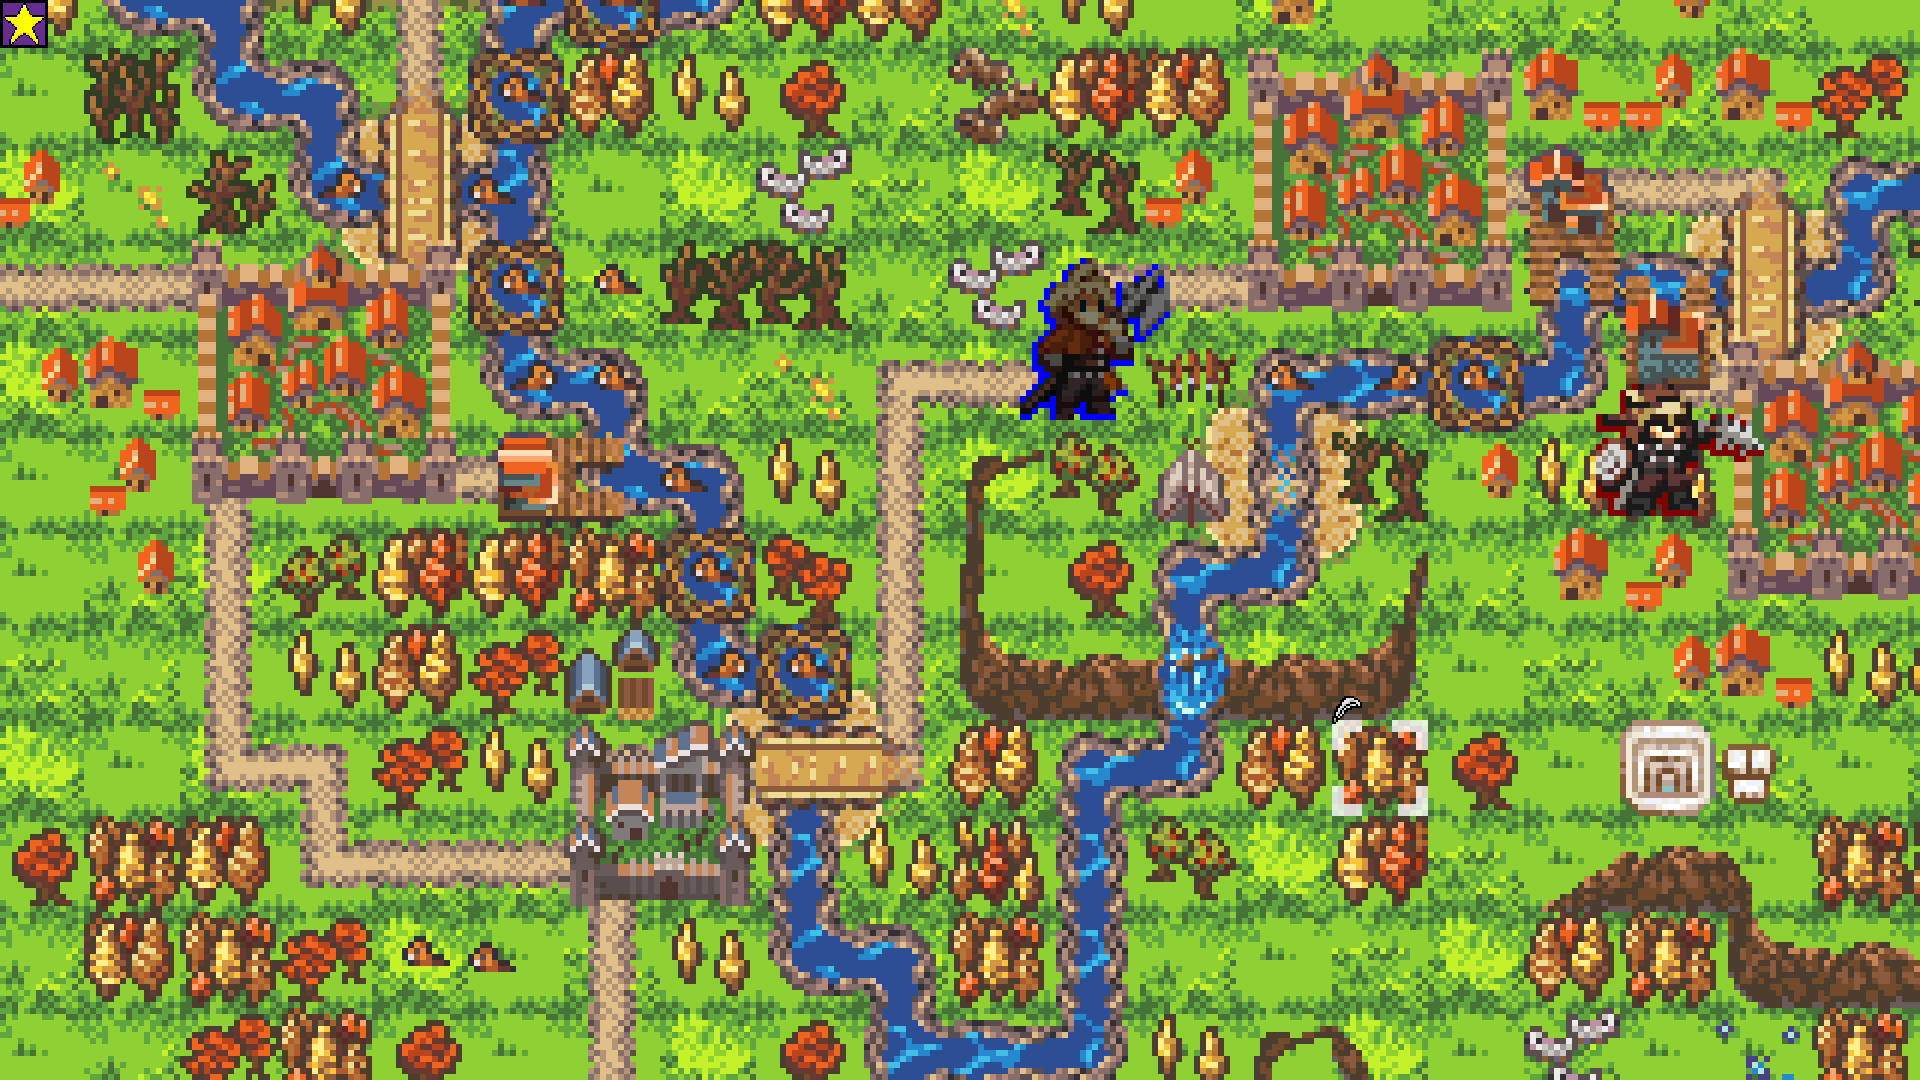
Gravitas: Noblesse Oblige (GNO) is a turn-based strategy RPG that will be released on Steam in the future. This project is heavily inspired by Fire Emblem and some members of the FEU community are contributing to its development, hence this post. The distinguishing features of GNO are in its campaign layer. There is a campaign map with a fully simulated economy system and dynamic trade routes. The world of Gravitas is very much alive and will react to your decisions. Armies will need supplies and you’re in charge of making sure they get them. Where two hostile armies meet on the campaign map will determine the battlefield. The goal of a campaign is to complete the main character, August’s, Ambitions. Every character will have their own Ambitions, see if you can achieve them all in one campaign to complete a Golden Run. The closest comparison to the game’s ‘formula’ is the Total War series, but like, Fire Emblemy, you know?

:cross_mark: No generative AI is being used any art, writing, music or any other assets on this project.

Disclosure: AI code review was used to optimize pathfinding code. The outcome of this use was eliminating redundant calls to the zone of control function and changing a data structure from a list to a priority queue resulting in end turn trade route execution taking 2 seconds instead of 5. Everyone deserves an honest disclosure about the use of this technology and if this use case crosses a line in the sand for you, I completely understand. My view is that this technology is useless at design and artistry, but incredibly useful for tasks like optimization which means I can spend less time working on tasks like these and more on the actual game design and character writing which is where my passions lie in my limited free time outside of my job.

Wishlist on Steam!

Gravitas: Noblesse Oblige on Steam

Key Features

  • Economy: Every city produces goods and has a local Supply:Demand which influences prices. Trade Routes can be used to buy low in one market and sell high in another for profits. Stay tuned for detailed information in developer diaries.
  • Cost of Living (COL): Certain goods are Staples and your pops need to buy them. If the income of your people is lower than the COL in the city, they will be living in Poverty and have negative population growth. These pops may turn into Bandits dynamically if their needs are left unaddressed for too long. Man’s gotta eat one way or another.

  • Politics: You will rule over a nation and as its king you are in charge of its laws and tax code. That does not mean people will like what you pick. Different Factions will have support from your people depending on their jobs. These factions will advocate for different law changes and upsetting them too much can result in rebels spawning from your cities.
  • Diplomacy: You will need to manage diplomacy yourself, controlling who you ally and rival on the campaign map. There is a great deal of variation on game start up, altering the diplomatic web each campaign. Cozying up to someone will upset their enemies, and the knock on effects continue from there.

  • Logistics: Your armies will carry Supply on them. Each turn on the campaign map they will consume Supply, if they run out they will take attrition, losing HP, Morale and Stamina. To keep them fed in the field and while besieging, you will need to create Supply Trains and safely escort them to your Army, which may require a smaller Army to protect the Supply Train.
  • Recruitment: There are many named characters, but you’ll also need to recruit generic Troops from your population. The Troops you can recruit vary based on culture. Troops and characters can not be healed during battle. Characters can only be healed by purchasing Medicine in cities and Troops need to be reinforced with more population. Human lives are the most precious resource in this game in a very tangible way. So don’t run out!
Tactical Combat

Here I’m going to list all the ways combat differs to Fire Emblem. Combat encounters can be scripted by the narrative or dynamically by encountering a hostile enemy on the map. The location (Grassland, City, Forest, Beach, etc.) will then determine the battlefield.

  1. Turn Order: You move 1 Troop at a time, then the enemy moves 1. Like chess. You can’t move the same Troop again until everyone else has moved. Prioritizing who to move where to cut off enemy movements is a key consideration you will always be making.
  2. Phases: There is a Maneuver Phase (MP) and a Combat Phase (CP). During the MP you move your Troops. Once all Troops have moved, it shifts to the CP where you take turns issue your attack orders back and forth.
  3. Morale: When taking damage Troops will also lose Morale. If an ally dies near them, they will also lose morale. If their Morale hits 0, they will Rout. Routed Troops cannot be controlled and will run to the edge of the map before fleeing on the following turn.
  4. Stamina: Every movement and attack will cost Stamina, as well as certain abilities. Troops with low Stamina get stat penalties in combat and be unable to activate certain abilities. Relying on a single Troop to juggernaut is not as effective.
  5. Charge Bonus: All Troops have a Charge stat which is added to their melee damage if they moved more than 1 space before attacking. This encourages aggression and creates new Troop archetypes.
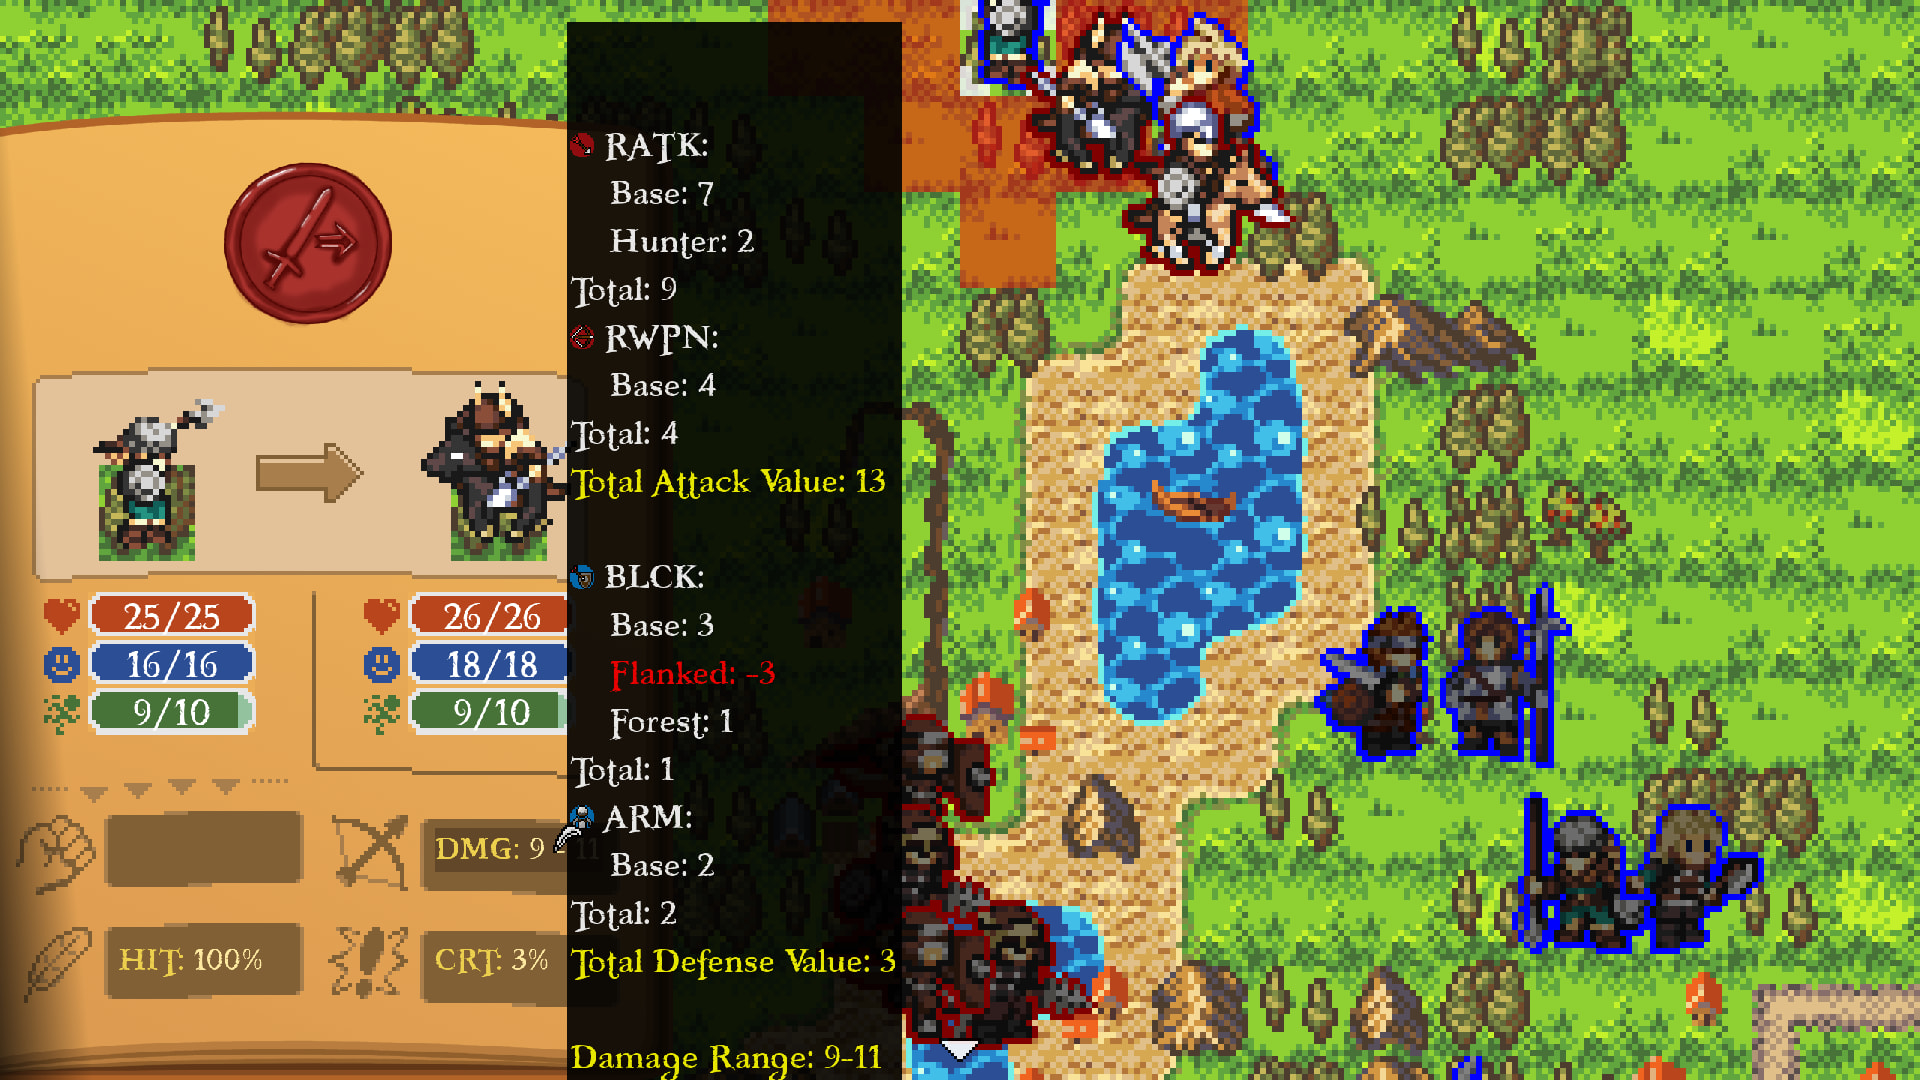
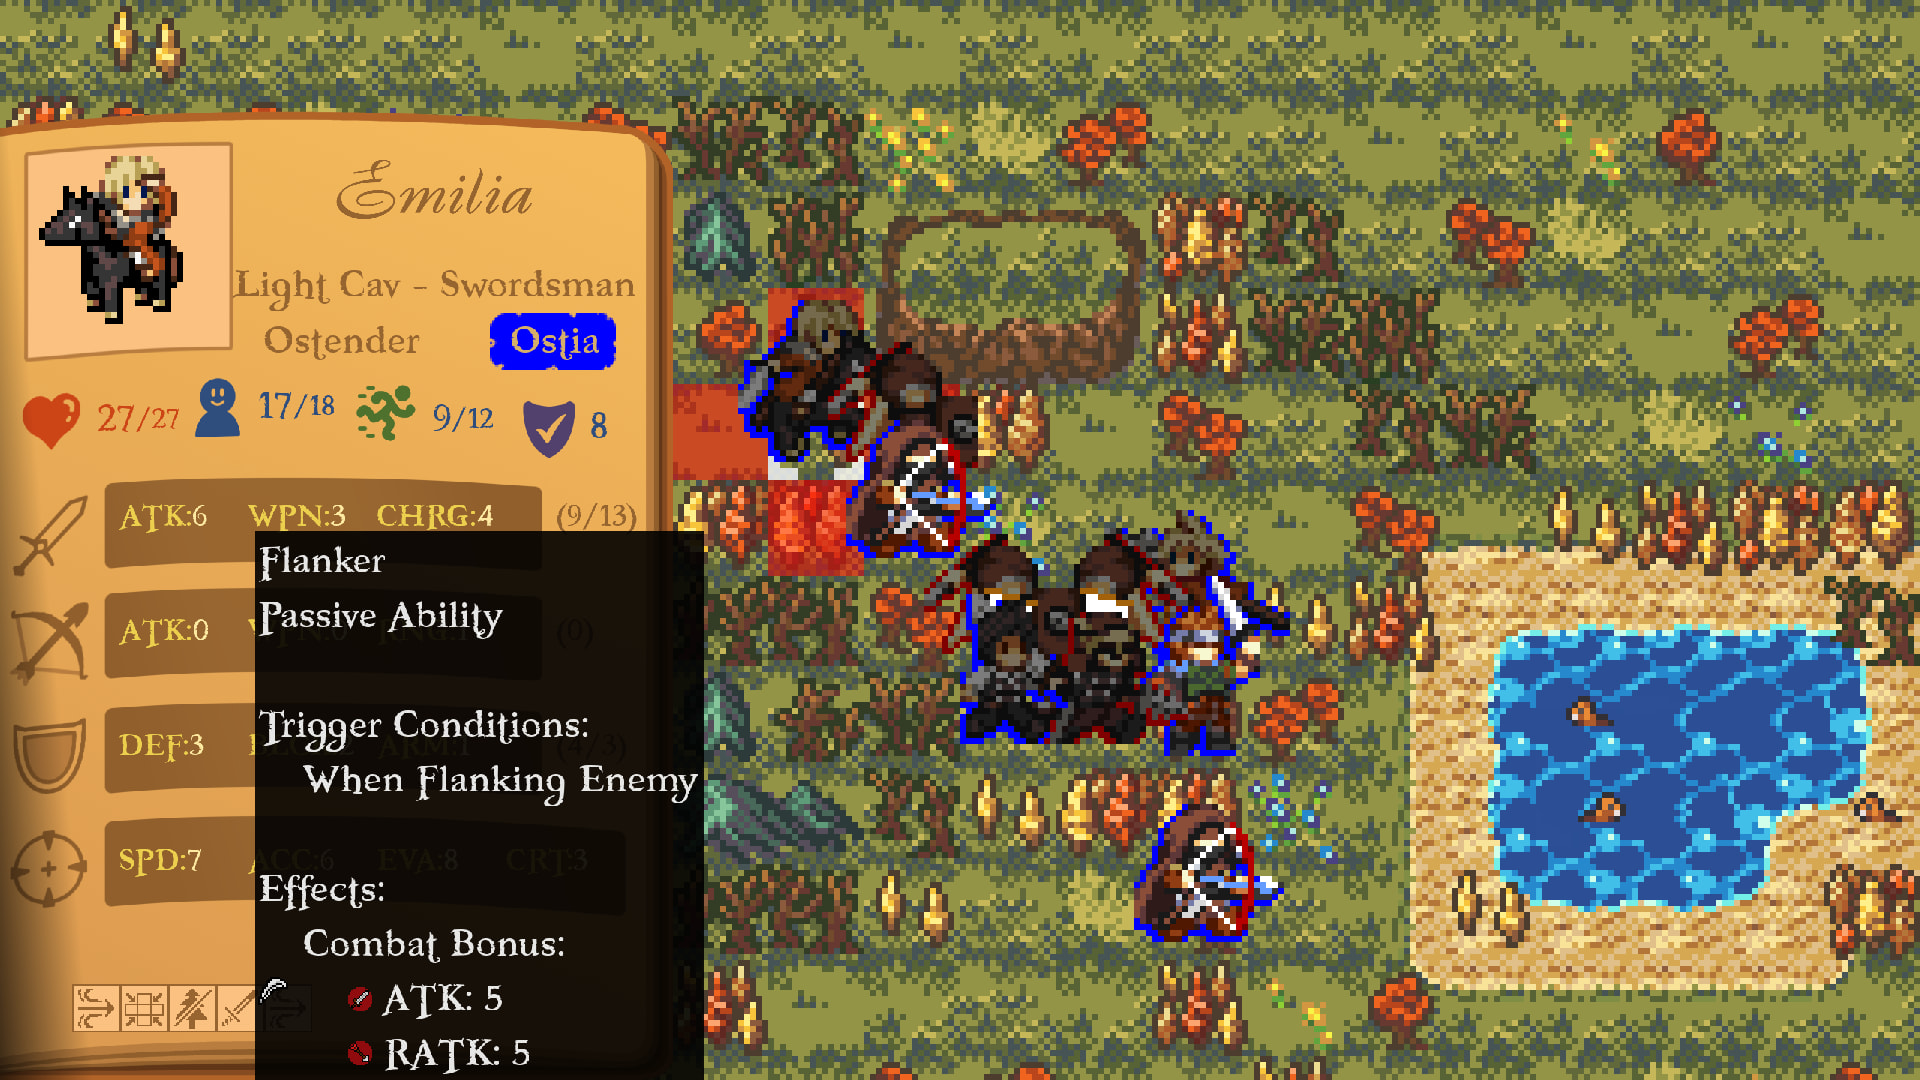
  6. Flanking: Having an ally on the opposite side of an enemy will lower their defenses and evasion.
  7. Zone of Control (ZoC): Moving adjacent to a melee Troop will end your movement. Trying to leave an enemy’s ZoC will give them a free Opportunity Attack. Limiting enemy movement to protect your squishies is a pervasive consideration at all times.
Story

The Hunter’s truce has finally ended and the fractured city-states of the former empire are poised to secure their positions. Among the disparate players on the board, the Champion of the West Wind stands out for having nearly succeeded in completing the Hunter’s challenge. Though he failed and the empire dissolved at the Great Wolf’s howl, the people are desperate for a hero and that is a most convenient role for August. Having received Meridian’s blessing, he will do all he can to prevent this period of warring states from ravaging his people.

Setting

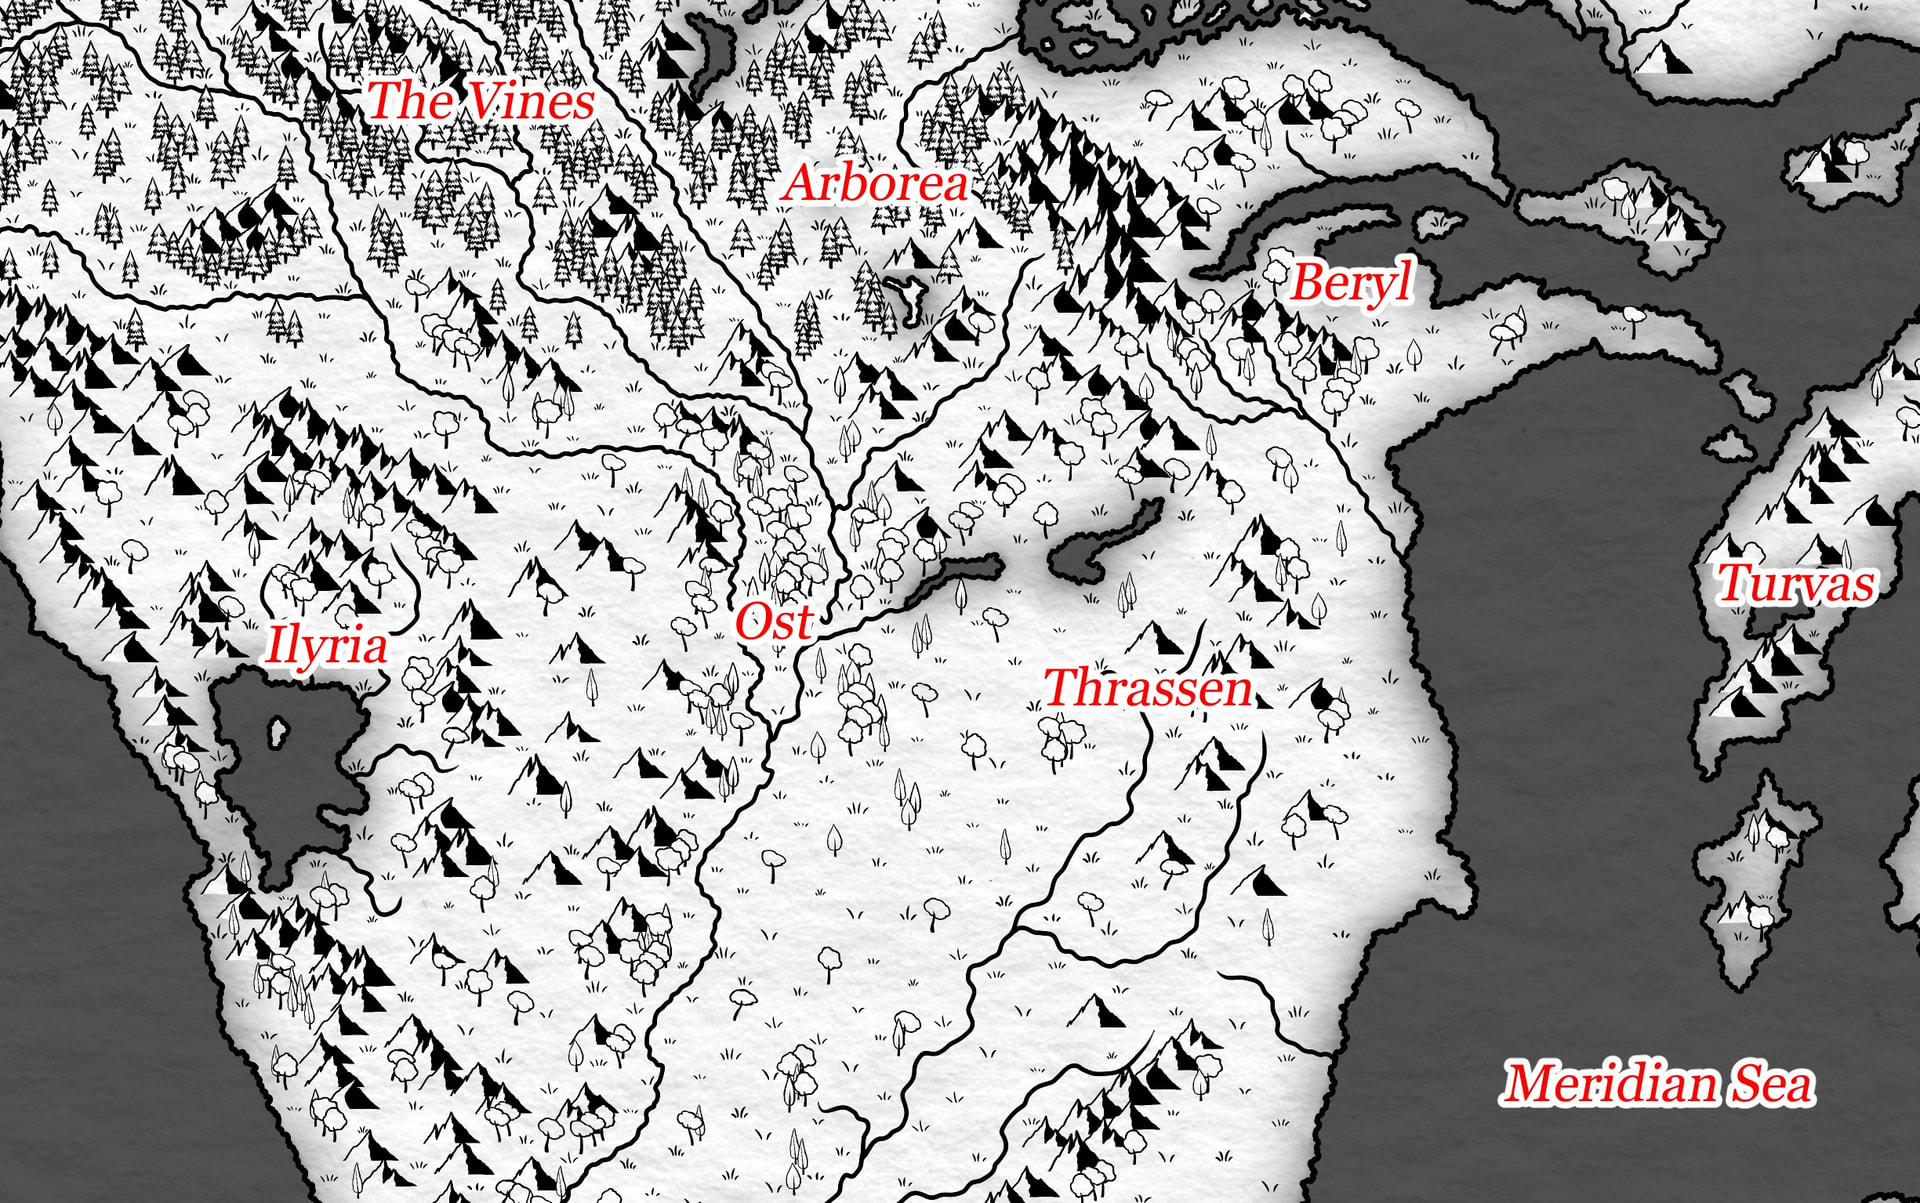
Ost is well positioned at the confluence of the West and East Vine Rivers where silk and furs flow south to Raleigh, while cotton and wine sail north. With the collapse of the Empire trade has broken down and nomadic Lyri pounce in the absence of the legions. Determined to prevent Ost from regressing into a backwater cut off from the centers of culture along the Meridian, August vows to avert the potential dark age. With mortals resonating with divine powers and the gods having divided the land during the Hunter’s Truce, games are afoot. Keep your wits about you.

Screenshots
View on Permadeath

Permadeath is an incredibly challenging narrative constraint to write around. I do not have the manpower to do this justice on a narrative level. Gameplay-wise, it will be functionally implemented, though characters will simply be too injured to fight. Combat in GNO is much more lethal than in FE since there is no healing during battle and once pinned in an enemy’s ZoC it is difficult to safely extract a character. Thus, it will operate on a ‘three-strike’ rule. Each time a character is injured, they will retreat for a few turns on the campaign map, then they can be added to an Army again. If they are injured 3 times, they can no longer be added to an Army, but they can still be used as an Admin, which is a campaign unit used to manage your cities and engage in diplomacy.

Contributors

@Ryan_Whimsy

  • Director/Developer/Writer
  • Bluesky

Paul

  • Developer - UI/UX

Bobby

  • Graphic design

Tobey

@Sphealnuke

Marcela Marceles

@cardcaph

  • Sprite artist

@Ericc

  • Music

@TrikkiNikki

Special Thanks To:

  • @Stitch for helping with some art assets earlier on in the project.
  • Emmet for help with setting up the business.
Join the team?

In the future I would like to expand the team to include more content designers/writers! Once all the core mechanics have finished being developed I want to have more help designing event chains to populate the world with narrative activity (hopefully early 2027). The sandbox design of the campaign map lends itself well to more self contained, episodic, narrative structures. Think lots of side quests. Once I am ready to onboard people, FEU will be the first to know, after all the talent for this stuff is already here, so stayed tuned!

What the position(s) will look like (not all will apply to every person):

  • Signing an NDA + Statement of Work, which will outline milestones and payment (Contractor)
    • Unfortunately, I am only set up to do this for people living in the US at present. Sorry!
  • Meeting in voice calls weekly (remote) to be briefed on project vision and sharing progress updates.
  • Reading lots of documentation for gameplay systems and lore/story.
  • Playtesting and examining Troop balance and general game balance.
  • Being taught the event scripting system and designing event chains.
    • Game is being developed in Game Maker Studio 2. You will be provided a license if necessary.
    • Light coding experience is necessary for these tasks, you do not need to know Game Maker, though it is a plus. The scripting system is self contained and very straightforward (I promise!).
  • Writing/Editing cutscenes if desired.
    • I will serve as the Chief Editor ensuring all writing is up to standard and cohesive in tone with the rest of the game.

Dev Diary Catalogue

Dev Diaries
Dev Diary Steam Link Forum Link
Dev Diary 1 - Trade Link Link
Dev Diary 2 - Combat Link Link
Dev Diary 3 - Region of Ost Link Link
Dev Diary 4 - Recruitment Link Link
Dev Diary 5 - Sieges Link Link
Dev Diary 6 - Diplomacy (probably) Coming Dec 11th…
13 Likes

Seems complex, but not in a confusing way. I like it so far.

2 Likes

I’m glad you think so! The mechanics are complex, but I think the Supply and Demand stuff is fairly intuitive. Biggest challenge is making sure the UI isn’t too overwhelming.

Oh, this is EXTREMELY my shit. I can’t wait to see when it comes out!

1 Like

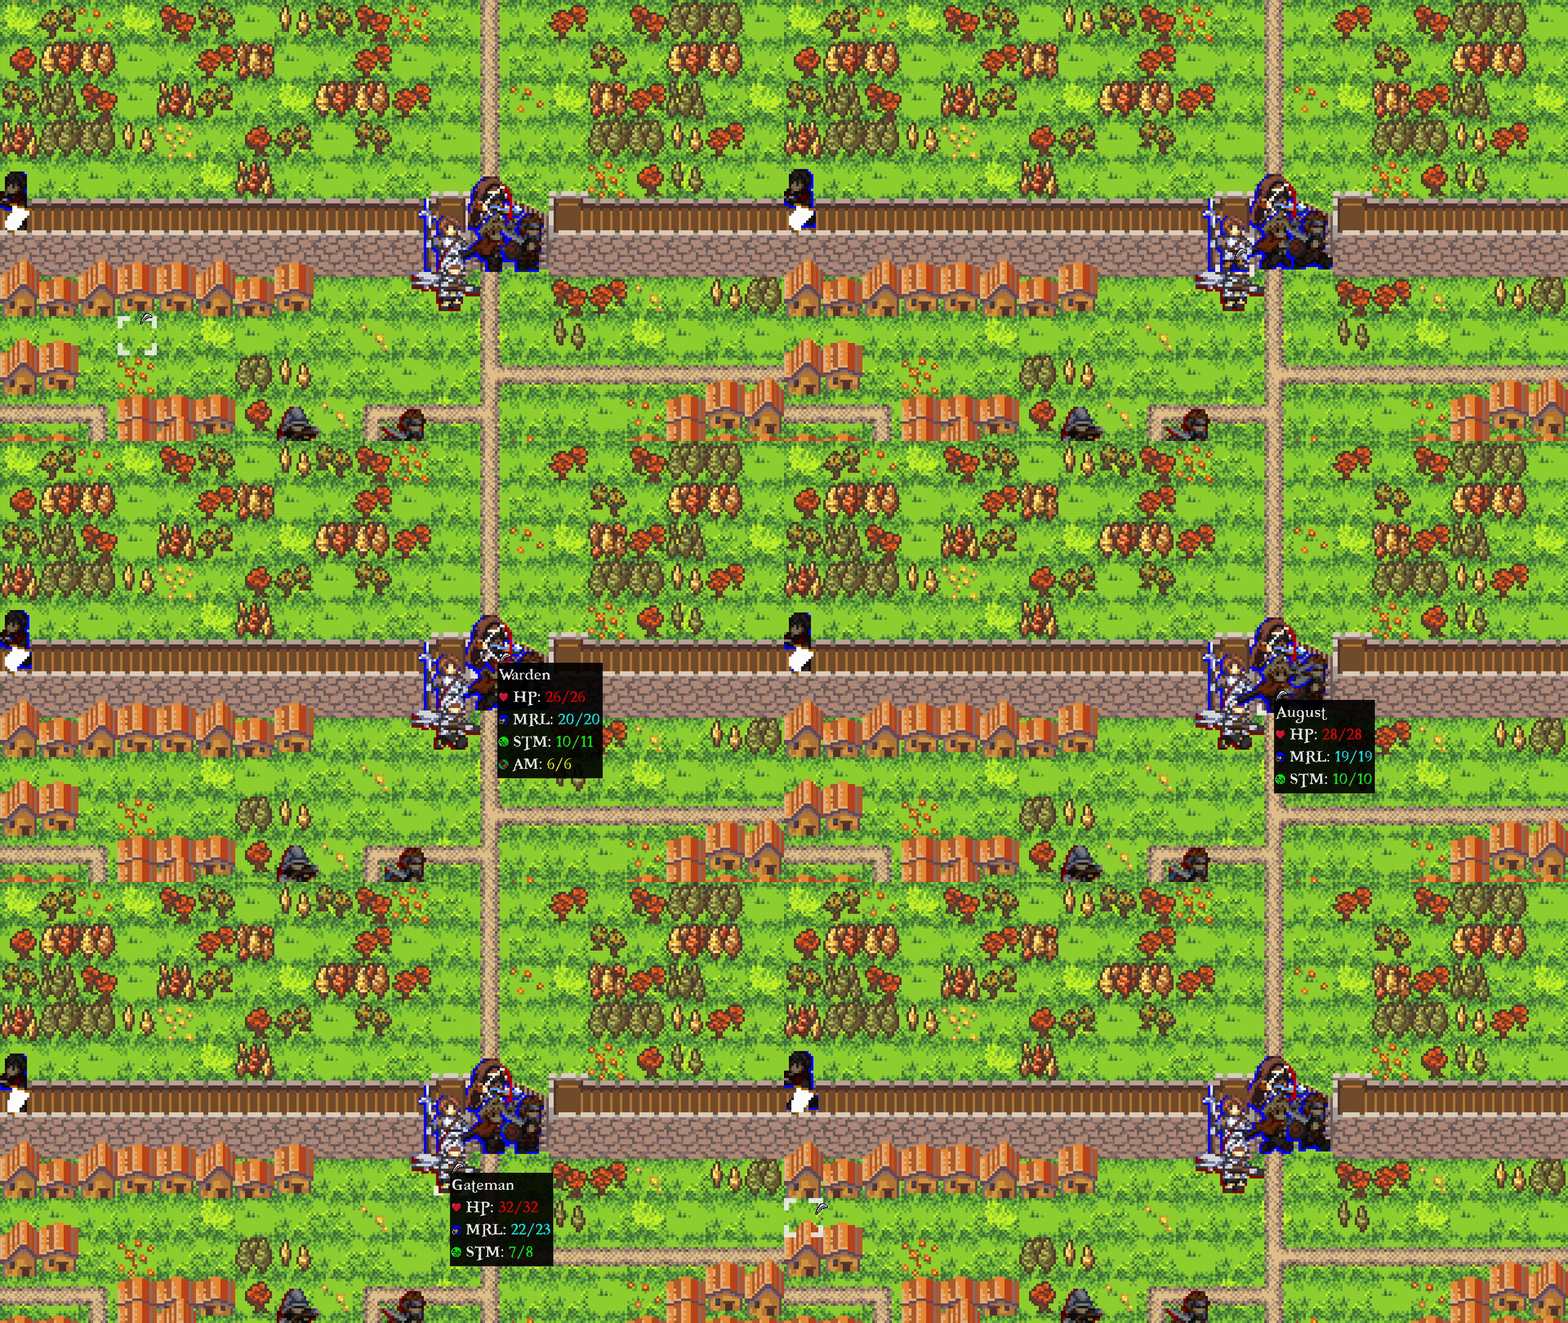
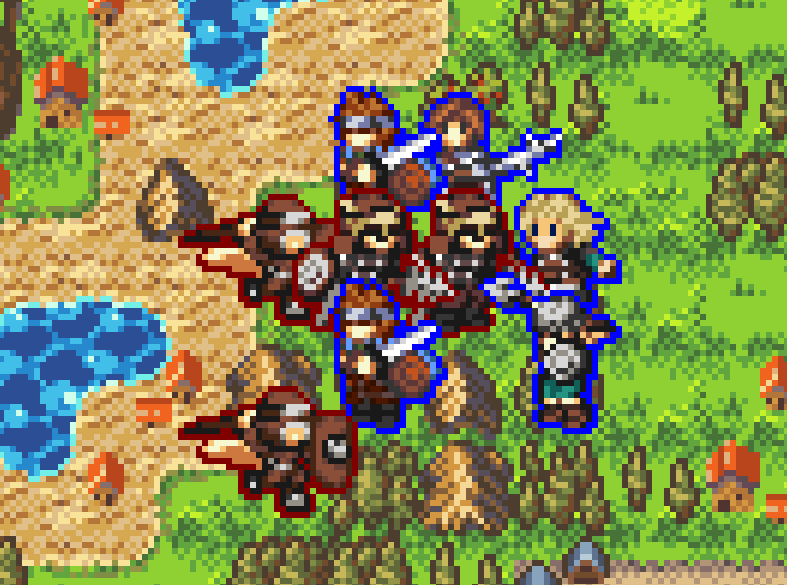
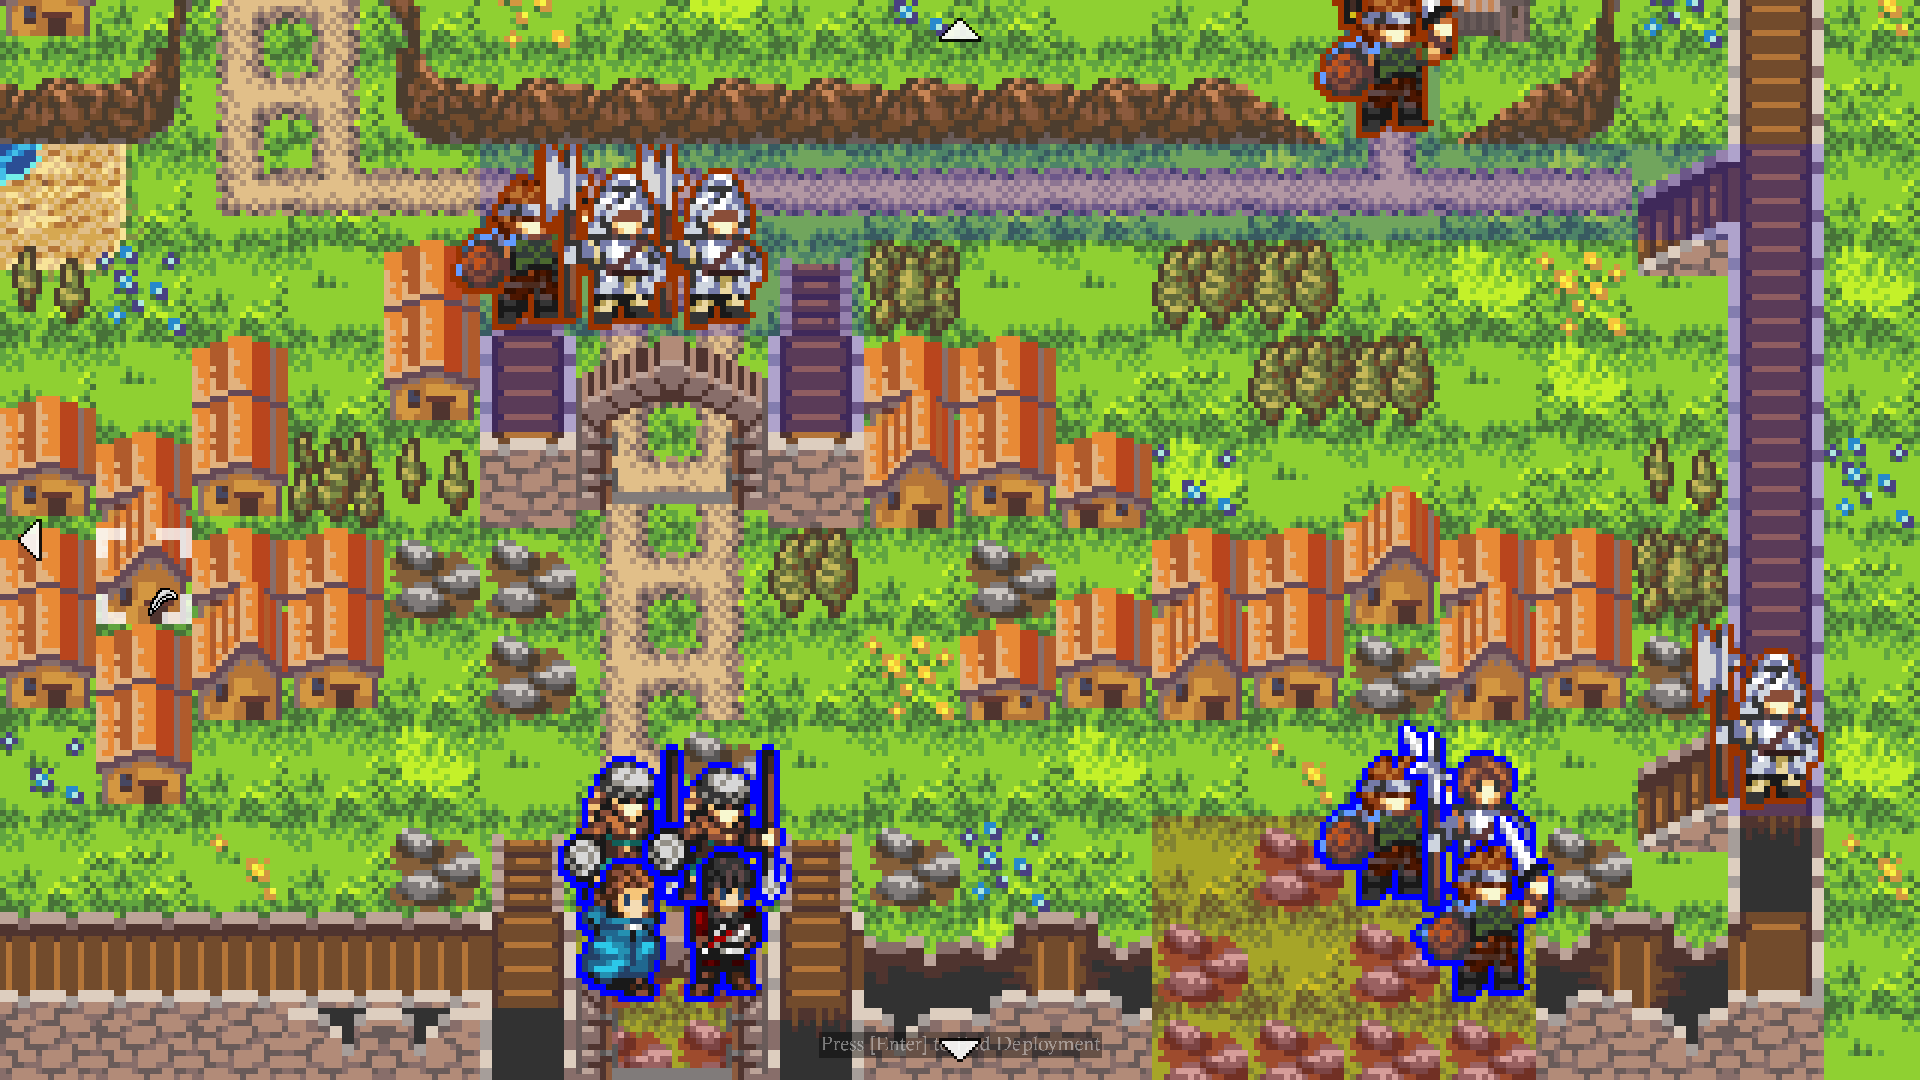
Just wishlisted. Looks really cool! I will say that it’s a little difficult to make out some of the details/boundaries of the units as they kind of blend into the background or each other.

Regardless, I’ll definitely get it when it comes out. Love the character art style.

1 Like

I’ve been thinking the same thing! I really like howthe 32x32 sprite look on the 16x16 tileset, but clarity is important. Right now something I’m thinking of is making it so when you hover over someone they come to the foreground more.

1 Like

Part of it might be the still images, the animations might help a make them more noticable. I just added an effect to make it so whoever you hover over goes to the front of the foreground. Please excuse the low quality on the gif’s compression, gives the tile set an ugly grainy look.

hover_foreground

2 Likes

This looks fire, will there be a demo for this?

2 Likes

There will, that’s the next Milestone me and the team will be working on. Plan will be to have around the first 12ish turns on the campaign set up for player to experience. Right now we’re going to be targeting January, because I’d like to show the game off at a small local convention in February. That hard date will make sure I actually stick to this promise too lol

3 Likes

i’m loving the art! its vibrancy and style is refreshing. i’ve wishlisted the game. very much looking forward to the demo and seeing how all the gameplay elements come together.

1 Like

Steam Announcement

Hello everyone, I’m going to be releasing developer diaries approximately every other Friday starting now. Every time I do so I’ll make a post here with all the info, but I’ll also include a link to the steam announcement for the dev diary as well. The main post will be edited to include a catalogue of links for all released dev diaries so you can easily find them. These are intended to be very meaty and lengthy so the content will be placed in detail panes. Now let’s get to it!

GNO Dev Diary 1 - If you give a designer a cookie...

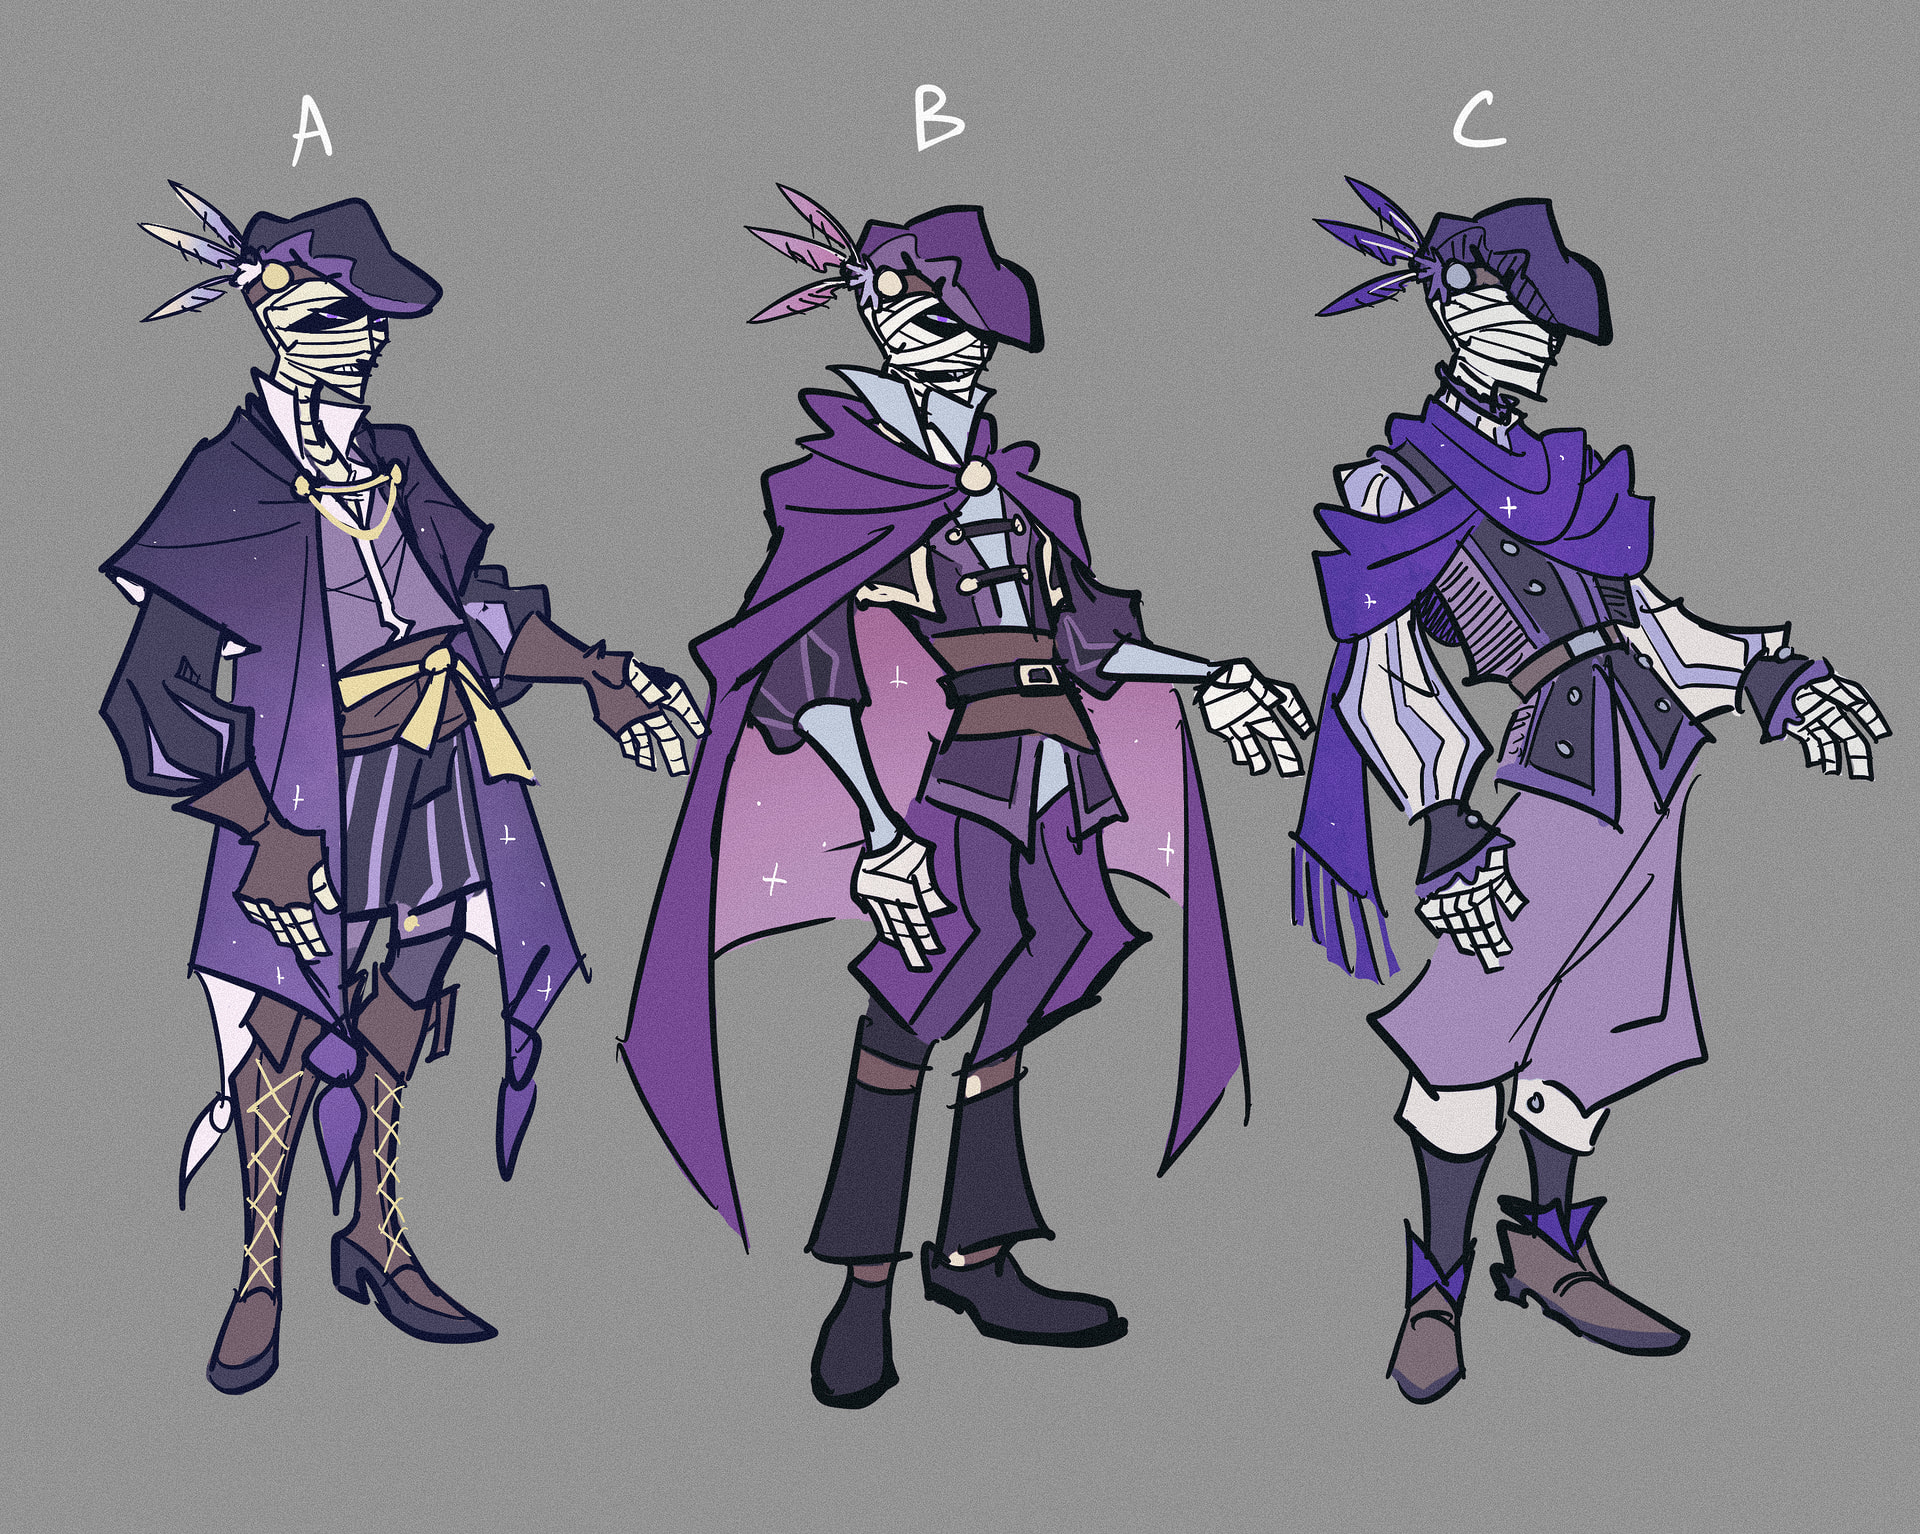
Concept art by Tobey

Hello everyone, my name is Ryan or you can call me Whimsy, and after many years of work, I am excited to begin sharing details on Gravitas: Noblesse Oblige or just GNO (gee-no) for short. At its core, GNO is a turn-based strategy RPG, with 2 layers, a campaign map and tactical battles. A kind of Fire Emblem meets Total War. Except like, way more complicated.

I think with this being the first dev diary I’m supposed to give a broad and holistic overview into the grander vision of GNO. Anyway, I’m going to spend ~1,300 words and a few screenshots talking about trade today. We’ll get to the vision in a future diary, but today, let me show you what I think is special about this project; trade mechanics baby!

If you’re not a freak for numbers this is your last chance to get off.

Where it all started

GNO started in 2020 while I was playing Imperator: Rome and I started thinking about what I wished trade was like in that game. I was an enterprising CS student at the time and I thought ‘yeah I can make that.’ I had a prototype (derogatory) in a few weeks and I started thinking about how to make a whole game out of the little simulation I had running. At the time it had no real player interaction and wasn’t much more than an ant farm to look at. It was even real time instead of turn-based at that point because I was following a Paradox Interactive model of game, but that ant farm was the cookie, and if you give a designer a cookie, they’re going to want a glass of milk.

I had a system that took geography into account, but I needed a canvas to put it on, I needed a world. So I made a map. But who would care about a funny shaped blotch of land and some seas? These places needed a history and people and conflicts and gods and a gazillion other things! The snowball was picking up speed and I continued iterating on my prototype as I improved as a writer. The design shifted to be increasingly character focused and that ended up solving a few game design problems I was facing, more on those at another point though. I was doing my yearly playthrough of FE6 when a lot of the pieces finally started clicking together on the fifth iteration of the prototype, which is now GNO. So let’s actually dig into the details of this iteration of the system.

Sectors

Obligatory WIP reminder for all screenshots.

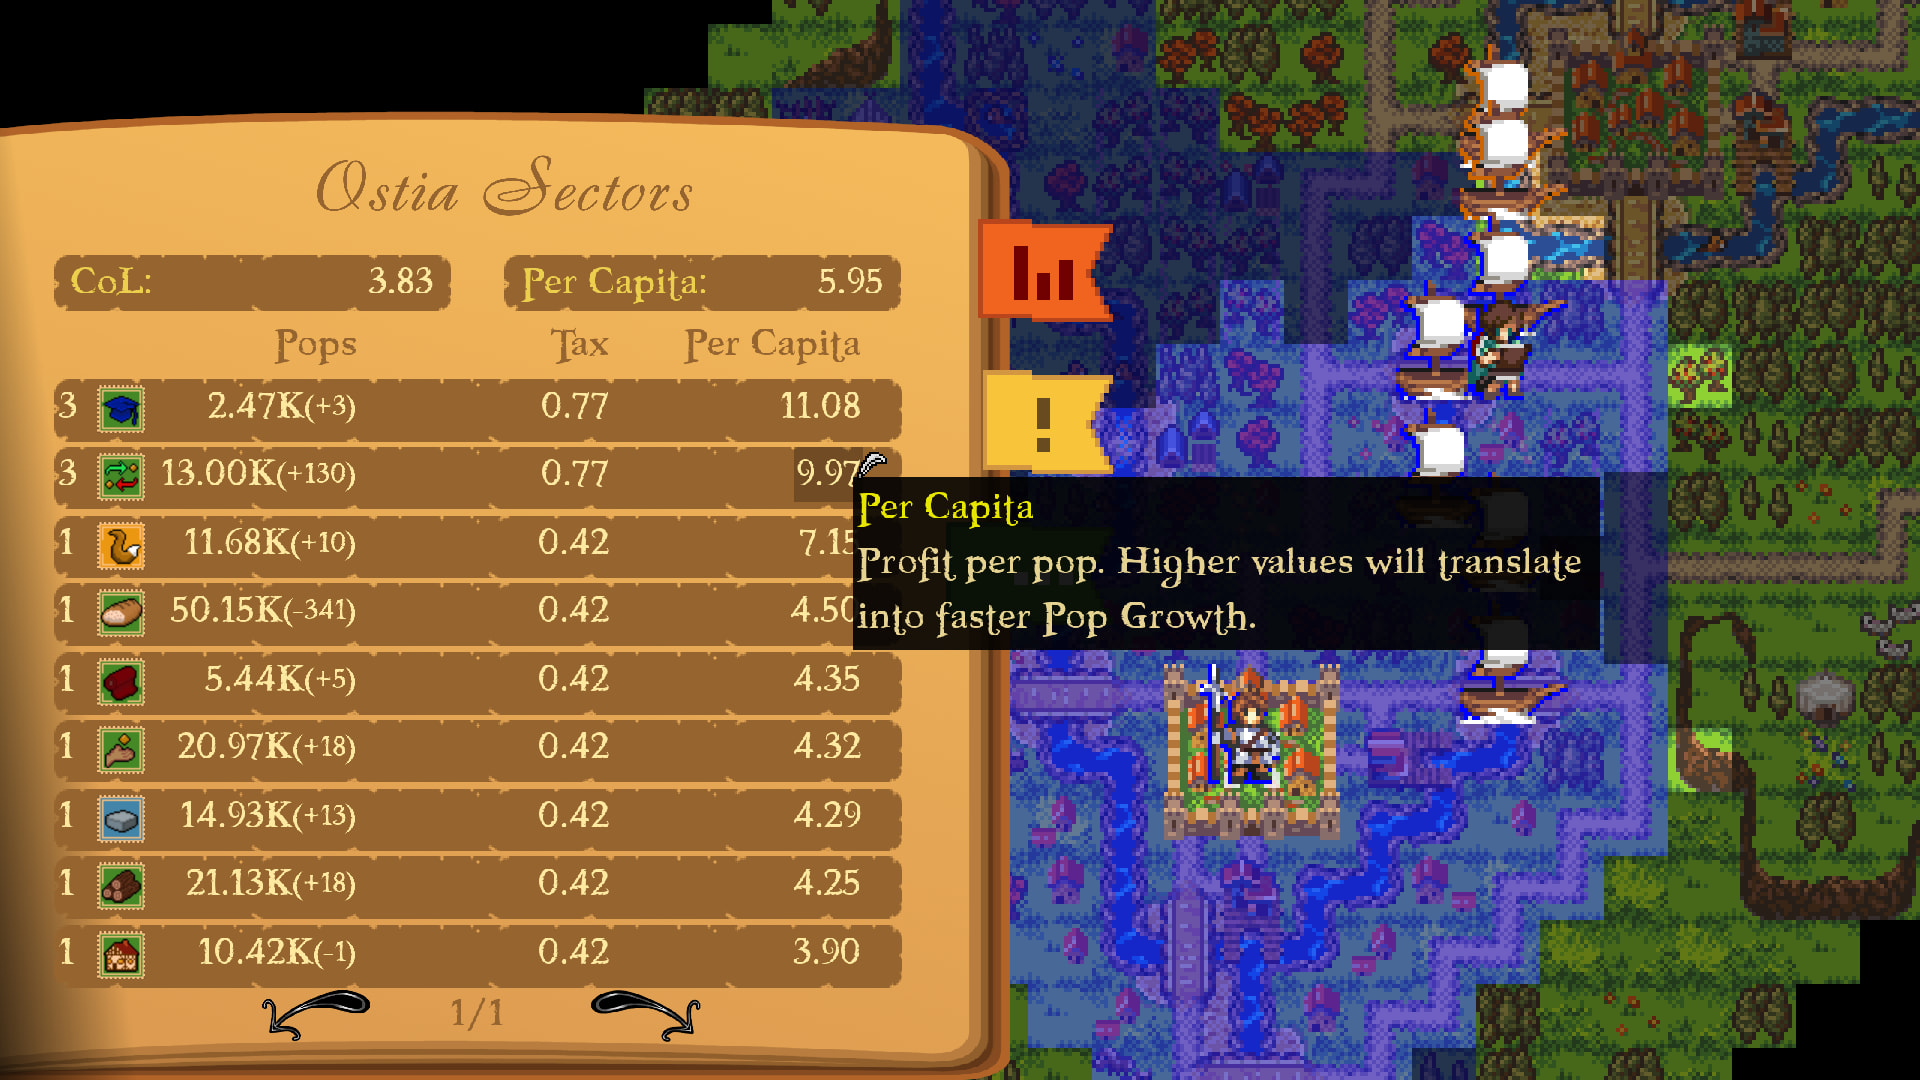
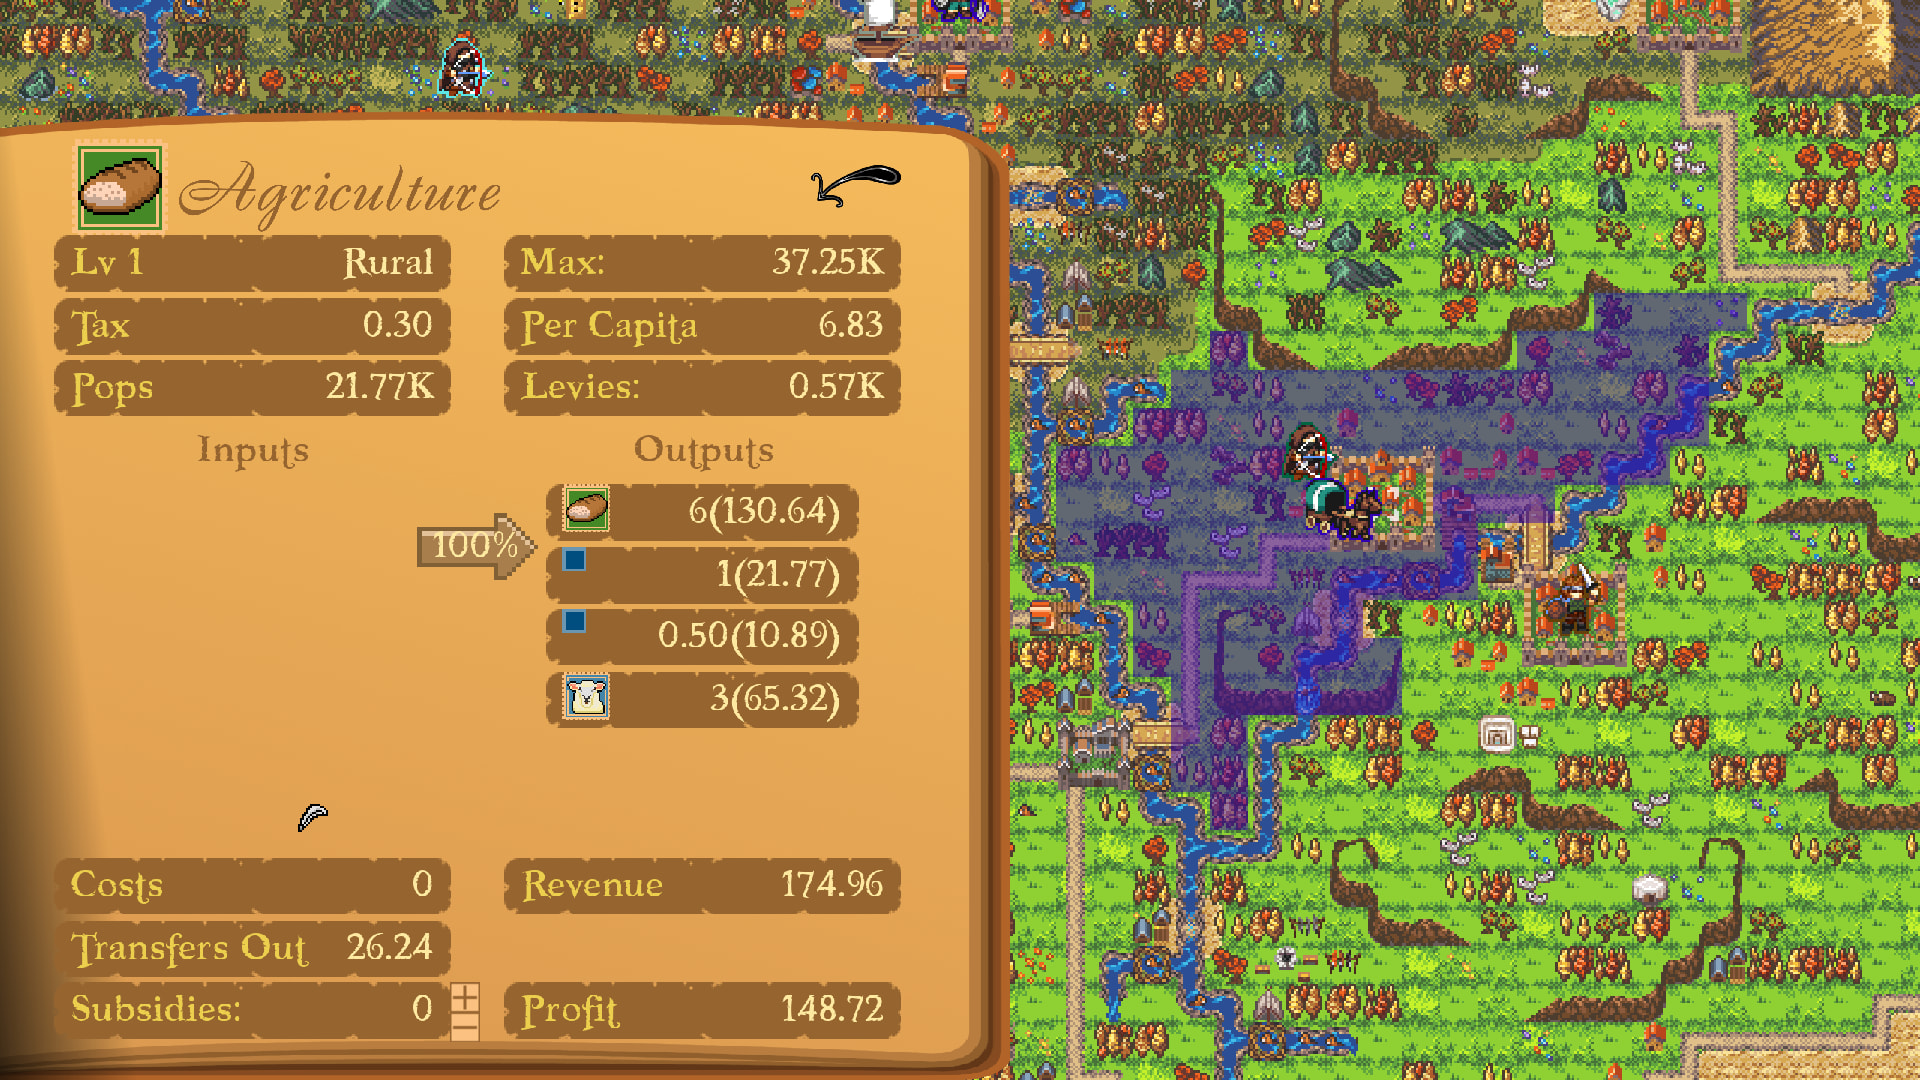
In GNO there are 100+ cities on the map. A city, for the uninitiated, is a place people usually live. Thus, every city has a population, Pops. A city is further broken up by the economic Sectors within it, representing various industries.

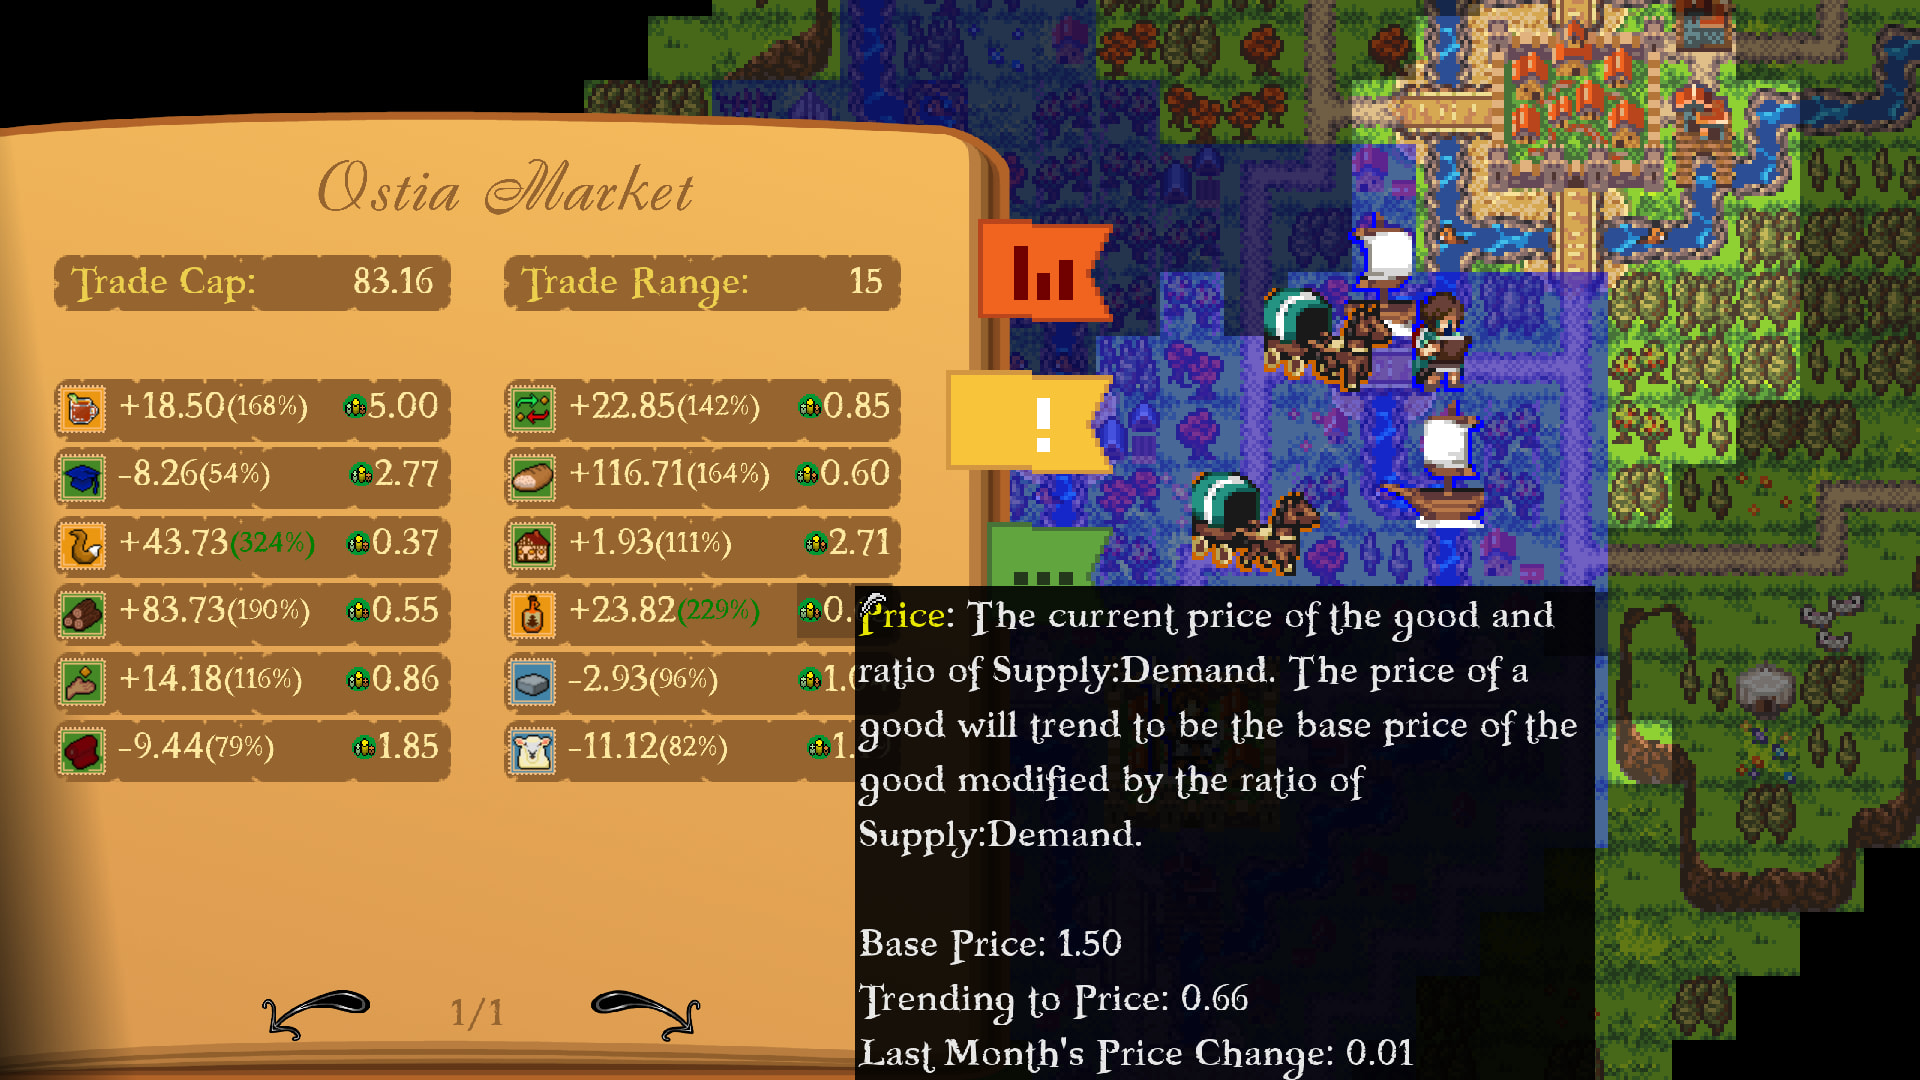
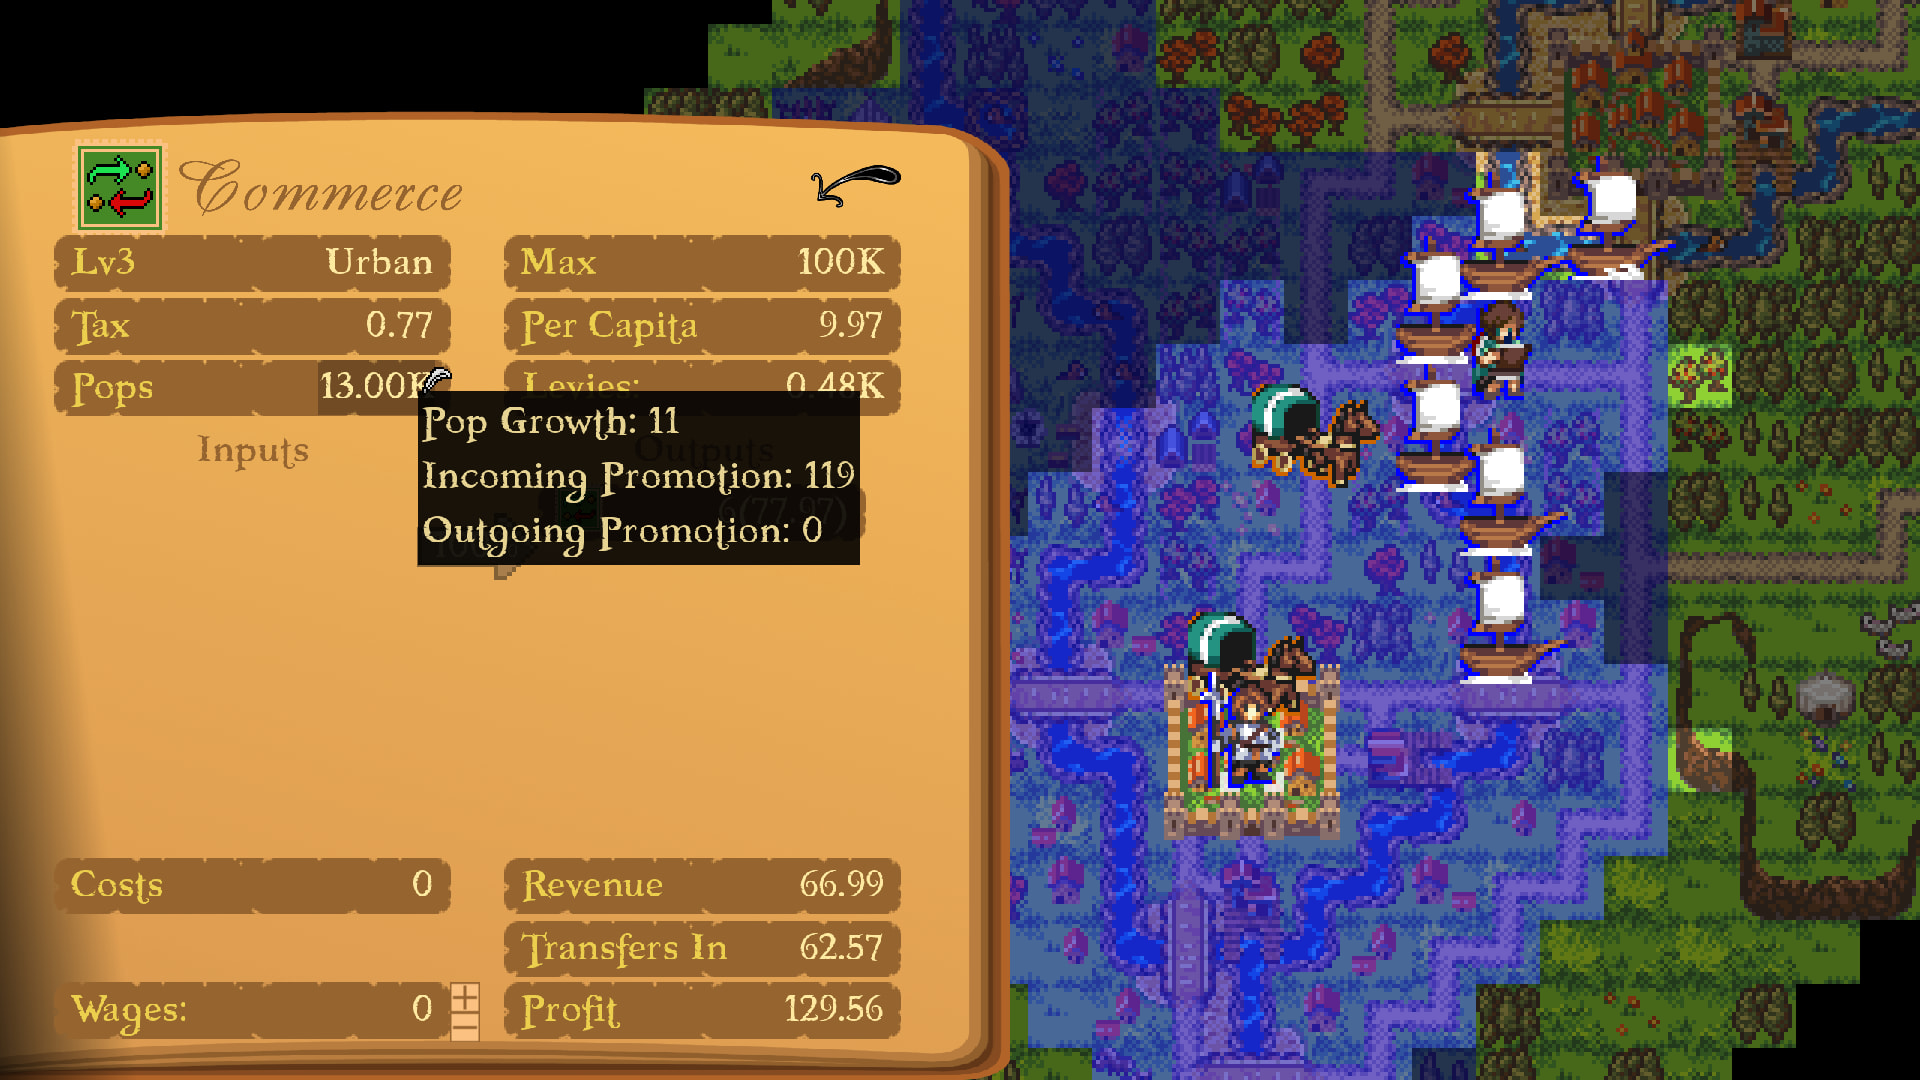
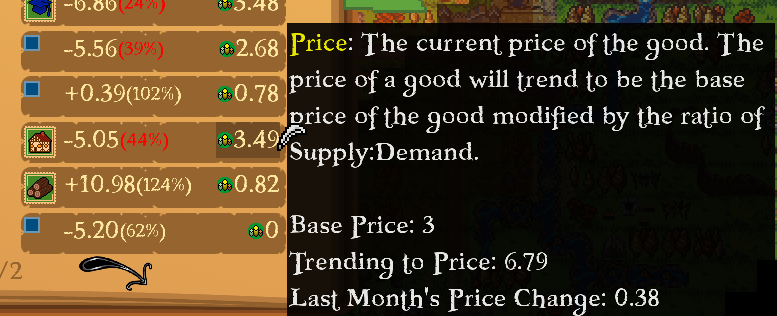
Every sector produces Goods or Services. These get added to the city’s market and are weighed against demand to determine a price for each good. The price the Sector is selling its output goods for determines their revenue and the costs to purchase any input goods are deducted to determine a final profit and then a per capita for each Pop. There might be a lot of numbers, but the concepts should be pretty intuitive. These are the base rules governing the simulation, so let’s get into some of the dynamics, shall we?

Trade Routes

Wait.

What if we took some of those goods and/or services, and moved them somewhere else!?

Now you’re thinking! The difference in prices between 2 cities creates an opportunity, so let’s exploit it for monetary rewards! So how do we do that? First thing’s first, you need a place to trade with, so step 1 is to make a friend. We’ll cover the diplomacy system another time. Once you’ve got some suckers customers to sell your surplus goods to, your city will begin to generate Trade Routes.

Let’s go over the parts you have control of, and what parts the infallible hand of the free market takes care of. Taking it from the top:

  1. The Commerce Sector generates the Commerce trade good.

  2. Every unit of the Commerce good adds 1 Trade Capacity to the city.

  3. The city will use its Trade Capacity to spawn Trade Routes.

  4. The Trade Route will automatically search every city in range, checking what import/export would be most profitable and use as much Trade Capacity to conduct that trade each turn.

  5. You can only trade surplus goods (more supply than demand) and different goods use different amounts of capacity. Some goods, like Housing, can’t be traded as they haven’t invented RVs yet.

  6. The profits from the Trade Route are Transferred to the Commerce sector after accounting for any tariffs or sales taxes.

Those are the rules governing the system, so how do you manipulate it?

  1. You can set Trade Priorities in your cities, such as targeting 200% supply of Food because you want to increase your population growth. As long as the Trade Route can find a profitable trade, it will fulfill the Trade Priority before seeking out highest profits.

  2. If you have built up a Brewing Sector, producing Beer, you could put a tariff on foreign Beer to discourage people exporting it to you as a protectionist measure to keep your domestic industry strong.

  3. If that doesn’t work, you could try altering your tax policy to lower taxes on your Brewery and Subsidize the industry. Pops from other sectors will start moving over to the more profitable Sector and you can speed it along using an Admin (on the campaign map). As pops flood in and production swells, your exports will become more competitive and you can effectively steal market share from competitors by prioritizing exports to them.

  4. By accumulating Civics you can unlock perks to specialize your city and boost production, increase trade range and plenty more.

  5. You can also make big investments in Public Works, like a University, to increase the production of the Education good and/or service. Might need to take out a loan for that one.

  6. Lastly, you can try getting a Trade Agreement with someone who has a surplus of a good you’re after, or build Roads and Ports to extend the range of your Trade Routes to access these new markets.

The Costs

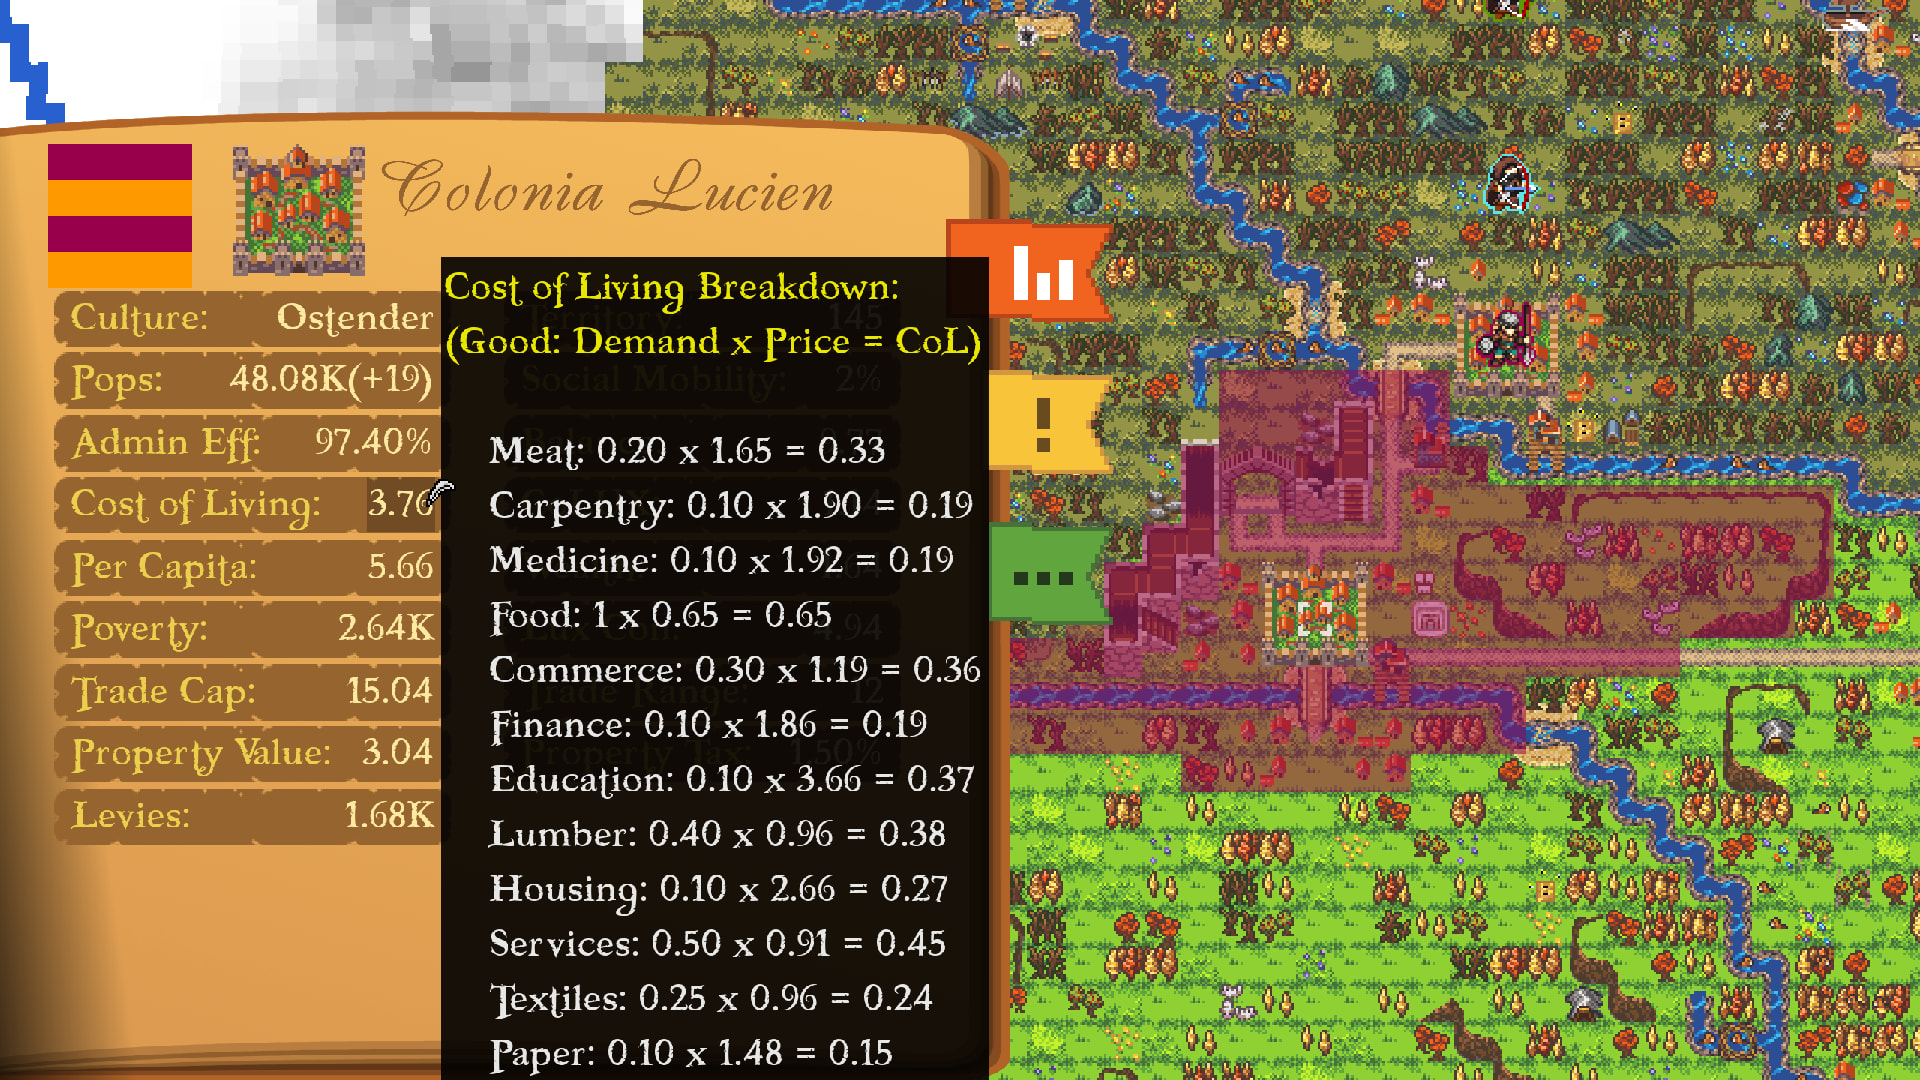
I hope your head is spinning! If it isn’t please begin factoring in that different goods factor into the Cost of Living (COL), which is a very important number. It’s how much it costs to buy all Staple Goods, like Food, Housing, Medicine, etc. Anyone with a per capita after taxes below the COL will be considered to be living in Poverty and can dynamically spawn on the map as Bandits who will begin raiding, interrupting your trade. Is it worth the opportunity cost to lower COL instead of going after the highest value trades or Civics to increase incomes? I haven’t even really figured it out yet!

Is it spinning yet? Well what about CoLUX? You know, CoLUX, Cost of Luxuries? The total cost to buy all available Luxuries in the city, if you have more money after COL and taxes your pops will buy as many luxuries as they can. If they can buy everything in the city, their demand for luxuries will begin to rise, resulting in higher prices and stimulating growth. Wealthy cities will begin developing into insatiable beasts to feed, devouring all imports that enter its hungry maw.

If you’re still not spinning, let me know what you’ve been diagnosed with. I might need to see someone for that too. That’s enough for today. Please wishlist if you haven’t already and follow to receive notifications for upcoming dev diaries and news. The next one will be about combat. Thank you so much for reading!

I would love to hear your thoughts and opinions on everything that’s here! Also don’t be shy to ask clarifying questions!

2 Likes

Content Rating: 16+ (References to alcohol, strong language)
Intro

Today I’ll be sharing the second developer diary for Gravitas: Noblesse Oblige [GNO] with you all.

Read time: ~10-15 min

Word Count: ~2500

Dev Diary 2 - Combat

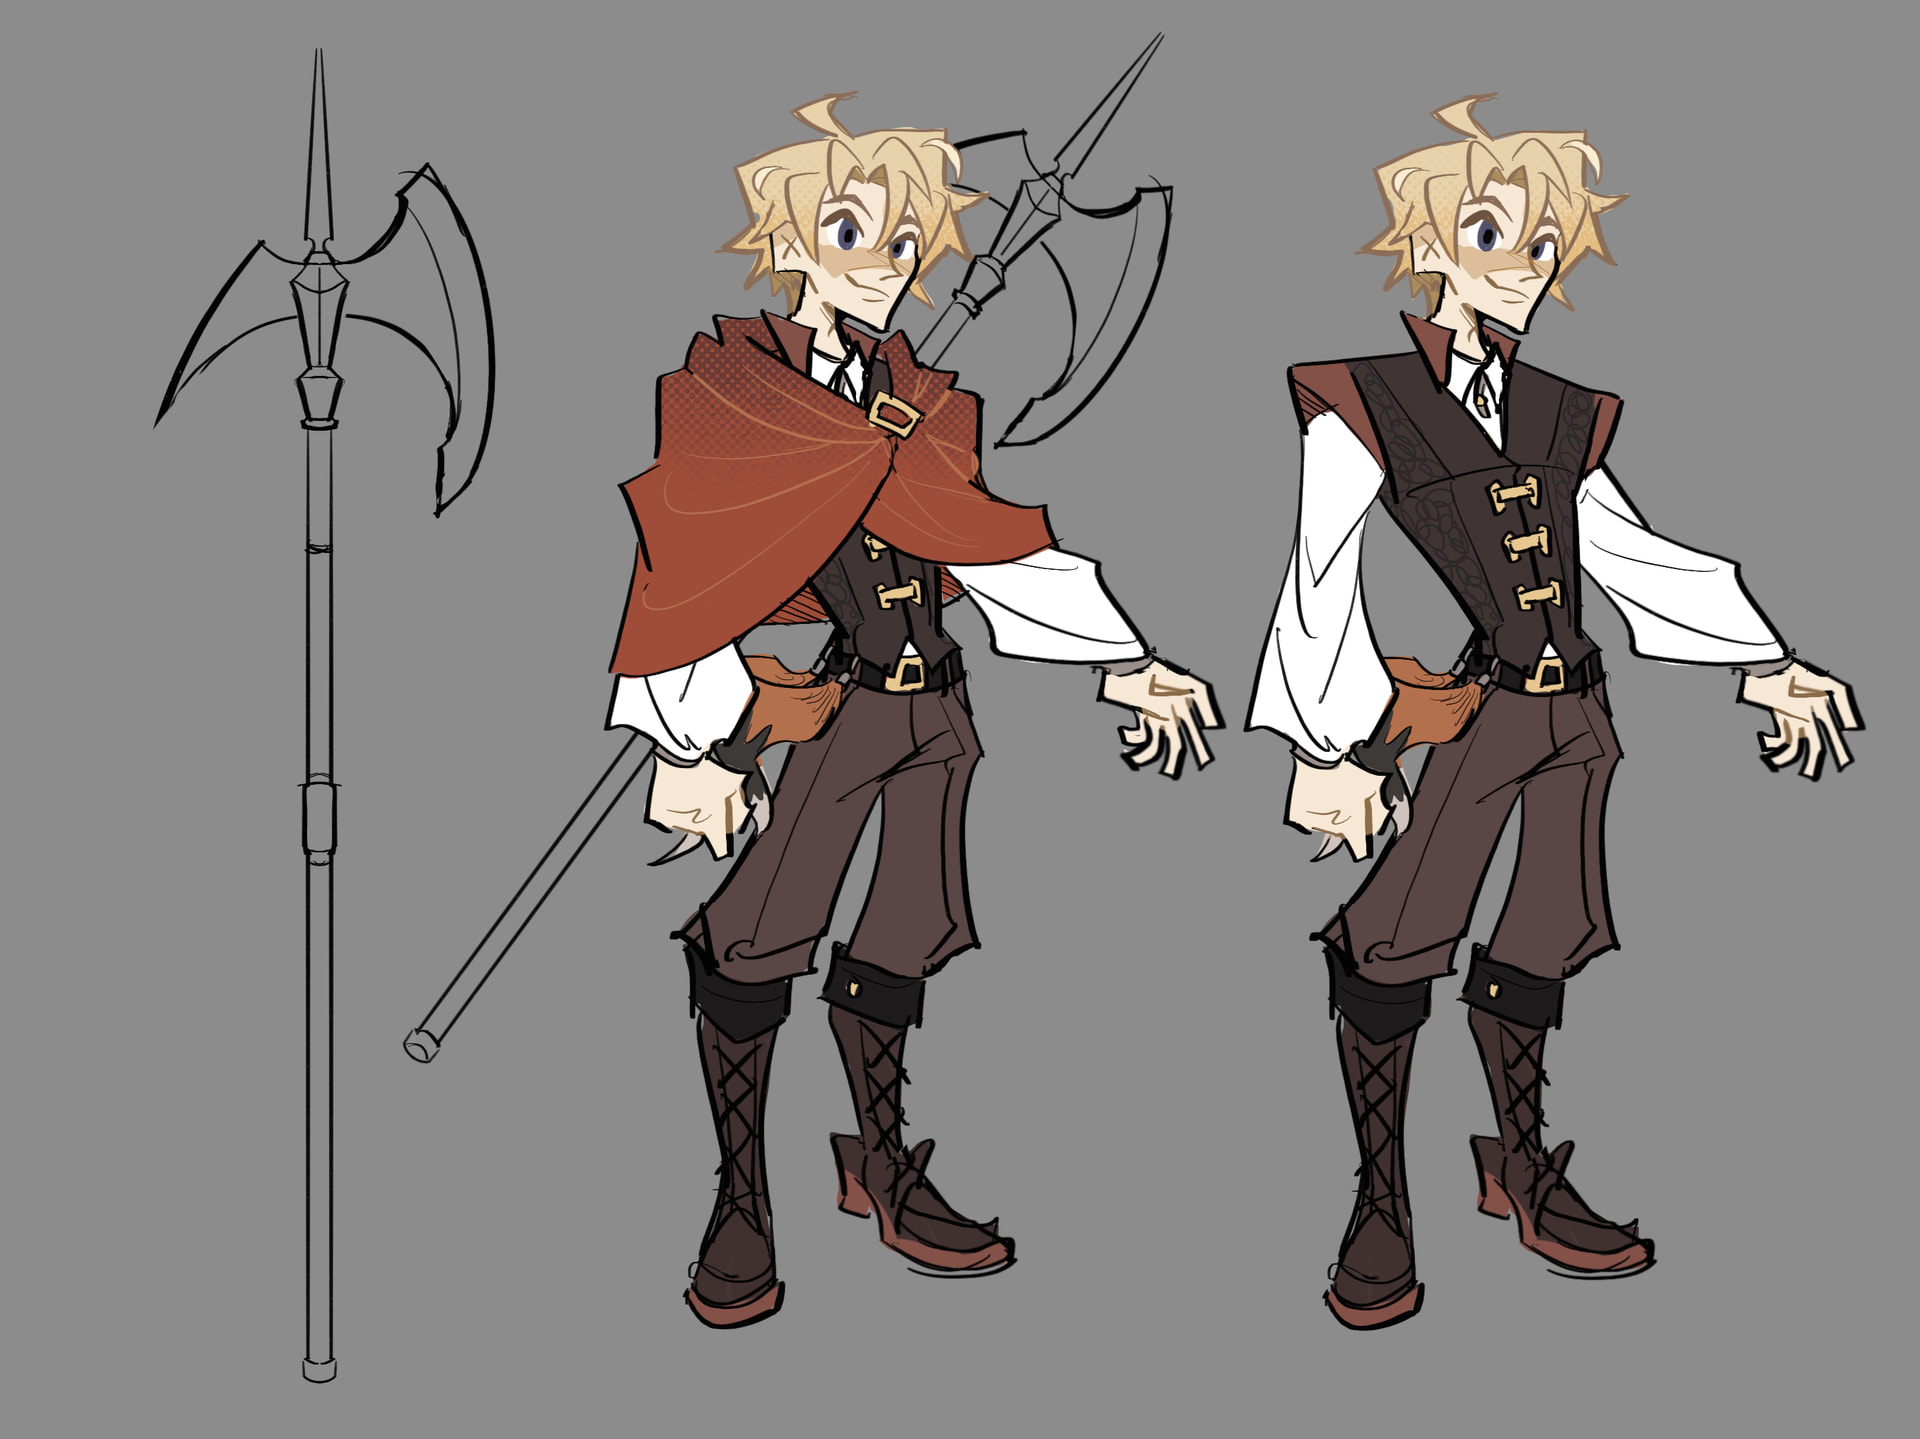
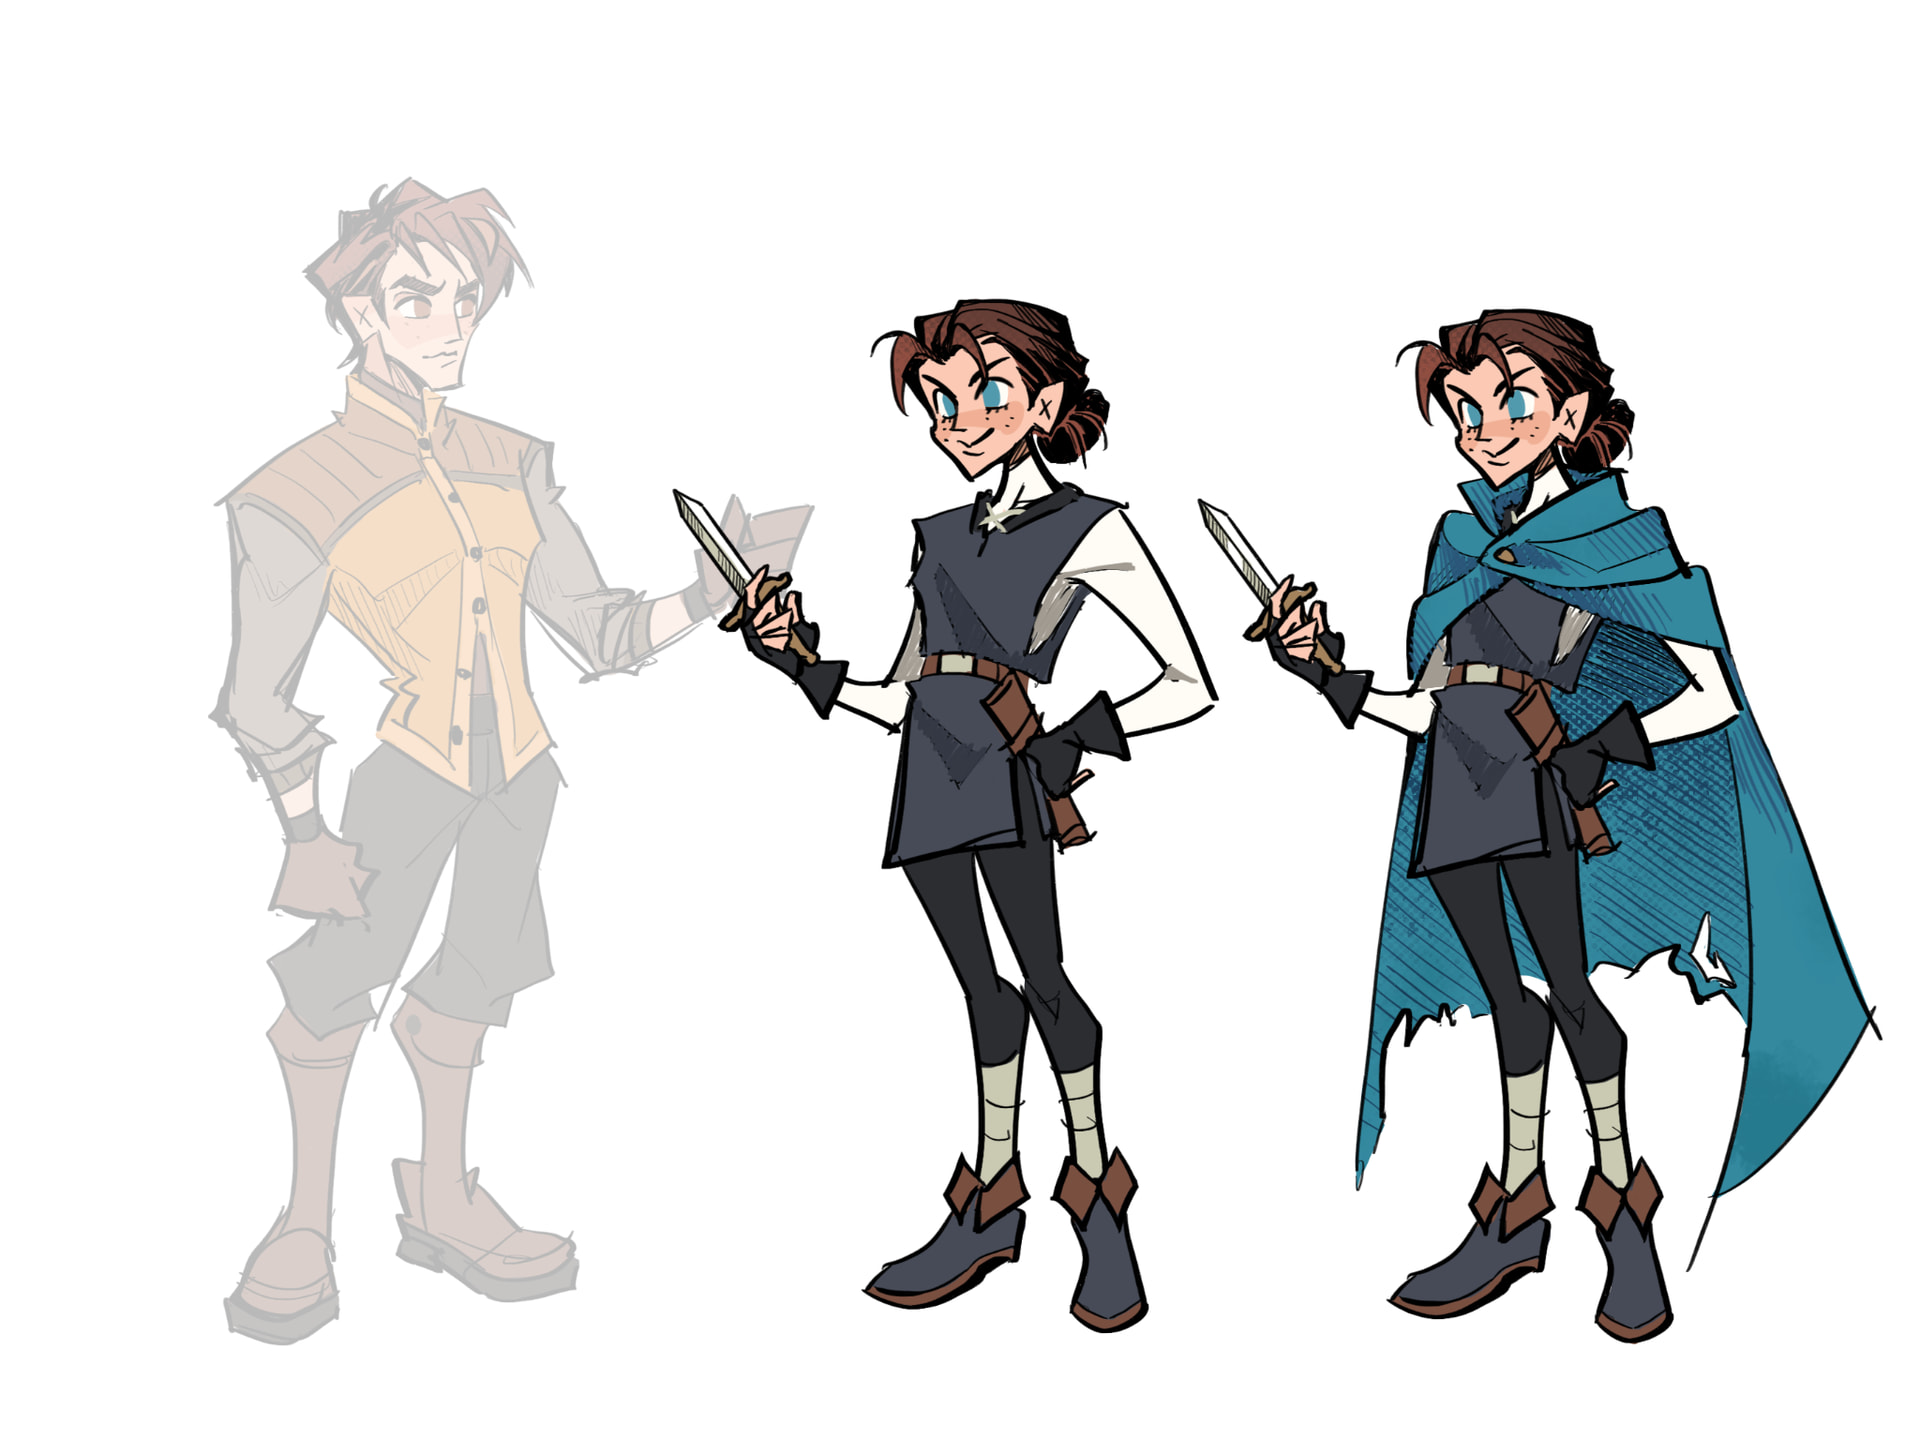
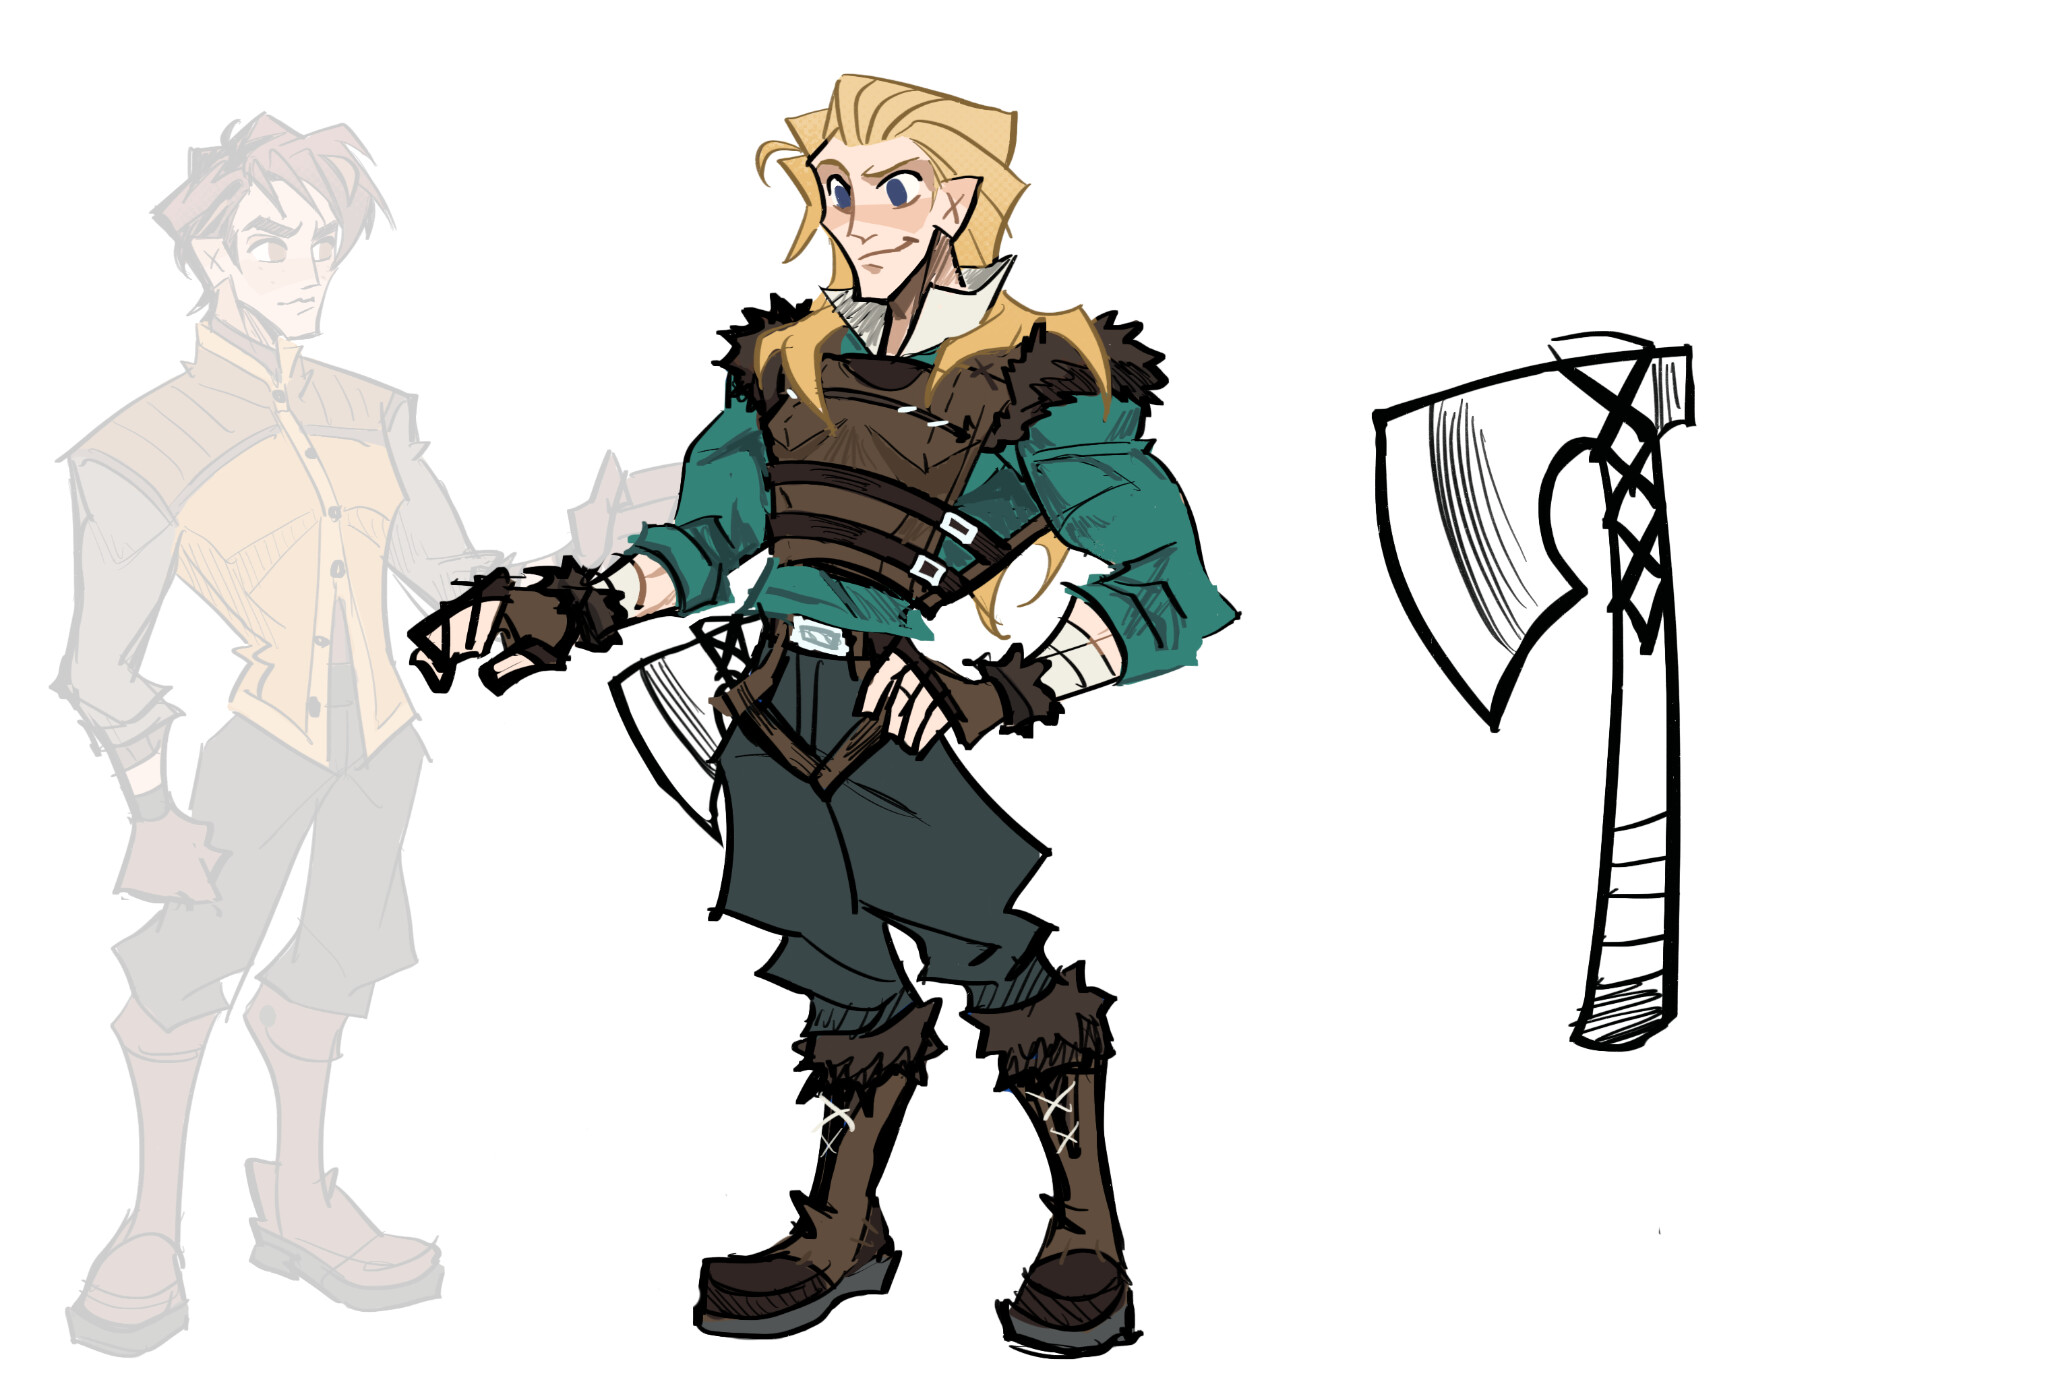
Above: Concept art of Oliver. Art by Tobey.

In this dev diary I’m going to walk you through a battle I set up to highlight the various mechanics you’ll see in the game, but I’ll also include a list of the key mechanics I will be discussing:

  • Deployment

  • Troops and Abilities

  • Turn Order & Phases

  • Zone of Control

  • Charge Bonuses

  • Flanking

  • Morale

Also worth noting here a few major differences to Fire Emblem, those being that there are no counter attacks, and there is no doubling. The notion of an enemy phase or player phase unit is not really a thing in GNO, instead play is generally more aggressive. Also, you’ll see ‘Ostia’ pop up in a few places here. I named a city Ostia as a reference to the historic port of Rome and have realized that in hindsight that will lead to confusion among other FE fans, because for some reason that didn’t dawn on me for ages. I have been calling it Ostia for years now and I will not be changing it.

Now then, onto the battle!

Battlefields & Deployment

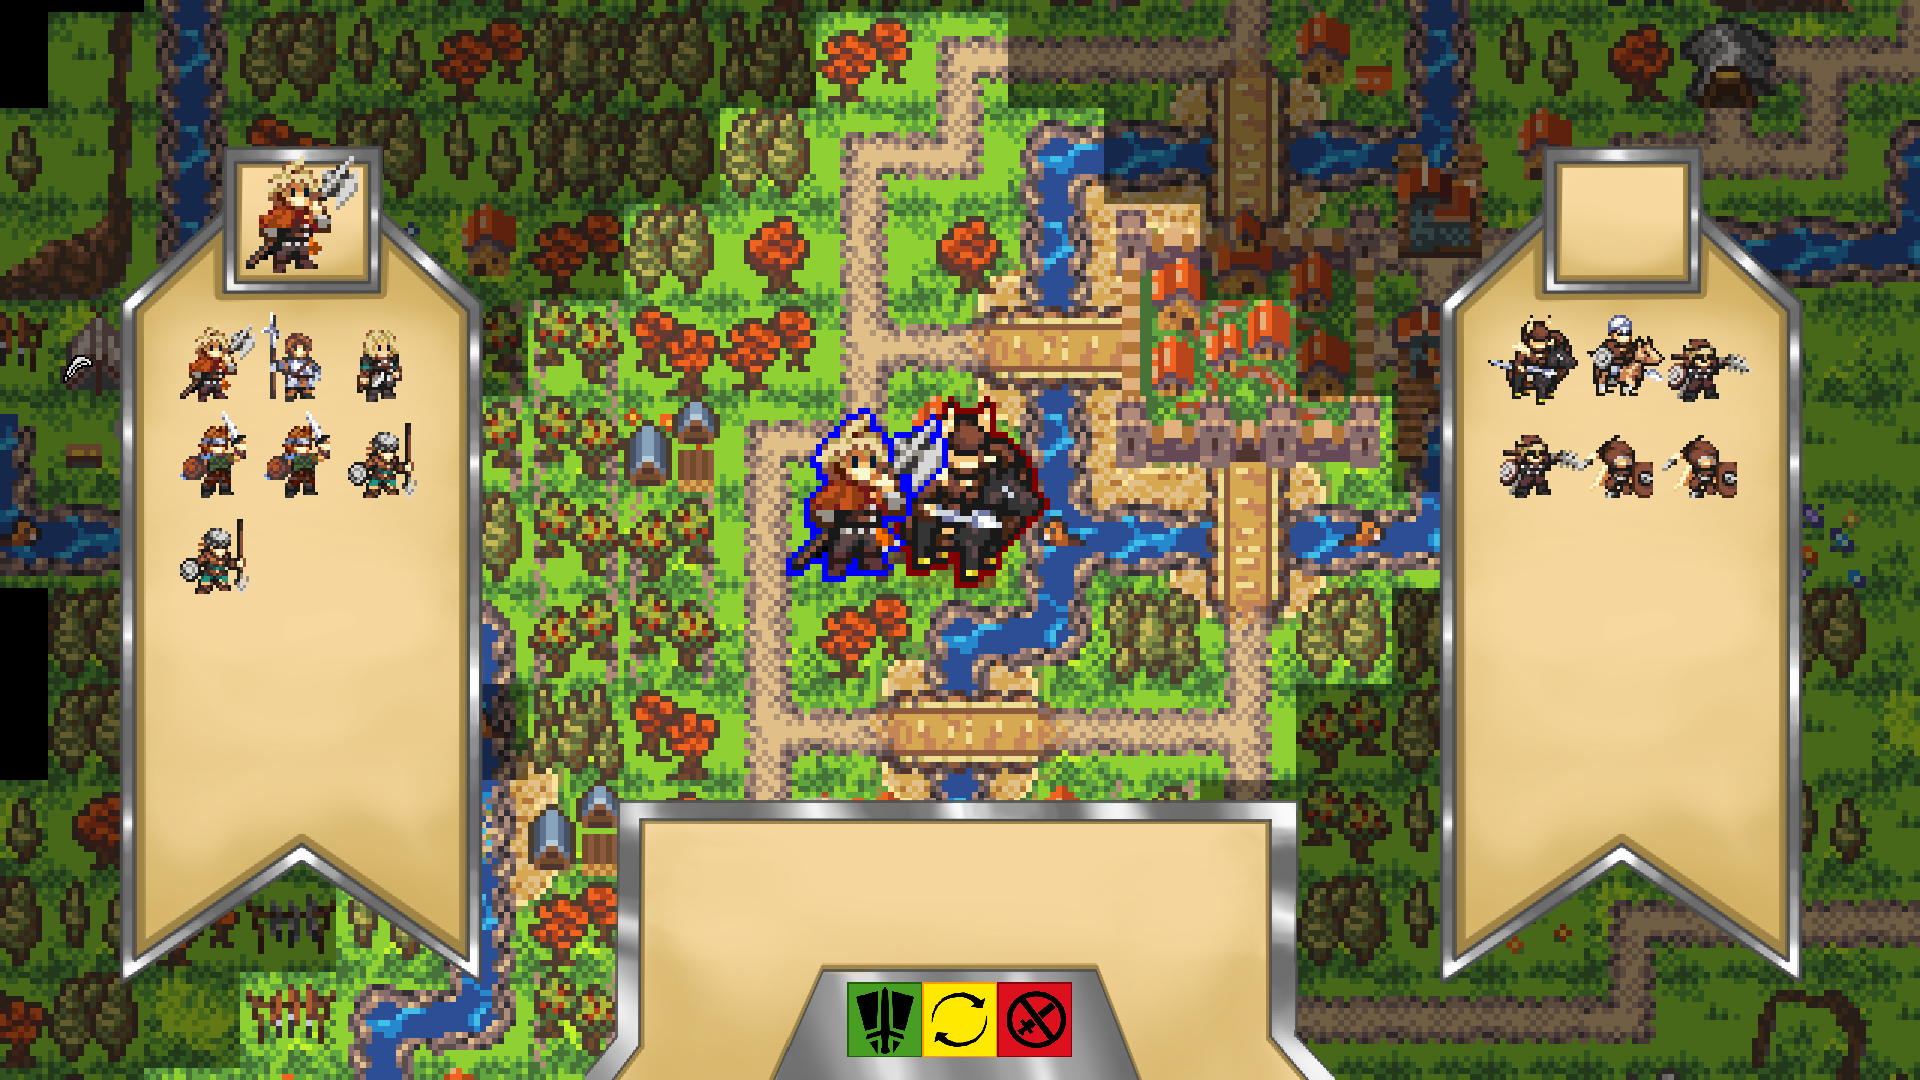
Obligatory WIP reminder for all screenshots. In the near future we’re doing a big revision to the UI/UX during battles to add some clarity for the player, so I won’t be talking much about the interface as it is subject to a lot of change at the moment.

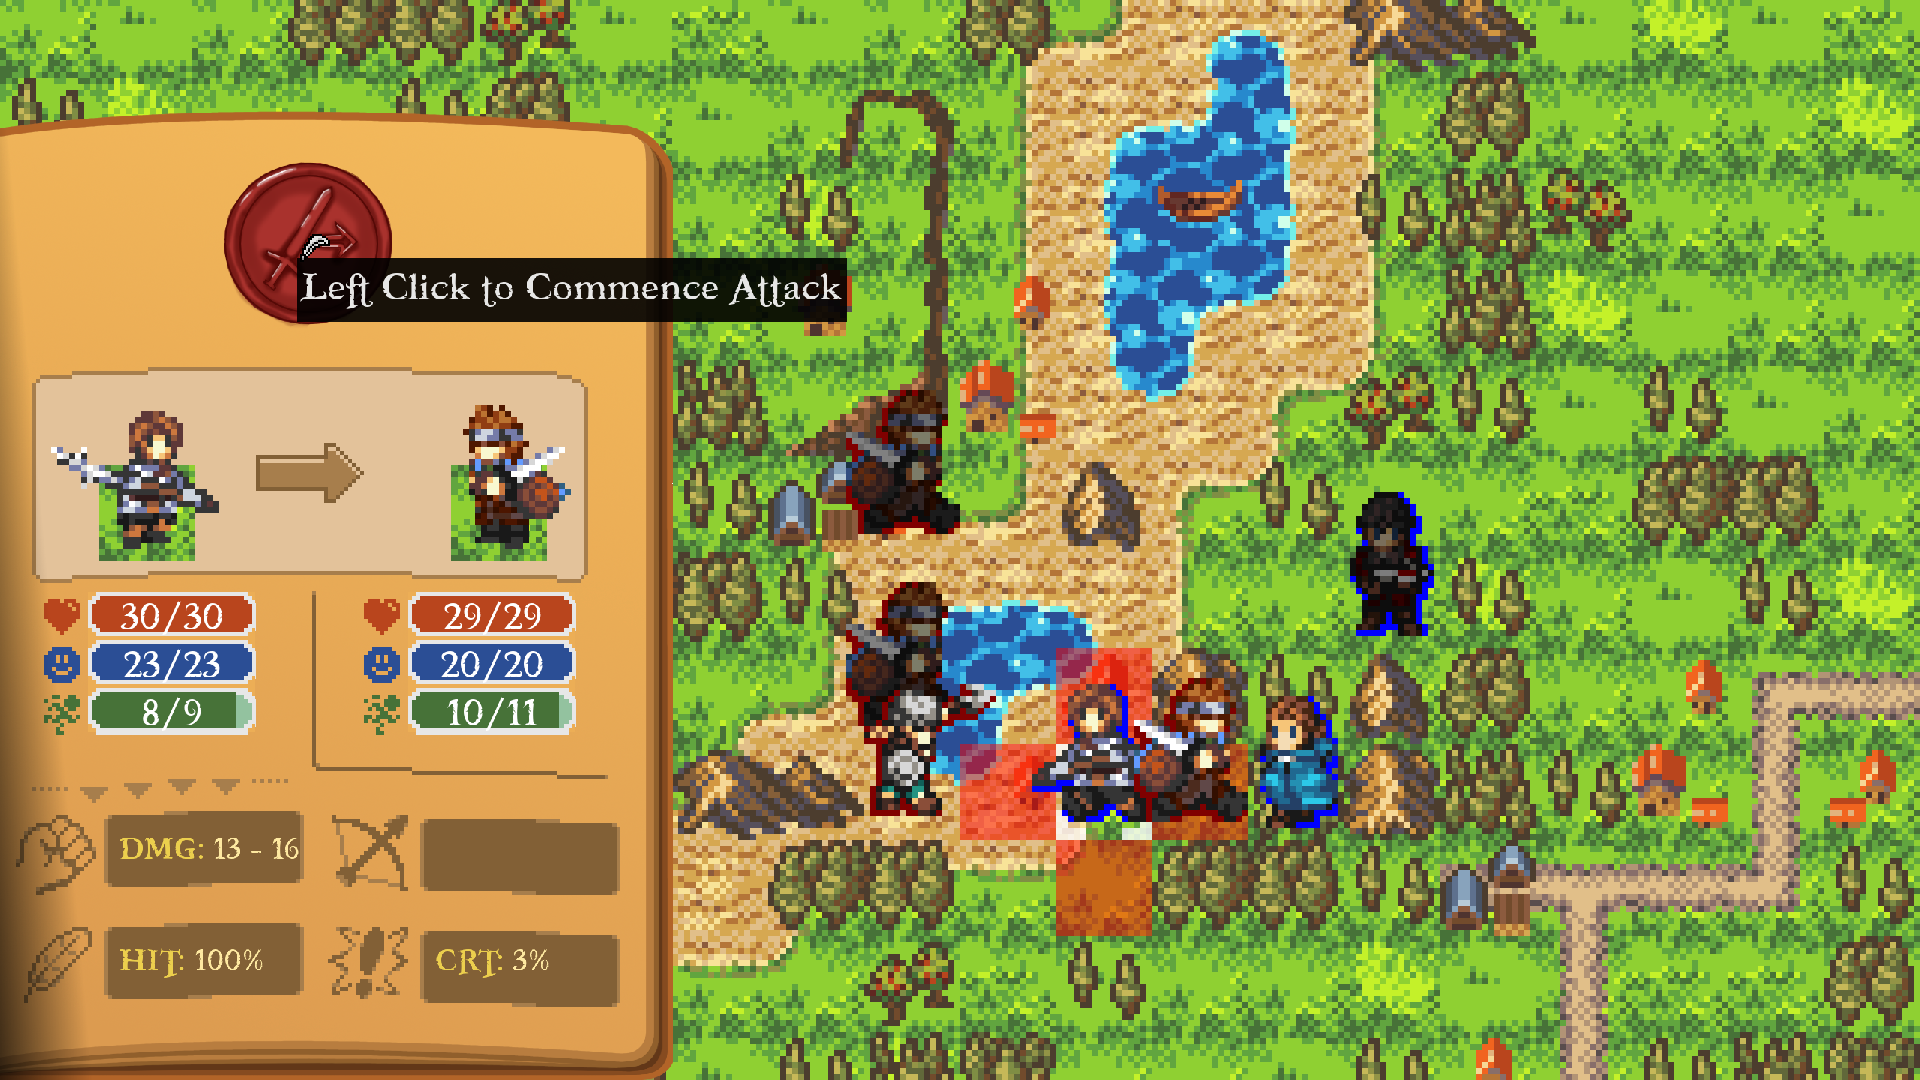
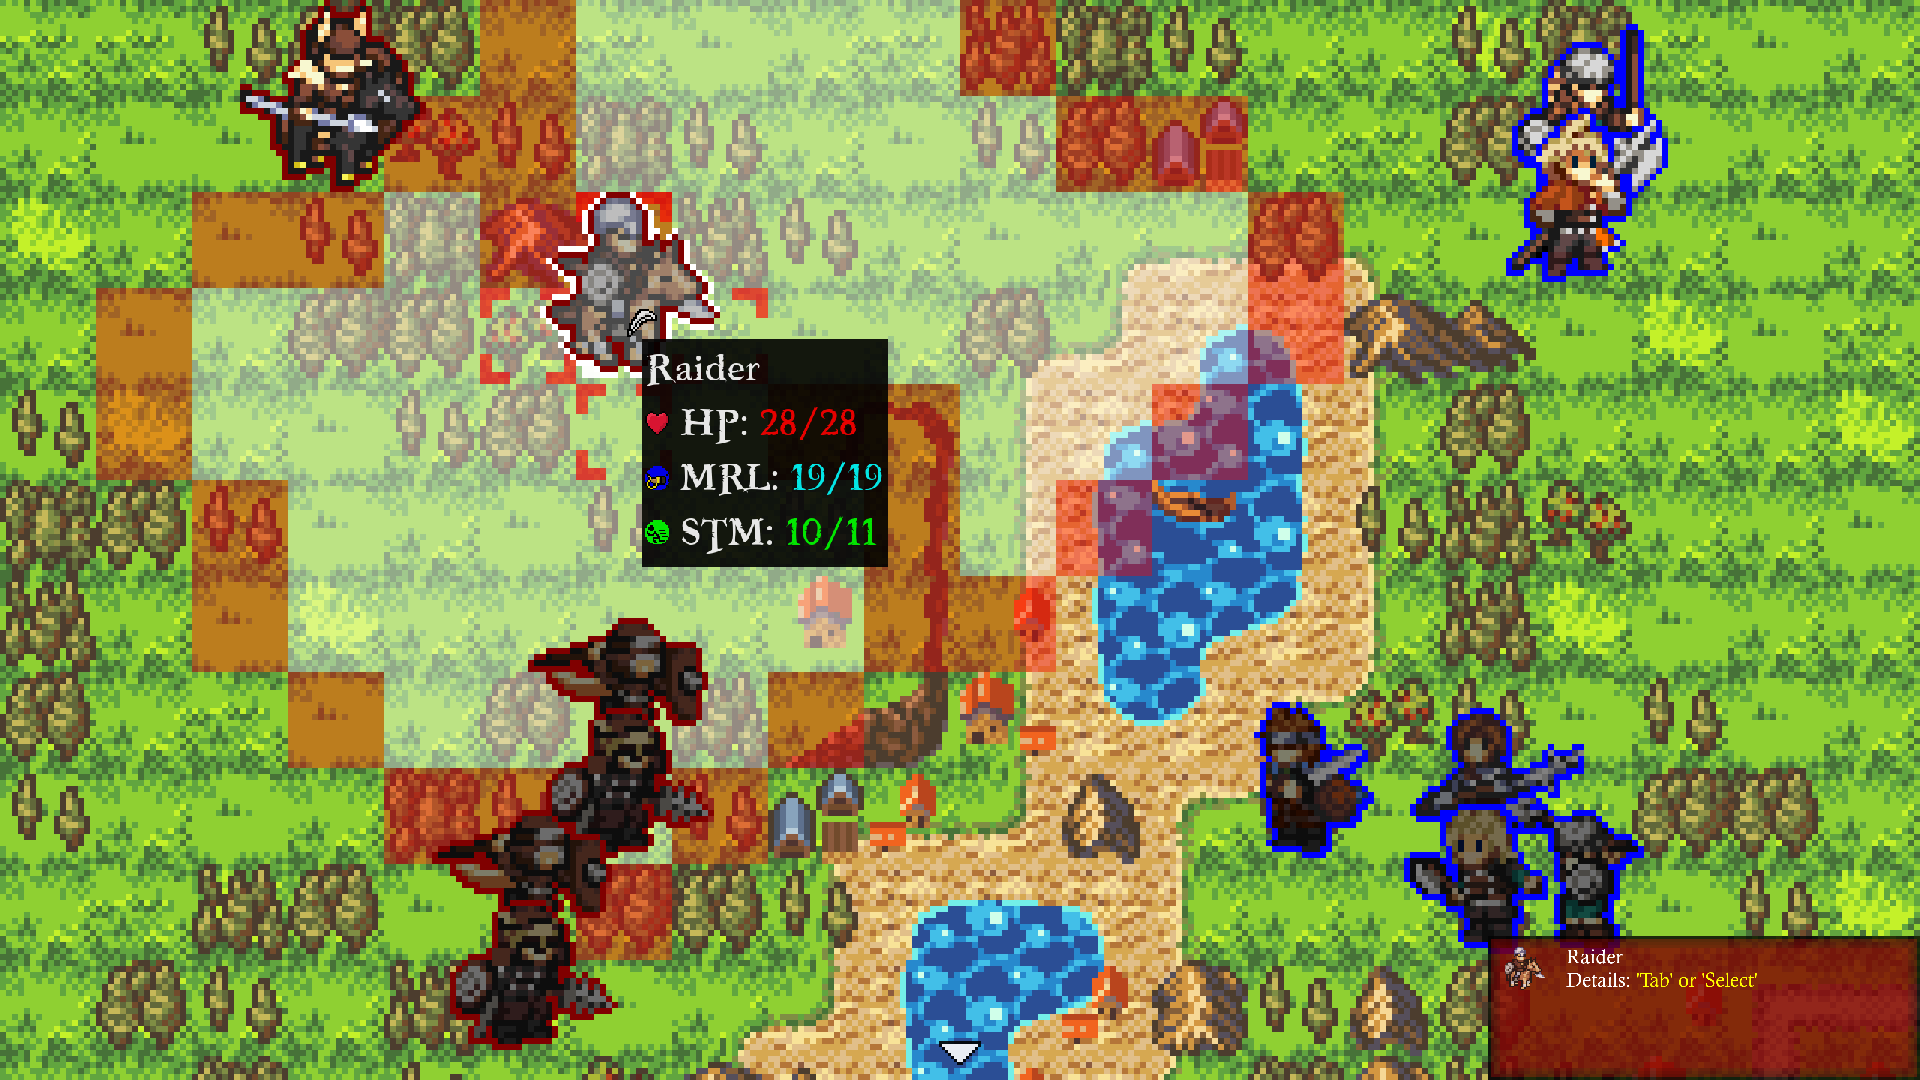
In the battle preview above we can see both our Troops and the enemy before we commit to the attack. Since we’re attacking them in the forest, we get a forest map once commencing the battle, which you can see here:

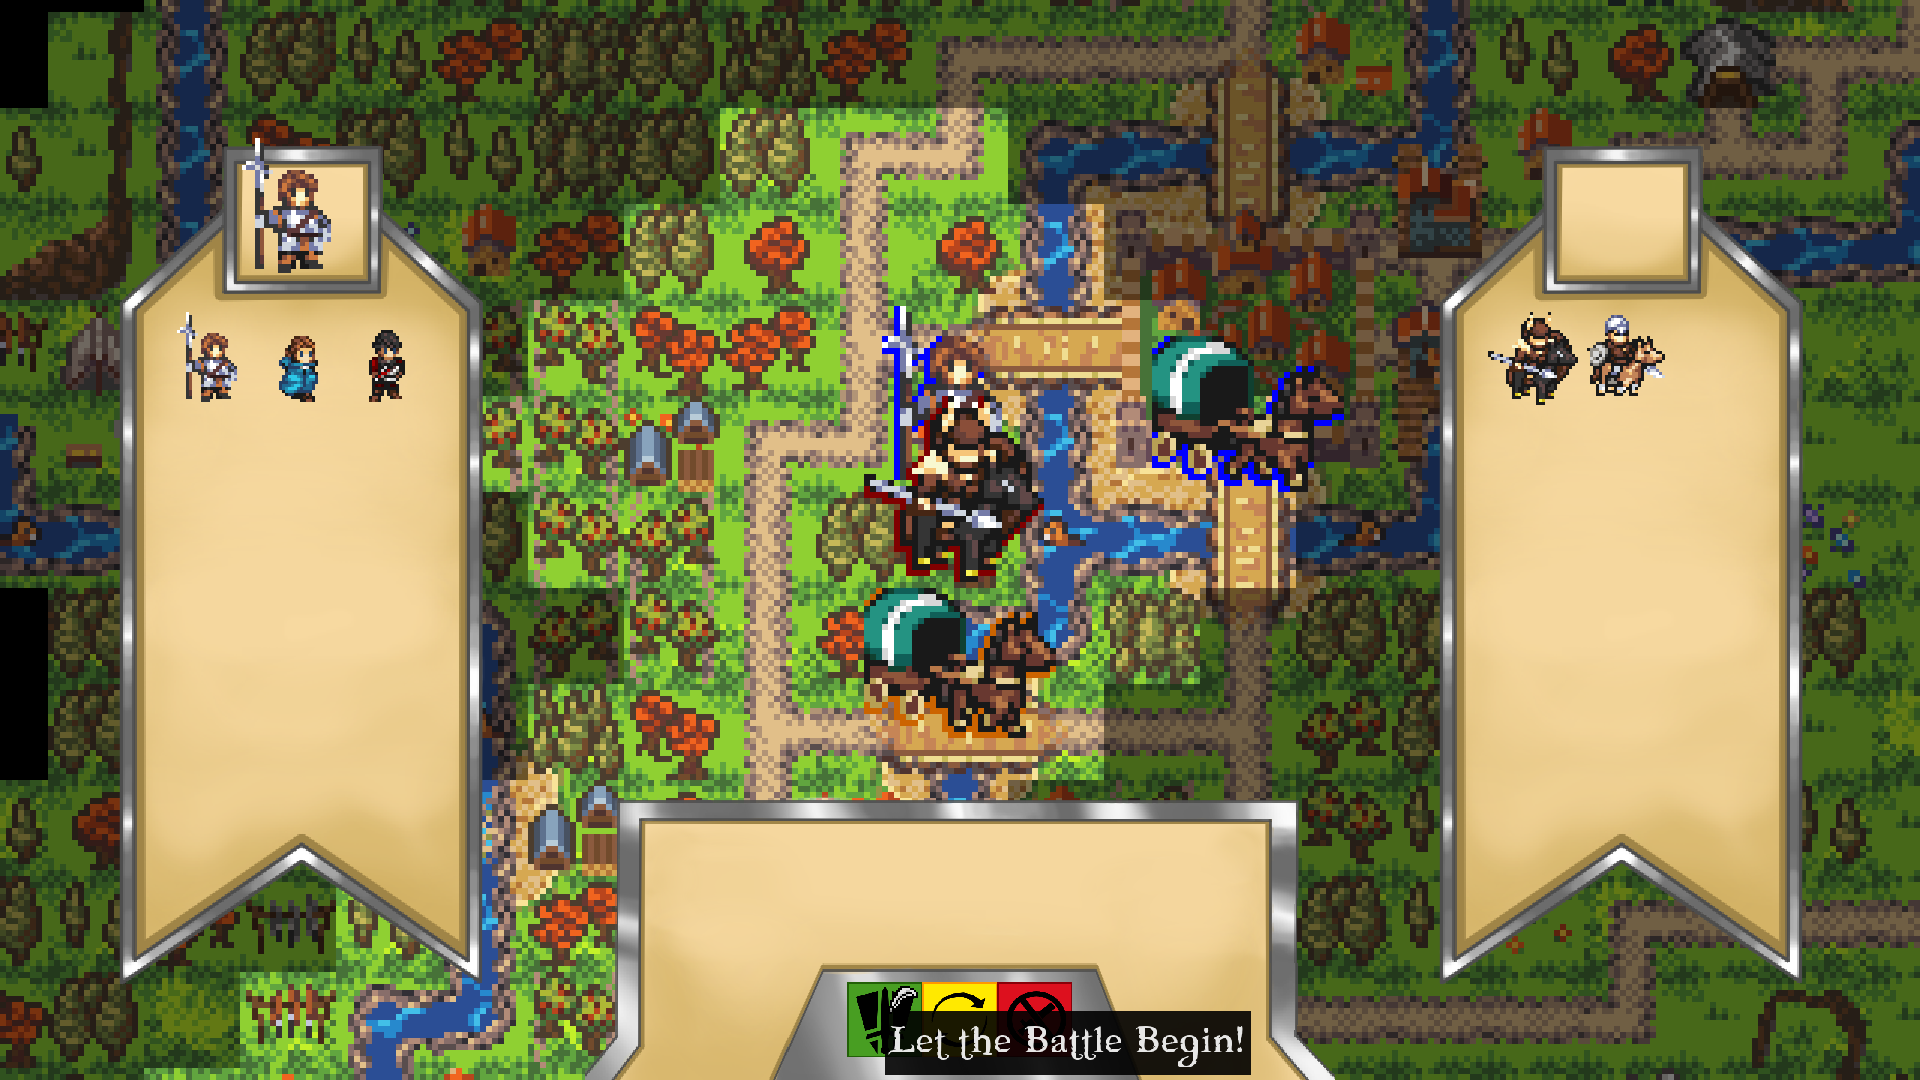
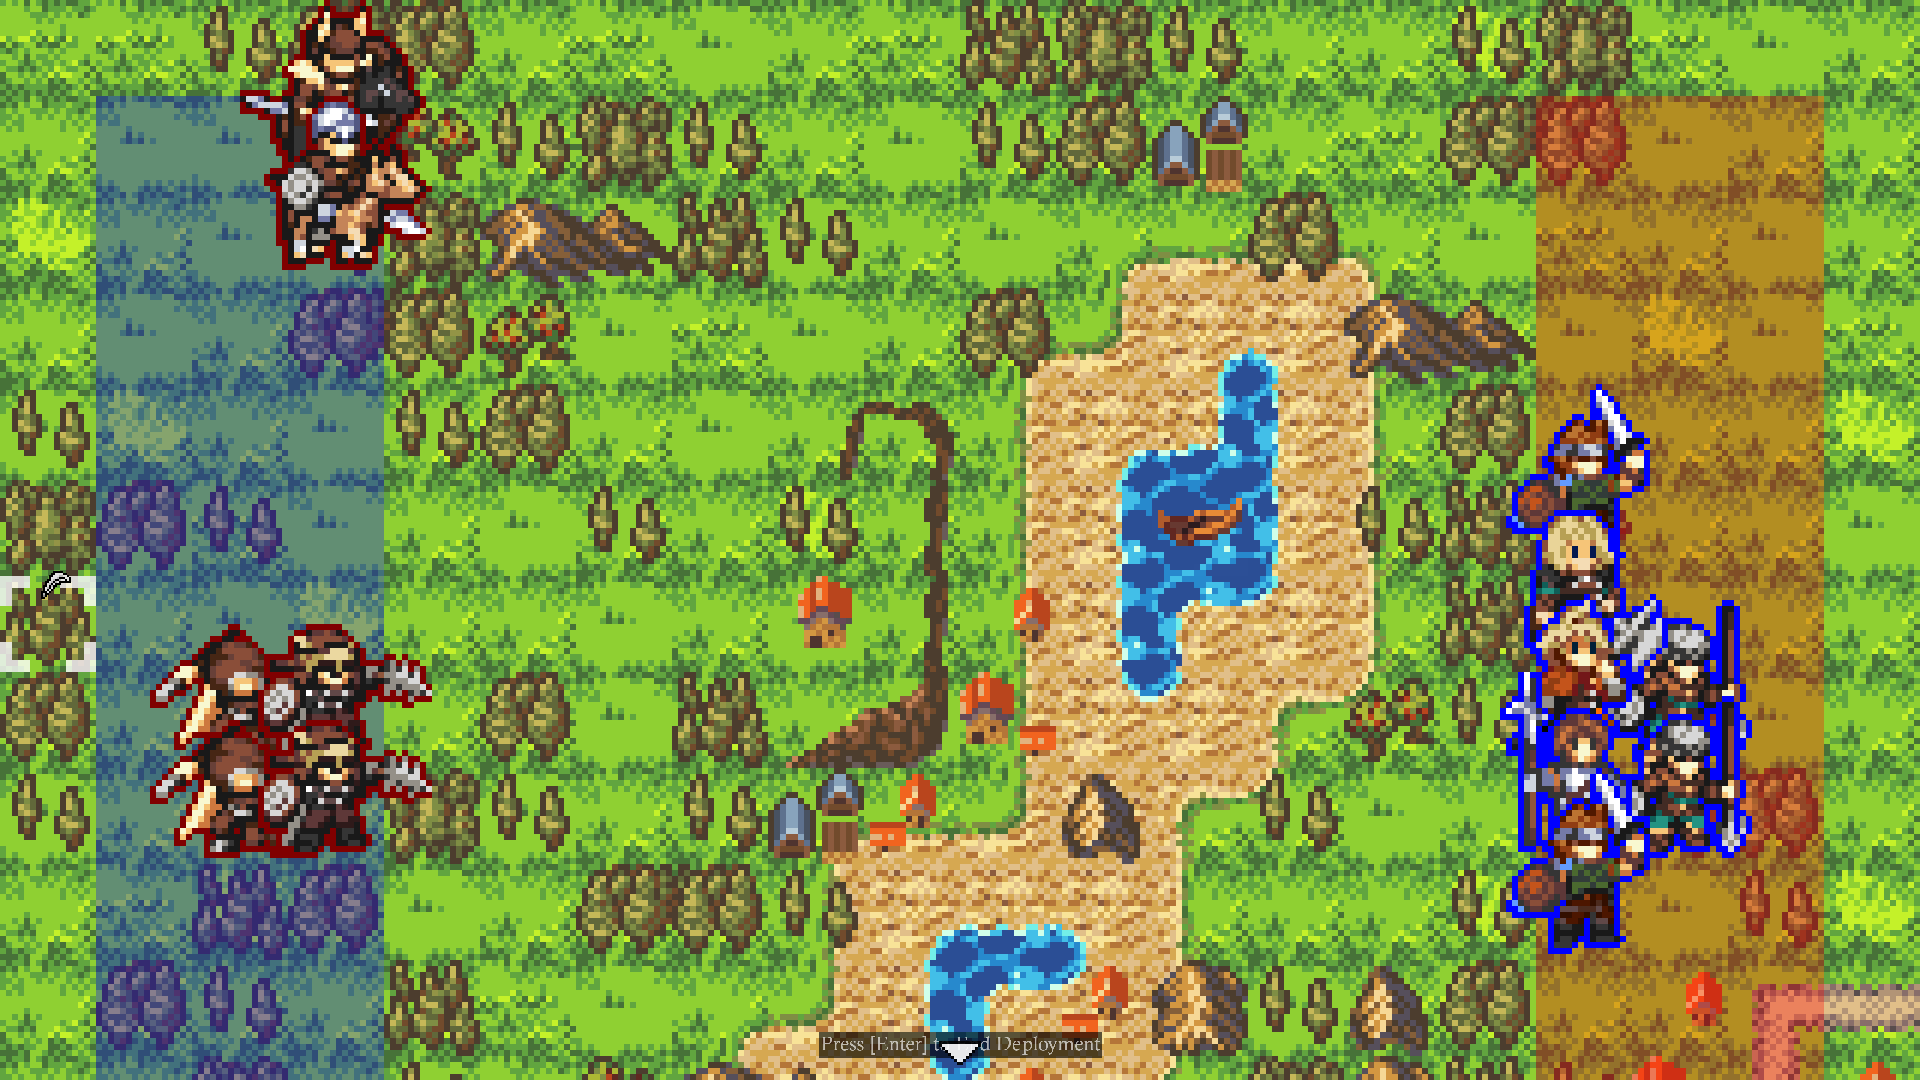
Since we’re the attacker, we deploy our troops in the red area and as the defender, the enemy has deployed in the blue area, placing their cavalry on one of the flanks and their ranged units behind their infantry. If you’re wondering about the colors, I might change them to match your nation’s colors (in my case blue), but for now we’re just using red for attackers and blue for defenders.

Before I position my troops for the start of battle, let go over our strengths and weaknesses, as well as the enemy. So, who’s on the board?

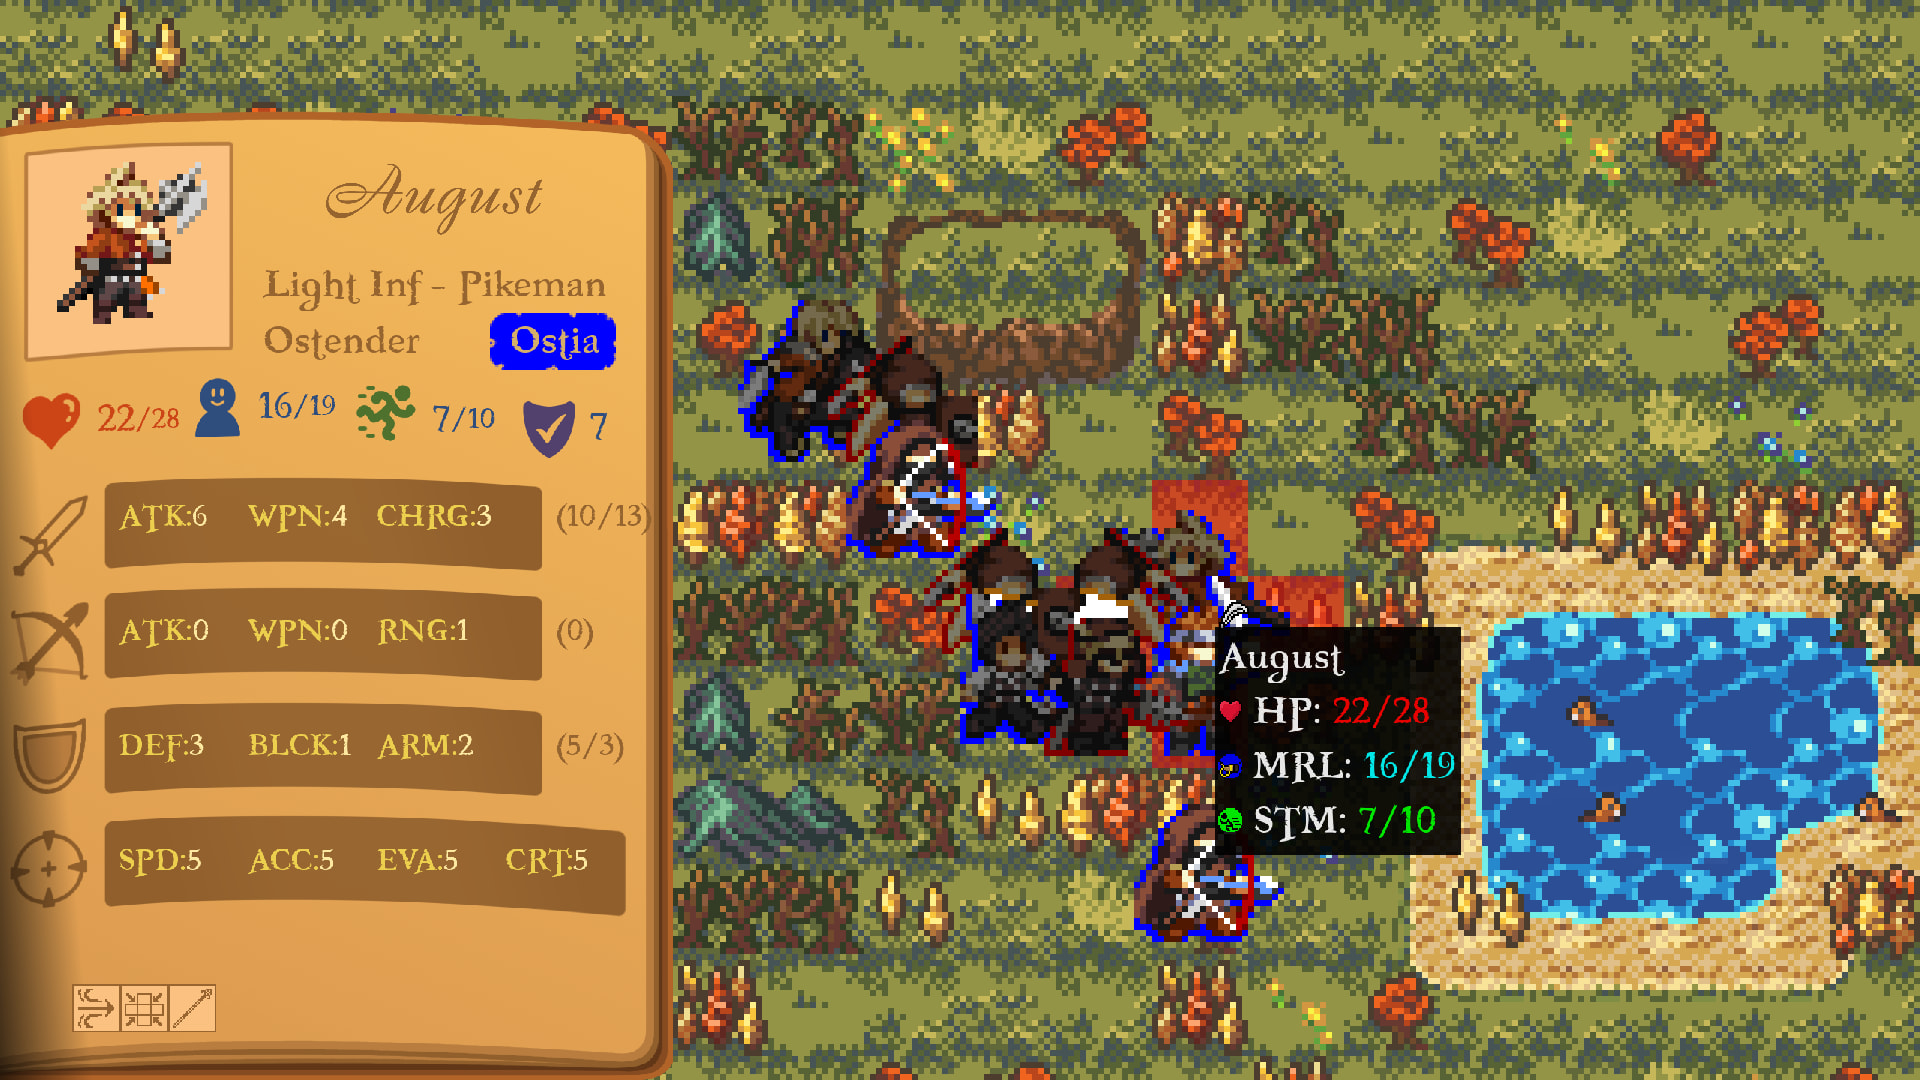
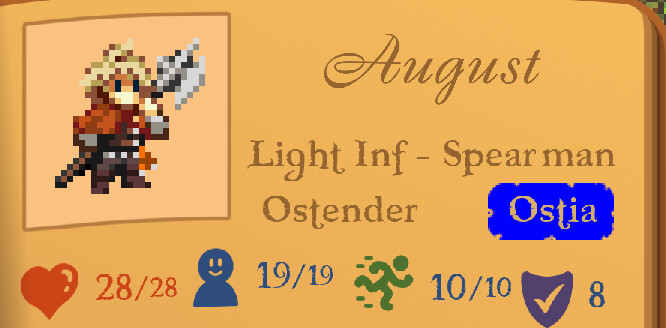
August

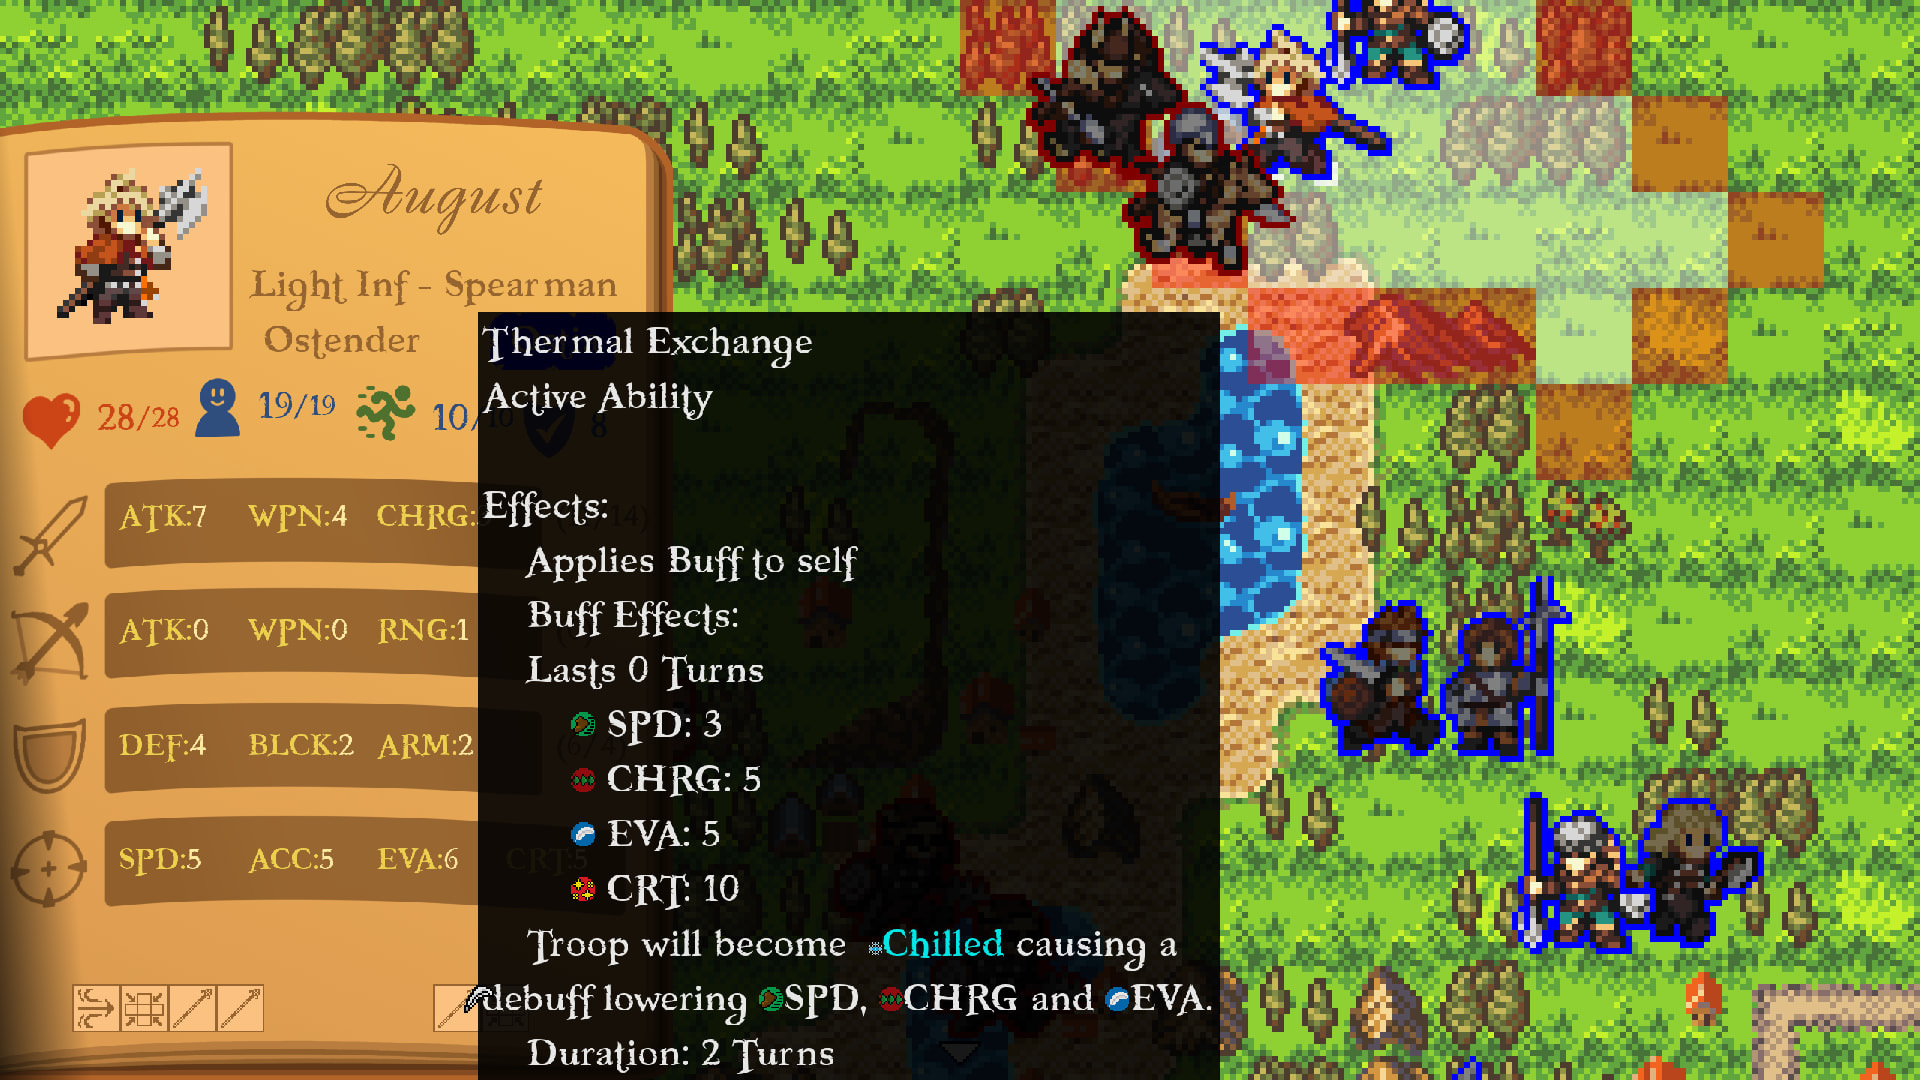
Our main character and lord is a special unit for he has been blessed by the Goddess Meridian and wields a unique power, Thermal Exchange! (Tool tip needs a little clean up)

Meridian, also known as the Mediator, is all about compromise and trades, and so this active ability allows August absorb and spend heat energy in return for a speed boost. It will give him a few stat buffs for 1 turn and then we will suffer the Chilled debuff on the following turn. Alongside this divine power, he has some staple abilities most spearmen have, Spearwall and Plant Spear. Spears are defensive units and both trigger after remaining still for a turn and fighting charging enemies, granting a defense boost and effective damage against cavalry respectively. He’ll be useful on the flanks to fight the enemy cavalry.

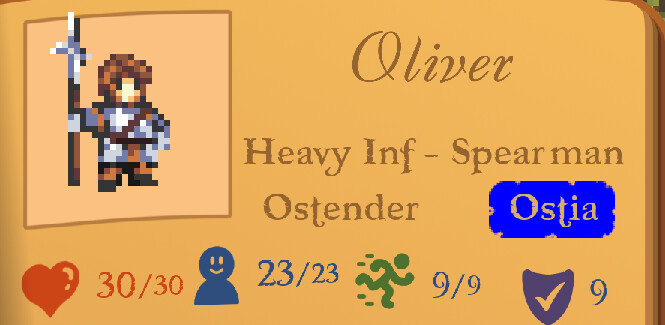
Oliver

Oliver is our bulkiest unit by far and shares many of August’s abilities as another spearman, however he is wielding a Billhook, granting him a bonus against other spearman. His melee defenses are great, though since he doesn’t have a shield to block incoming arrows, his ranged defense is about on par with August.

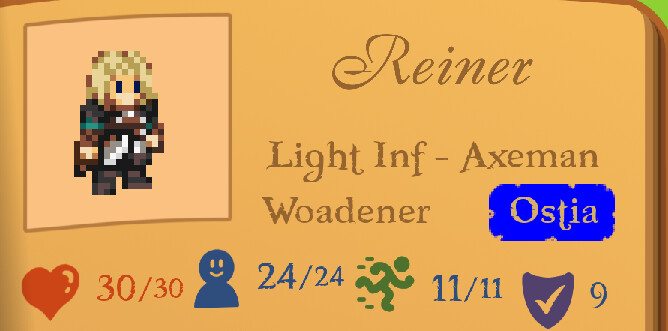
Reiner

August isn’t the only one who has resonated with a god’s domain, for Reiner bears the Thunder Pulse! Resonating with the Lover’s domain has made it so every beat of his heart generates electricity and the result is an axeman with a crit rate that rises every turn and after every combat until he lands one, at which point it resets. All that is to say, big damage. Unfortunately, Reiner can’t wear metal armor as it would cause his power to spark on him, so he has pretty low armor. It’s also worth noting that Reiner has some of the highest morale in the game.

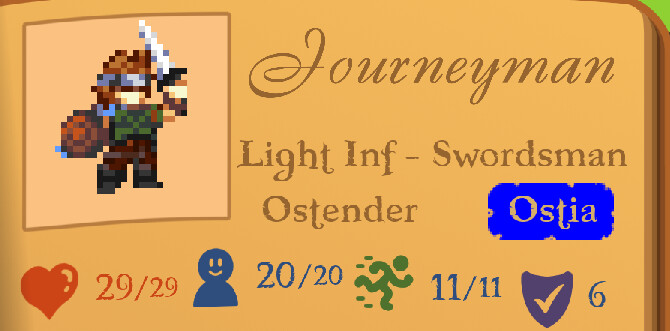
Journeyman - Ostender Light Infantry

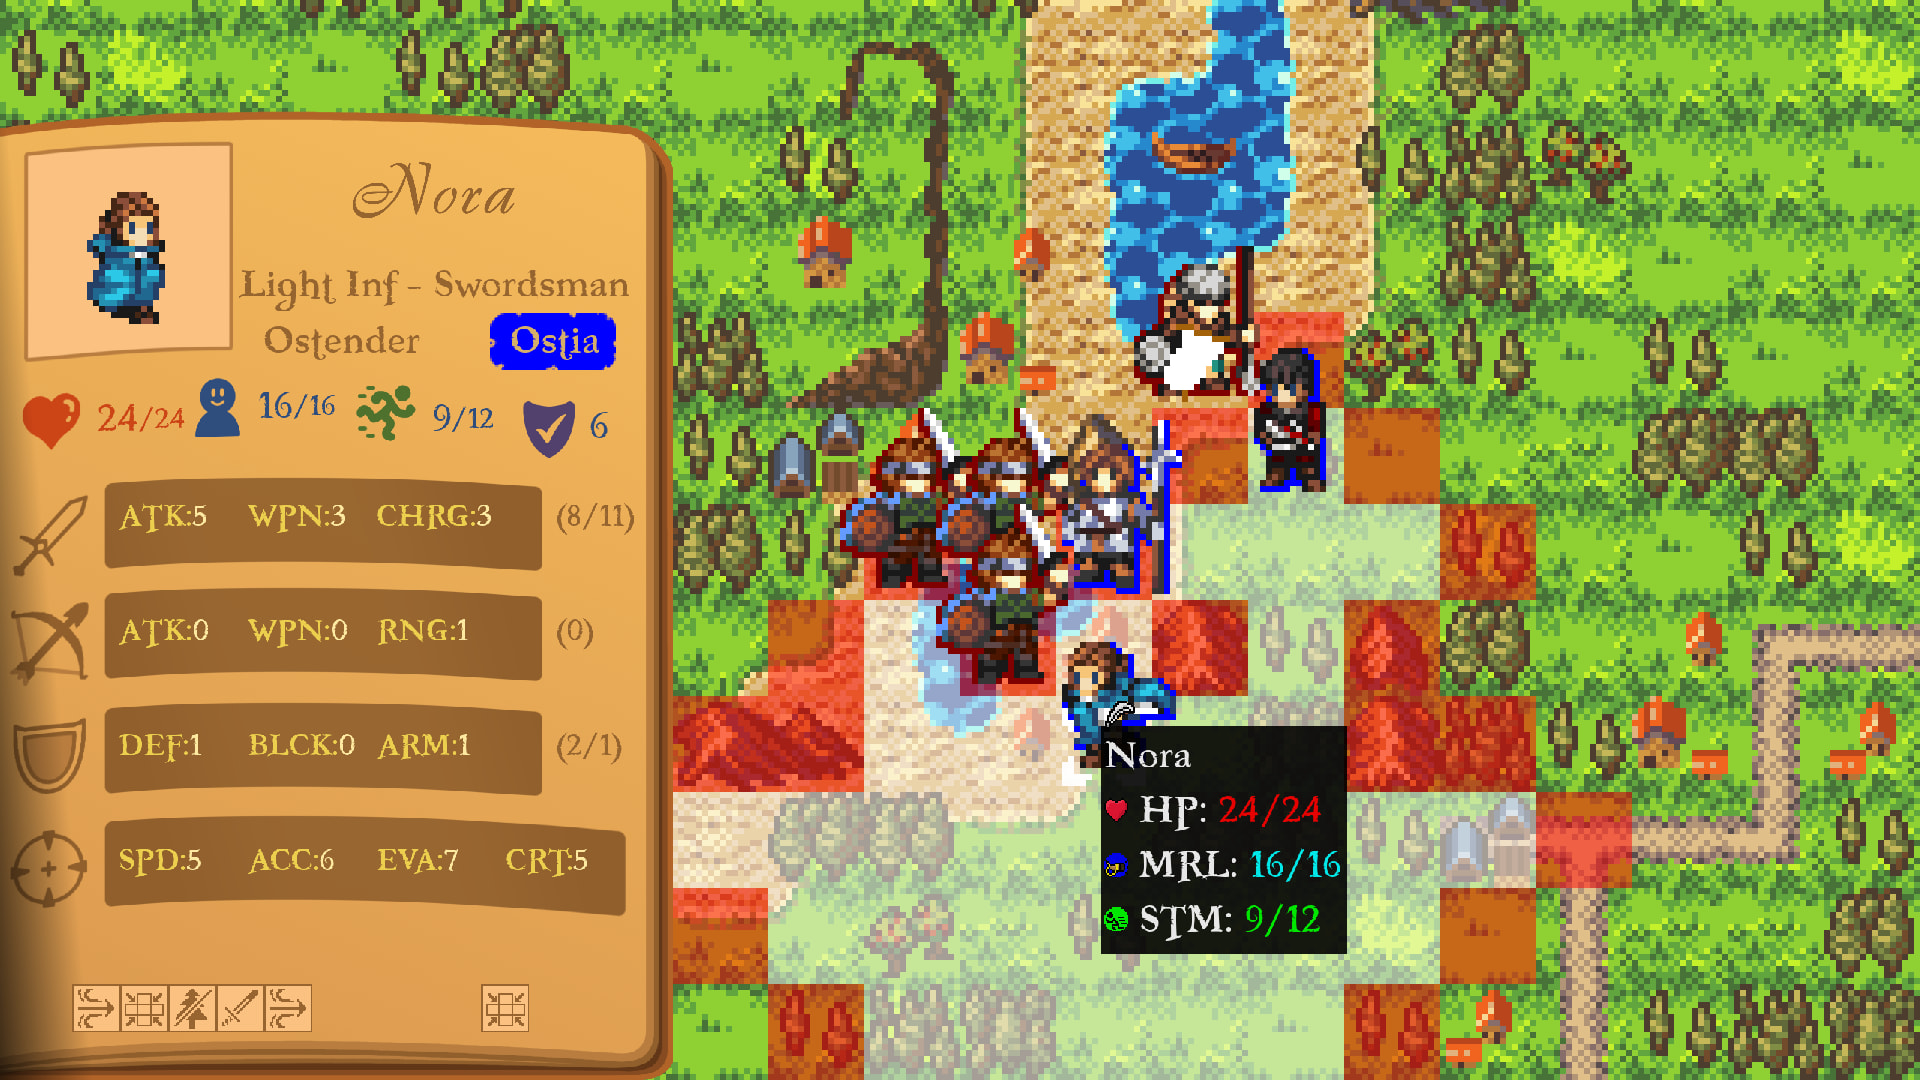
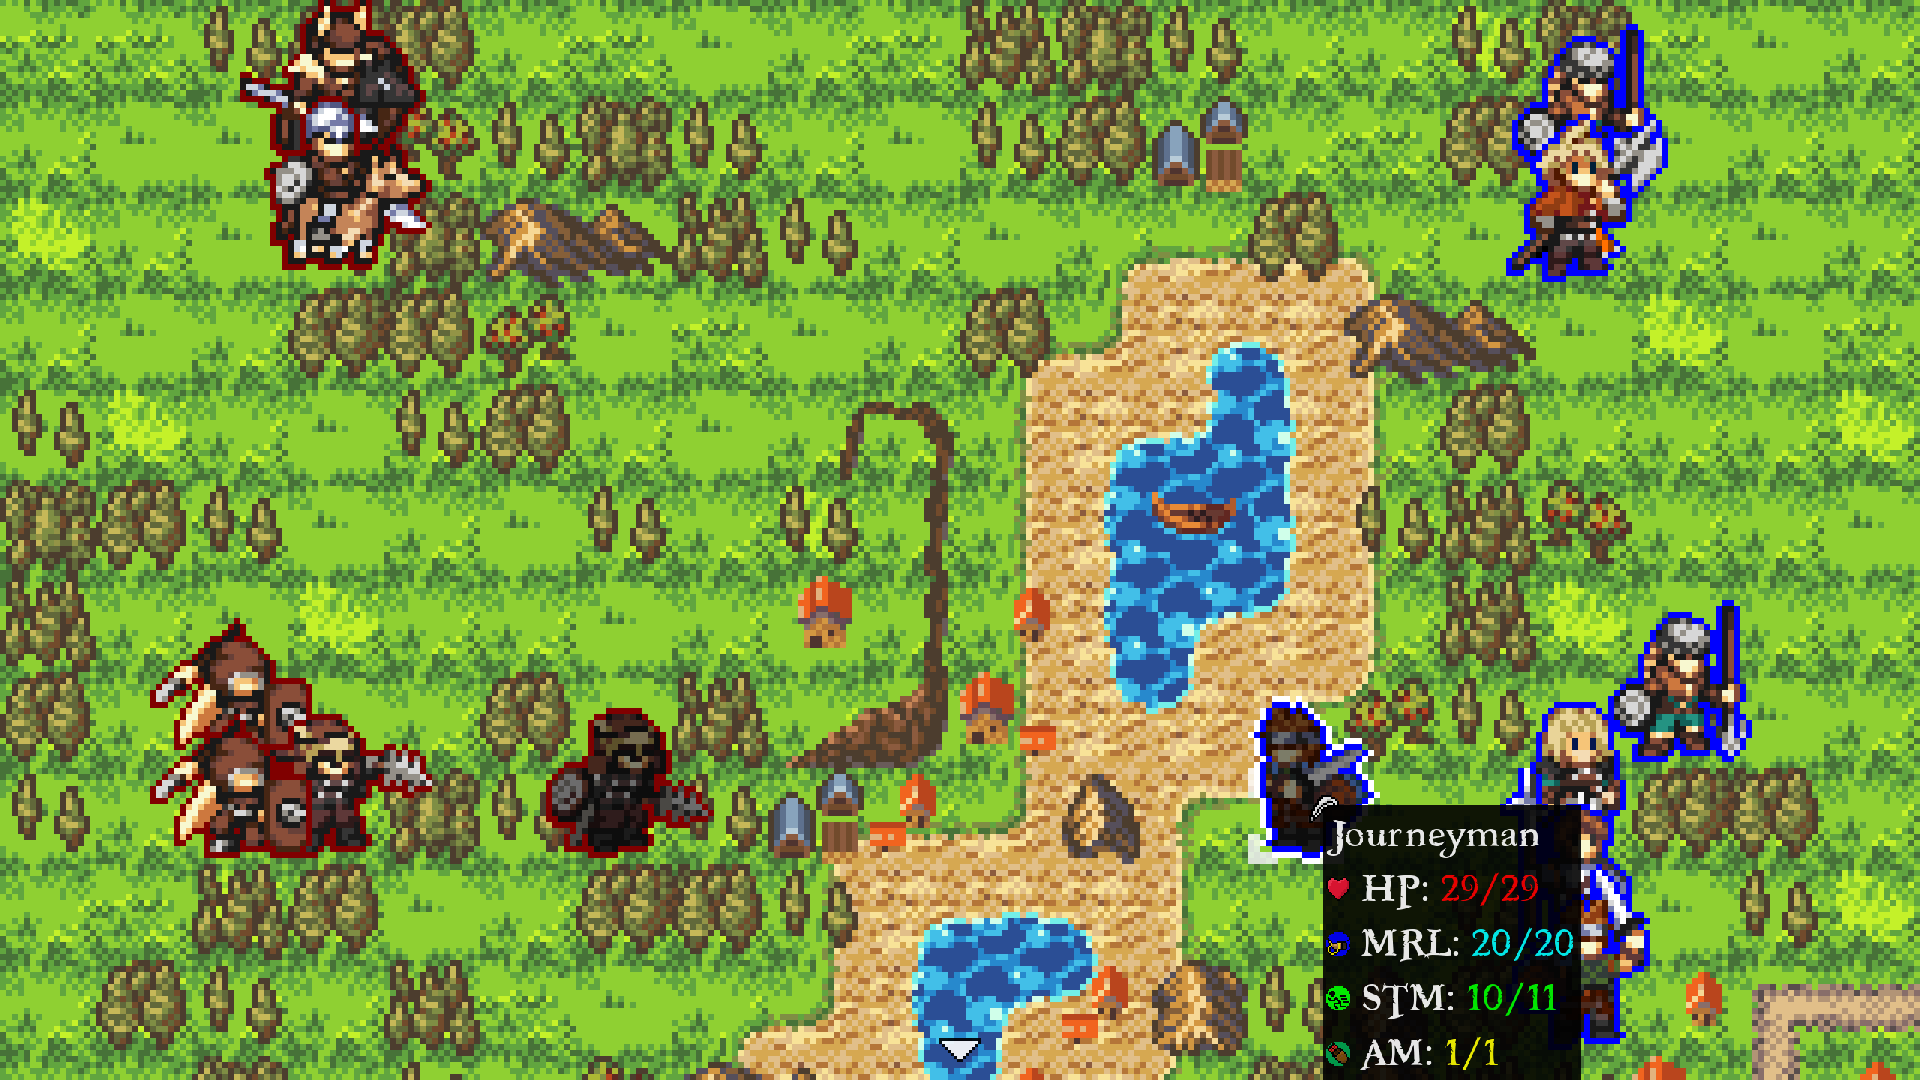
These wayward adventurers are the most accessible Ostender troop and are no strangers to rough terrain. The main advantage they have here are that they can pass through rough terrain without being slowed down, giving them excellent maneuverability for setting up flank attacks. They’re also a little more evasive than most troops. They have some other abilities, but they won’t come into play unless you’re crossing a river.

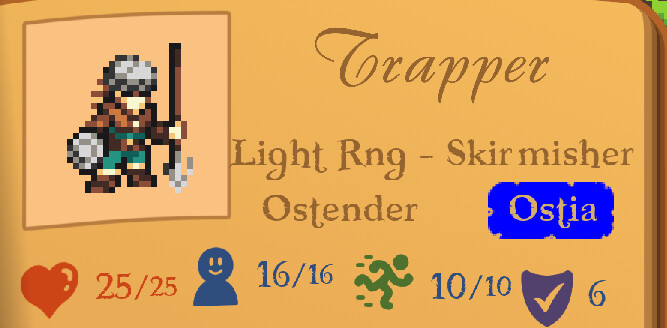
Trapper - Ostender Skirmisher

This troop, recruited from your Hunter population, is excellent pairing with the Journeyman as he also boasts the ability to traverse rough terrain unimpeded. Additionally, he suffers no accuracy or damage penalty against foes in forests and as a master of his craft he reduces the evasion and movement of those he hits with his Ensnare ability.

Now, what are we up against?

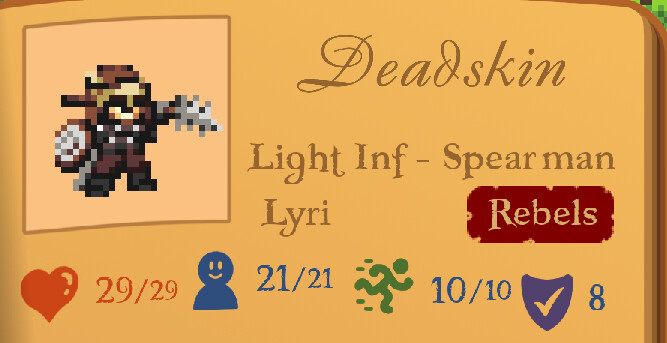
Deadskin - Lyri Infantry

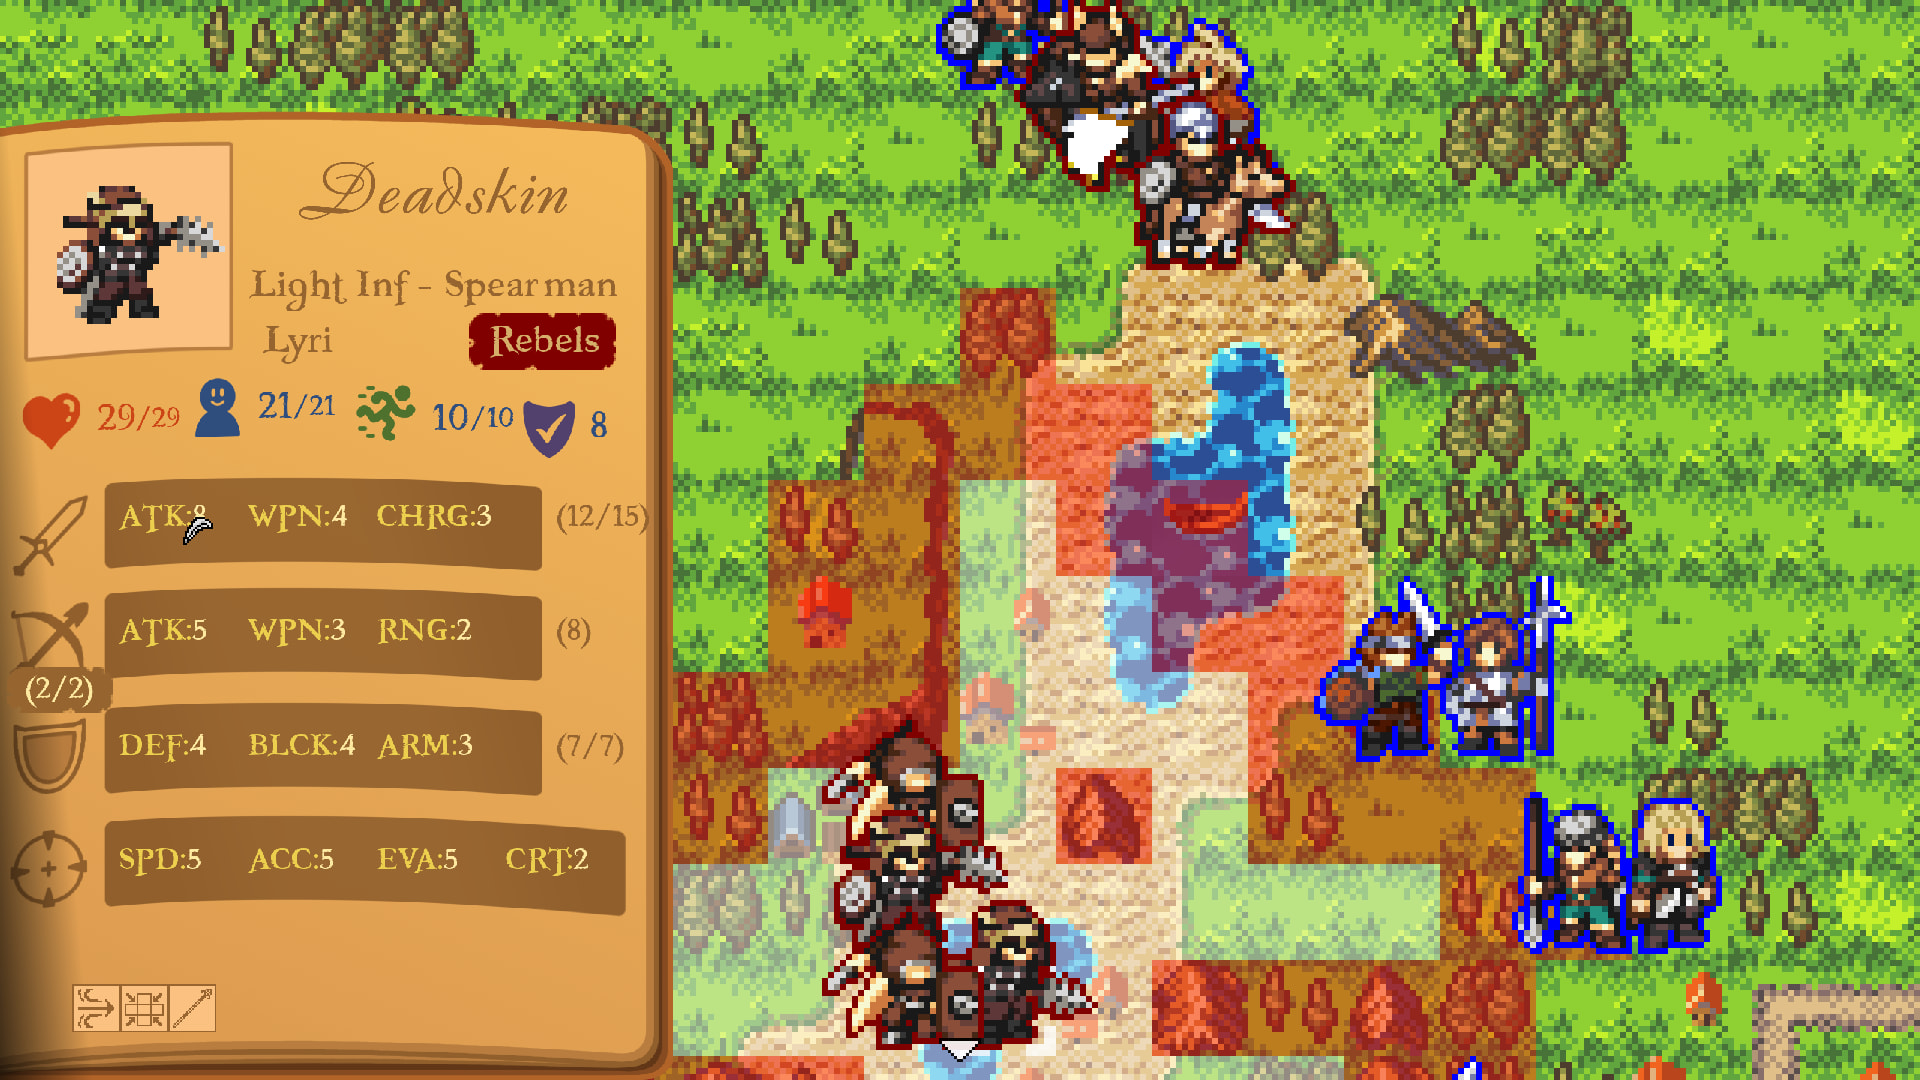
The Lyri are renowned for their leather working and have THE premier light infantry unit, the Deadskin. Wielding a savage barbed javelin, they deal effective damage against cavalry, so it’s good that we didn’t bring any. In addition to melee stats that can almost go toe to toe with heavy units without the draw backs, they have 2 uses of a ranged attack with their javelins giving them options in battle. This is pretty scary for me as I don’t have any great way to tank ranged damage. The only troops with shields I brought were the Journeyman who can’t beat a Deadskin head on.

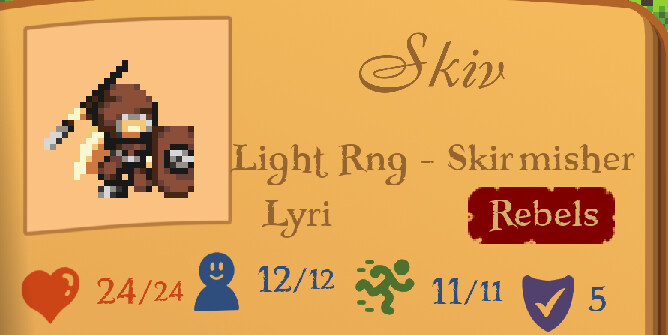
Skiv - Lyri Skirmisher

These dastardly little rogues are the Lyri Skivs. Like the Deadskin, they also use barbed javelins that are effective against cavalry. Aside from their high evasion, their stats aren’t anything impressive and they have horrible morale, meaning with one clean hit we might be able to rout them. They are pretty cheap though, which is nice if you can get your hands on them.

Raider - Lyri Cavalry

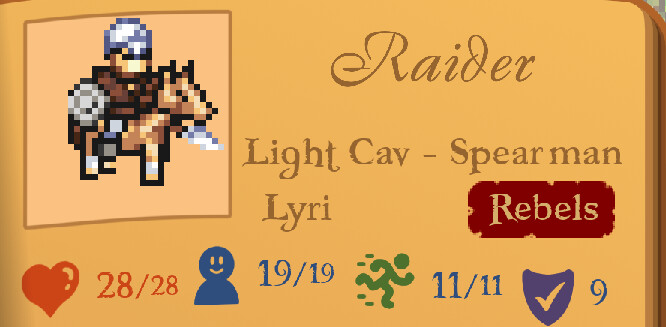
The Raider is a fraudster. They have the Lethal Charge passive which grants them +10% crit when charging and the active ability Blitz, which sacrifices defenses to give them another +5% crit and 2 extra charge damage. They have pretty typical stats for a light cavalry, lots of movement speed, middling bulk and decent charge damage. They’re just trying to cheat me. I guess that’s an honest day’s work for them?

Horn Hunter - Lyri Skirmish Cav

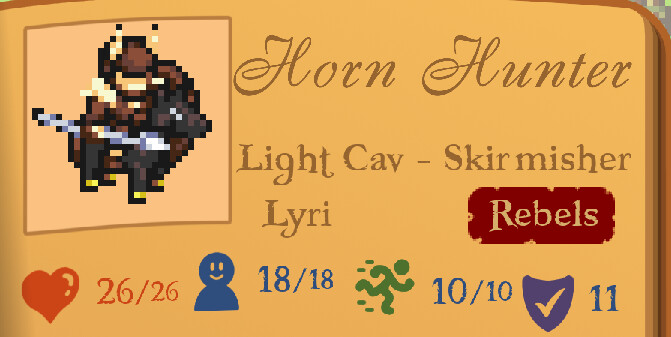
The velikirog isn’t going to hunt itself! Fortunately, this javelin unit doesn’t have barbs! Unfortunately, they apply their charge bonus to their ranged attacks as well as their melee. Given my already stated vulnerability to ranged damage, it would appear I’m half way up shit’s creek. Let’s hope the spears can double as paddles.

The Gameplan

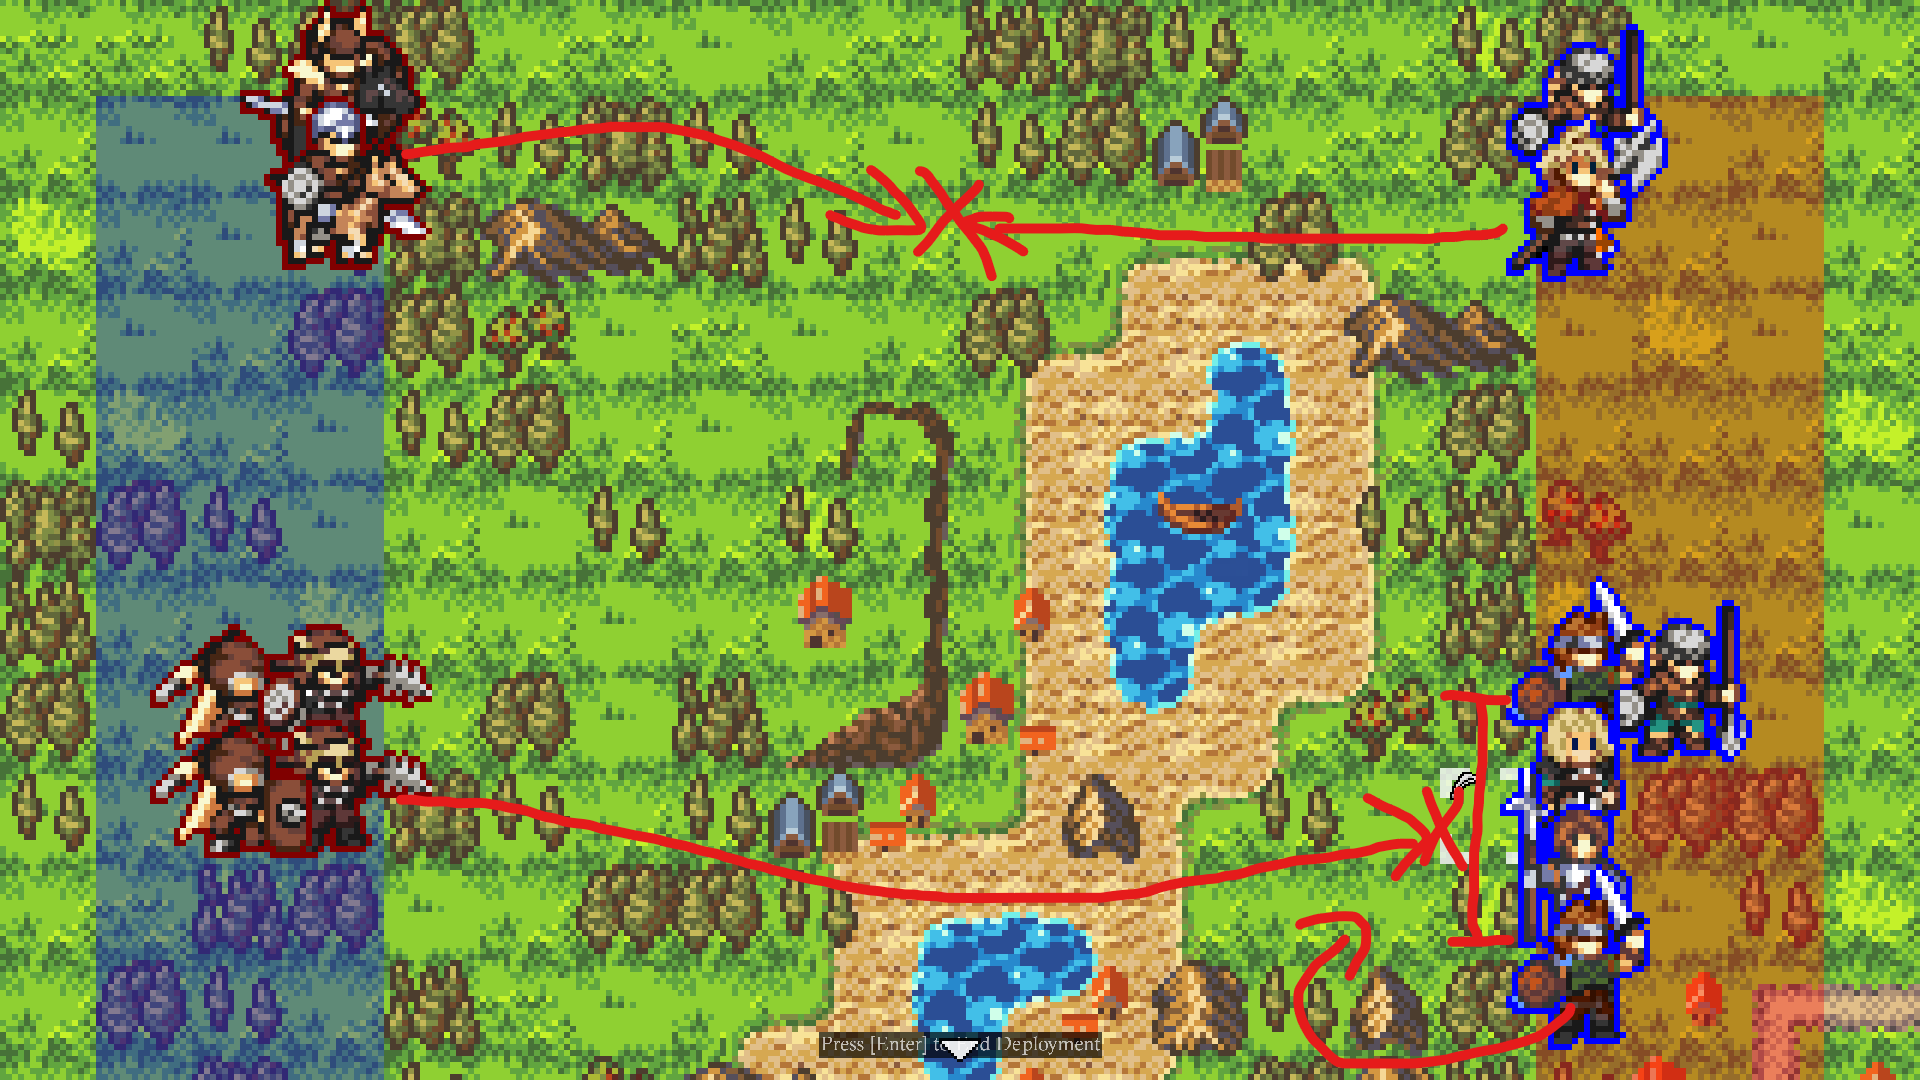
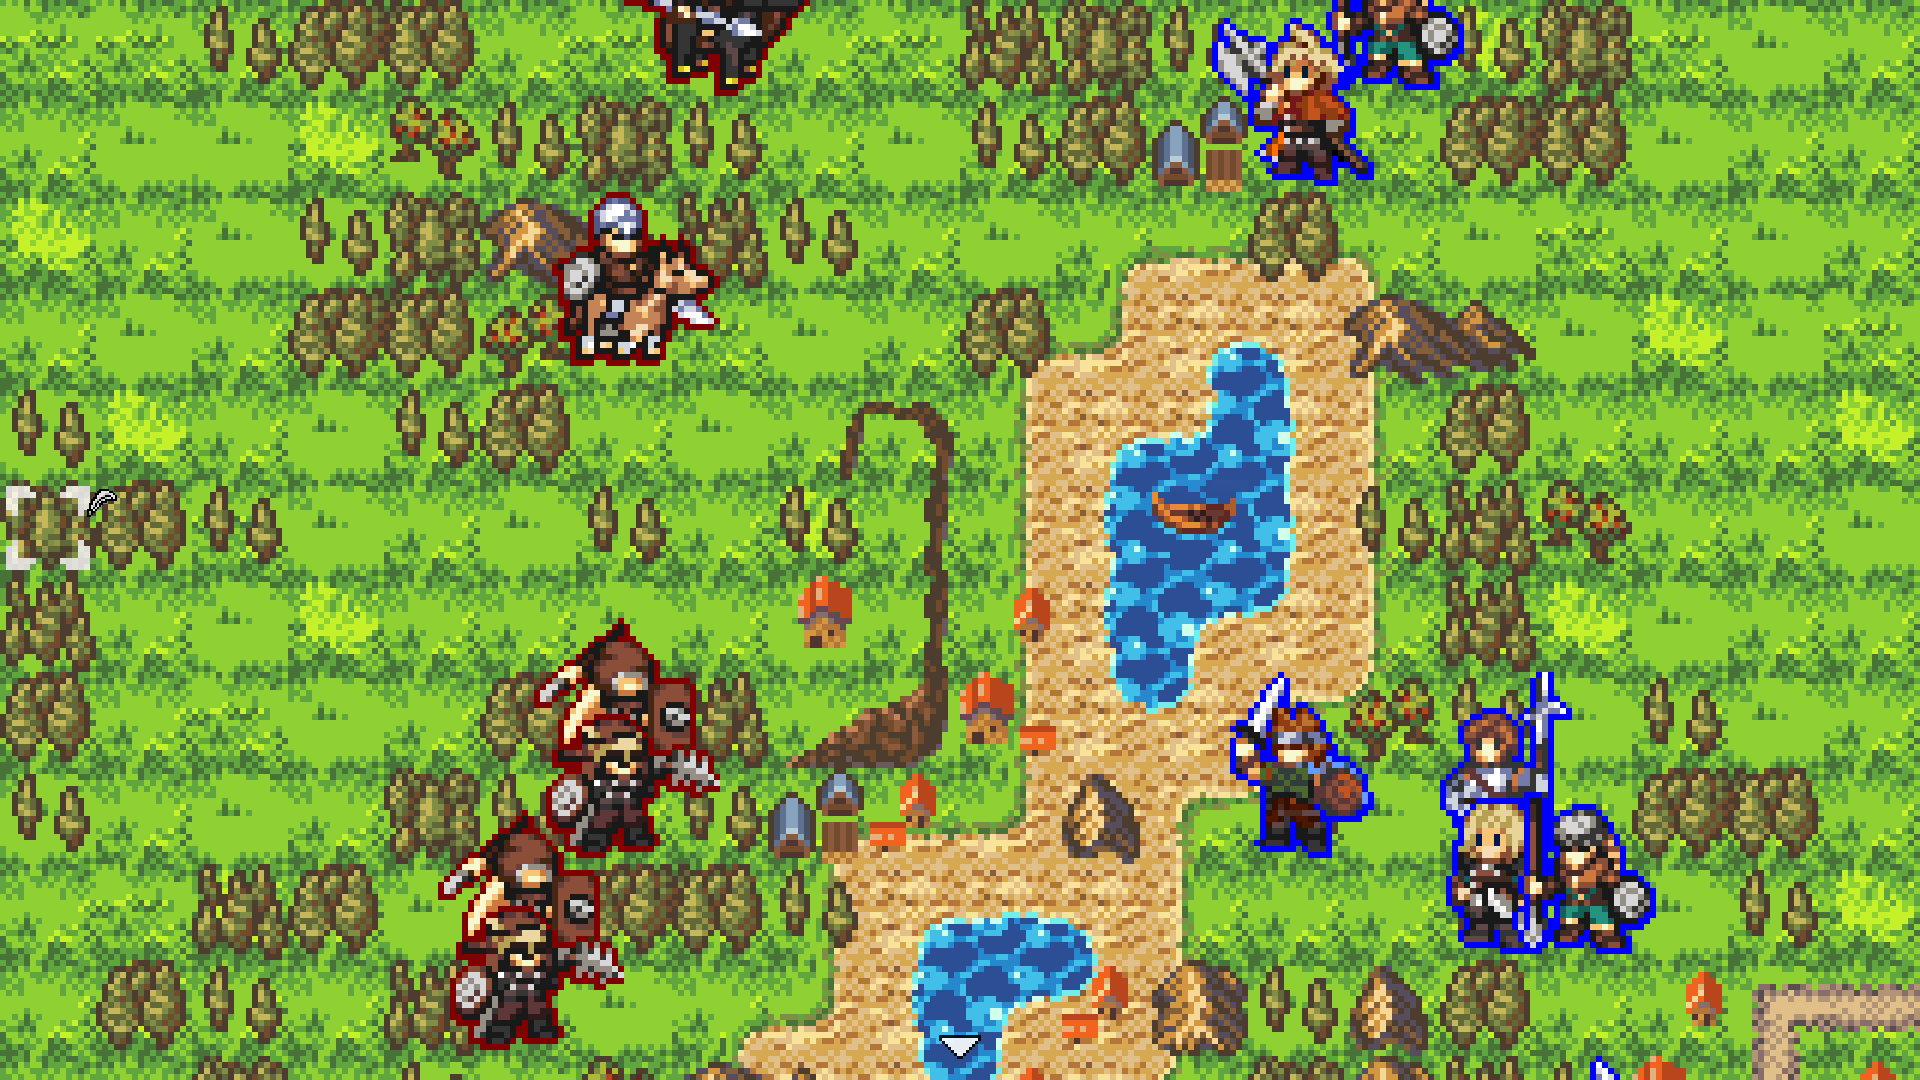
Using my expert MS Paint skills you can see what I’m planning to do. I’ve deployed August and a Trapper in the North to intercept the Raider and Horn Hunter. Idea here is to bait them into attacking August while I have Thermal Exchange up (hopefully while I’m in a forest) to hopefully dodge their attacks while they’re charging, which is when they’re the scariest. The Trapper can keep up with August thanks to his ability to pass through the forests unimpeded. Together I think they should be able to defeat the two. I know the Horn Hunter will try to stay at range until it’s out of ammo, so I’ll try to get August to attack him first, trapping him in my zone of control so he’s stuck fighting in melee.

In the center I’m going to form a line 1 tile in front of where I deploy and wait for the enemy to approach, giving Reiner a chance to get about 2 stacks on Thunder Pulse. I could probably try to back up to squeeze out a third turn of it, but then my forces are further apart and I like the spot I marked as I should easily be able to run a Journeyman around the mountain tile to get into the Skivs or deliver a flank attack.

Let’s see how it plays out!

Opening Moves

We start in the Maneuver Phase and I get to move first since I’m the attacker. During this phase all we’re doing is moving troops. Once everyone has moved, we go to the Combat Phase, where anyone that moved >1 space will be considered Charging and add their Charge bonus to their melee attacks.

I run a Journeyman forward, but not too close so I’d be in enemy range next turn. I want to have more control over the turn order next Maneuver Phase. I’ll explain when I get there. I ran the Journeyman up because the enemy will prioritize moving troops closest to a foe. This helps ensure they move their main body before their cavalry. We can see a Deadskin takes the bait and it’s back to my move.

I move the rest of my main force into position, deciding to place Reiner in the forest since he’s squishier than Oliver, and the enemy advances. They also move the Raider up and I’ve highlighted what his movement range is going to be next turn.

I could rush forward now and move into range. This way on the next Maneuver Phase I could choose to move August first. Using my Zone of Control I could lock the Raider down so they can’t get a charge without giving me a free opportunity attack. However, I elect not to because I’d rather ensure I can get into melee with the Horn Hunter and from here I need an extra turn for him to get close enough due to all the trees. If August could ignore the terrain, like the Trapper, this wouldn’t be a problem. Also getting too aggressive now could cause one of the Skivs to peel off in August’s direction and I don’t want to take on a 2v3 up here, I’m asking to getting flanked. Here’s where I end up:

This position is great for me because with the mountains, August’s Zone of Control will prevent the Raider from reaching my Trapper no matter which way he goes, keeping my ranged unit safe. I’ve left August in range of the Horn Hunter so that I know which tile he’s going to move onto, the forest 2 tiles left of August. I can safely predict this because I know they’ll move their melee troops first and the Raider will occupy the only other tile where the Horn Hunter could attack him. It’s a little awkward, for reasons I’ll explain shortly, but this will work. In the meantime, let’s go back to our troops in the south. I’ll leave the Journeyman up front where he is for now as no enemies can run up and use their Zone of Control to lock him down. Remember when I said I wanted to move him up, but not into enemy range? This is why. If I had done that, he would’ve been the first troop I’d need to move, otherwise I’d need to suffer an opportunity attack or move my own infantry up into a position where I wouldn’t get the extra turn to build up Thunder Pulse and where it’d be harder to flank due to those mountains in the middle. I begin making my moves and here’s where we end up:

When I said the positioning was a little awkward, it was because in order to lock down both the Horn Hunter and Raider, I didn’t get to move more than 1 tile, so I don’t get my charge bonus, which Thermal Exchange boosts, these are pretty good terms of engagement. As a ranged troop, the Horn Hunter doesn’t have a Zone of Control and my Trapper can slip by to set up a flank shot on them since August is on the opposite side of the enemy. The flank attack will reduce the enemies Defense/Block. We’re in the Combat Phase now, so here’s how things play out:

  1. Trapper attacks Horn Hunter

  2. Horn Hunter chooses to attack the Trapper since his hit rate on August is so low, he hits and oof that’s almost half my Trapper’s HP due to the Horn Hunter’s charge bonus. One more and his morale is going to be 0…

  3. August attacks the Horn Hunter and thanks to Thermal Exchange’s buff, we land a crit! This is actually huge, because it routs the Horn Hunter who will now try to flee without attacking me!

  4. The Raider misses August with a 25% hit rate

  5. Turn ends and August is afflicted by the Chilled debuff, massively reducing his evasion and movement speed this turn.

We’re back to the Maneuver Phase and the first thing I want to due is move Reiner back into the forest. I didn’t explain why I moved him out of it before, so let me do that now. I want to give him a running start so his charge bonus applies to his next attack. He’s up to 50% crit right now, so if I get to deal double damage from landing a crit, I want the charge bonus to also be doubled. I move him up so that he’s no in melee range of the Deadskins and he has the protection of the forest to help him a little. Here’s how the main engagement forms up:

Pretty good for me! Reiner and Oliver will get their charge bonuses and the Journeymen managed to pincer the other Deadskin! The only awkward thing is that one of the Skivs is going to get a flank attack on my Journeyman. I’ll have him attack first to make sure he gets his damage in. Here’s the play by play:

  1. Journeyman attacks for 11 dmg

  2. Deadskin attacks back

  3. Trapper attacks Raider (I do this early because they’ll reduce enemy evasion)

  4. Raider hits August for 4 dmg (not so scary when they aren’t charging

  5. August hits back

  6. Deadskin attacks Reiner for 8 dmg

  7. Reiner attacks back, landing a crit for 22 dmg!

  8. Skiv 1 misses my Journeyman in the forest (phew)

  9. Trapper hits off Deadskin (probably should’ve had him go before Reiner to debuff, but I was looking forward to seeing if I would crit, so I got antsy)

  10. Skiv 2 hits my Journeyman, routing him (he did his job and I salute)

  11. Oliver finishes off Deadskin

  12. Journeyman hits Deadskin and routs him

Here’s where we are now.

Smooth sailing! From here all I need to do is mop them up. The Skivs have no one with zone of control to stop me from getting up in their face and they’ve already lost a bunch of morale after their allied Deadskin died. The Raider is likewise sitting on 2 morale, so I’ll conclude this diary here.

The key thing I hope I got across is how much depth there is to controlling the terms of engagement by planning out your turn order and utilizing zone of control offensively to limit your opponents options. It really is something I’m proud of in terms of the game’s design, so I’d love to hear what you think!

Thank you so much for reading! The next developer diary diving into the region of Ost and its culture will come out in 3 weeks (Oct 16th), I hope to see you there!

3 Likes

Dev Diary 3 - Ost and Regional Variety

Read time: ~7-8min (~1,900 words)

Summary: This dev diary covers the starting region of the campaign, highlights its strengths and go over some of the potential ‘builds’ for each of the region’s 6 cities.

I meant to have this out yesterday, but I got completely absorbed in AI pathfinding for several hours and uh, forgot to post it even though I already wrote the whole thing. Oops…

Happy to answer any questions about mechanics on this for those curious!

Dev Diary 3 - Ost and Regional Variety

Concept art for Charlie and Nora. Artist: Tobey

Hello everyone, it’s time for another dev diary on GNO and today I’ll be going over the region of Ost, using it as an example to showcase what distinct aspects set one region apart from another. First I’ll give some background on the region, then I’ll go over each of Ost’s 6 cities one by one and the role they play in the wider ecosystem, including starting diplomacy. When planning out the ‘build’ of a given city, it will be prudent to consider the strengths it possesses. In many cases, your key bottleneck is going to be the supply of goods and specializing each city for a role is important as specialization is balanced to be extremely rewarding. Let’s get into it!

Link to Steampage.

Ost: Background

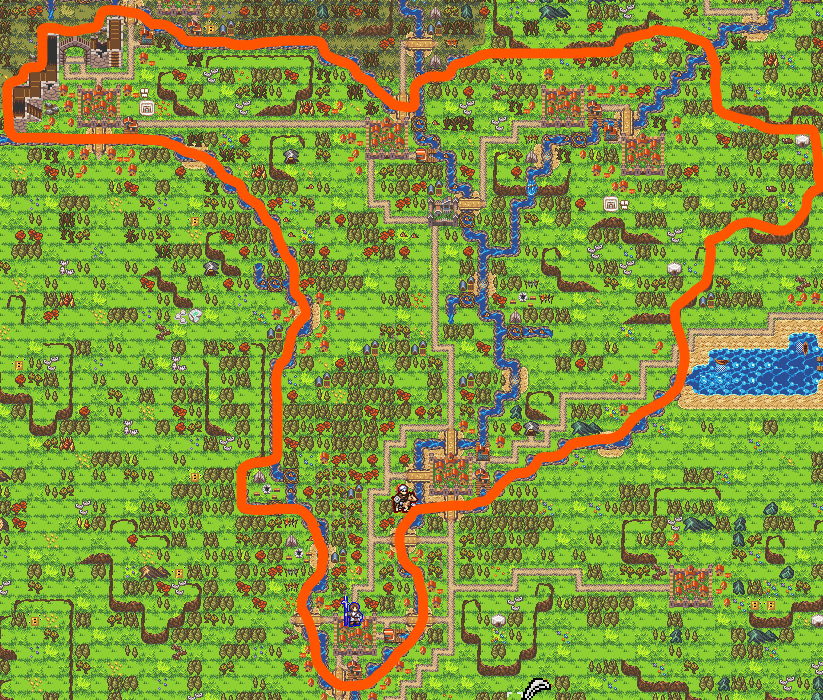
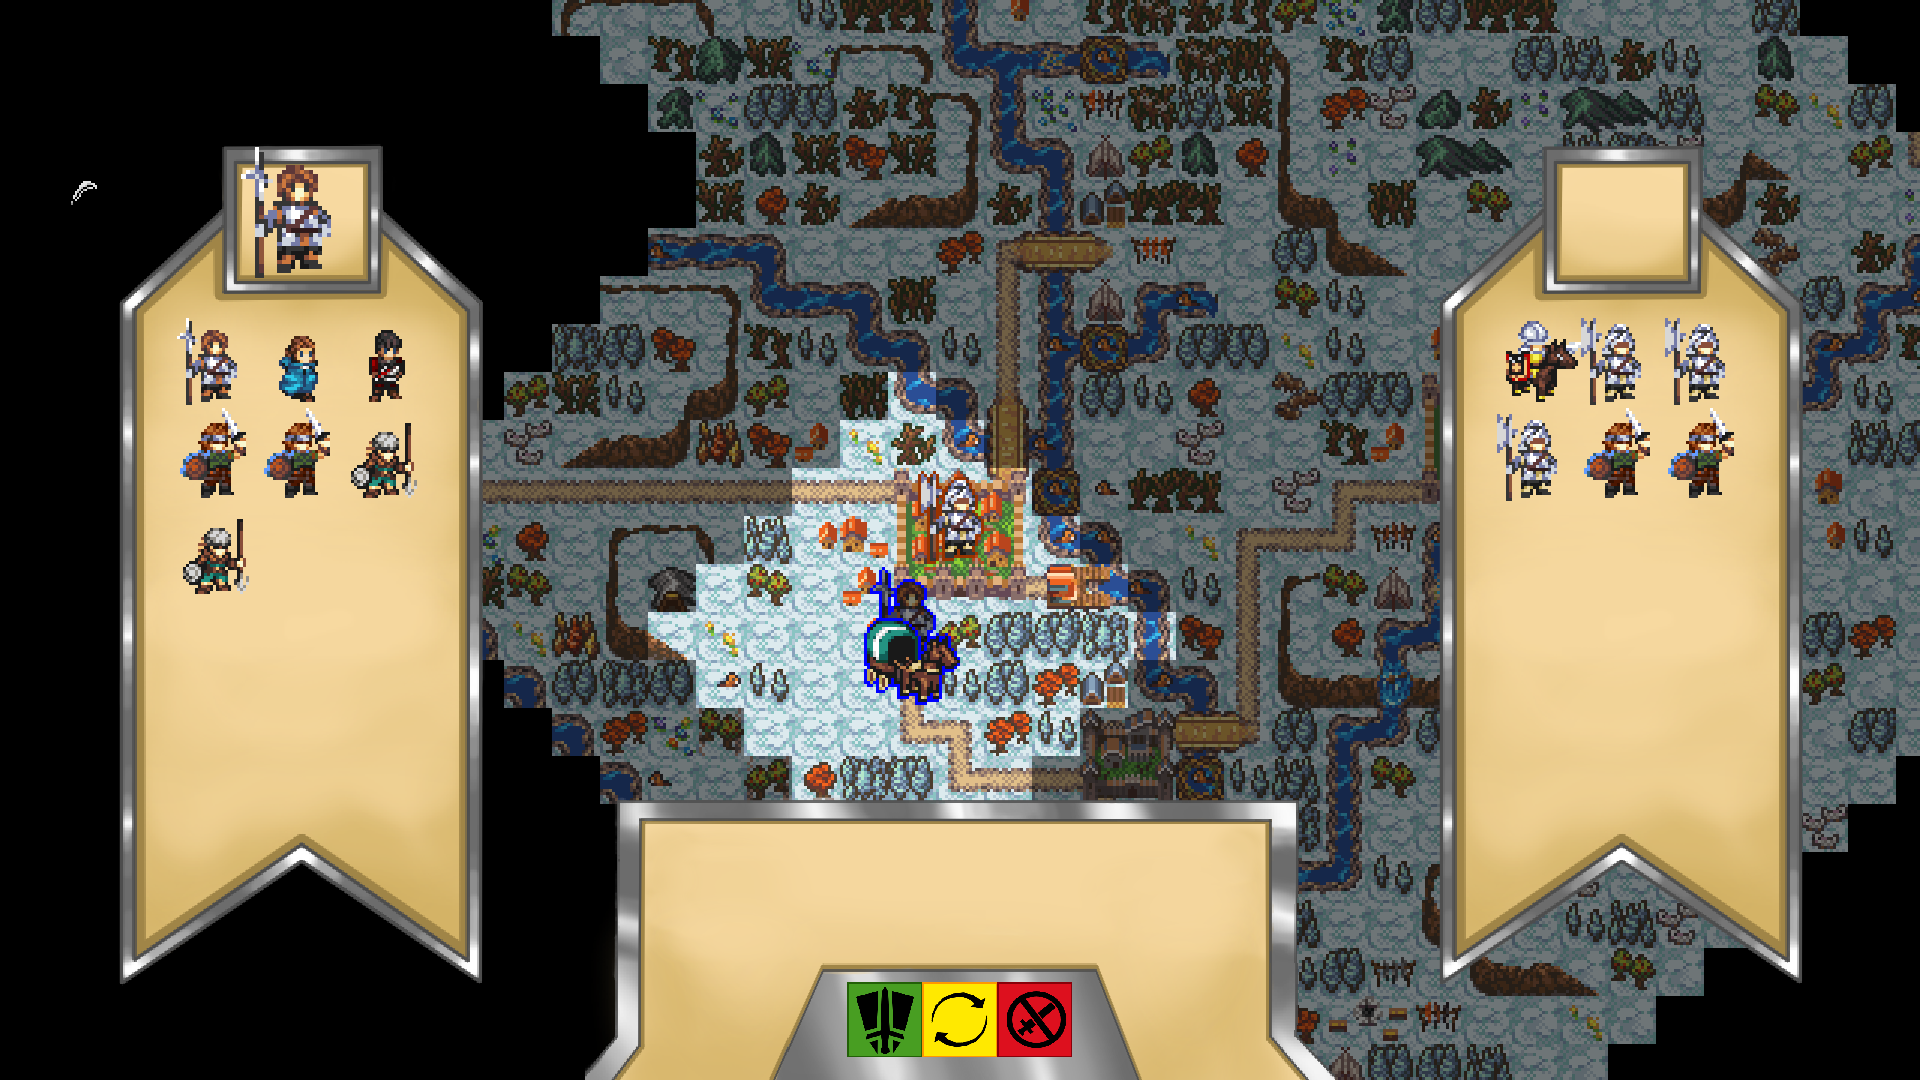
Region of Ost, fog of war off.

The vast majority of the region’s population are Ostenders, which is an exonym given to the people on the East side of the Vine River by the Cercei Dictator who long ago conquered the region. Under the empire’s rule for centuries, Ost has served as a border province and is regarded as a backwater by the people of the Meridian with little more to offer than as a crossroads and bulwark against Lyri and Woadener raids. However, it is that position as a crossroad that underlies great opportunity. Woadener spider silk to the north and Rallen cotton to the south are two of the most notable exchanges traveling the Great Vine and Ost stands to benefit as the middleman.

The forest around Ost is dense with lumber and furs being significant exports, accompanied by a steady stream of maple syrup. The orchards are prolific and the cider a point of pride. Every Ostender looks forward to the Autumnfest where they can enjoy the fruits of their harvest while surrounded by the scenic colors of fall. This area gets four seasons, so take care while managing armies in the winter as they will suffer attrition if they’re outside friendly borders.

City Tour

Ostia

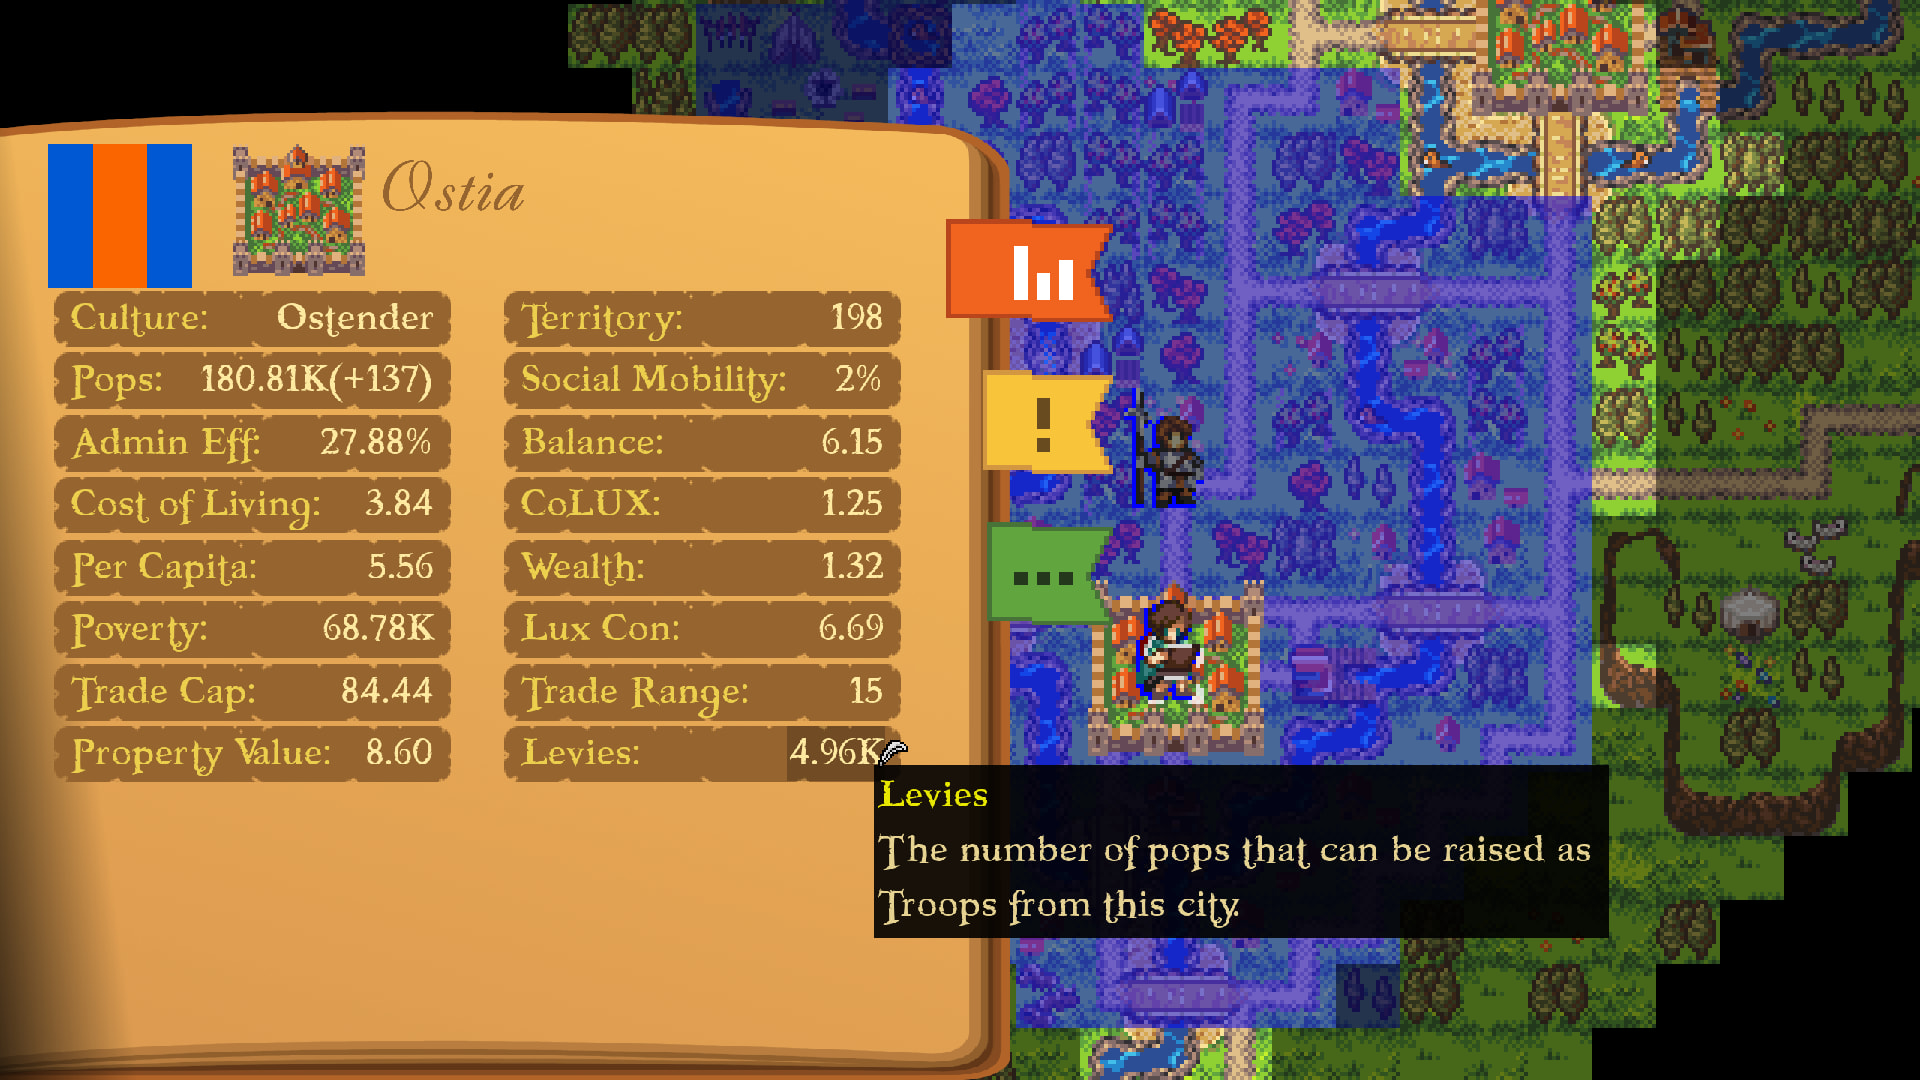
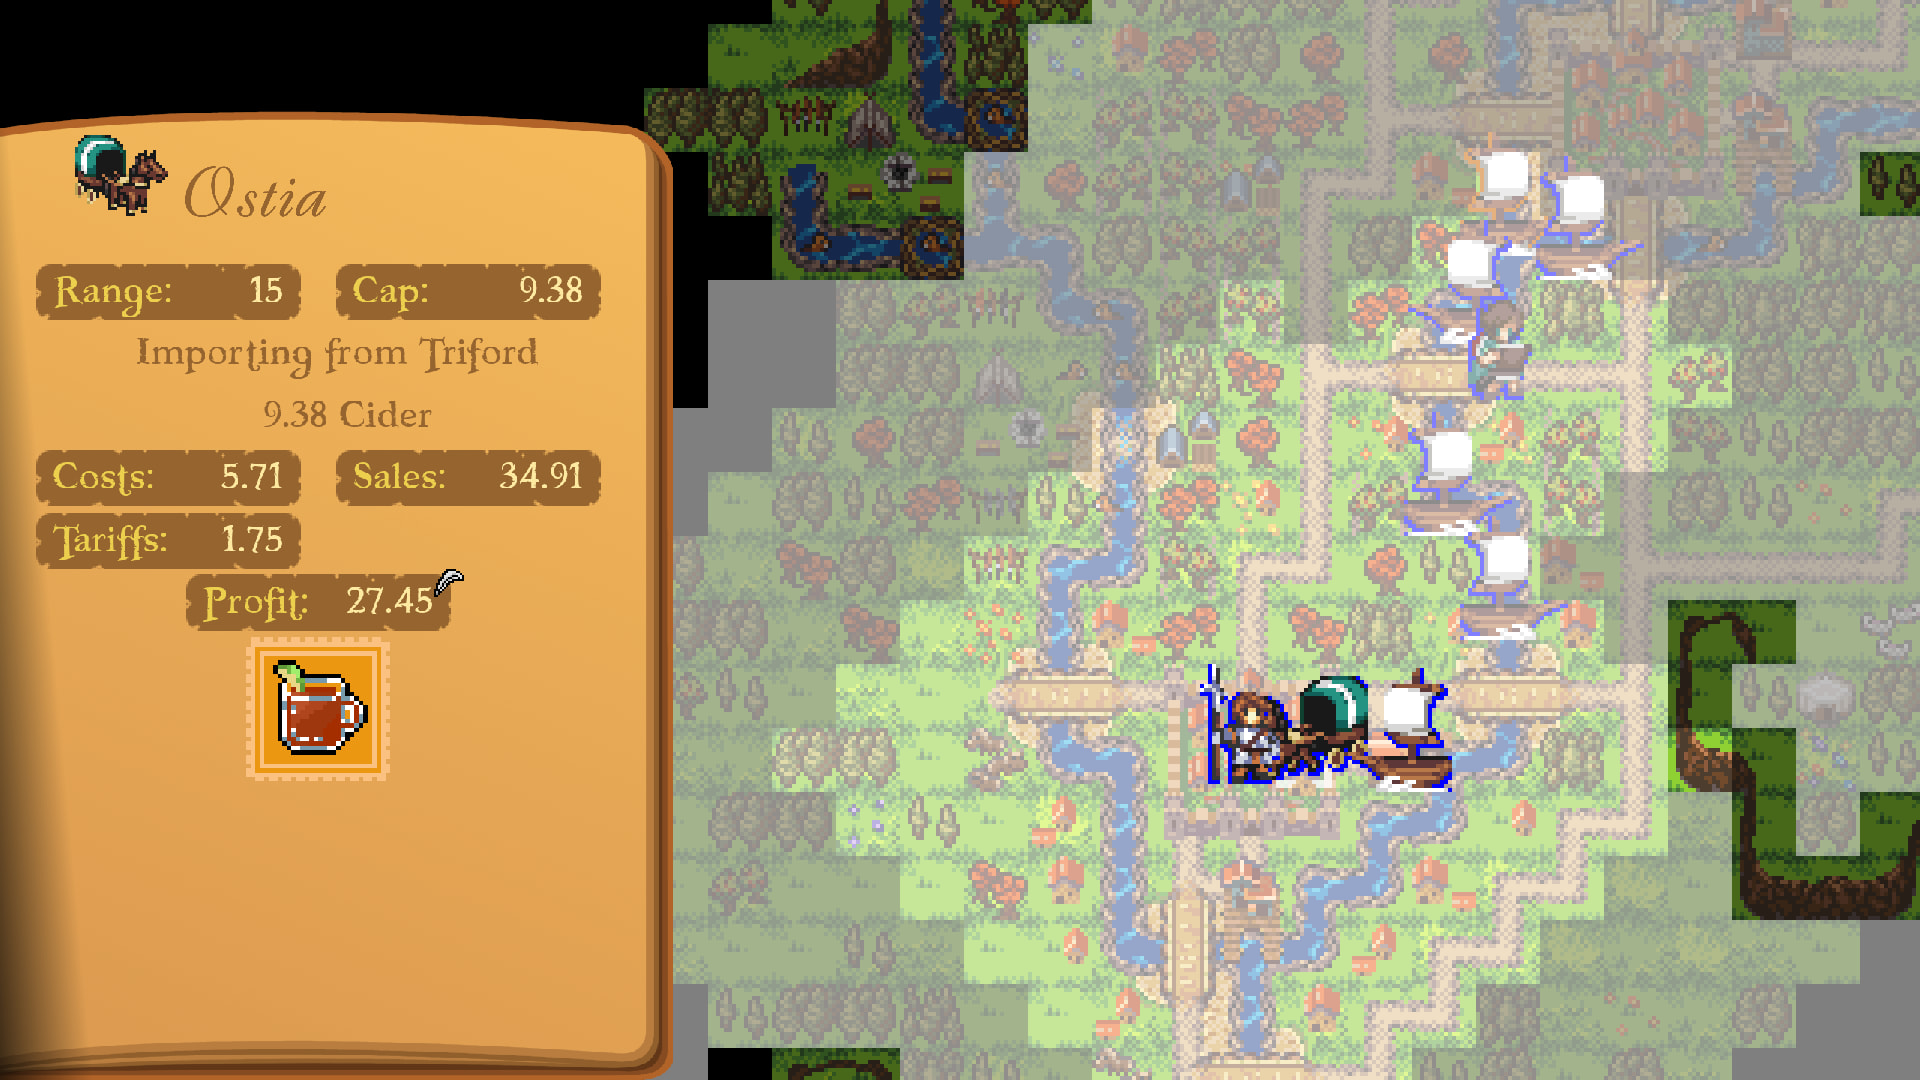
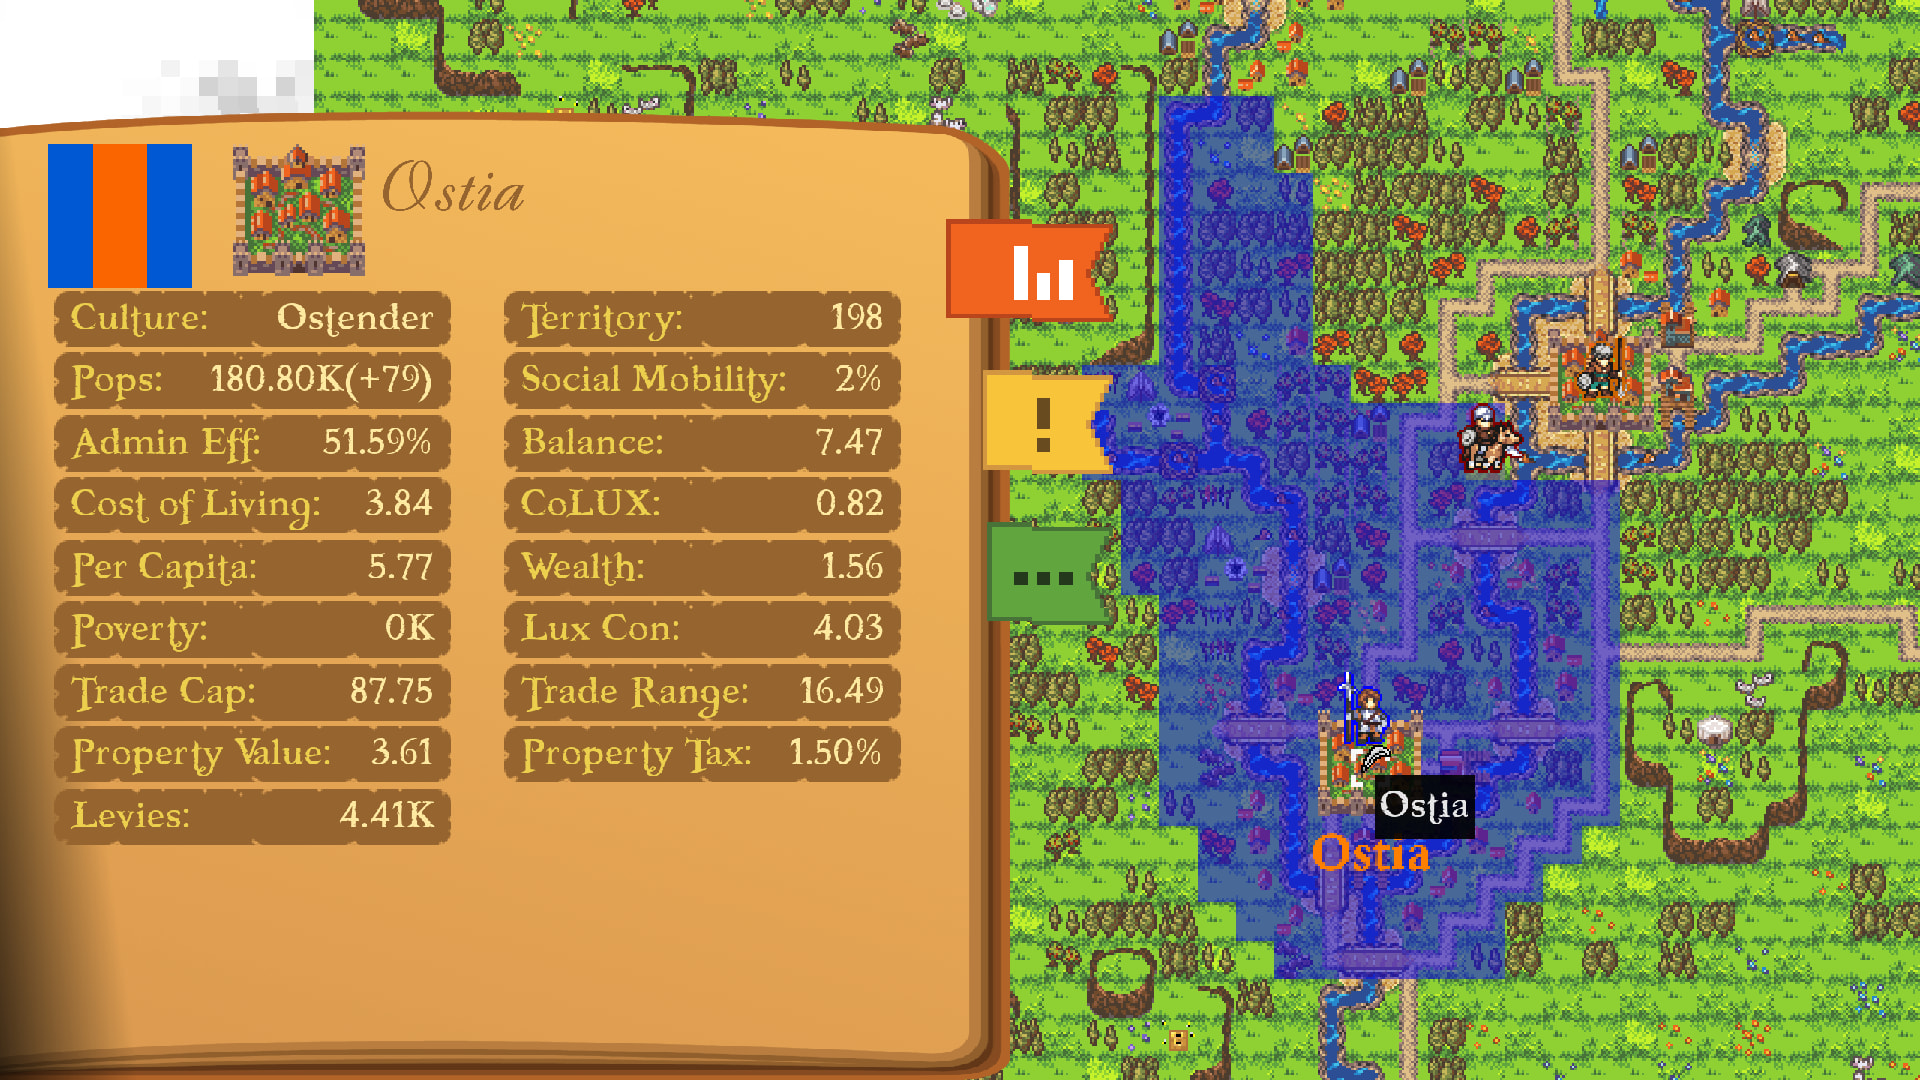
The capital of the province when it was an imperial holding, Ostia is the most impressive city in the region, and the player’s sole starting city. With ~180K people centered around the confluence of the West and East Vines, the city is brilliantly positioned for shuffling goods between Ost and Raleigh to the south. As a major center of trade, Ostia starts with a rare sector, Insurance, granting improved Trade Range to reach more markets. This couples nicely with the fact Ostia produces horses, which also increase range as well as providing the ability to recruit the Caravan Driver troop, which is a bulky cavalry unit offering logistical support.

Cities conduct their trade in order of who has the most Commerce per Pop and no city in the region tops Ostia, meaning the merchants based there have first dips on the most profitable trades. With its starting focus on higher tier Sectors it will have a strong demand for luxuries, so one option for your ‘build’ will be to invest Civics in the Commerce tree to maximize your trade range and capacity to bring all the excess goods from other production centers into the city to be devoured by the city elites.

Triford

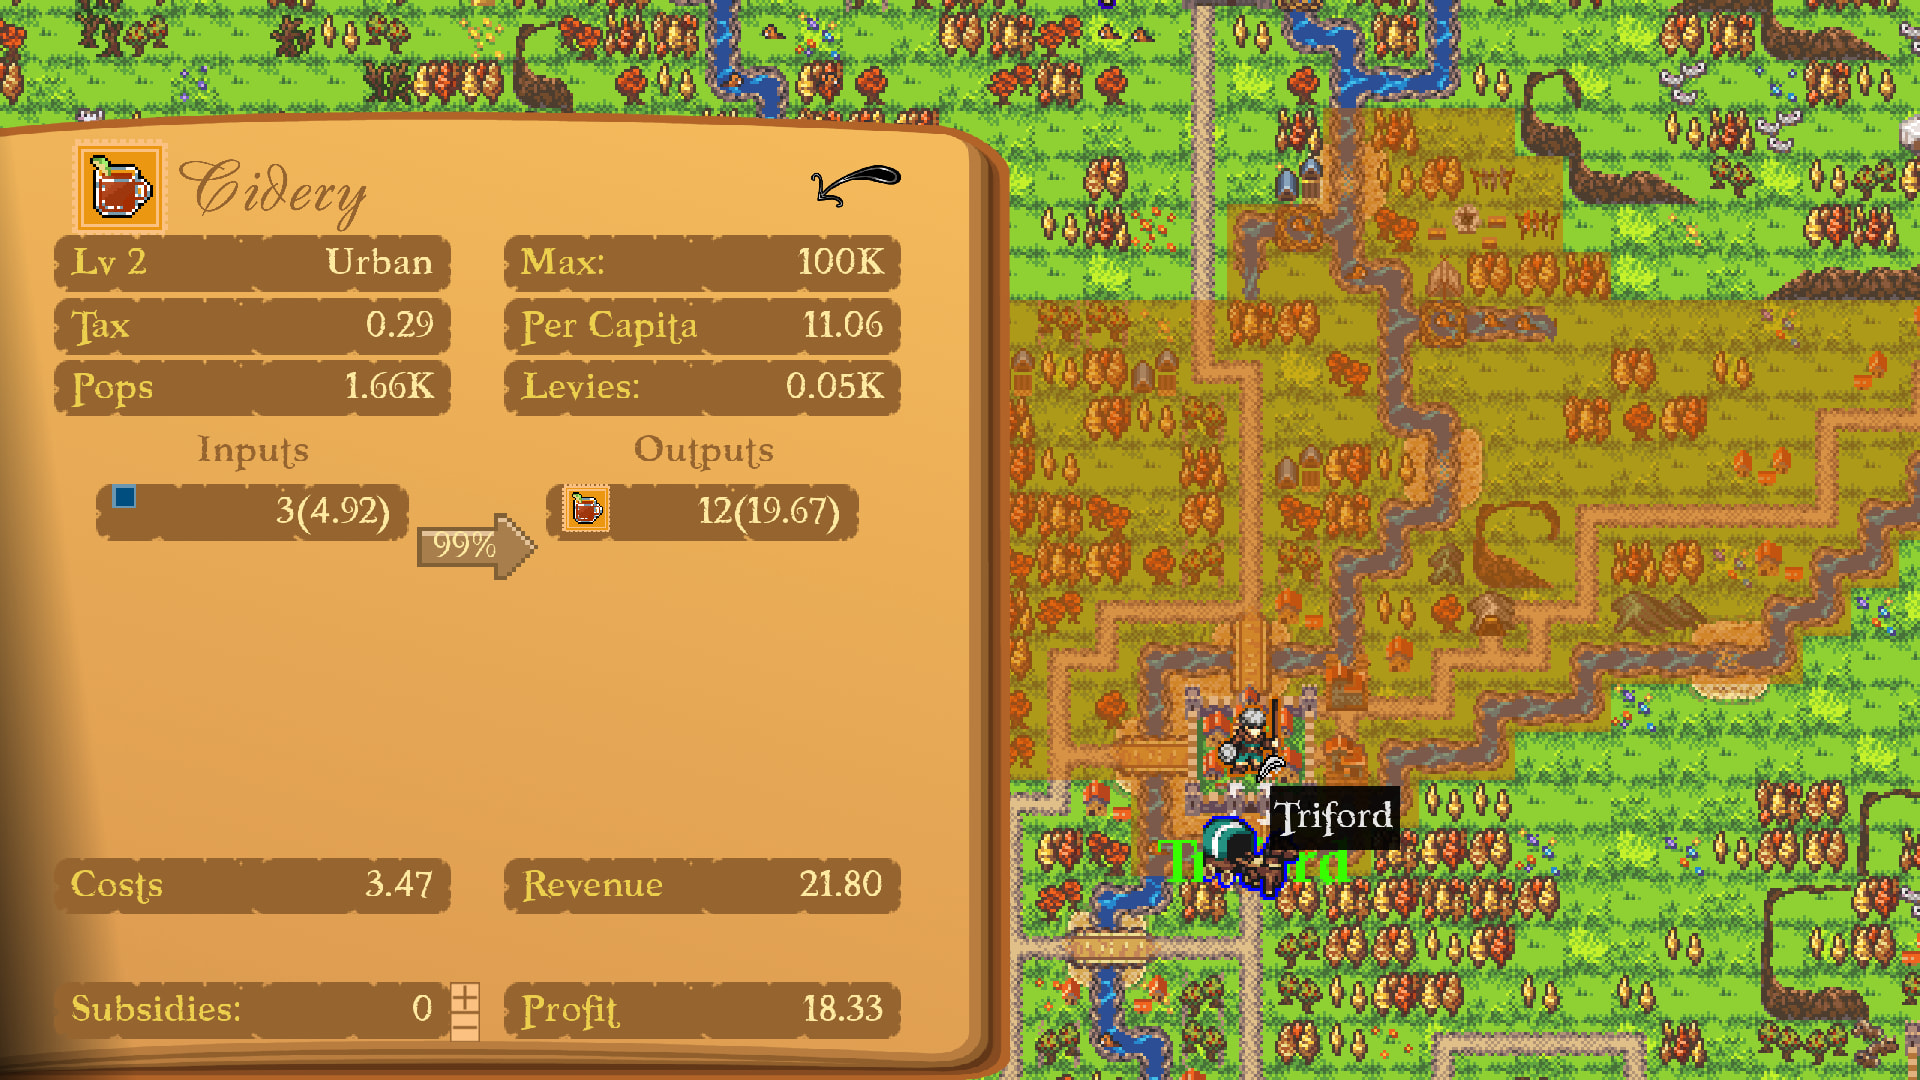
The first city the player will interact with and likely your first trading partner, Triford is a very typical Ostender city with the second largest population in the region of ~118K. The differentiating aspects of Triford are its copper mine and starting Cidery Sector. The copper mine is awkward, in that it easily gets out competed by other nearby mines and will likely need subsidies to achieve a surplus for export. Once it does however, the price will stabilize and it can become self-sufficient, but this takes significant investment. Doing so will give you a surplus of ore, which can be used by a Smithing Sector if you choose to open one, creating Arms and allowing the recruitment of Heavy Infantry. Leaning into that starting Cidery can be more profitable however.

Due to starting diplomacy, Triford hasn’t been able to export its Cider, causing the price to crash and bringing a sort of recession to its Cidery sector. Once trade gets moving again, the price will begin to rise, the profits will jump and pops will begin moving back. Once their starting surplus is cleared it will take a while for enough pops to return so it can meet the rising demand, but it will happen on its own, one of the benefits of free trade. As the player you’ll be able to vassalize Trifrod relatively early and I would encourage you to dedicate some turns to attracting workforce to the Cidery as it can become very profitable quite quickly. Ostia will benefit greatly from this, because as mentioned their merchants get dibs on the best trades and the margin on Cider will be very high for quite a while.

In terms of ‘builds’ Triford can go in a lot of different directions, but I’d recommend turning it into a production hub to supply Ostia with goods of your choosing. A simple choice early could be between opening a Brewery, turning the city into a major alcohol supply center, or leveraging the cheap price of lumber to open a Carpentry Sector. The advantage of the Brewery is that Beer is another luxury and will likely be more profitable, but Carpentry is a staple good and reducing its price will decrease the Cost of Living (CoL) which has a host of positive effects.

Trapfort

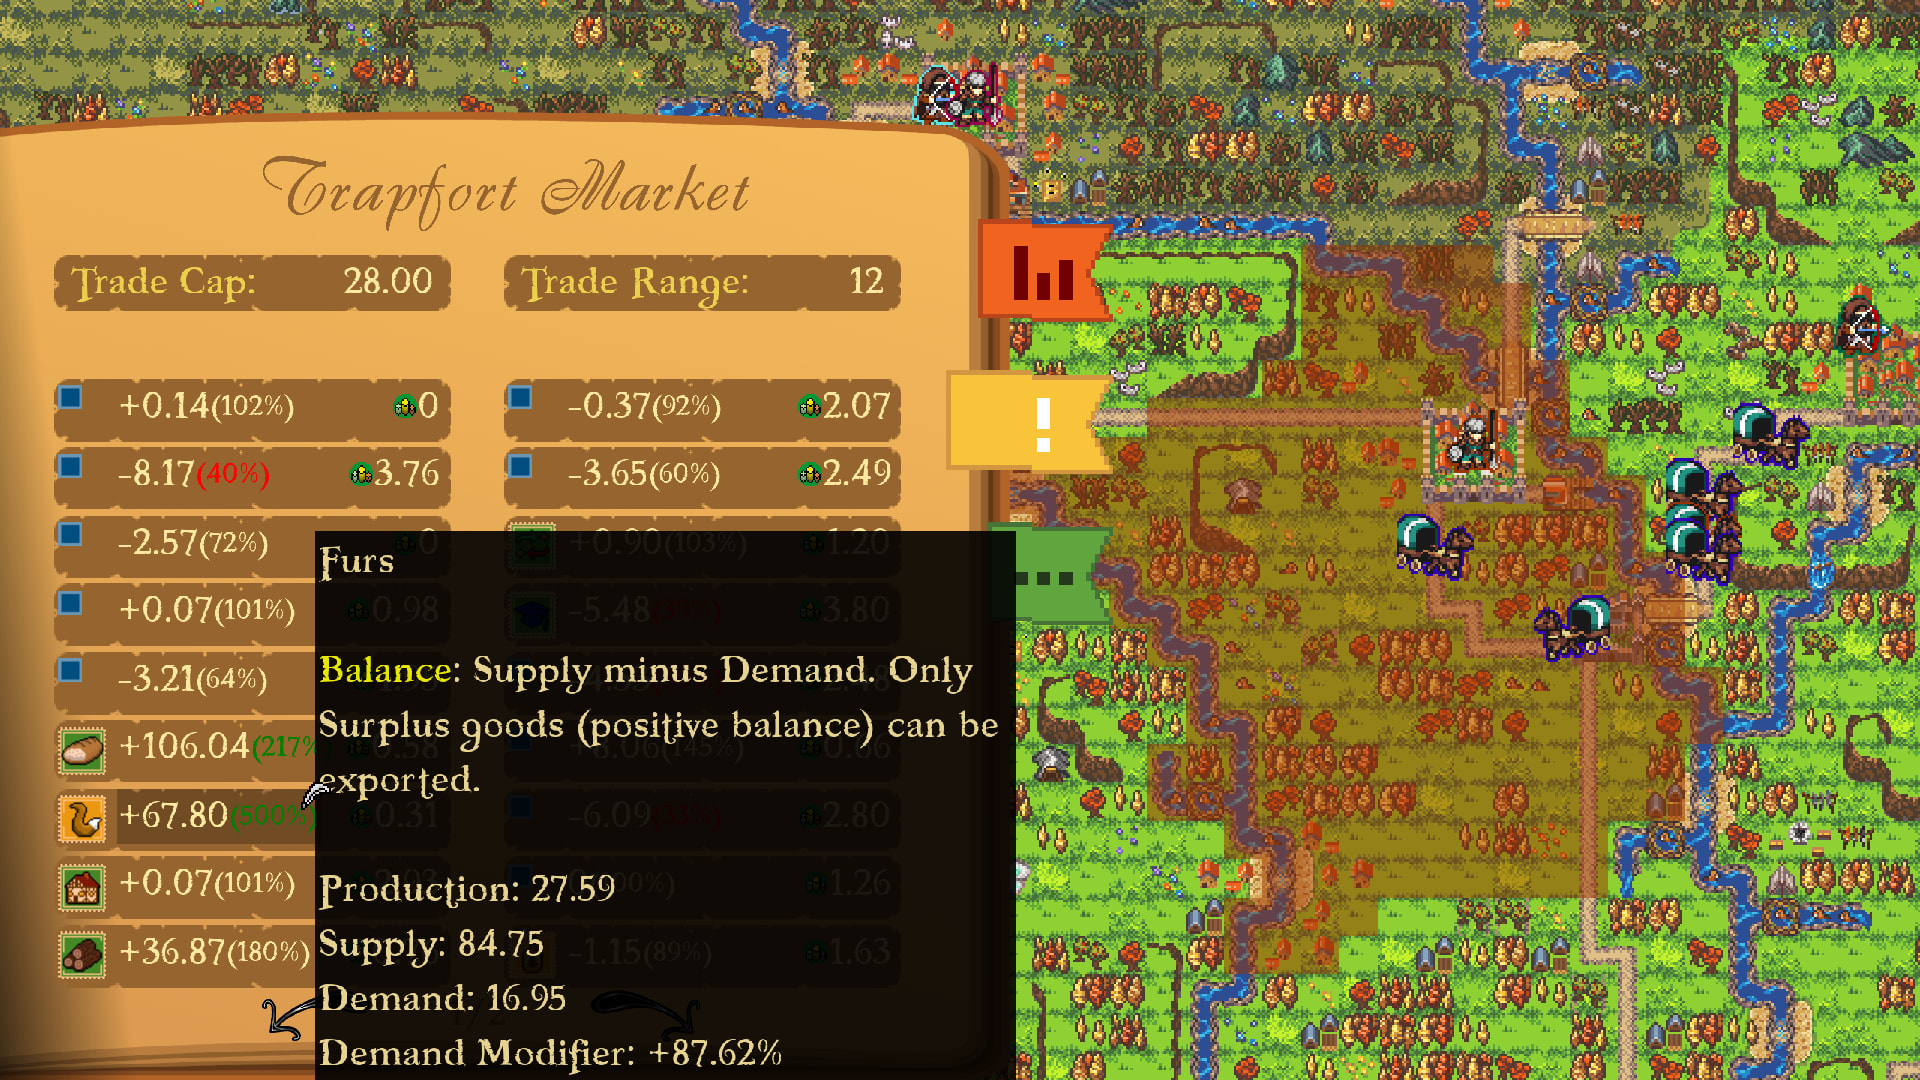
(Not all goods have icons yet, please ignore the blue squares k thx)

Trapfort hates your closest ally and that will make starting diplomacy awkward, especially since the city of ~90K people is rather important. Dubbed the ‘City of Beavers,’ if maxed out it could probably supply the whole of Ost with enough furs to meet demand. It is also positioned between you and your starting ally, which is not ideal. Additionally, its iron mine paired with a starting Smithing sector leaves it as the only source of domestically produced Arms in Ost at the start of the game. Meaning if you want Heavy Infantry early… You’ll need to be very very nice or very not nice.
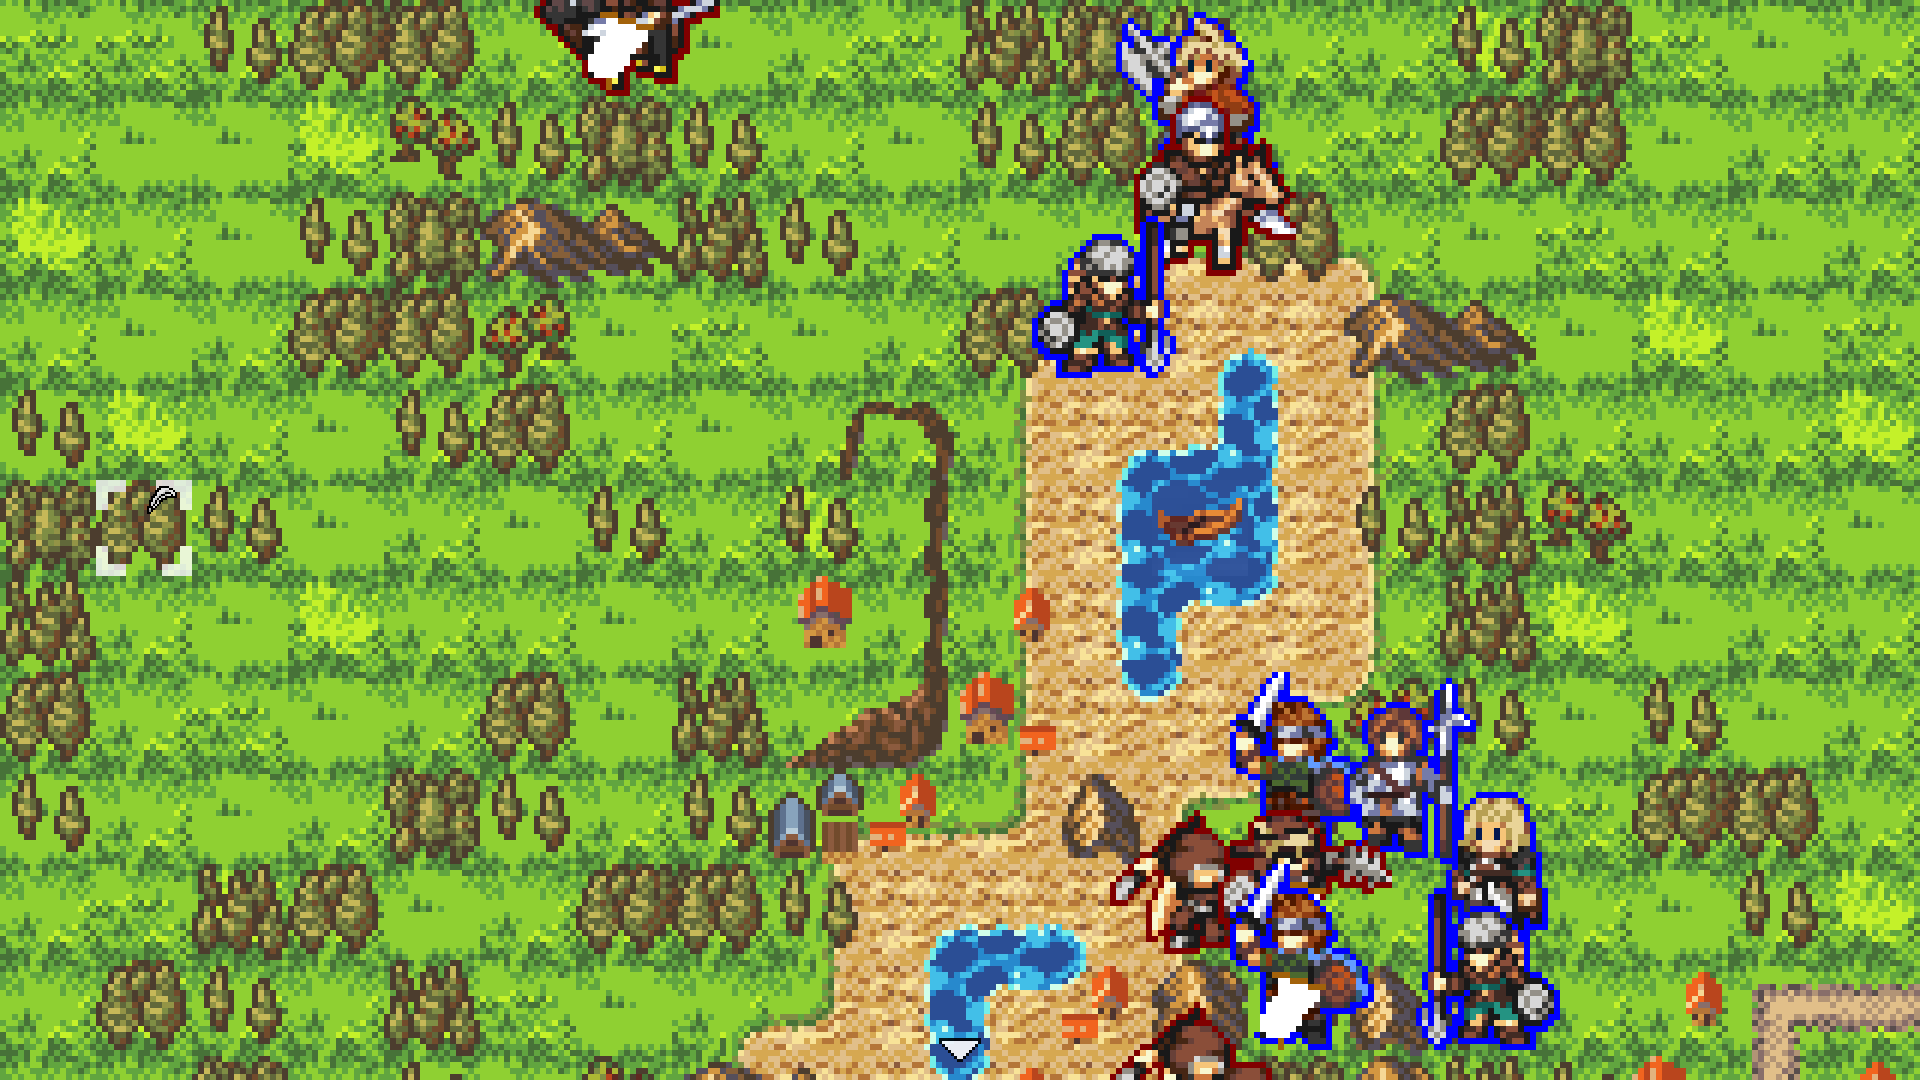
The Ostender sales tax on furs also gives Trapfort a strong source of revenue and therefore a strong starting army, with Heavy troops. They also tend to trade with Eastfalls who have horses, giving them access to cavalry. This varies though depending on how the AI picks its starting rivals. You can tell Trapfort is a natural place to become Ost’s armory and training ground. That’s what the empire used the fort for, it was their bastion against the Woadeners and the people haven’t forgotten that. A shame since your starting allies with silk to trade are those same Woadeners.

Colonia Lucien

This remote settlement is in the far northwest of Ost and was the furthest extent of Dictator Lucien’s conquests, the exact line of which is easy to see as the wall he erected still stands, though it’s seen better days. The Cercei colony is small at only ~47K pops, but does have some Cercei minorities giving it access to some Cercei recruits, which is unique for the region. It’s starting sector can be either a Cidery or Masonry, the later of which leverages the fact that it is one of the only places in Ost with a surplus of Stone. This also means construction tends to be cheaper here, which might prove useful if someone decides to spruce up that wall…

Despite its small size it has the potential for rapid growth. It has a surplus of Wool->Textiles and Stone->Housing giving it a fairly low Cost of Living (CoL), which means low Poverty. In addition to this, it has a ‘Rare Herbs’ modifier, improving its production of Medicine, which also boosts population growth.

I like leaning into Stone production and by building Ostia in a way to maximize its trade range you can have Lucien supply it with all the Stone it needs, which will help to reduce Housing costs in your capital city.

Eastfalls

If you want to maximize population growth, Eastfalls may be one of the best choices on the entire map. This scenic city of ~78K overlooking the falls has a very high fertility, boosting its Food production and it also shares the ‘Rare Herbs’ modifier for a competitive Medical Sector. With the high fertility and the fact that its Agriculture Sector produces Horses and Wool, it’s very profitable to go all in on it. Easily the most profitable Agriculture Sector in Ost, Eastfalls will be producing a ton of Food, to the point where exporting it is often competitive to exporting luxuries. This presents an interesting choice, do you want Eastfalls to enjoy the benefits of plentiful and cheap food, or do you want to direct that food to a particular city?

While the falls limit its trade range south toward Ostia and Triford, it can extend up the Lesser Vine River into the mountains where it can import things like Precious Metals from the silver mines the Albines control up that way. Eastfalls has the potential to start with either a Cidery or Insurance Sector, the latter of which will help with trade. Eastfalls can sort of act similar to Ostia, but anchored around the Lesser Vine instead of the Greater Vine, though its focus will likely remain on Agriculture.

Briarcliff

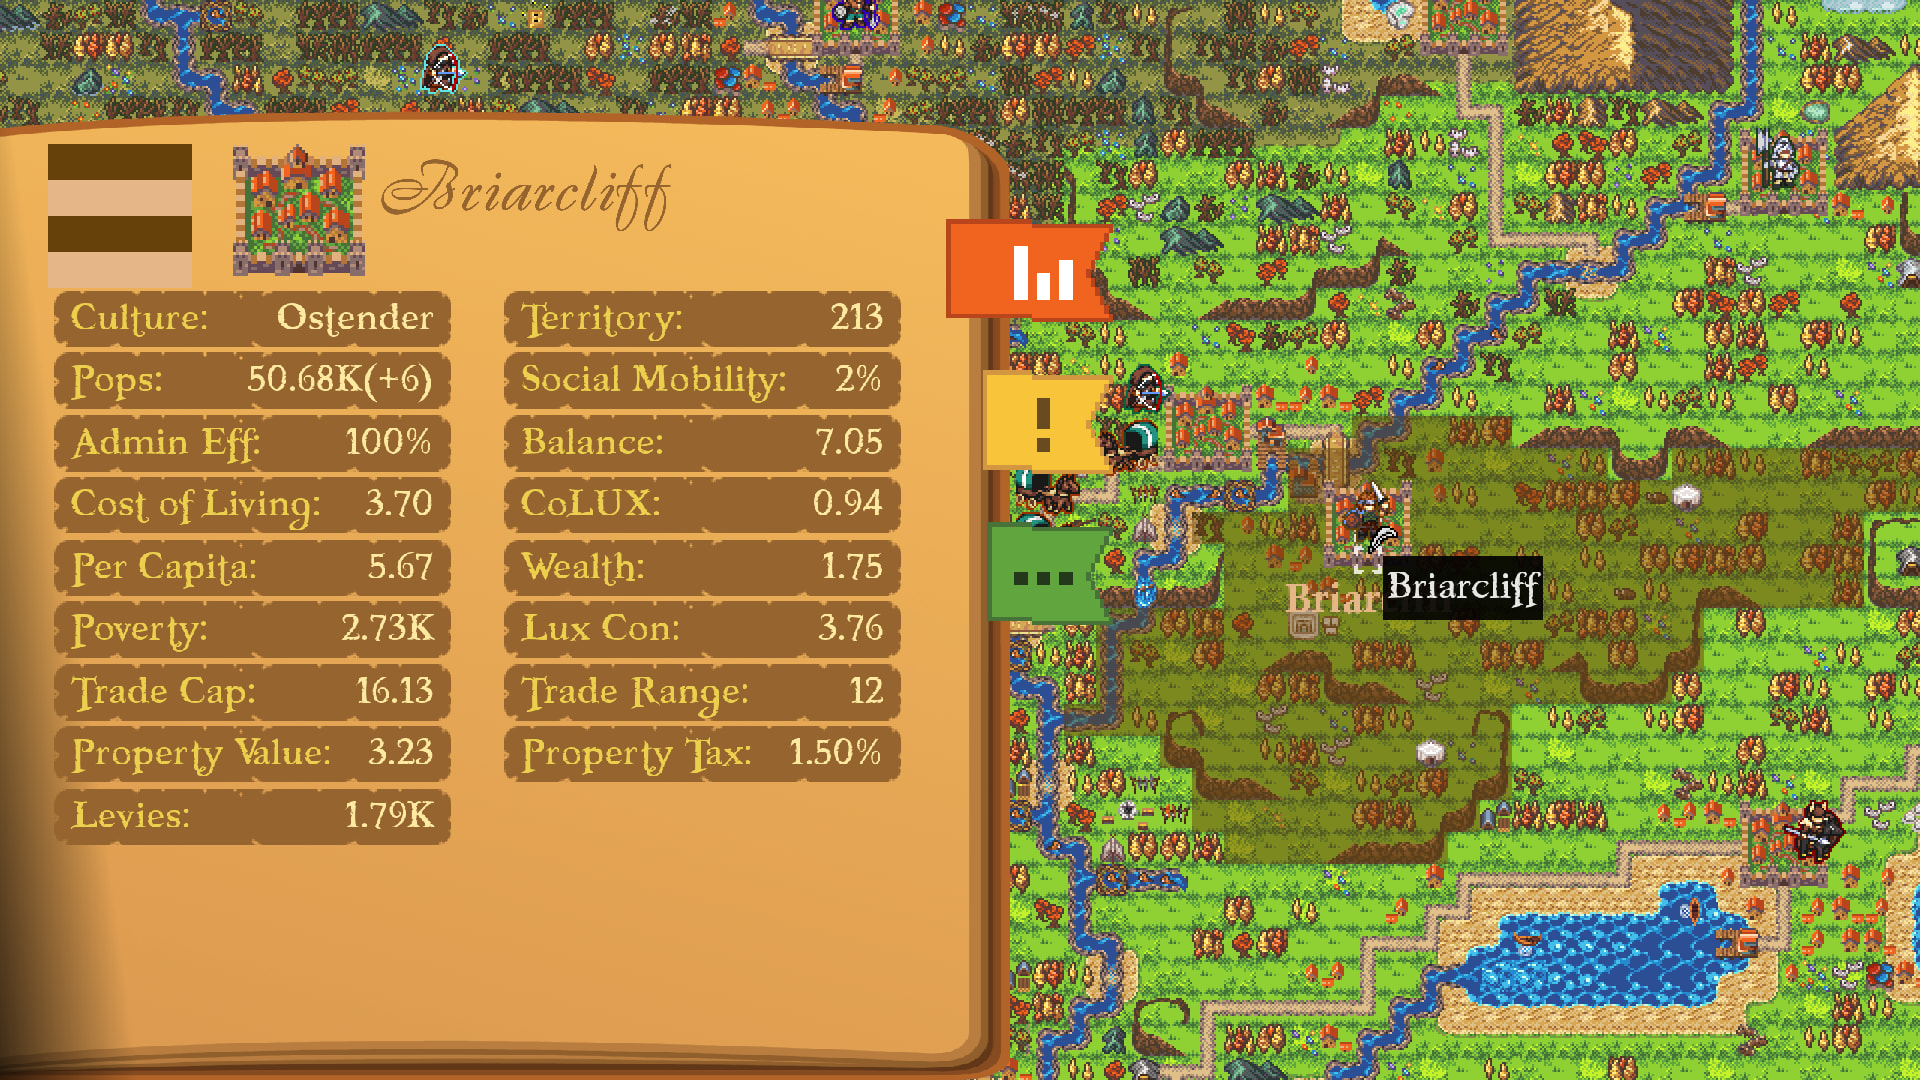
The sister city of Eastfalls is but a stone’s throw away just on the opposite side of the river. It is the smaller of the two with only ~50K pops, some of which are Lyri minorities, granting access to some of their recruits. The terrain is rather rough and underdeveloped, so it’s a bit of a blank canvas. Constructing a road to the nearby Lyri city of Jezeragrad could be very helpful in creating a useful new trade route, which should be relatively affordable since the city has a surplus of stone.

But why is there a Lyri minority here anyway? Where there are Velikirog, Lyri nomads will follow. The ‘big horns’ cause Briarcliffs Hunting Sector to produce extra Leather and Meat, which reduce the cost of Light Infantry and CoL respectively. This pairs well if you want to invest a Civic Perk in a Tannery, which will further increase Leather production, making Briarcliff an attractive place for recruiting light troops, including Lyri ones.

Closing

If it isn’t apparent, I love learning about why different cities and towns are where they are. The different industries and natural resources/features that drew people to different areas and so I try to put a lot of effort in making each and every city feel like a unique place as it’s someone’s home. Ost in particular is inspired by the Hudson Valley, where I grew up, and the fur trade that drew the Dutch to the region. I will continue to make similar dev diaries covering each of the world’s regions, but we’ll come back to those in the future as the next dev diary will focus on levies and recruitment. I hope to see you in another two weeks on October 30th for that one!
2 Likes

Oh.

OH

I gotta keep an eye on this. This looks sick as hell.

Also holy shit Tobey art.

1 Like

Thanks! I recognize you from bluesky too!

1 Like

GNO Dev Diary 4 - Recruitment

Hello everyone, another fortnight, another dev diary. Today’s is about recruit troops to your army. Btw, I probably should get better about doing call to actions, so be sure to wishlist the game on Steam if you haven’t already, it’s the best way to support indies!

Steampage

Read Time: ~5min (~1,100 words)

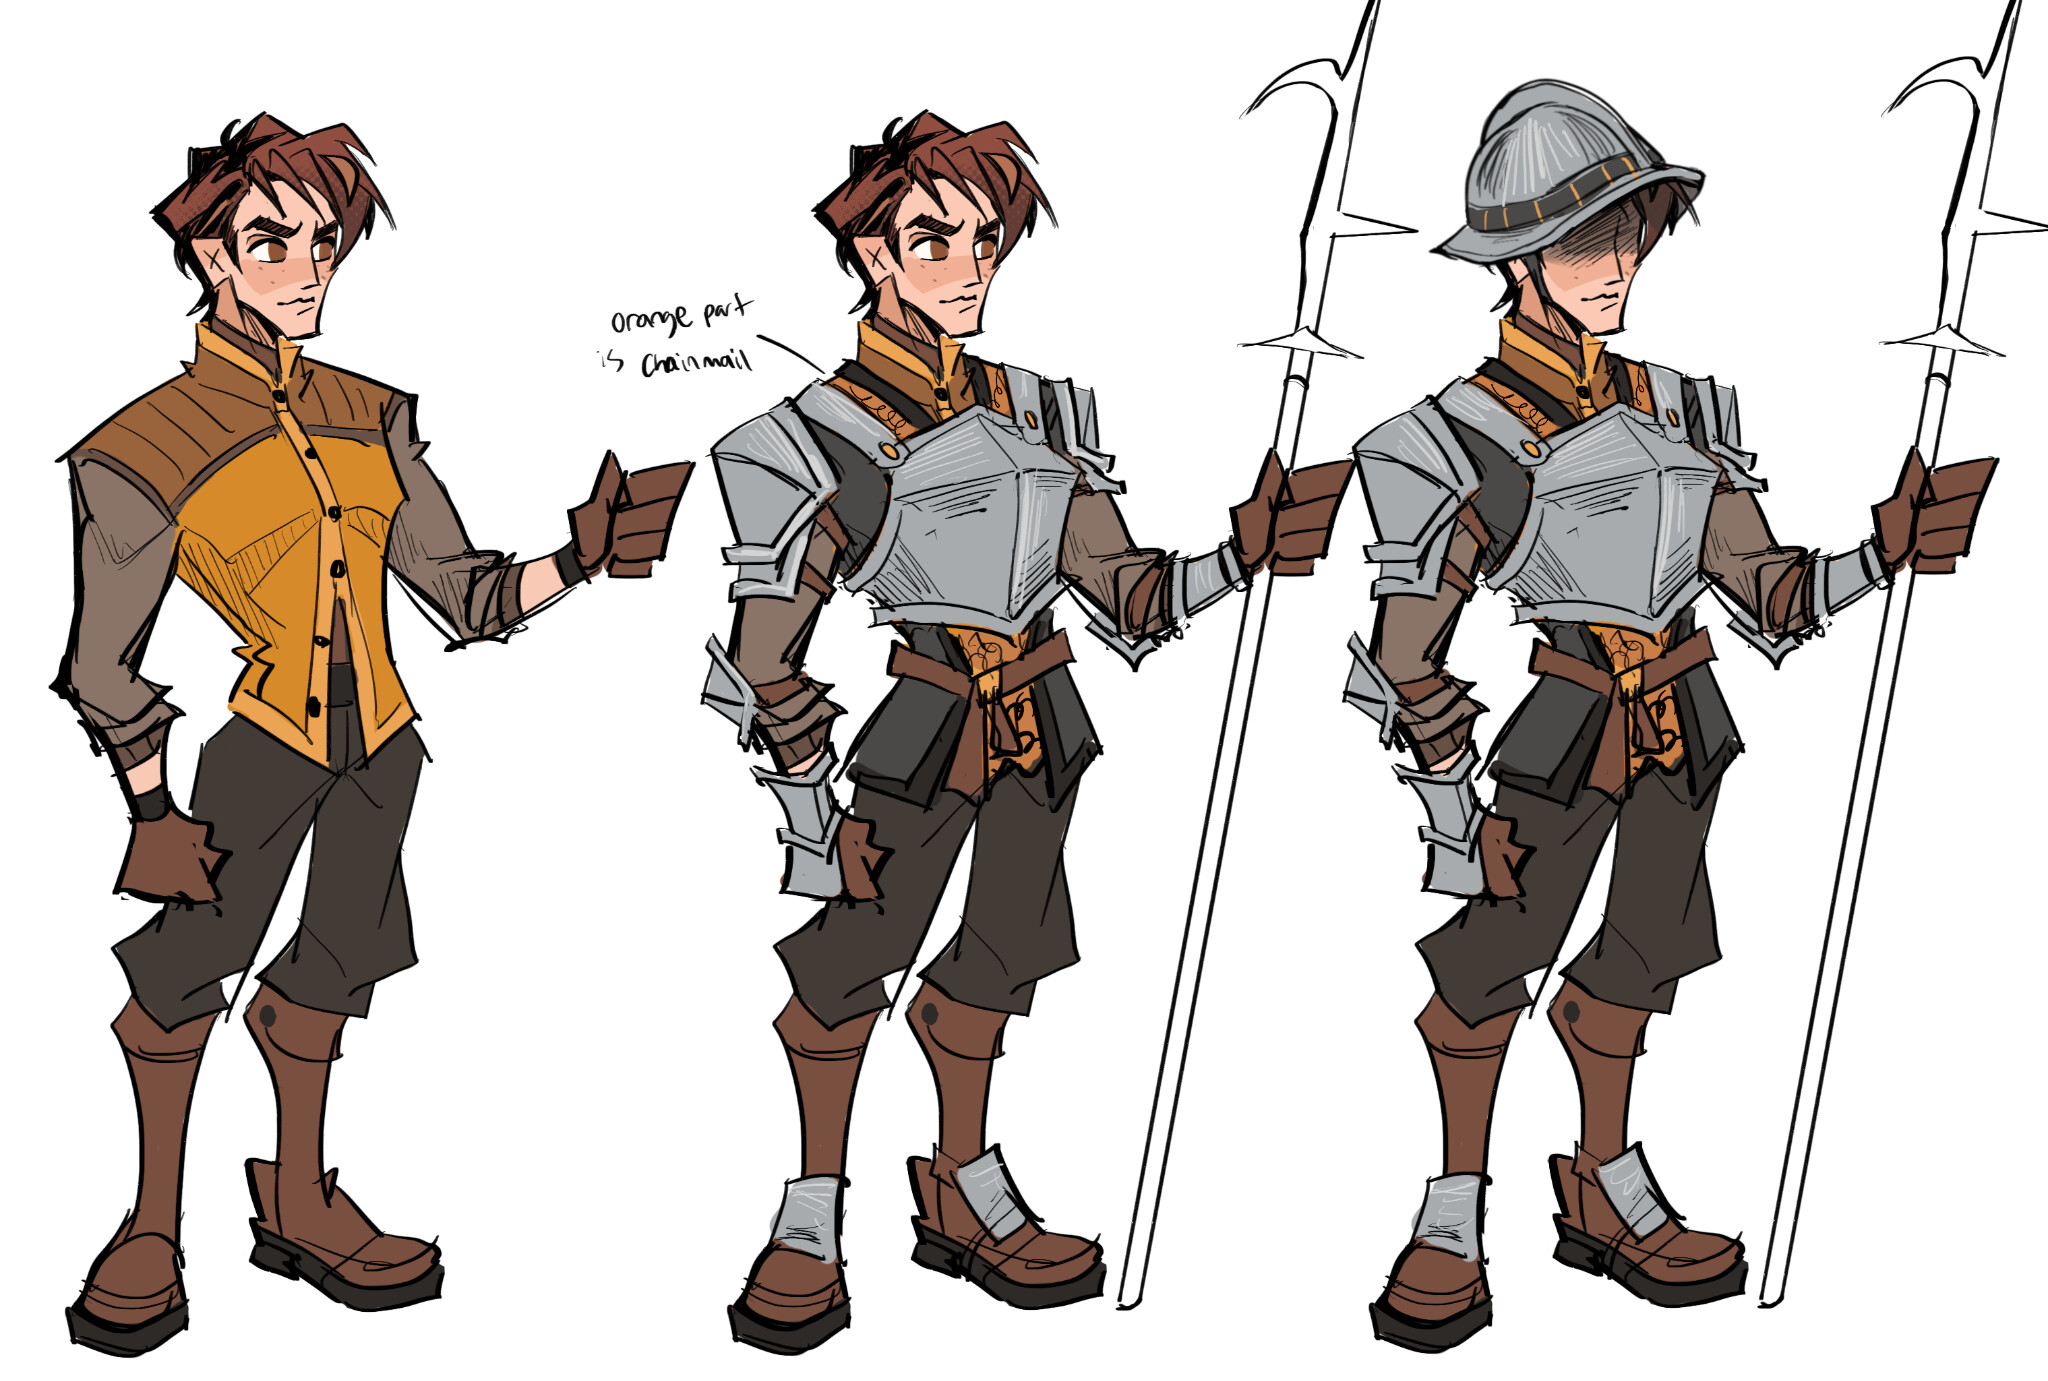
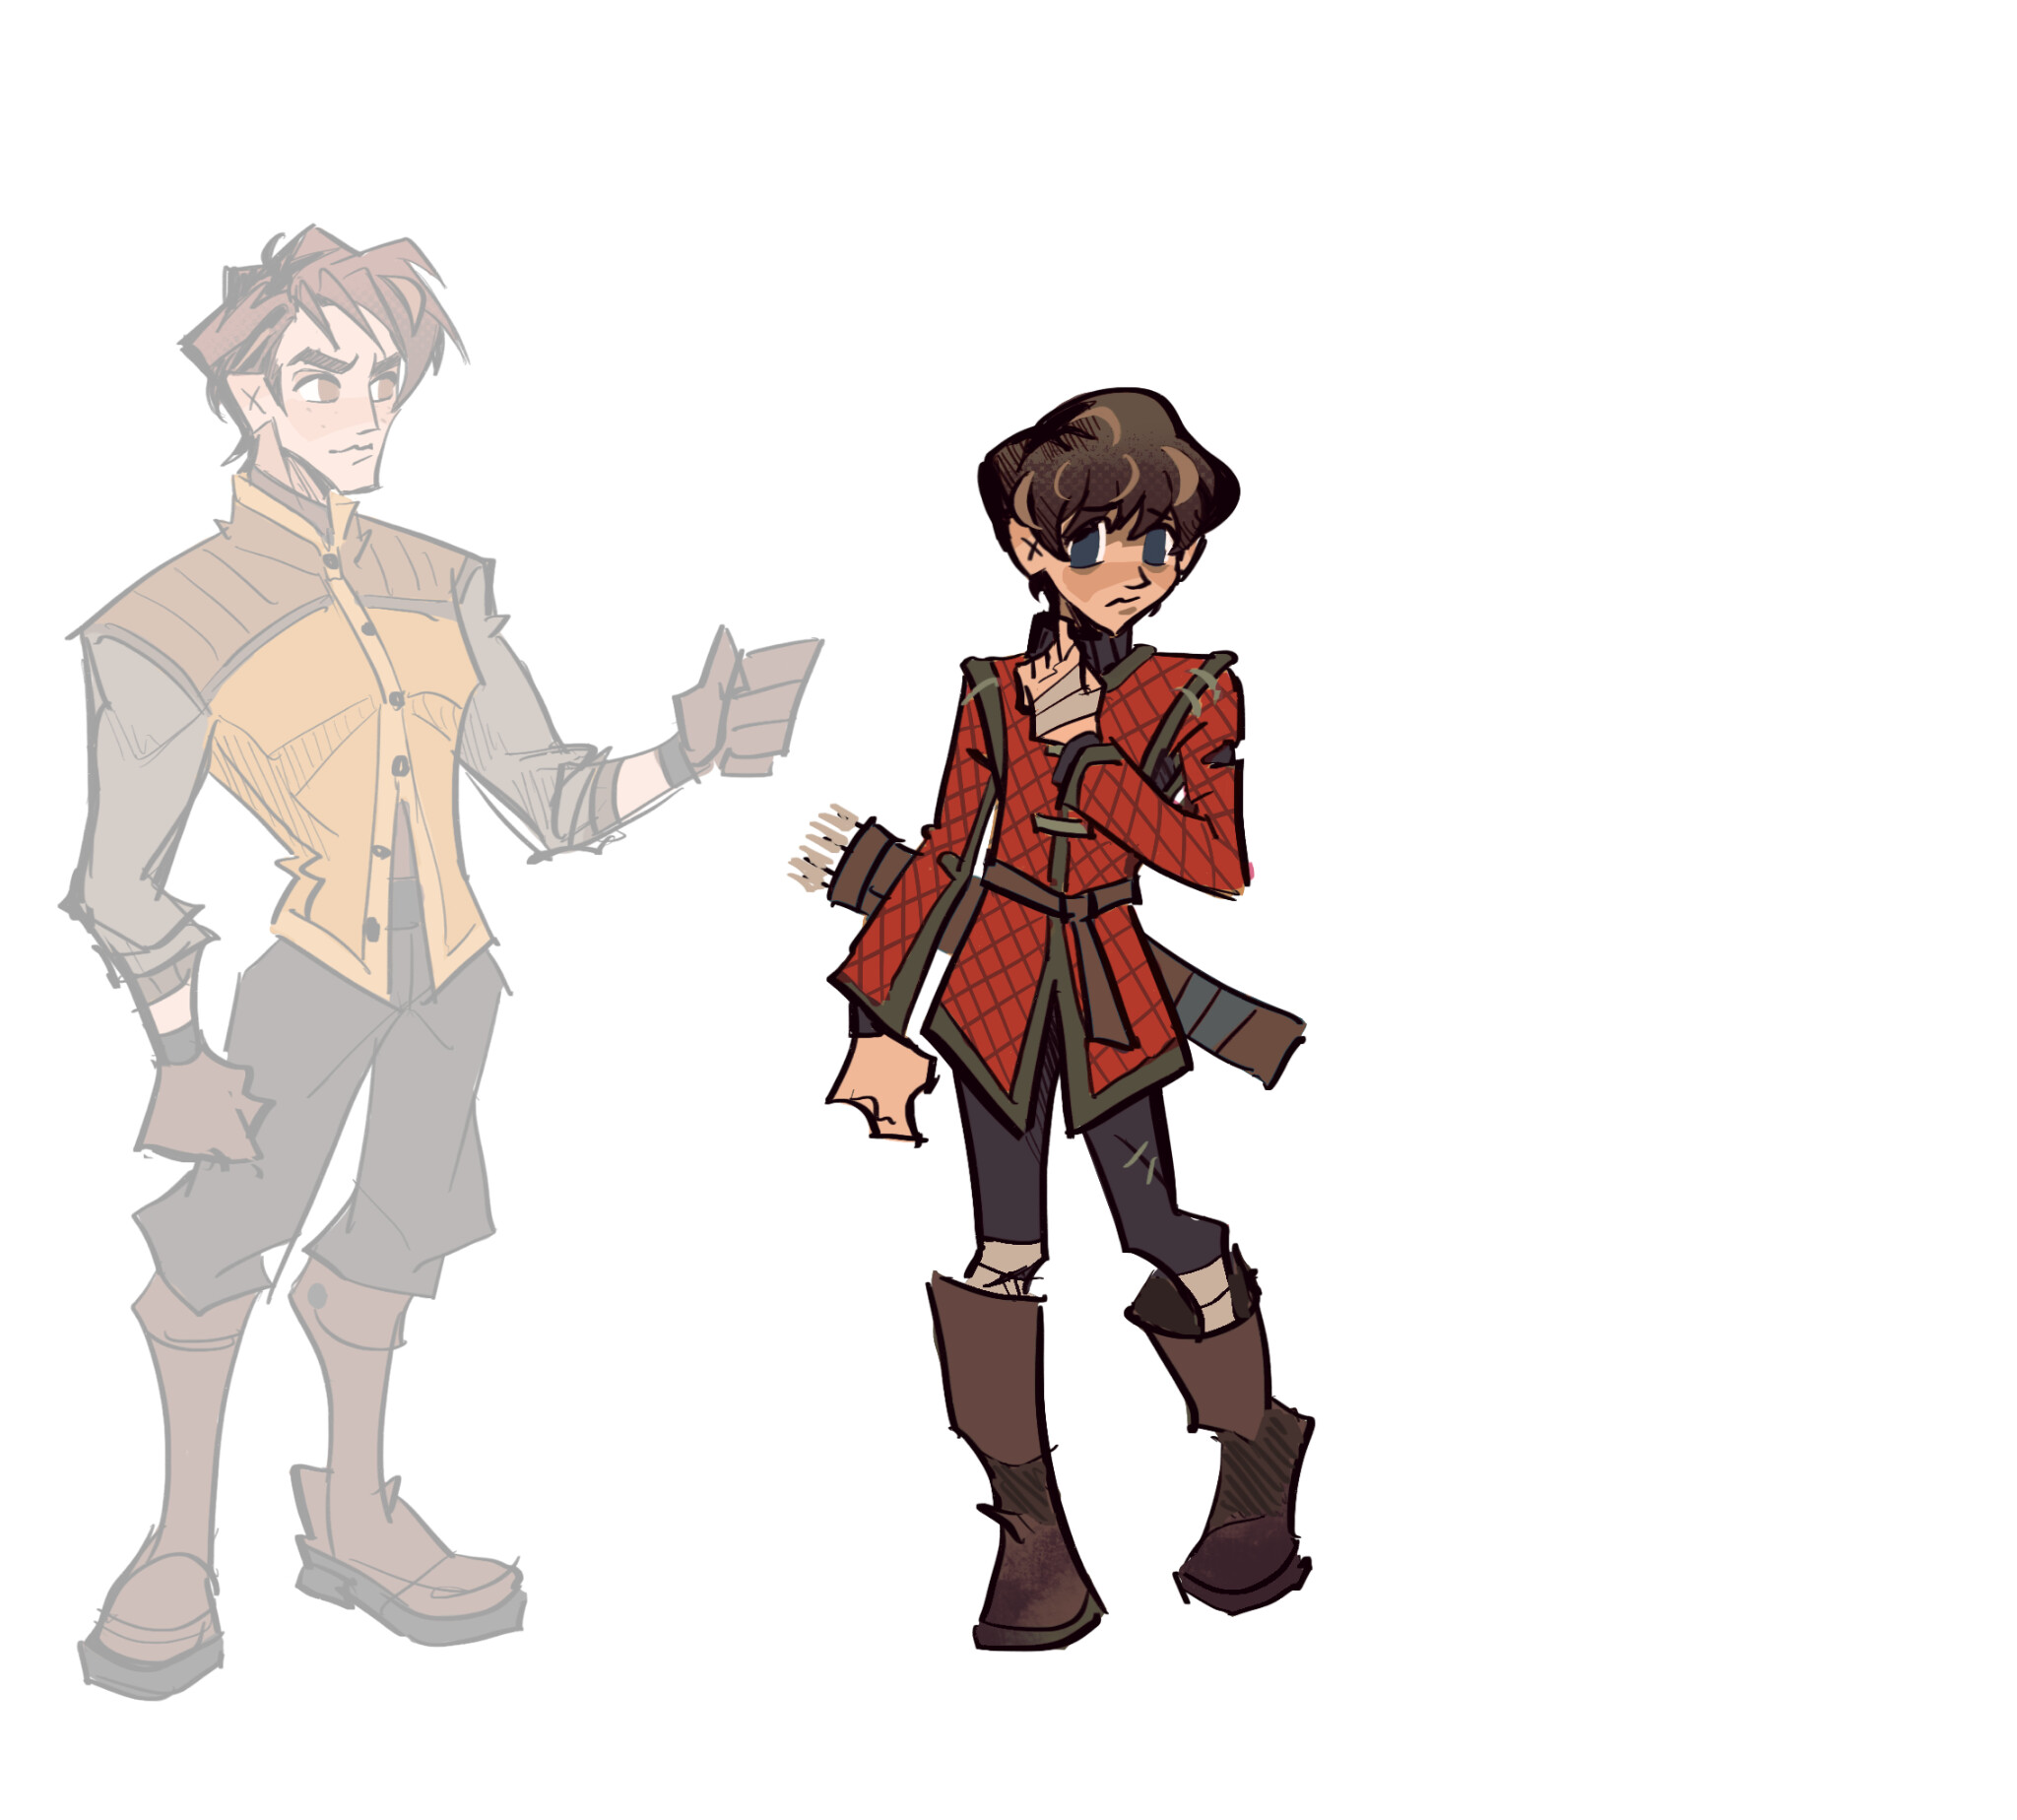
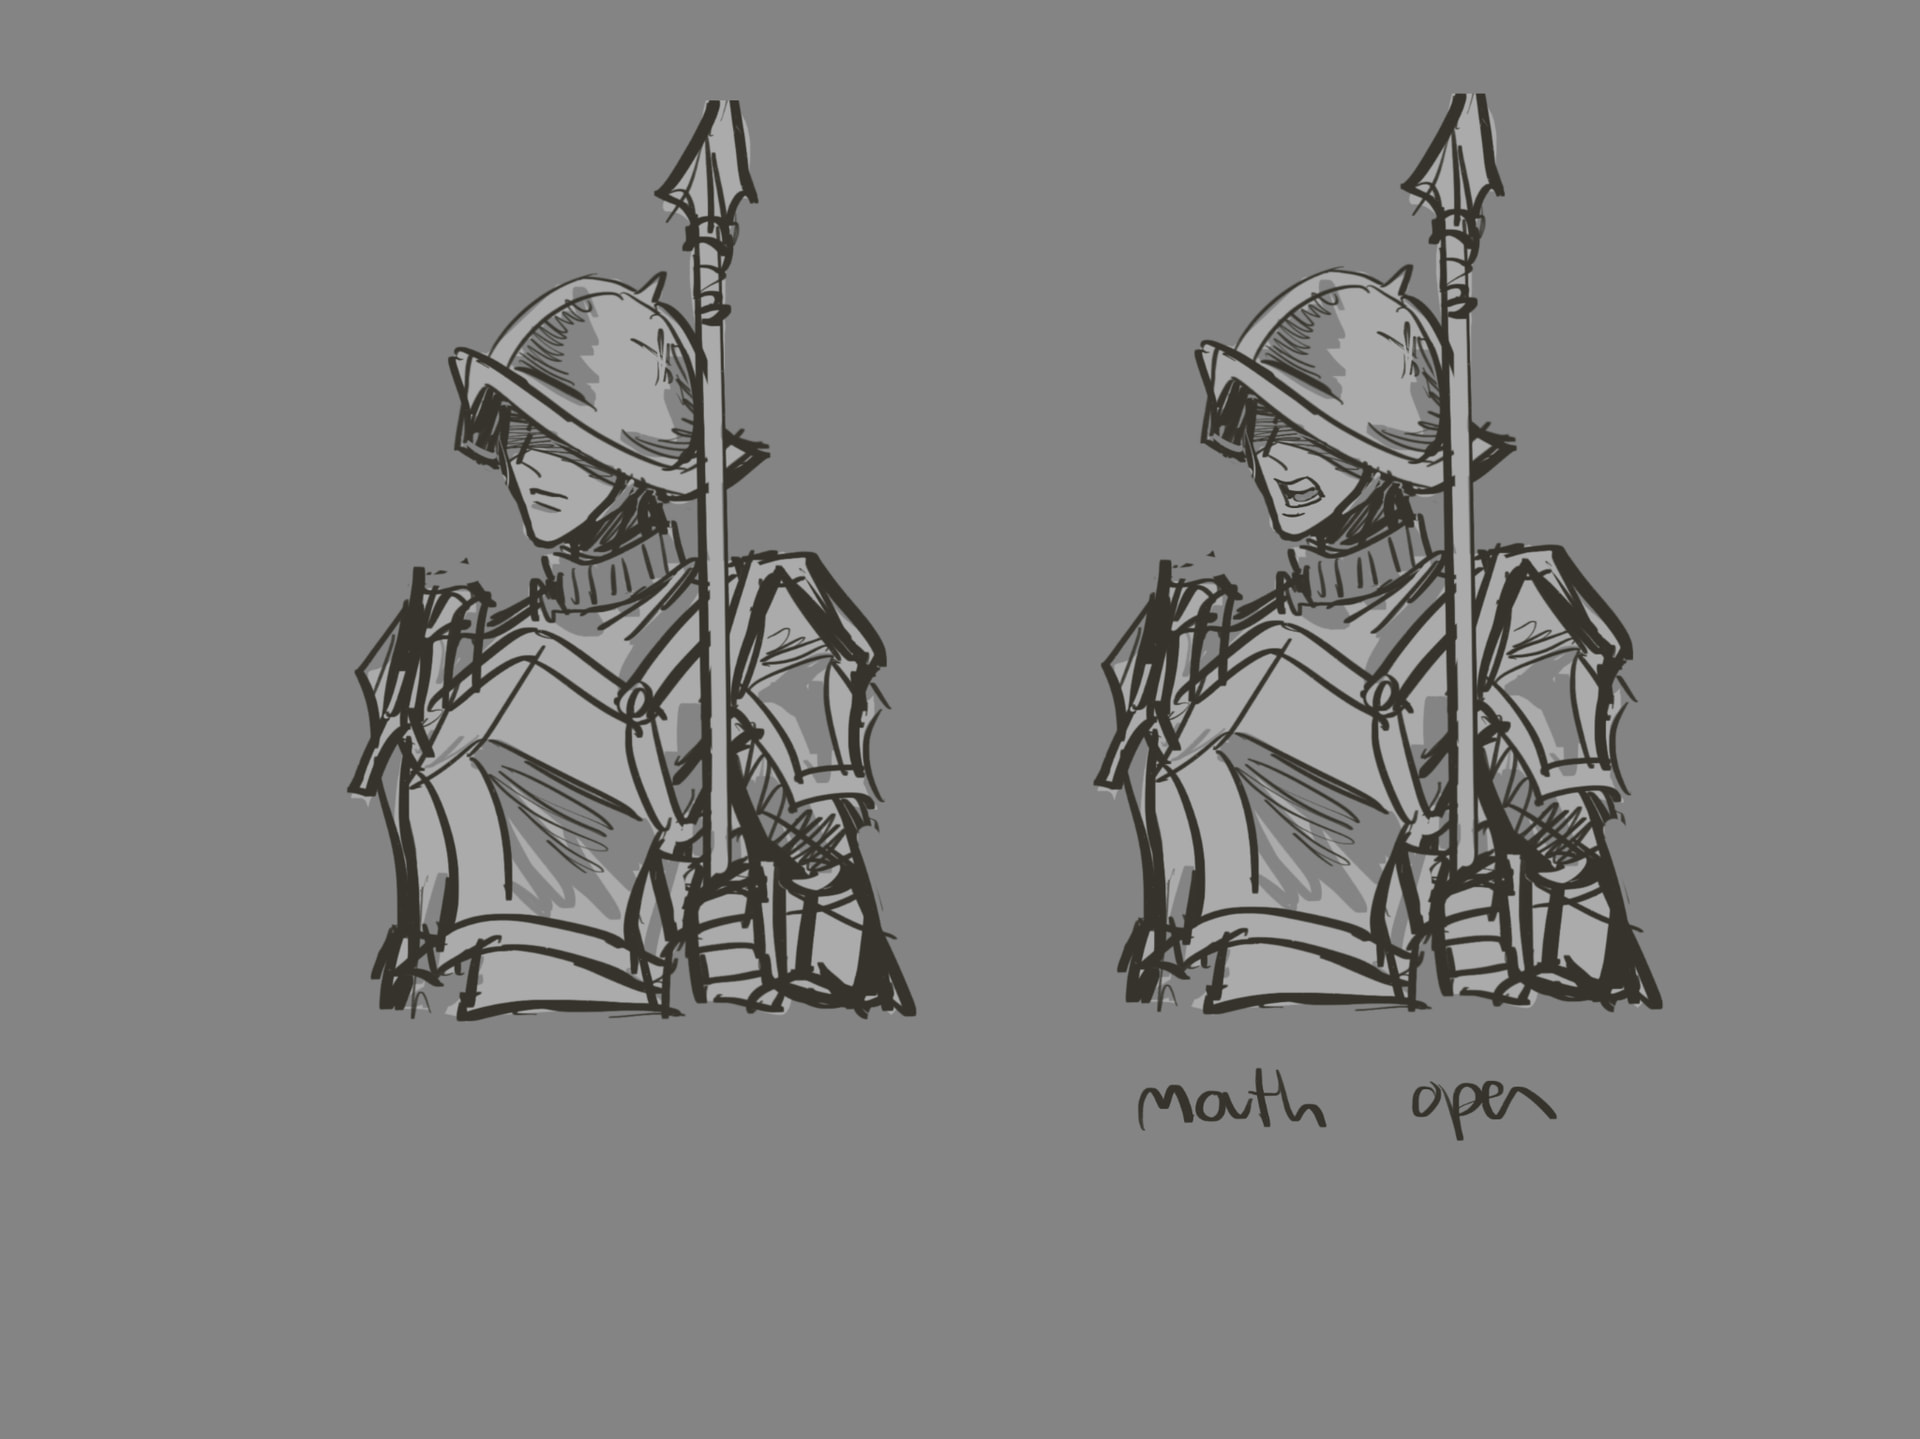
Above: Concept art of generic soldier

Dev Diary 4 - Recruitment

Named Characters

There are 2 types of Troops you can recruit, named characters and generic troops. In order to create an army, you’ll need to assign a character as the General. In battle, if your general goes down, all of your Troops will lose a chunk of morale, 5 for right now, but this may change based on more play testing. The General isn’t just a Troop with a target on their back however, every character has several Leadership Stats that come into play while they’re a General or an Admin managing your cities. Those stats are:

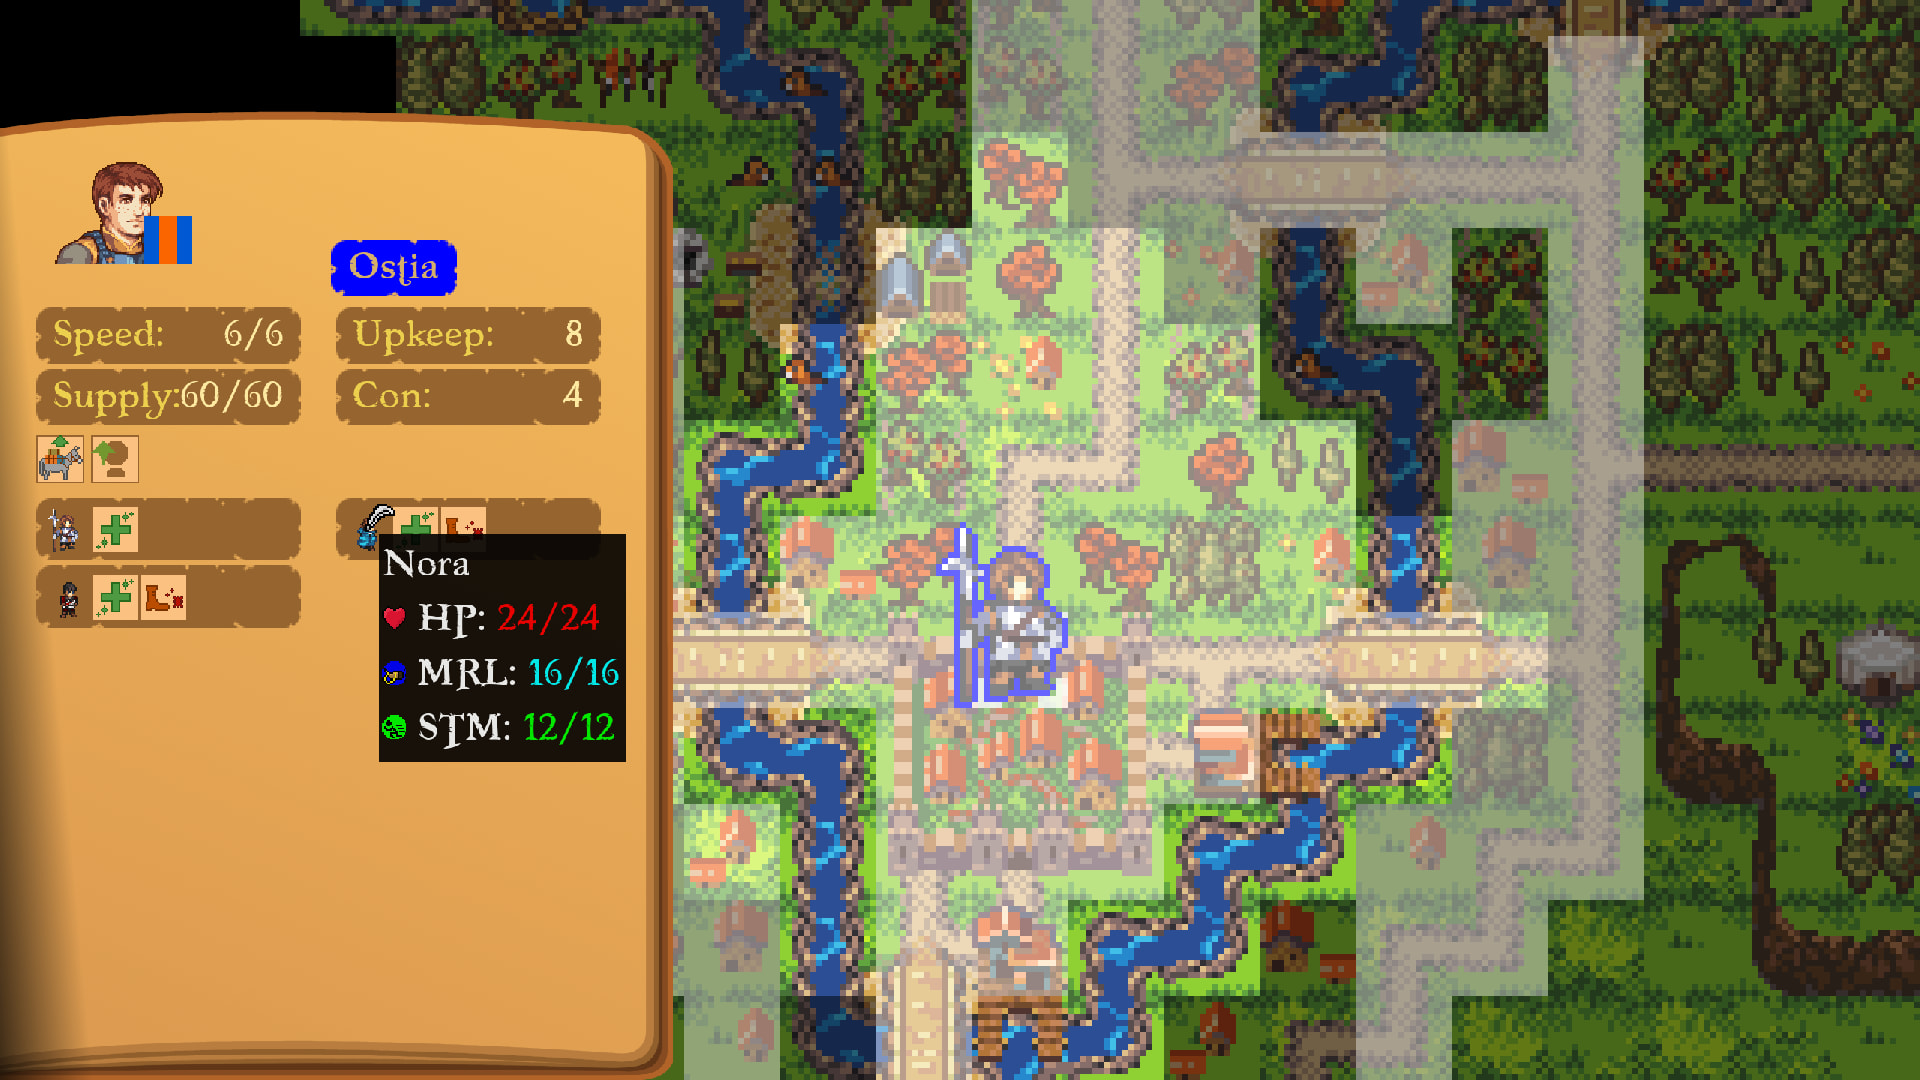
  • Charisma: Recovers Troop morale faster on the campaign map. +1 Troop Capacity (Base is 10, max is 20).

  • Authority: Passively increases Troop XP each campaign turn. +1 Troop Capacity (Base is 10, max is 20).

  • Cunning: Increases vision range.
  • Stewardship: Increase maximum supply.
  • Intellect: Increase siege progress per turn.

  • Zeal: Increases movement range.

Additional effects may be added as I work on the game, but this makes it so different generals will be predisposed to certain things. Charismatic and Authoritative characters are leaders of men who can manage large forces. After a battle your Troops will lose Morale along with HP, which will take time to recover, so a Charismatic General is able to get them back in the fight quicker, helping to press your advantage on the campaign map. High Authority makes a General a good drill sergeant, slowly training up your force. This in particular will need some fine tuning and I may limit it so that this passive XP doesn’t bring Troops over some level determined by Authority, this way it’s best used for bringing freshly recruited greenhorns up to a useful level more readily without being something you can use to snowball too hard. A Cunning General will be more effective at scouting. An effective Steward will be able to go longer without needing as frequent supply runs. An intelligent General will be able to siege cities quicker with superior engineering ability. A zealous General will be able to march his troops faster.

Once a General is picked for an army you can assign additional named characters to the army, these are called Captains. For now, a Captain’s stats don’t contribute to the overall Army, but I may make it so they supplement the General’s stats. This is one of those design decisions best reserved for playtesting, so we’ll see.

Assigning characters to an army is free, aside from the opportunity cost of making them an Admin instead. Characters are your most precious resource and they’re limited. Each Army or Admin essentially equates to 1 action per turn on the campaign map. You could put them all in one powerful army, but your Action Economy will be strained. Instead, you’ll want some balance of characters and generics.

Generic Troops

Every city on the map has a variety of economic Sectors in it, which each have a population working in it. For example, Ostia has a Hunting Sector as well as a Commerce Sector. Each combination of Sector type and Culture allows the recruitment of 1 type of troop.

  • Ostender + Hunting = Trapper

  • Ostender + Commerce = Caravan Driver

  • Woadener + Hunting = Warden

This determines what Troops you’re able to recruit inside a city. However, you’ll need 2 things to actually recruit one of these troops to your army.

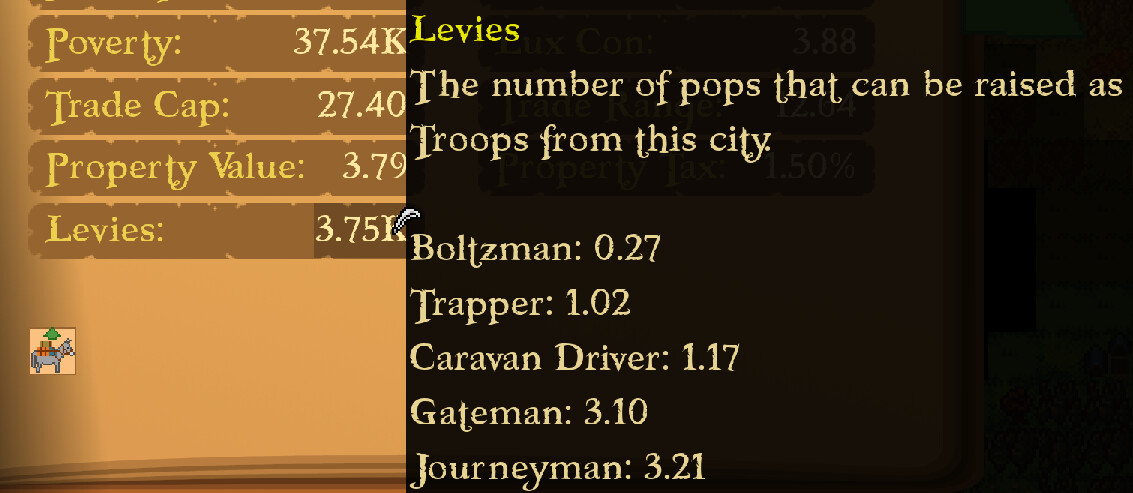
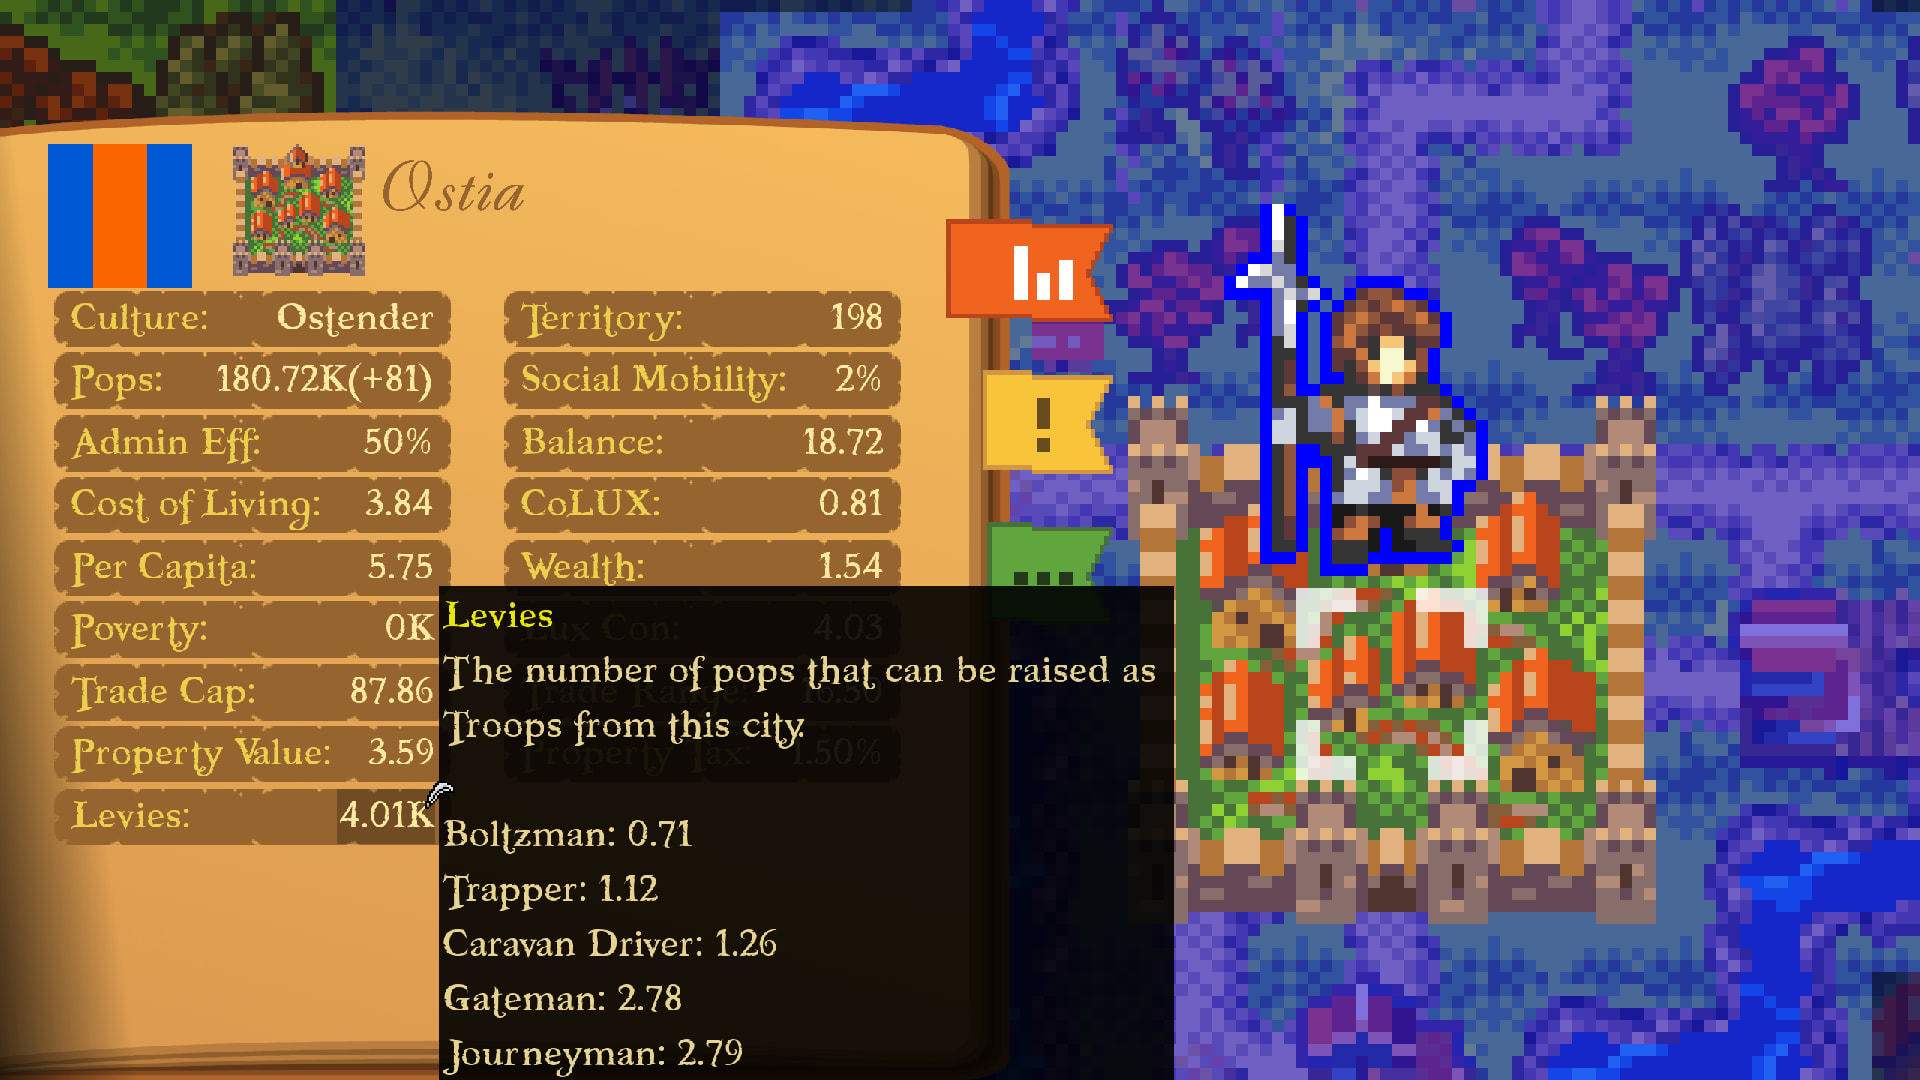
  1. Manpower/Levies: Not everyone in your Sectors is fit for soldiering. Typically, only 2-5% of a population is and as such you’ll be bound by the same constraint. Sector’s with high happiness will be closer to that 5% margin, while unhappy/rebellious Sectors may offer no levies at all. This means if you conquer somewhere and they aren’t loving the new manager, you won’t be able to easily replenish your numbers and you can find yourself in a pickle if this area is an active warfront. Some exceptions to this are the Barracks and Aristocrat Sectors, which have a 50% and 25% bonus respectively. Additionally, when generic Troops take damage, you’ll need fresh levies to refill their ranks and restore their HP. As of right now, disbanding Troops will return the population to the city you disband them in, but I may change this to the city/Sector of origin in the future.

    1. Each Infantry unit typically uses 500 population and Cavalry 250 for perspective. Recruiting these Troops will naturally impact your economy as those pops were producing goods before picking up a spear.

    2. The city of Ostia has a population of ~180K at game start, so it can support about a dozen troops before you need to wait for the levies to replenish.

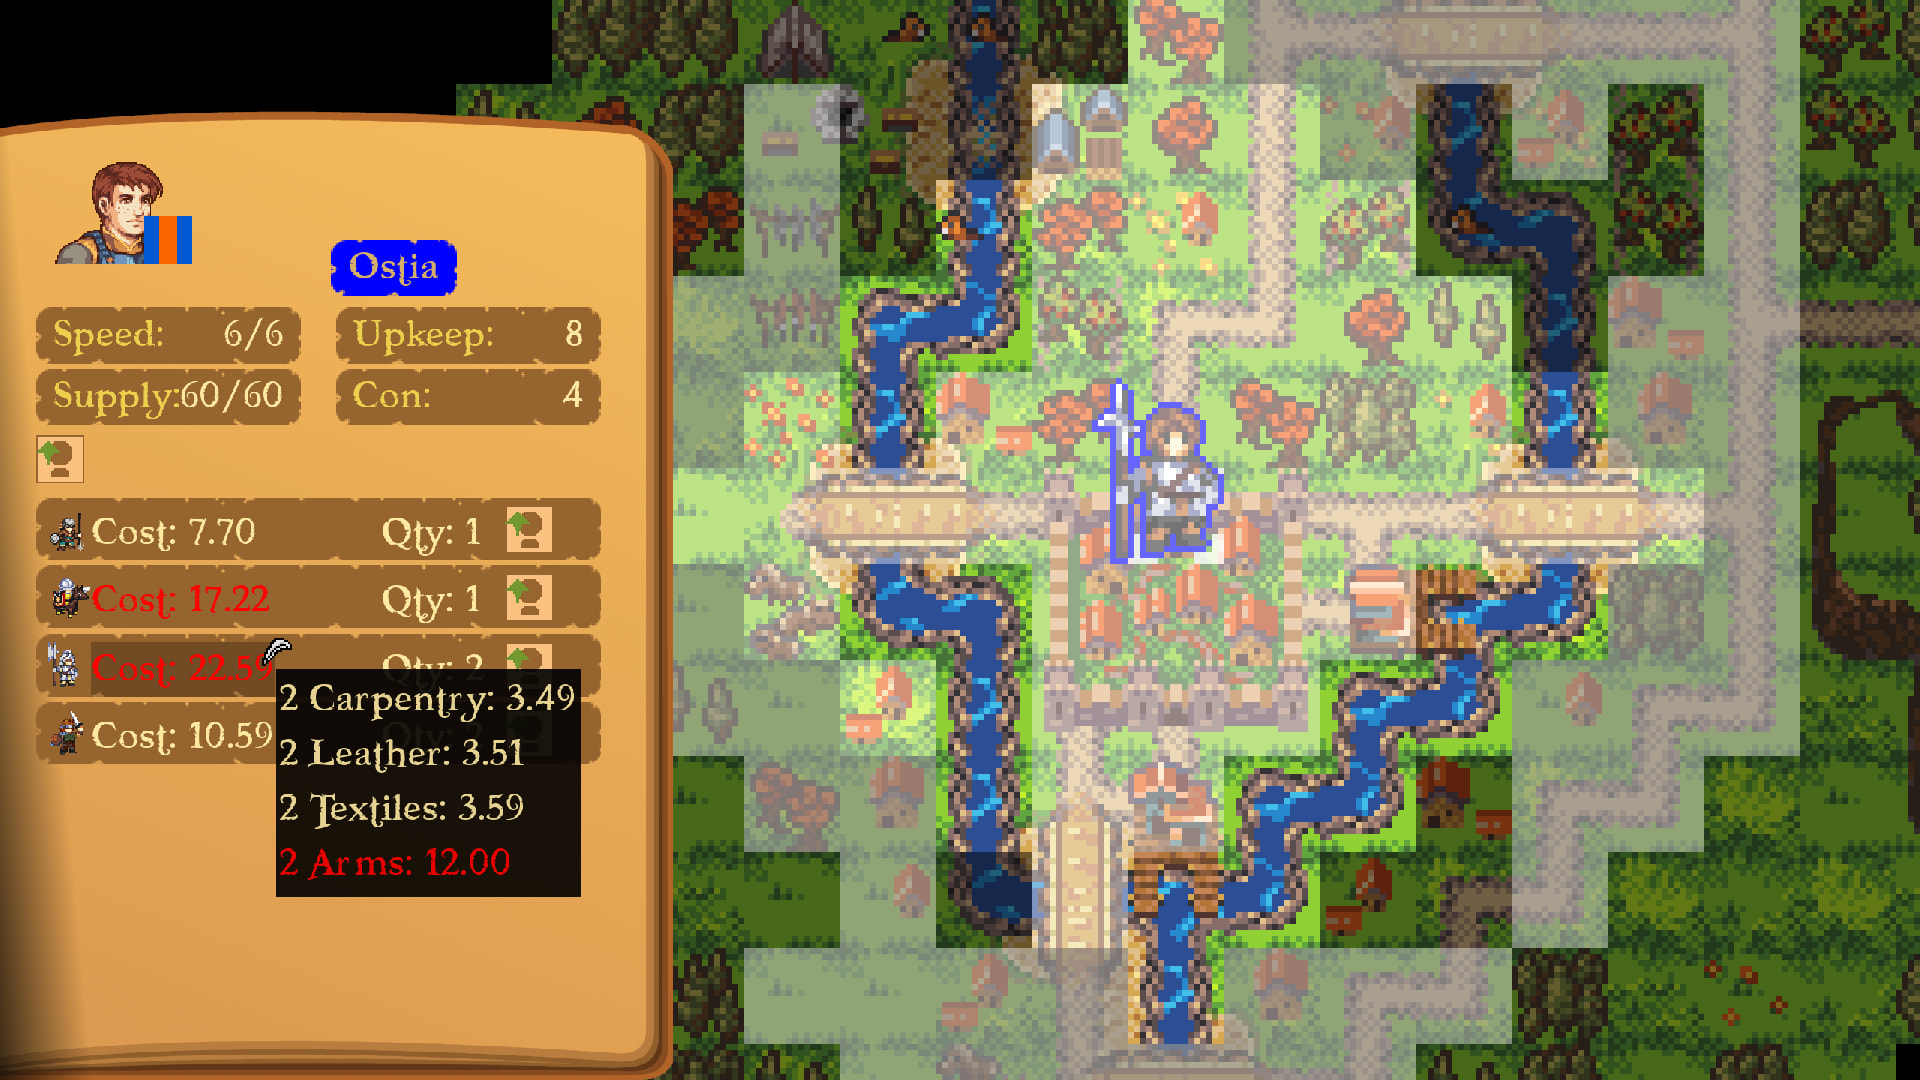
  1. Goods: When you try to recruit a Troop, you’ll need to purchase goods from the city. This is still very subject to balancing, but light troops typically need Textiles, Leather and Carpentry (representing shields and bows). Heavy troops require Arms, which are only produced by Smithing Sectors, which not every city has. Ostia for instance, will need to trade for Arms if it wants some of its best units. Finally, Cavalry need Horses. The recruitment cost is directly determined by the price to buy all the needed goods in that city, which has the bonus effect of meaning recruiting all at once will lead to a shortage in the city, causing prices to spike for some time afterward. This means it’s probably a good idea to build a few different cities for recruiting each type to save some money. I will likely also be adding an option to have an Army drill, where they will consume some goods in return for passive XP while depleting the Army’s morale and stamina for a turn. This way you are further rewarded for building up a military industrial complex, probably a better use of your tax dollars than schools and healthcare or other woke nonsense /s. Don’t forget to vote if you haven’t already and live in the US btw! Btw everyone knows /s is sarcasm right? Right?

Wrap Up

That’s pretty much it for recruitment. So far I think managing manpower has been an interesting challenge, primarily from a logistical standpoint. Needing to replenish your Army will typically mean retreating to a safe position after a big fight or creating a second Army to bring a fresh batch of cannon fodder recruits up to the front lines. This often involves splitting your forces creating moments where you’re more vulnerable and have to decide between pressing your advantage and falling back. The system also rewards managing your population’s happiness well. If you can make different cultures happy, you essentially unlock access to their troops too!

The next dev diary will go out on Nov 13th and the topic will be sieges! I hope to see you there!

2 Likes

Our trailer aired on the FEU youtube just a little while ago in case you missed! In a slightly awkward note, we made a second version after the submission date with some updated voice over that you can find on the steam page!

Also the updated version will be reuploaded soon!

2 Likes

FEE3 2026 Trailer!

3 Likes

GNO Dev Diary 5 - Sieges

Read Time: ~4-5 min (~1,000 words)

Hello everyone, today I’ll be covering how sieges work in GNO and perhaps more broadly logistics. This is very fresh in implementation so all UI are place holders.

Link to Steampage.

GNO Dev Diary 5 - Sieges

Sieges

Example of a siege map.

I want to start by discussing what the real purpose of sieges are from a gameplay perspective. They serve 2 purposes, one is to the benefit of the campaign map and the other for tactical battles. The tactical battle side of things is more obvious as whether you’re the defender or attacker they have a distinct feel to them. They’ll feel fairly similar to a defense map in Fire Emblem, but there’s no hard turn limit you have to survive until. Instead, we’ll probably be adding a mechanic where if the attacker fails to take the seize point after some number of turns, the attacker’s troops will all begin to lose morale, create a soft turn limit, but we’re going to be doing some playtesting with that probably throughout December and January before settling on how we want that paced. When you’re the attacker in a siege, the pressure is on you and while the defenders don’t have any bonuses, the maps will generally be designed to favor the defender.

Now, circling back around to the value sieges provide to enriching the campaign experience we’ll have to talk a bit about logistics. Firstly, when a city is under siege its economic output will be reduced, incentivizing the defender to drive off the aggressor quickly.

**While making this dev diary I was looking at how much of an effect this was having and realized following a siege and all the property destruction there was a pretty noticeable housing shortage among other things lol. Home prices are up ~50%! NIMBYs use this one simple trick they don’t want you to know about! Is now the time to buy???

If the defender doesn’t feel strong enough to beat the attacker, then what can they do? I’m glad I asked! This is where logistics come in. From any of your cities you can create Supply Trains, which can bring fresh Supply to your Army. Each turn the army will consume Supply and if it runs out, its Troop will lose HP, Morale and Stamina, making them a sitting duck. Thus, begins a can and mouse game of trying to cut off the attacker’s Supply Trains.

The Supply Trains can’t defend themselves and will be instantly destroyed if a hostile army moves onto them, so you’ll want to split your forces up to safely escort them to your besieging army. This gives the defender an opportunity to potentially pick apart a superior enemy, I.E. defeat in detail. Sieges and Supply are balanced such that you’ll typically need 1-3 supply runs for a successful siege. Why is that? Because you can’t simply walk up to a city and instantly launch the battle. Each turn your army is set to siege they accrue Siege Progress representing efforts to breach the walls/gates. Right now, you need about 25 progress and each turn your army will roll a D6 plus the General’s Intellect stat (meant to represent their engineering ability at running a siege camp) to add to the progress. Typically, this should take about 6-7 turns, but is highly variable. The RNG will certainly be the source of occasional frustration, but I value the uncertainty of sieges a lot for forcing you to plan for the worst and necessitating proper contingency plans in regards to your Supply Train routing. Another interesting implication of this is that smaller armies that consume less Supply need fewer Supply Trains, so if you want to risk aggressive play with a smaller elite force, you’ll be rewarded! Unless you overestimate yourself, in which case you had it coming.

Garrisons

I won’t cover how recruitment works here, you can read the previous dev diary for more information. Up to 20 available recruits/levies available in the city will automatically be raised by the defender when the attacker launches the battle. Additionally, I’m working on making sure any defending armies stationed in the city also join as reinforcements. Like I said, this is all pretty fresh code and the intent for the demo is get the player to experience a siege for themself. Since all these troop numbers are directly tied to population, any defenders who die in the battle will also result in dead pops in the city. Upon winning a siege, you’ll annex the city to your nation and its Admin Efficiency will drop to 0%, meaning you’ll collect 0 taxes from it. This will gradually rise back up over time and you can bring in an Administrator to more quickly get the city back online. After conquering a location the available levies will drop to 0 as well, after all they probably aren’t happy about the hostile takeover of the new manager. This means if you were hoping to blitz on to the next city, you better hope you don’t need reinforcements because they’re going to be hard to come by.

Next Up

We’re going to break from the usual cadence of two weeks due to Thanksgiving coming up, and the next dev diary will be on Dec 11th. That one will probably be about Diplomacy. I also want to thank anyone who provided feedback on the FEE3 trailer. Based on that feedback we’re going to be enlarging the tileset to give troops some more breathing room and make it easier to see what’s going on when there are a bunch of them together. We’ll also be toning down the saturation on a lot of the tiles so the troops pop better. The tileset is going to mean a bit of unplanned work, so I’m going to bump the demo back to roughly the middle of February. There are still a lot of things to clean up in the UI/UX and a few remaining systems oriented things that need implementation. While I could probably get something out by the end of January, I would be rushing the level design with the new tileset and I don’t want to do that. I’ve spent a lot of time working on all these systems and none of it will matter if they aren’t all put together and paced appropriately. Thank you for reading as always! It’s been very encouraging to see a few consistent likes on these posts every time I make one!

3 Likes

A soft timer based on attacker morale makes sense, but I’d tie the start of the decay to something visible—like supply stock or siege progress stalling—rather than a hidden turn count. That way the attacker can read the pressure and decide whether to assault or withdraw.

1 Like