Hi everyone! I’m Ganzap! If you don’t know who I am, I am a novice ROM hacker who has joined the community about a year ago, though I have been lurking FEU without an account for awhile now. During my time at FEU I have noticed the lack of GBAFE Mug tutorials/guide here on the forums. There are some out there on many different sites (some are very good like toa’s) but not a popular one here on the forums. I do not consider myself a godly spriter or anything but I do believe that a tutorial here might help aspiring spriters learn a thing or two. And it’s usually fun to help people anyway so let’s get on with the tutorial!
##What is a splice?
The kind of sprite I will be referring to for the rest of this tutorial is a splice. But what exactly is a splice?
Well to put it simply, a splice is a GBAFE mug (by mug I mean the portraits that you see in game when a character is talking in cutscenes during FE6/7/8) made by taking 2 or more vanilla mugs, and combining them in some way.
Here is an example splice taken from Toamar’s Splicing tutorial
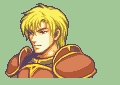
If you look closely this is a splice of Perceval from FE6 and Marcus from FE7.
This is an example of a rather simple splice. I will be going over splices similar to this level of skill in this tutorial. It may not be something big but splices like these can help an artist along the road.
Step 0: What You Need
Now before we begin there are a few tools you will need before making your lovely splices. I am assuming that you have at least Windows 7 or higher as an OS.
-
Microsoft Paint or any other Photo Editing Software that can edit images in a similar way This is pretty self explanatory. You can also use programs like Paint.NET or Gimp.
-
Usenti This is another program similar to MS Paint but is a bit more geared towards editing GBA Graphics and has useful things like a color count, which we will be using in the tutorial.
-
this image This image here has all the GBAFE Mugs ready to insert in hackbox form. Use this for referencing vanilla mugs as well as picking mugs to splice.
-
A creative mind don’t know where to get this but uh use it to create sick splices.
Ok now that you have everything ready let’s start this tutorial by getting a few mugs from the image I showed earlier.
Step One: Choosing Your Mugs
Ok so this is the somewhat easy part. I’m going to pick 3 mugs which have a similar build, and angle. I recommend this for new spriters because angles and shading can be a nuisance if you don’t know what you are doing (i have testimonies to prove it).
Here are the mugs I chose. 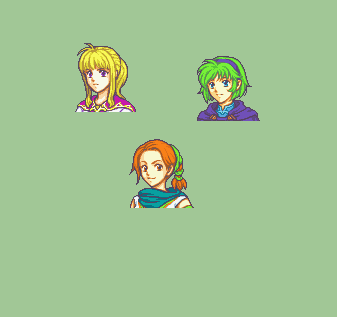
I chose 3 smol girls. We haven’t done anything yet but here is a tip for MS Paint users. On your selection tool there should be an arrow below the actual tool. Click it and check the box Transparent selection. This allows the background color (second color up here0![]() to be transparent, allowing for a much smoother and clean splicing process.
to be transparent, allowing for a much smoother and clean splicing process.
Step Two: Splicing
Now here is where the fun part begins! Choose which parts of the character you would like to put on another character! For simplicity I will put Nino’s head on Cath’s body. I am using the standard selection tool for this so it shouldn’t be too hard. To make it easier, try and erase some of Cath’s head/hair to make the splice look cleaner. For beginners, try and keep the neck on to deal with less manual editing.

 YESS WE DID IT! WE GOT NINO’S HEAD ON CATH’S BODY YAY!!! Use trial and error. If it doesn’t look good to you, use Ctrl + z and try again.
Alright! So we got the head on but what else? Well I am going to put clarine’s mouth on to make the splice look cooler. 

Ahh wait! Clarine uses different skin tones than Nino! Oh no! Before you pee your pants about a few stray colors let’s go into the third phase, cleaning.
Step Three: The Cleaning Process
Now if you notice the few stray pixels around the scarf that’s good! You’re an attentive person and that’s great for splices. Now this phase is a bit tricky to explain but I’m going to try my best to help you guys. Since this is a rather large section of the tutorial, I’ll put this into a few sub sections to make it easier to see.
Stray Pixels
This here is a bit self explanatory, as I mentioned earlier there are a few orangish pixels around the scarf. Use your eraser tool/pencil tool to get rid of those pesky pixels!  There we go! All nice and clean down there. There could be a ton of stray pixels and stuff around your mug when splicing, so take the time to edit it out and make the mug look more presentable
Skin Tones
Now, if you notice, the mouth that we spliced from Clarine had a few different skin tone colors.If you don’t clean these up, the stray colors can really mess up your mug!
 Here is a skin palette of Nino from lightest shade to darkest shade. For the sake of this tutorial I will be using these colors for our splice. Go ahead and use the eraser tool to recolor the stray colors to match this palette. (To recolor with eraser in MS Paint, use the eye dropper to have the color being replaced be in the first slot, then the color replacing the first color in second box. When using eraser tool, instead of using the left click to erase, use the right click)
 Horray! We cleaned up skin tones without much trouble. Remember this when splicing mugs with fairly different skin tones.
Palette and Color Control
Here is where the almighty Usenti comes into play! An insertable GBAFE standard mug should have 15 colors total (16 including background). When splicing, it is easy to mess around with colors and you could have mugs with 18 or even 20 colors! Anything greater than 16 is not good and should be fixed, so that is why Usenti is here!
Alright, so first things first save you mug. NOTE PLS: When you save your mug always save it as a PNG! Don’t use JPEG or any of those weird file types. Those can screw up your color count and things will be bad.
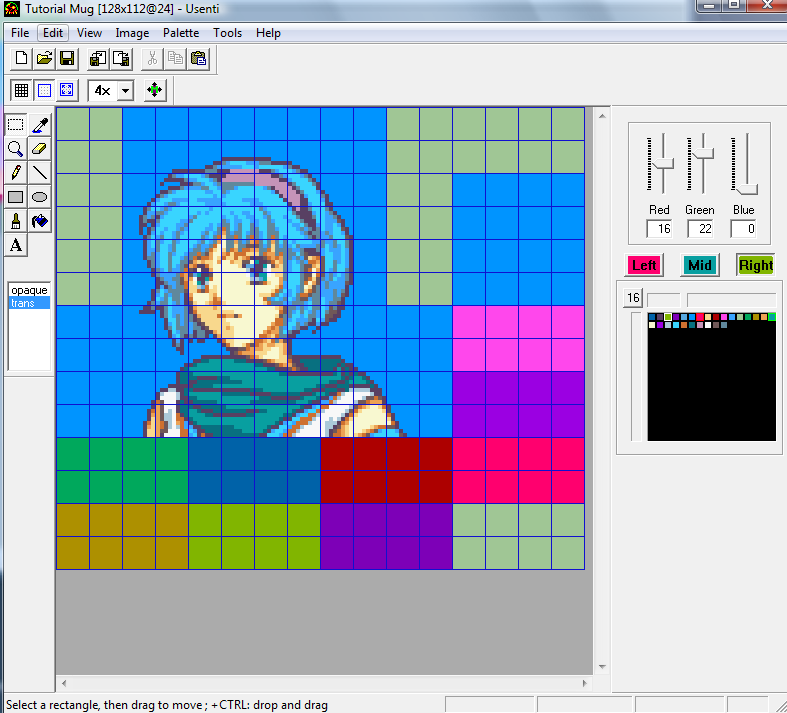
Now that we have our mug saved as a PNG, open up Usenti! And Open the file, hard I know. When we open up Usenti it looks similar to MS Paint…BUT LOOK! WHAT IS THAT WEIRD BOX OF COLORS AAA!!!
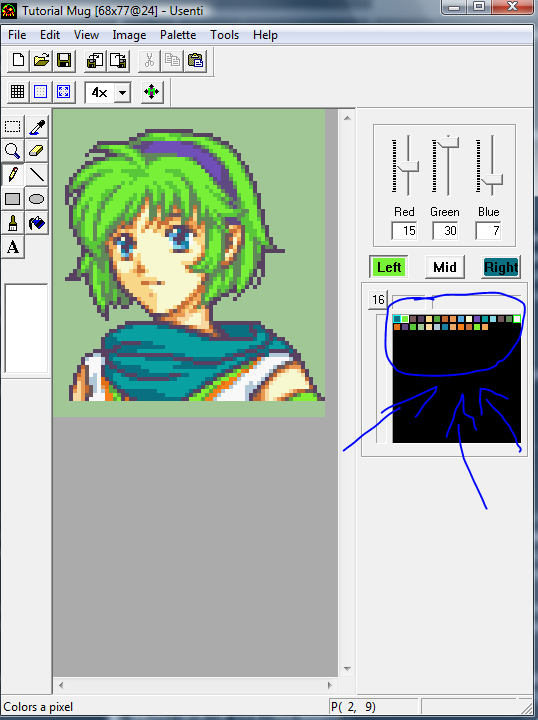
This is our color count. Each row is 16 colors, so our mug has 28 colors…Oof. It will take hours of cleaning and finding each and every color ugh…splicing sucks. But wait! Usenti has a special thing called Requantization. By requantizing your mug, Usenti can make your mug have a certain amount of colors! And all you have to do is a few clicks. Just click Palette->Requantize and than change the color count to 16!
Yay! Now our mug is 16 colors and is insertable! Now before we get to hackboxing and other stuff make sure the mug looks alright and mess around with vanilla colors a bit until it’s too your liking. I like the mug as is right now so i’m fine. Just go ahead and save the mug. If you want to do a bit more editing you can but just make sure it’s 16 colors.
All FEGBA games have slightly different colors and styles. I suggest not mixing FE8 with 7/6 to avoid weird colored mugs and shading problems. I also suggest to not use custom colors. Unless you are very confident and know a lot about RGB values do not use custom colors when it comes to mugs looking professional with good contrast. If you aren’t making the mugs for a let’s play intended hack then you can use custom colors to just mess around and have fun.
Since I’m not using this mug for any hacks or anything I decided to give it a few custom colors to give my splice a bit of spunk.
 Final result
Step Four: Hackboxing and Insertion
Congrats! You finished your first splice! But…whats the point of it if I can’t insert it?! Well, in order to make mugs insertable we are going to have to do a bit of extra work.
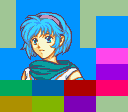
First, get this image. This is going to be the basis of our insertable Mug.
Second, put the damn mug in the big area thingy over there
 Yay she’s in! But we aren’t done yet. Save this image and open it up in Usenti.
Go into View->Tile Grid as well as View->Texel Grid
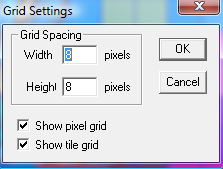 Make sure your grid settings are like this. You can also enable tile snap if you want a slightly easier time
Now you want 32x16 (or 2x4 8x8 tile selections) for mouth selections and eye selections.
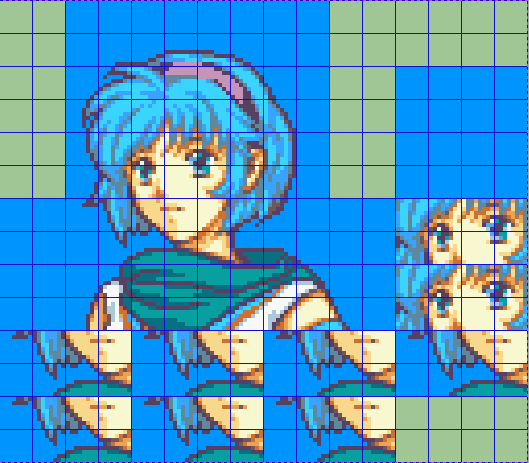
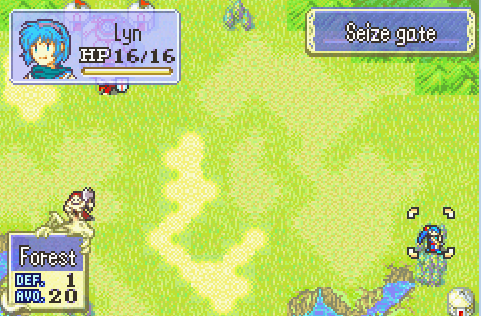
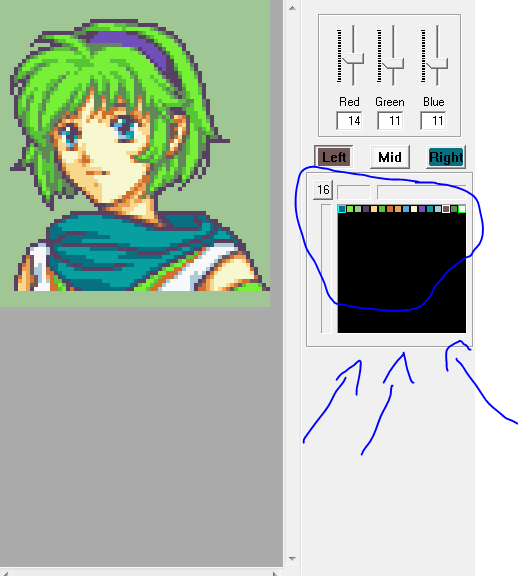
It should look something like this right now. But we aren’t done yet. We have to add in blink and mouth frames. Hmm…This looks similar to the boxes in this image. Good observation! Now just fill in the mouth frames and eye frames In the according order to something like this  The top mouth frames are smiling frames and it goes (from left to right) Fully open,half open, closed
The bottom frames are the samebut aren’t smiling.Fully open, half open, closed
For eye frames the top one is half open and the bottom one is full blink. The 32x32 area is for minimugs.
There are mainly 2 ways to do minimugs: 1 is to resize a good selection of the mug and then cleaning (by cleaning i mean fixing broken outline, simple mouth and giving simple eyes. as well as pixel error). The other way is to splice the mini’s of the mugs used in the main splice. The second one is a lot more time consuming but could lead to a more clean minimug.
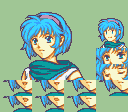
After copying down frames and splicing a mini here is the result of my mug. NOTE FE6 mugs do not have eye frames and don’t have eye frames. If you used any FE6 eyes during your splice consider try to make custom eye frames or just using FE7/8 eyes.
Make sure your mug is 16 colors and the image size is 128x112. Once that is finished, simply put your splice through FEBuilder’s portrait editor and ta-da! You just made your first splice! Even if it doesn’t look as grand or epic as some mugs it’s still helpful in a way. Before I decide to end this tutorial here are a few tips to becoming a great spriter!
Take Criticism
While this may be hard to admit your art isn’t always going to be perfect, and people’s art could be ‘better’ than yours. So when someone shows feedback/criticism don’t take it hard and personally. Unless it’s just blatant hate use that criticism and learn from it. Improve upon your mistakes so you can improve. I can’t tell you how helpful these people are. In the discord channel #spritans, there are many spriters there to help and support your art. It may be harsh but don’t take it personally or anything. I thank the people like 2WB, DerTheVaporeon, Tsushi, Blade, Xigdar, Glaceo and many others for critiszing my art and helping me improve. Don’t take people like this for granted and let others help you succeed, and maybe you can even help somebody else’s art.
Trying New Things
When splicing try and open up from your regular 3-2 mugs of splicing. Try maybe 5 mugs or even 7! Trying new things is almost always great, whether it be custom clothes, custom eyes, mouths or even fully custom mugs! It may not always look great, but looking back and seeing what you did wrong in certain situations can really help you out when tackling the same thing.
Don’t Give Up
You can do it Even when it seems you aren’t improving, criticisms are too harsh, or your just not feeling good, don’t give up. There is always another chance to improve at something and it’s ok to fail. Learn from your mistakes. I can’t count how many times I’ve whined and complained about how bad I am, but even when I was at the lowest low I still tried, and I improved. If I showed you guys a splice from 2016 and showed a mug from 2018 the difference in skill would be different (in a good way). Just know you aren’t alone and there are people who can help.
Alright that’s enough from me. Hope you guys learned something from this and had a good time, I sure did!
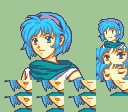 Small errors fixed by @Blade. Finished product
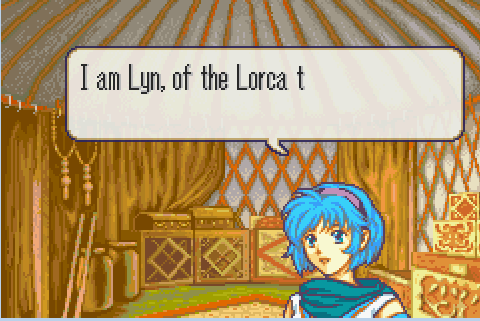
It loads perfectly in FE7. The mini works as well.