Avatar / Tactician / My Unit
Overview
This allows in-game customization of a character.
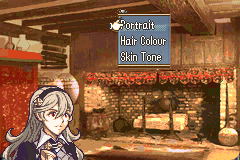
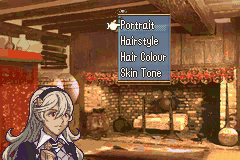
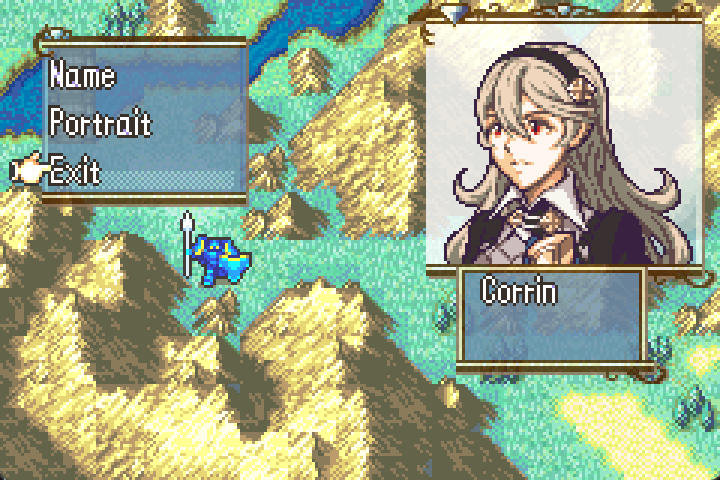
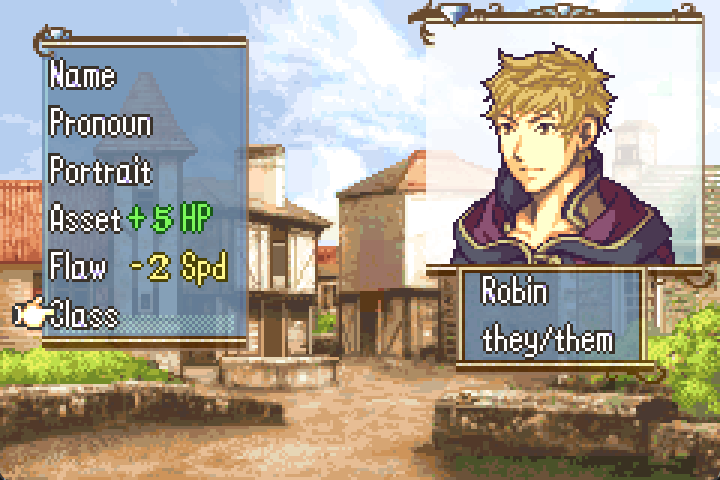
Display whichever options you want players to customize:
Make your choices and enjoy your self-insert, or become a bad archer.
The portraits here are with permission from Garytop. Their excellent artwork can be found here:
Setting Up
Download the avatar folder using gitzip or by downloading the whole repo.
1. Prepare your portraits
Summary
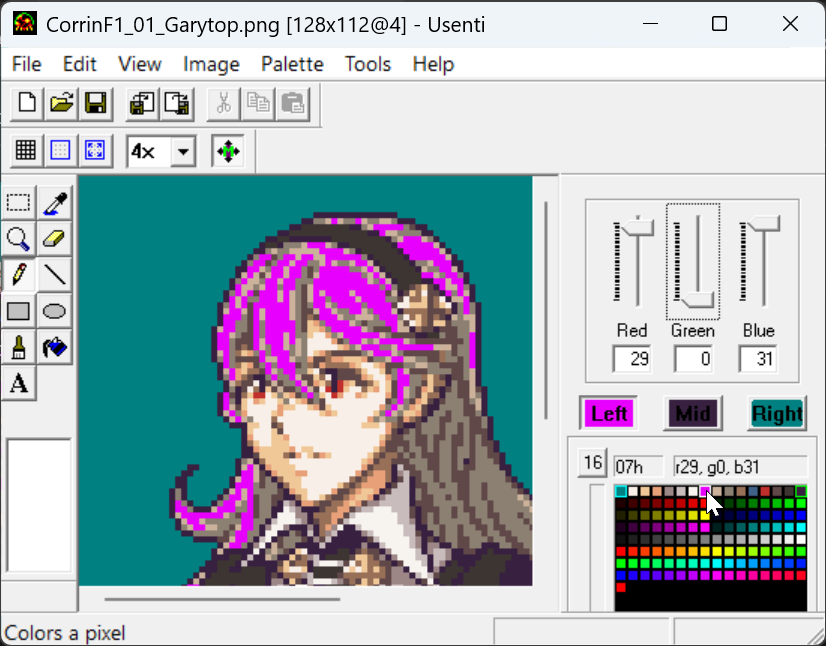
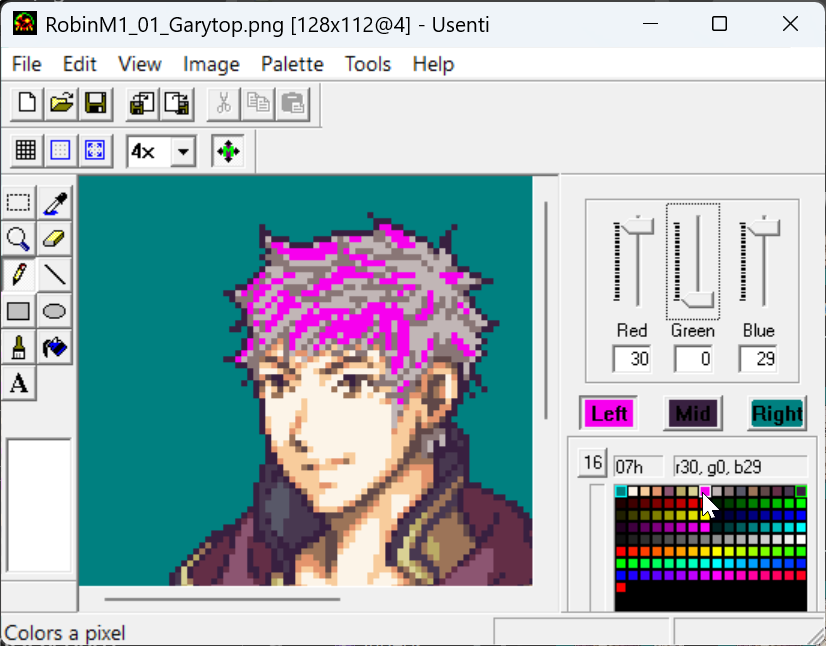
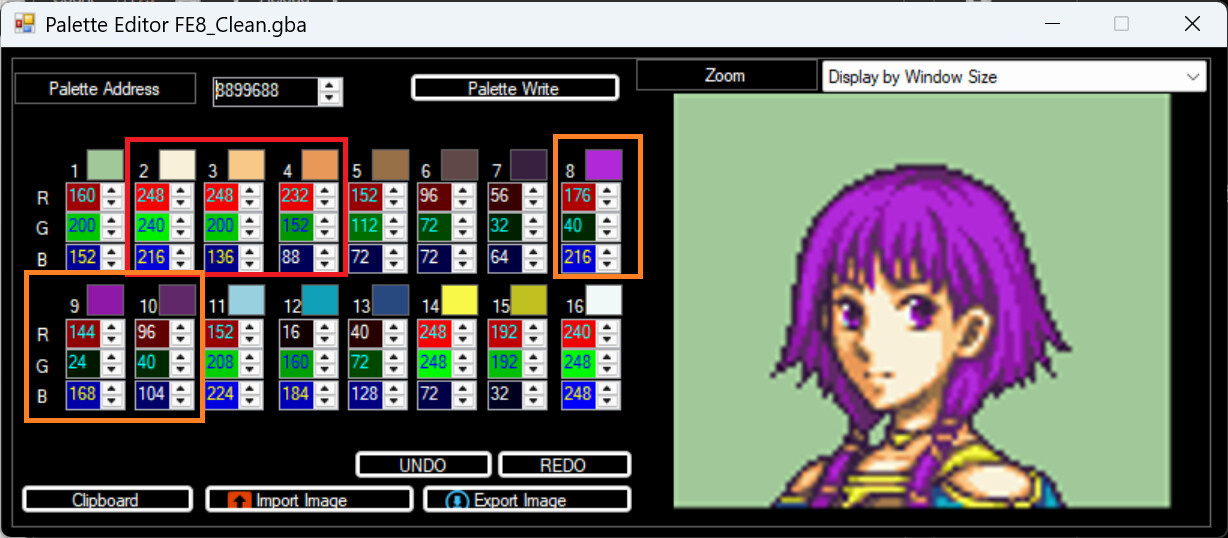
- Your avatar portraits should share the same palette order for hair and skin. E.g. If Corrin’s lightest colour of hair uses pal index 7, then Robin’s lightest hair colour also needs to be index 7.
-
They do not need to have identical colours, but certain colours will be replaced ingame depending on your setup.
-
Often 1, 2, and 3 are skin colours, while 7, 8, and 9 are hair colours. (Add 1 if using FEBuilder’s palette editor, as it counts from 1 instead of 0.)
-
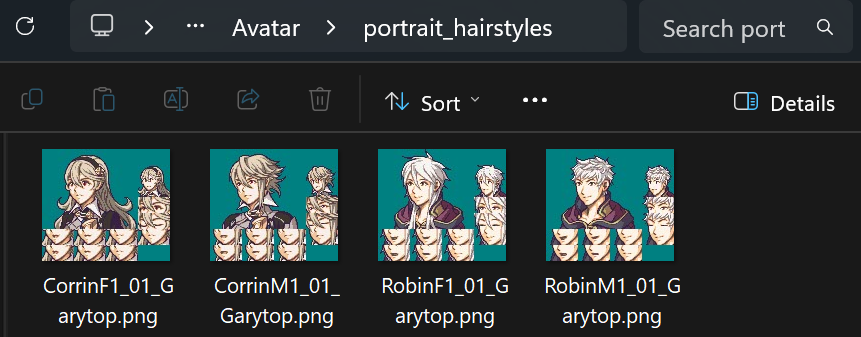
For each character (and optionally hairstyle), name your images as
NameA_01,NameA_02,NameB_01,NameB_02, etc. and put them into theportrait_hairstylesfolder.
Without multiple hairstyles:
With multiple hairstyles:

-
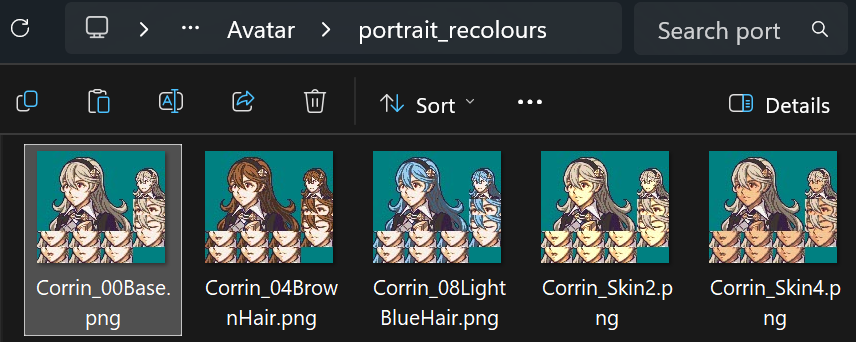
Copy your base character, create any recolours, and put them into
portrait_recolours.
-
These recolours will be applied to all your avatar portraits ingame.
-
Warning: Each image in
portrait_hairstylesandportrait_recolourswill use a global flag, which can add up quickly. -
Run GetPals.bat or GetPals.py, which makes
GeneratedInstaller.eventbased on the portraits you’ve put into these folders. It also tells you how many global flags you’re using. You only need to editGeneratedInstaller.eventif you want to add more toDynamicPortraitTable(more on that later) orPortraitPalReplacements, which allows changing specific colours of portraits if the corresponding flag is on.
PortraitPals(0x101, 0x103, 0xC1, rgb(31, 31, 25), rgb(31, 25, 16), rgb(29, 19, 12), skip, skip, skip, skip, skip, skip, skip, skip, skip, skip, skip, skip)
(For mugs 0x101 - 0x103, overwrite colour IDs 1, 2, and 3 if flag 0xC1 is on. This is the skin tone being changed.)
2. Prepare your rom
Summary
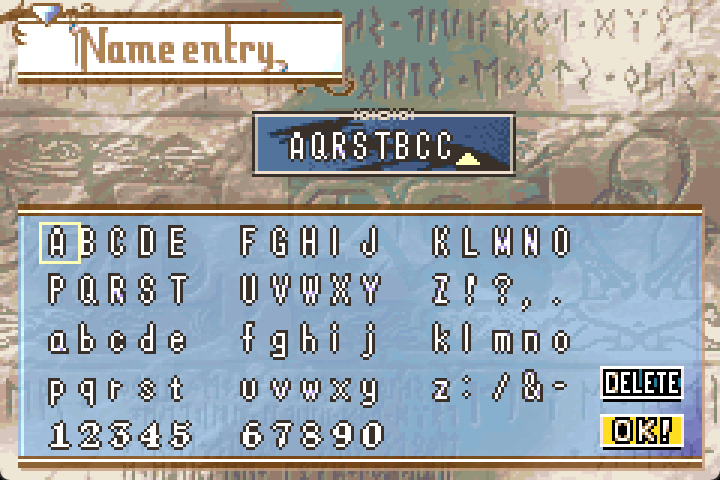
- Erase
Team Namefrom the name input screen if desired
- Put your avatar portraits in order (e.g. in the PortraitEditor).


-
In
Installer.event, edit#define StartingMug 0x101to whatever ID you started with. -
If the
UnInstall SkillSystems RandomMugspatch is available to install, then do so:
-
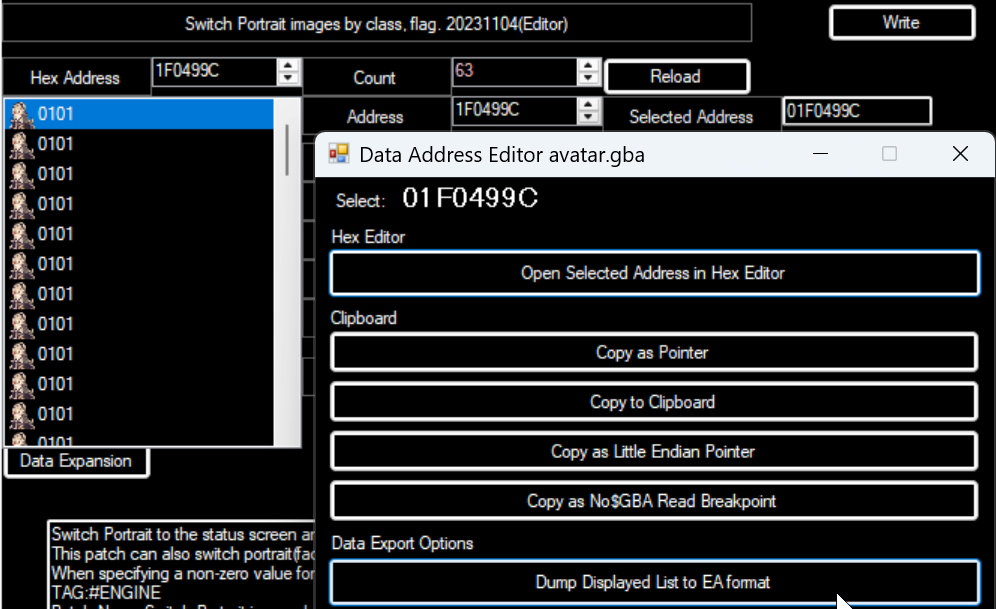
If you have Scraiza’s DynamicPortraits installed, uninstall it:
(It will be installed with this hack.) -
If you want to keep what you have for DynamicPortraits, then open the editor, double click the
Selected Addressbox, thenDump Displayed List to EA formatand save this.
-
Delete the
PUSH,ORG, andPOPlines, and copy the rest into the end ofDynamicPortraitTableinGeneratedInstaller.event.


-
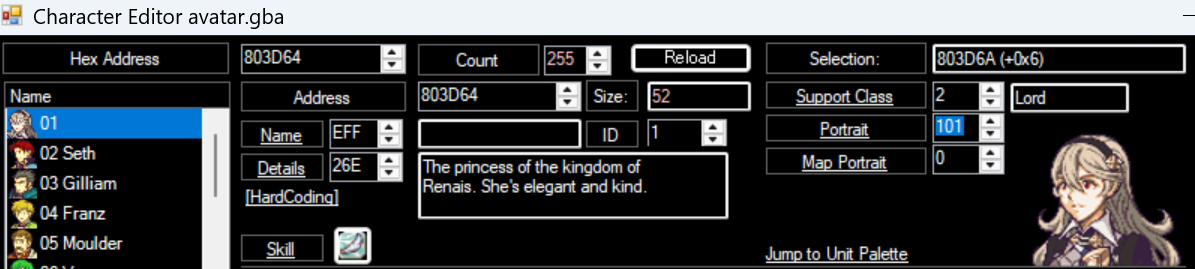
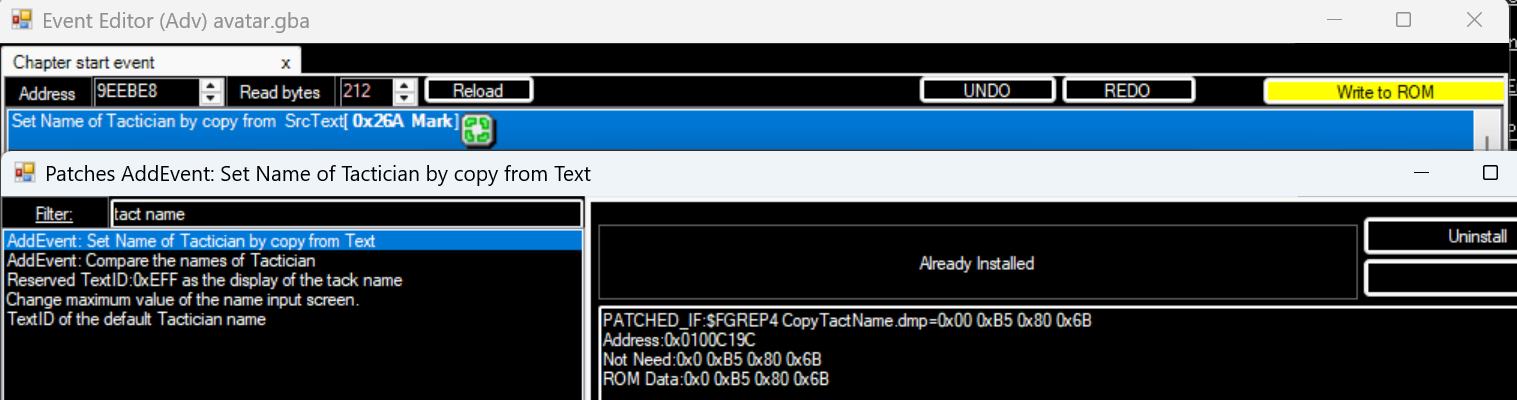
In the character editor, give the avatar text ID 0xEFF for
[Tact]and portrait ID of yourStartingMug.
-
Optionally, set a default name for your tactician:
3. ReplaceText
Summary
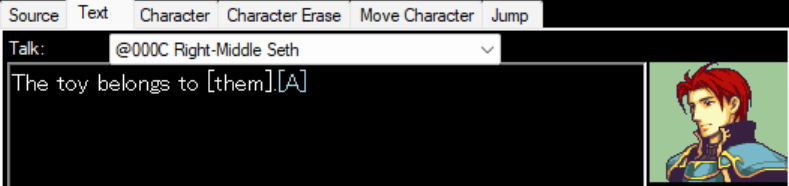
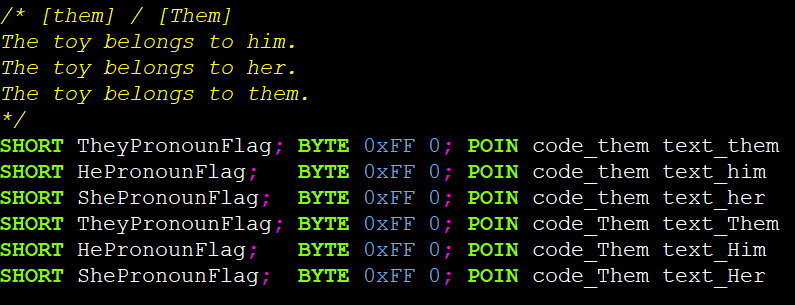
Having the #include "ReplaceText/Installer.event" line adds pronoun text control codes. (If you don’t want it, comment out this line with // and change the definitions for the flags to 0, e.g. #define TheyPronounFlag 0.)
By writing [them] in your dialogue, it’ll become them, him, or her ingame based on the player’s choice of pronoun.
Also adds these codes to make conditional dialogue easier:
[ifFlagXXX][endif] // replace XXX with flag e.g. 0B0 is casual mode
[ifAliveXX][endif] // replace XX for 01 for Eirika
[ifDeadXX][endif]
[ifMissingXX][endif]
Feel free to add more pronouns or find other uses for control codes that vary the text based on global flags.
4. Configure Installer.event
Summary
There are some definitions and labels that you may wish to edit.
StartingFlag is the global flag you want to start at, and it’ll use subsequent flags for each character, hairstyle, and recolour you have. Running GetPals tells you how many flags you’re using and overwrites GeneratedInstaller.event.
AvatarClasses lets you choose which classes your avatar can start as. I recommend loading your avatar unit in a wimpy class before calling this menu.
AssetBonusPerStat and FlawLossPerStat allow you to choose how much each stat should be adjusted by when choosing an asset/flaw.
Various options can be hidden by changing IsXAvailable to 0 instead of 1. E.g.
IsFlawAvailable:
WORD 0 // Players cannot choose a flaw
5. Insert & Test
Summary
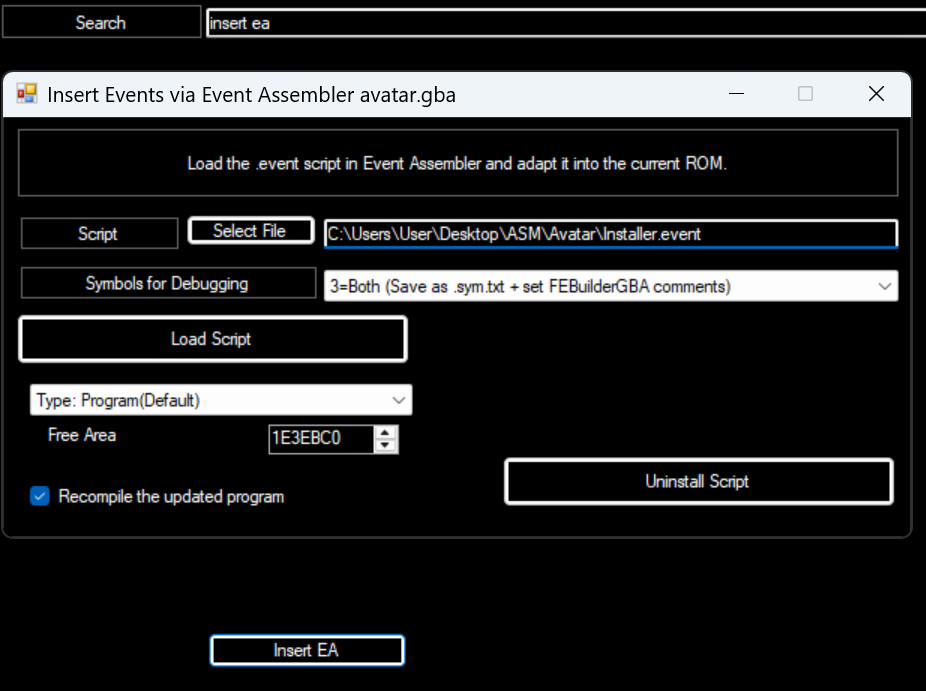
Make sure you have the latest ColorzCore in Febuilder/App/Event Assembler.

In advanced editors → insert ea, choose Installer.event.
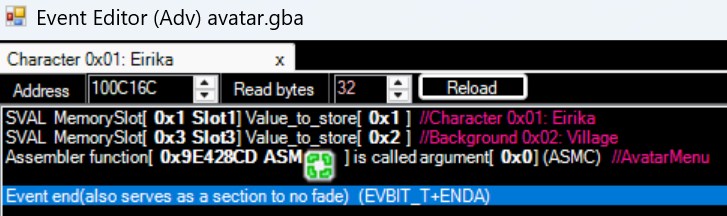
In the folder with your rom, romname.event_assembler.sym should appear. Open it and ctrl+f StartBmAvatar.

Copy the address (in my case, it’s 09E428CD) and use it in your events to start the avatar menu.
Finally, test it ingame and only save your rom when you’re satisfied with the results.
Enjoy!