How do I make weapons only usable by one unit/class? How do vanilla weapon locks work?
There are two methods of making weapons restricted to specific characters and/or classes: the vanilla weapon locks, and the WeaponLockArray patch included with SkillSys. Let’s start with the vanilla method.
On every weapon, unit, and class, you’ll find checkboxes at the bottom for various “locks”. Eirika lock, Ephraim lock, etc. You can check any number of these for a given item, unit, or class. There are seven of them in total:
- Eirika Lock, which by default is used for the Rapier and Sieglinde, and for Eirika’s Lord and Great Lord classes
- Ephraim Lock, which by default is used for the Reginleif and Siegmund, and for Ephraim’s Lord and Great Lord classes
- Lyn Lock, which is unused in vanilla FE8 but fully functional
- Athos Lock, which is unused in vanilla FE8 but fully functional
- Weapon Lock 1, which is unused in vanilla FE8 but fully functional
- Myrmidon/Swordmaster Lock, which by default is used for the Shamshir, and for the Myrmidon, Swordmaster, and Assassin classes.
- Monster Lock, which by default is is used for monster weapons and monster classes.
Monster Lock has additional hardcoding to it, however. First of all, it hides weapon stat displays, which can be fixed with this patch:
Patch Name:Monster Weapon display fix @FE8U
Author / Source:Brendor FE8 Monster Weapon Display Fix
It also, however, disables Hammerne use, regardless of whether the “disable Hammerne” checkbox is checked, and WEXP gain, regardless of the weapon type or set WEXP value.
Any weapon with one or more locks checked can only be used by a unit that has those same locks set somewhere between their unit data and their class.
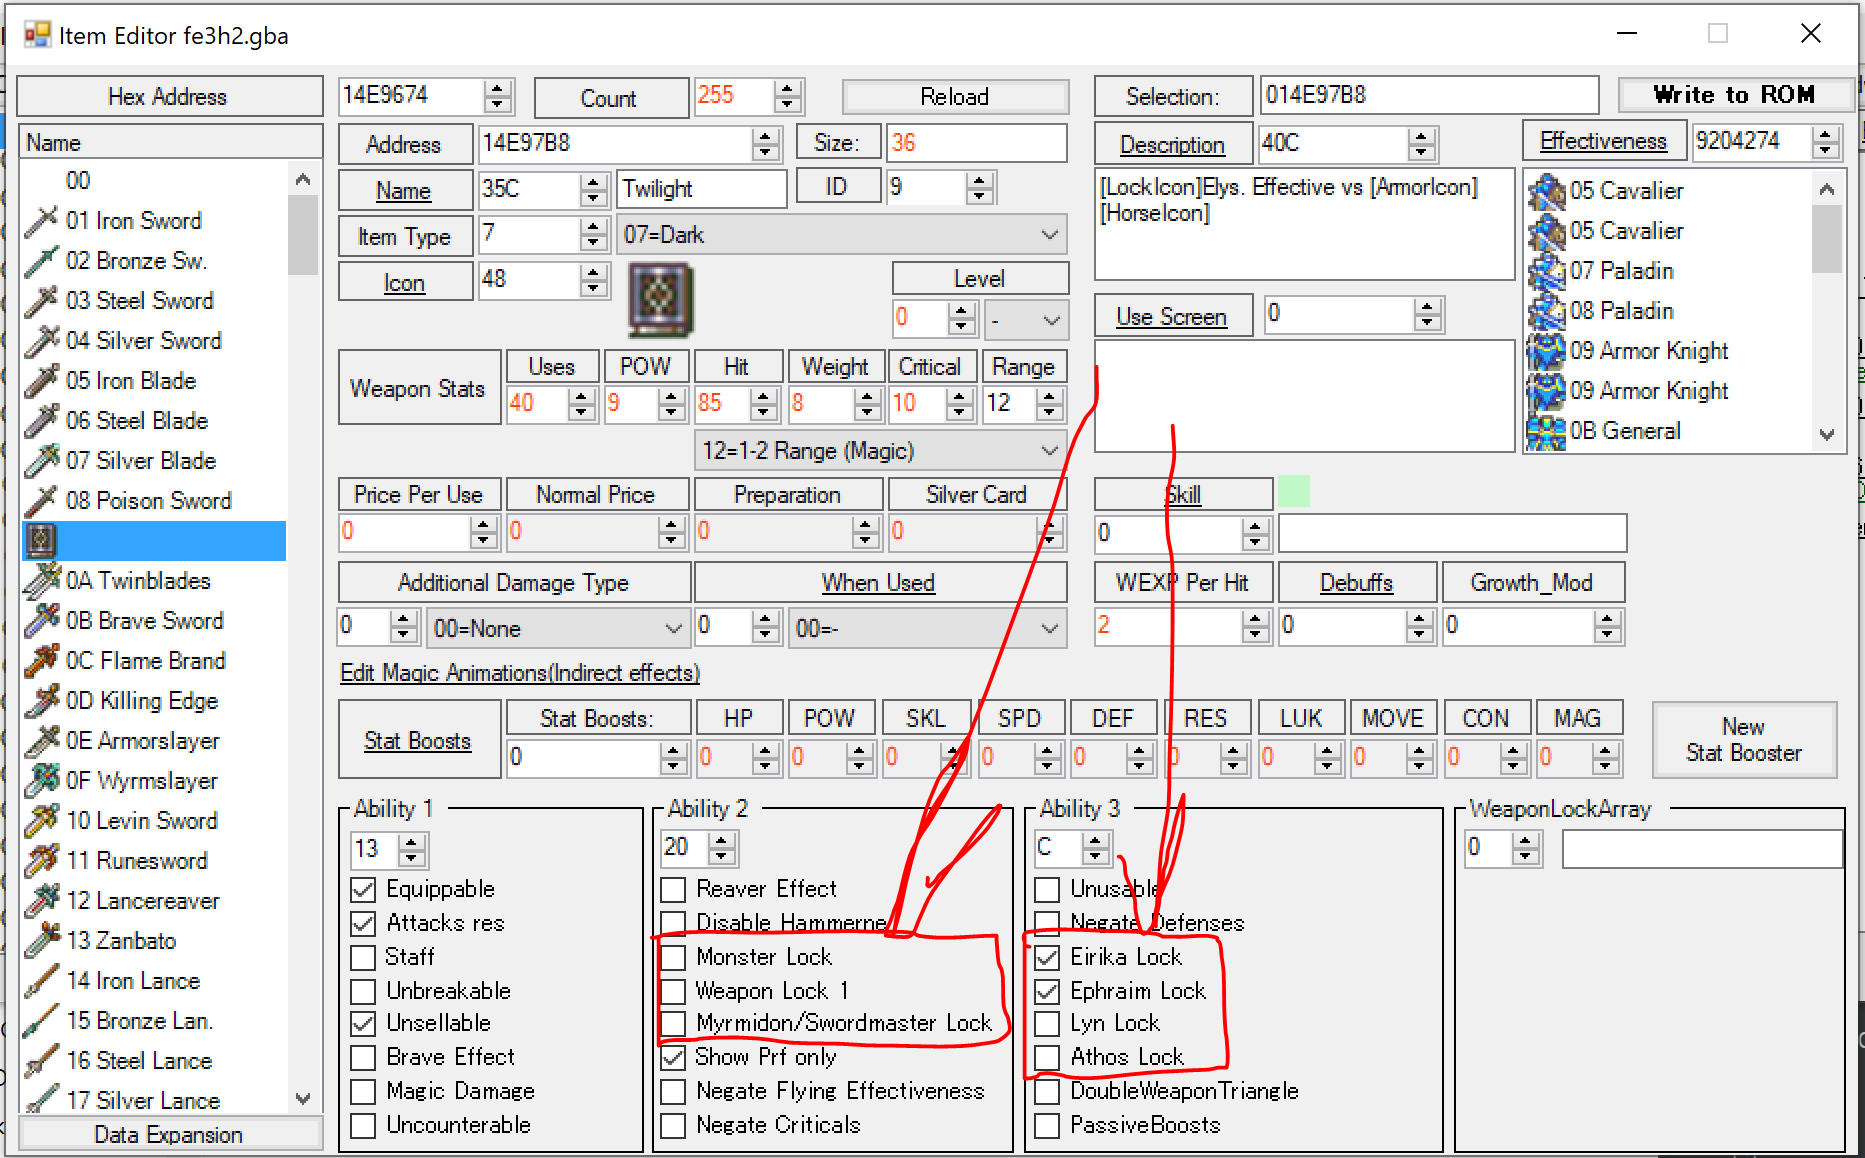
So, for example, here I have the Twilight tome with the Eirika Lock and Ephraim Lock checked. It can only be used by a unit who has both Eirika Lock and Ephraim Lock checked on either their unit data, class, or both. (Can also be one of the locks set on the unit and the other set on the class, I think, so long as they have both when combined.)
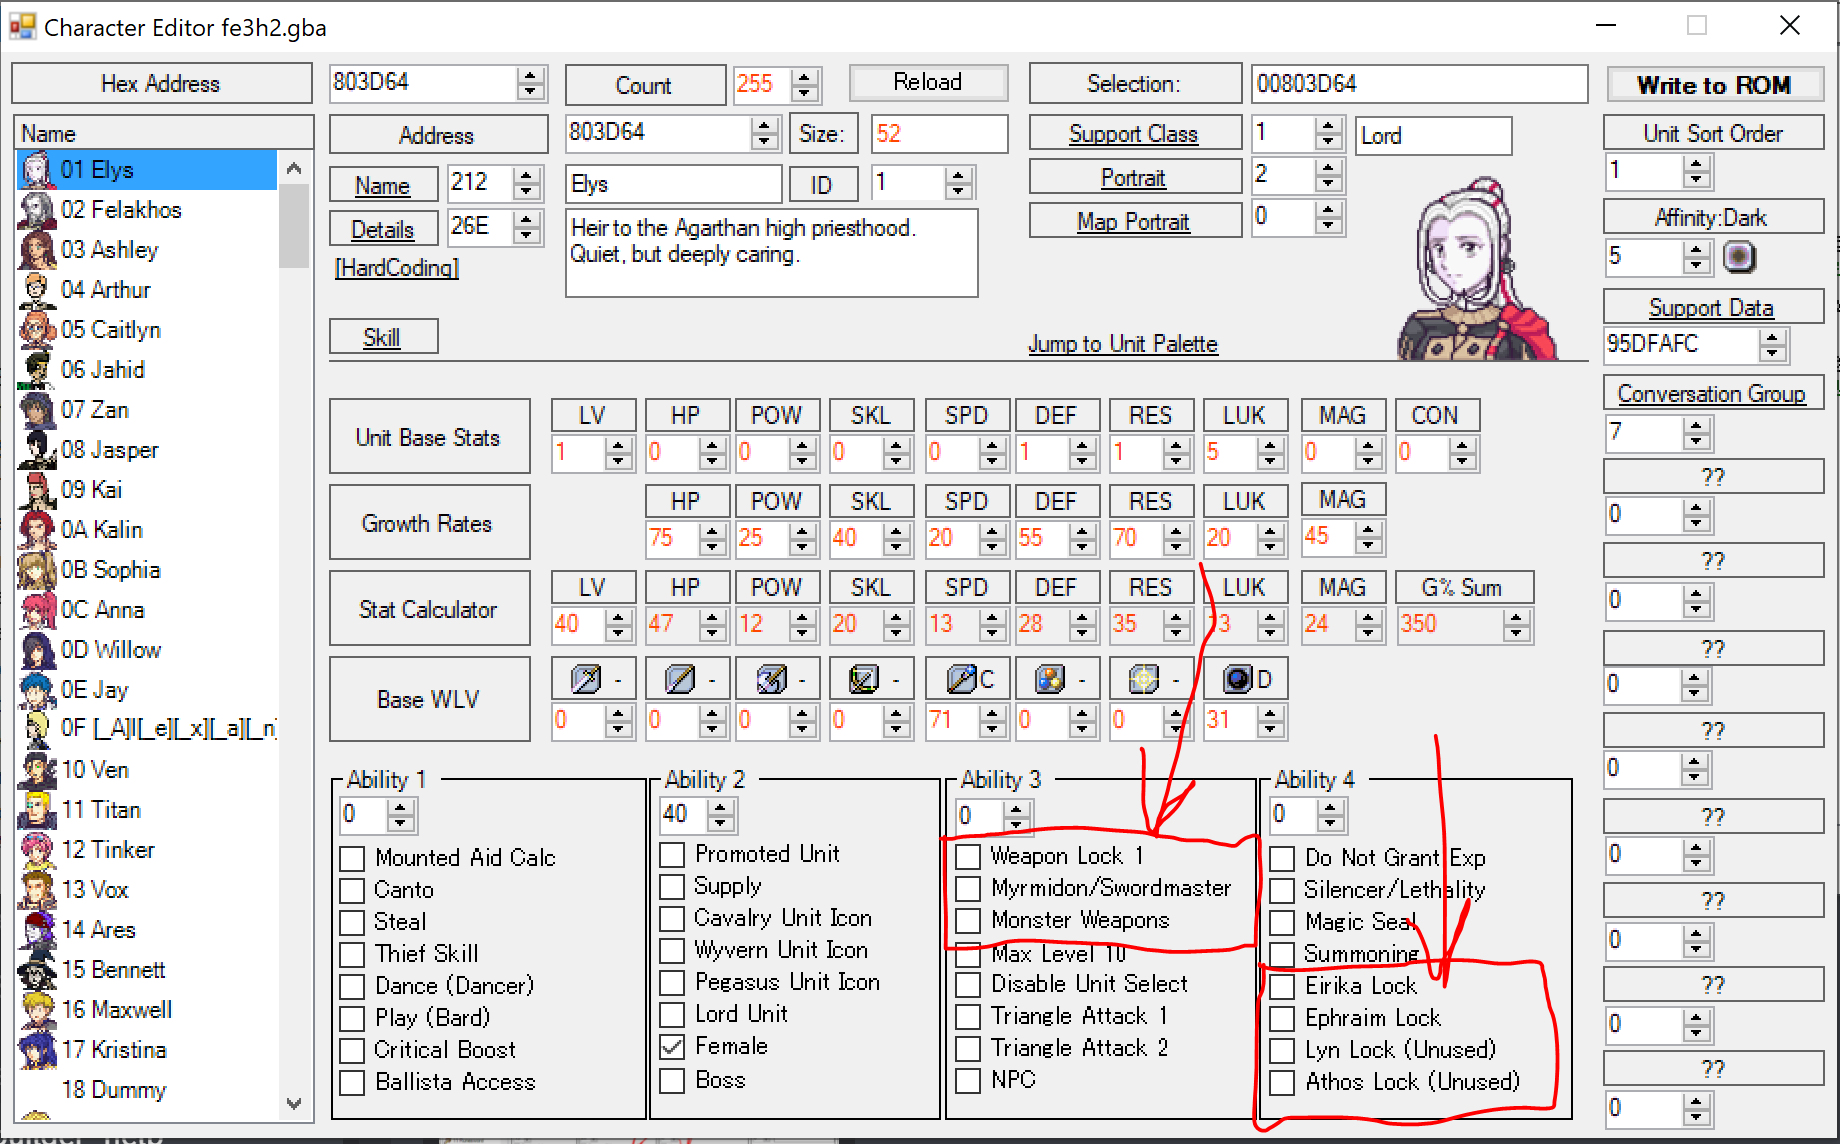
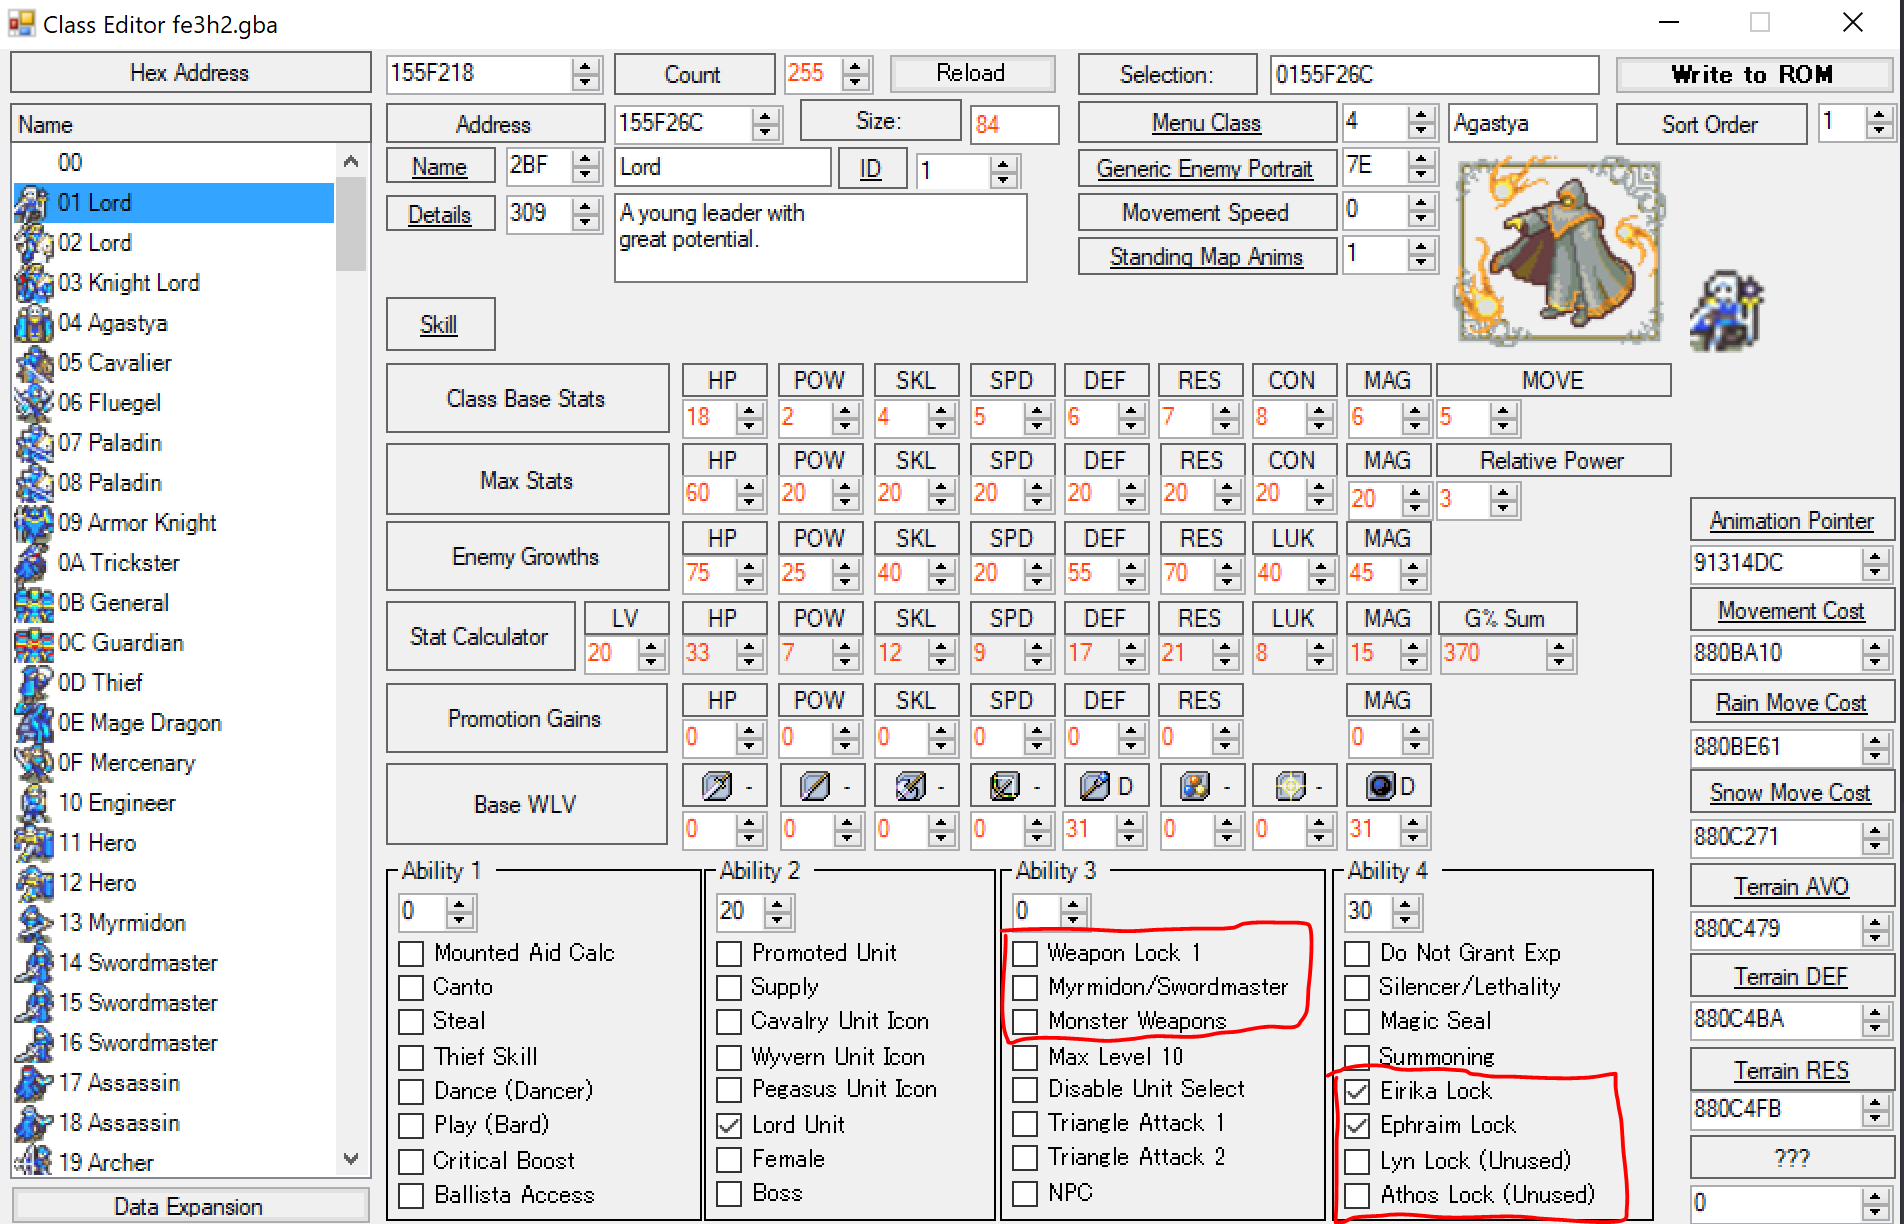
Here, this unit, Elys, has no locks set to her character data. However, her Lord class has both the Eirika Lock and Ephraim Lock checked. Therefore, as long as she is in that class, she can use the Twilight Tome.
Usually you’ll only need to use one lock at a time. Ex. vanilla just has Eirika’s prfs locked to Eirika Lock, with the lock set for her classes. But if you need a lot of different prfs, you can combine the different locks to get more different combinations (I currently use two at a time in my hack, so Eirika-Ephraim, Eirika-Lyn, Ephraim-Lyn, and so on). If you need even more than that is where the patches come in.
I need more weapon locks. How does SkillSys WeaponLockArray work?
The SkillSystem includes a function called WeaponLockArray, which can be accessed from the patches list. It allows you to create as many different weapon locks as you could possibly need, with the ability to define locks for character sets or class sets, as well as “hard” variants (only the specified characters/classes can use it) and “soft” variants (other units can use them but require a weapon rank, while the specified characters/classes can use the weapon as if it were rank E).
Be warned that WeaponLockArray is broken in some older versions of SkillSys. If you’re using an older version it may not work at all, and soft weapon locks may still be nonfunctional even in the current Builder SkillSys version. The multiple locks method described above always works and should give enough locks for most hacks.
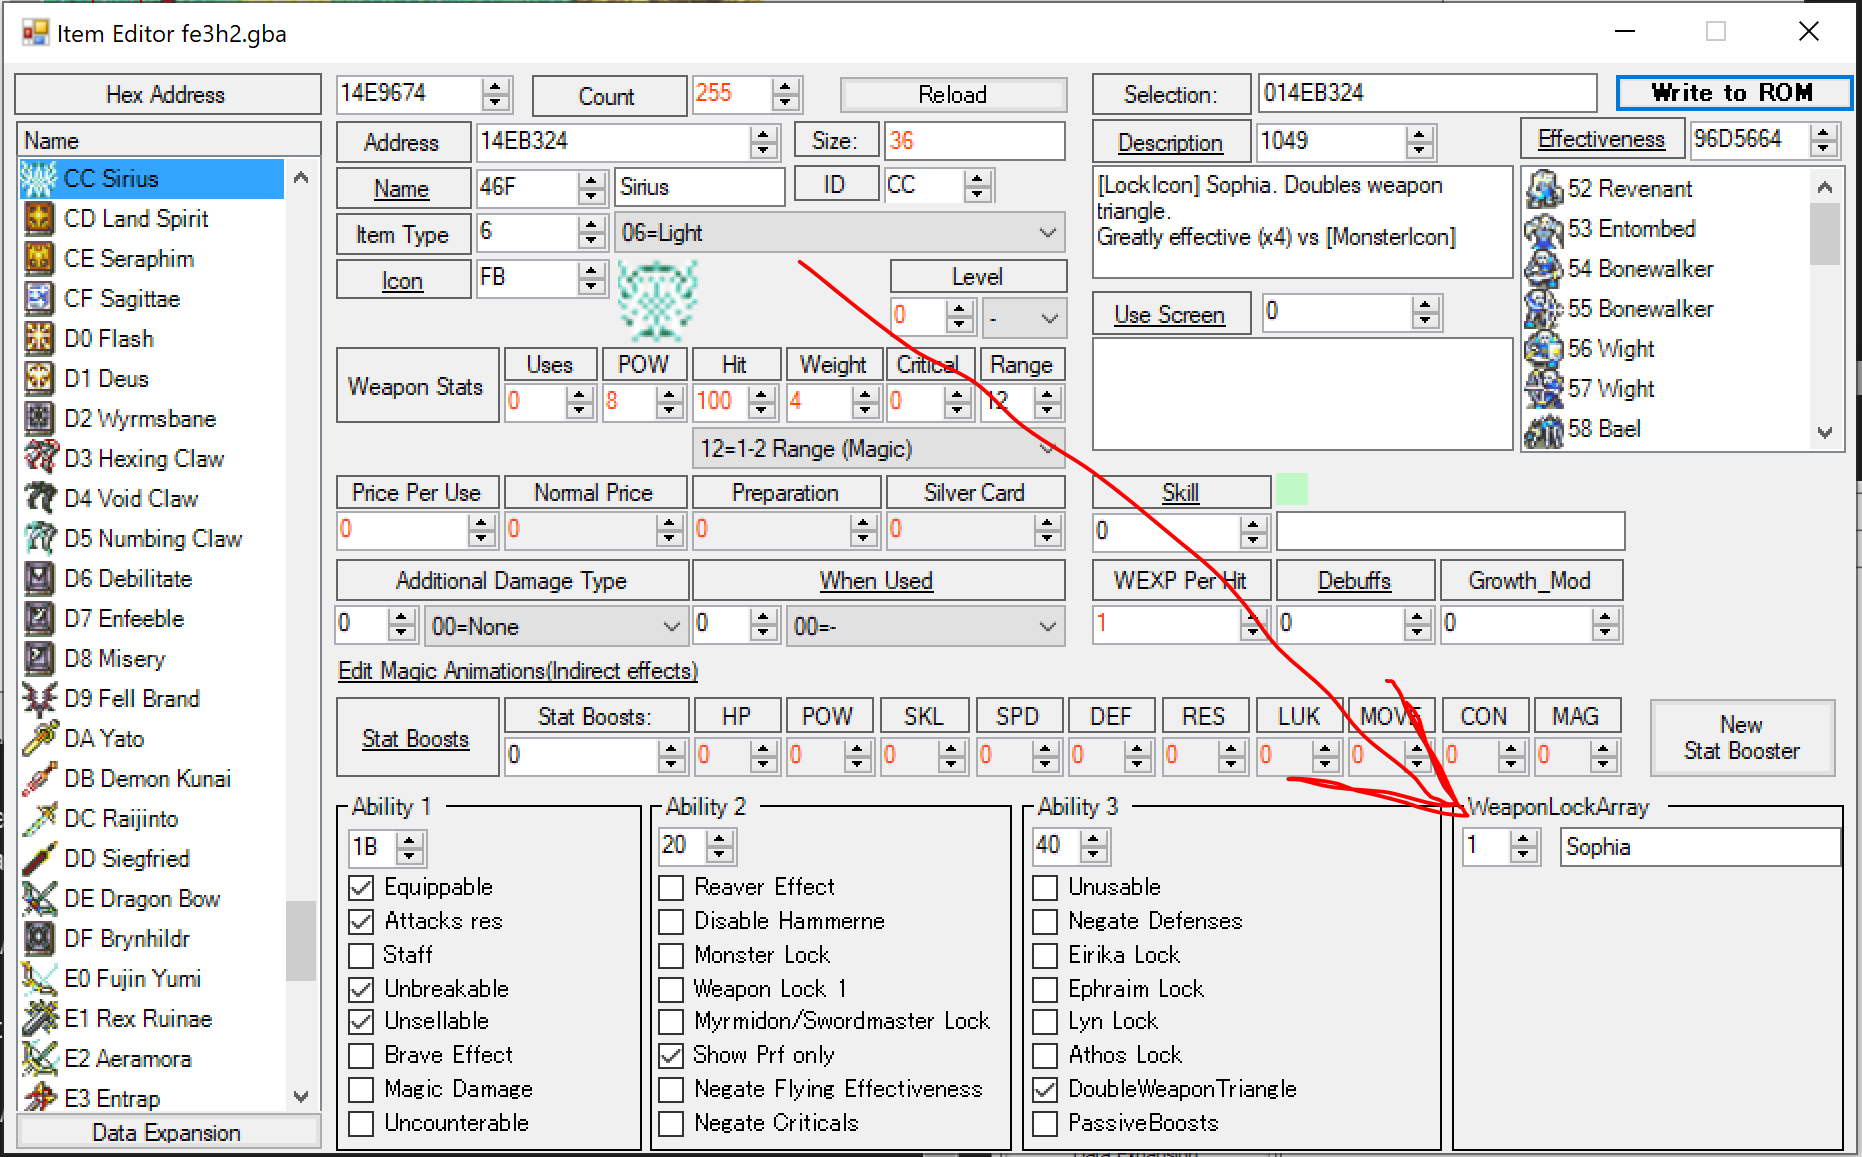
NOTE: The “Show Prf only” checkbox in the Item Editor must NOT be checked when using WeaponLockArray to lock a weapon, otherwise the weapon will be unusable. Don’t ask me why, I don’t know.
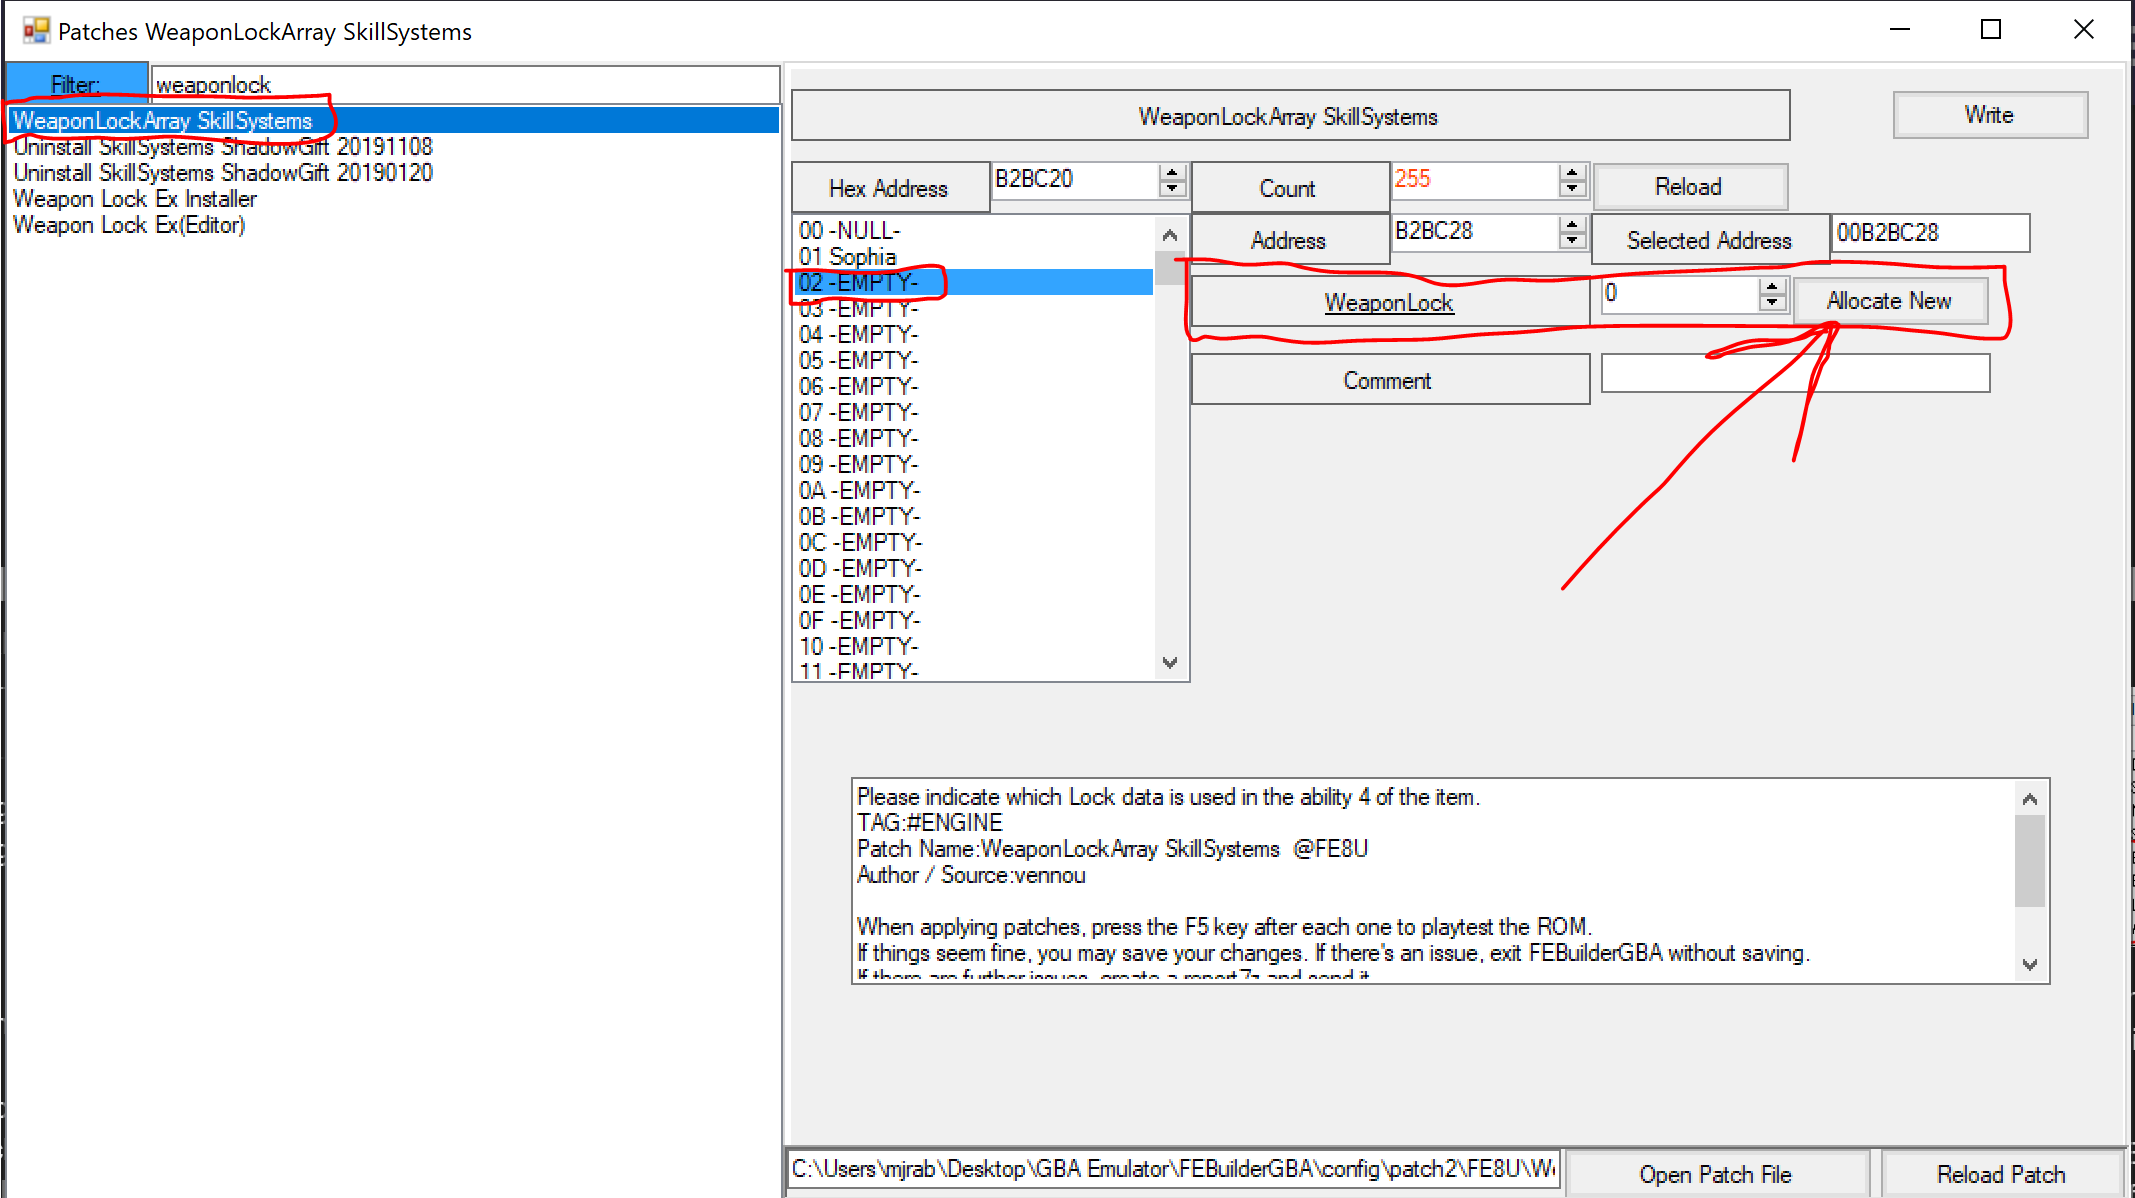
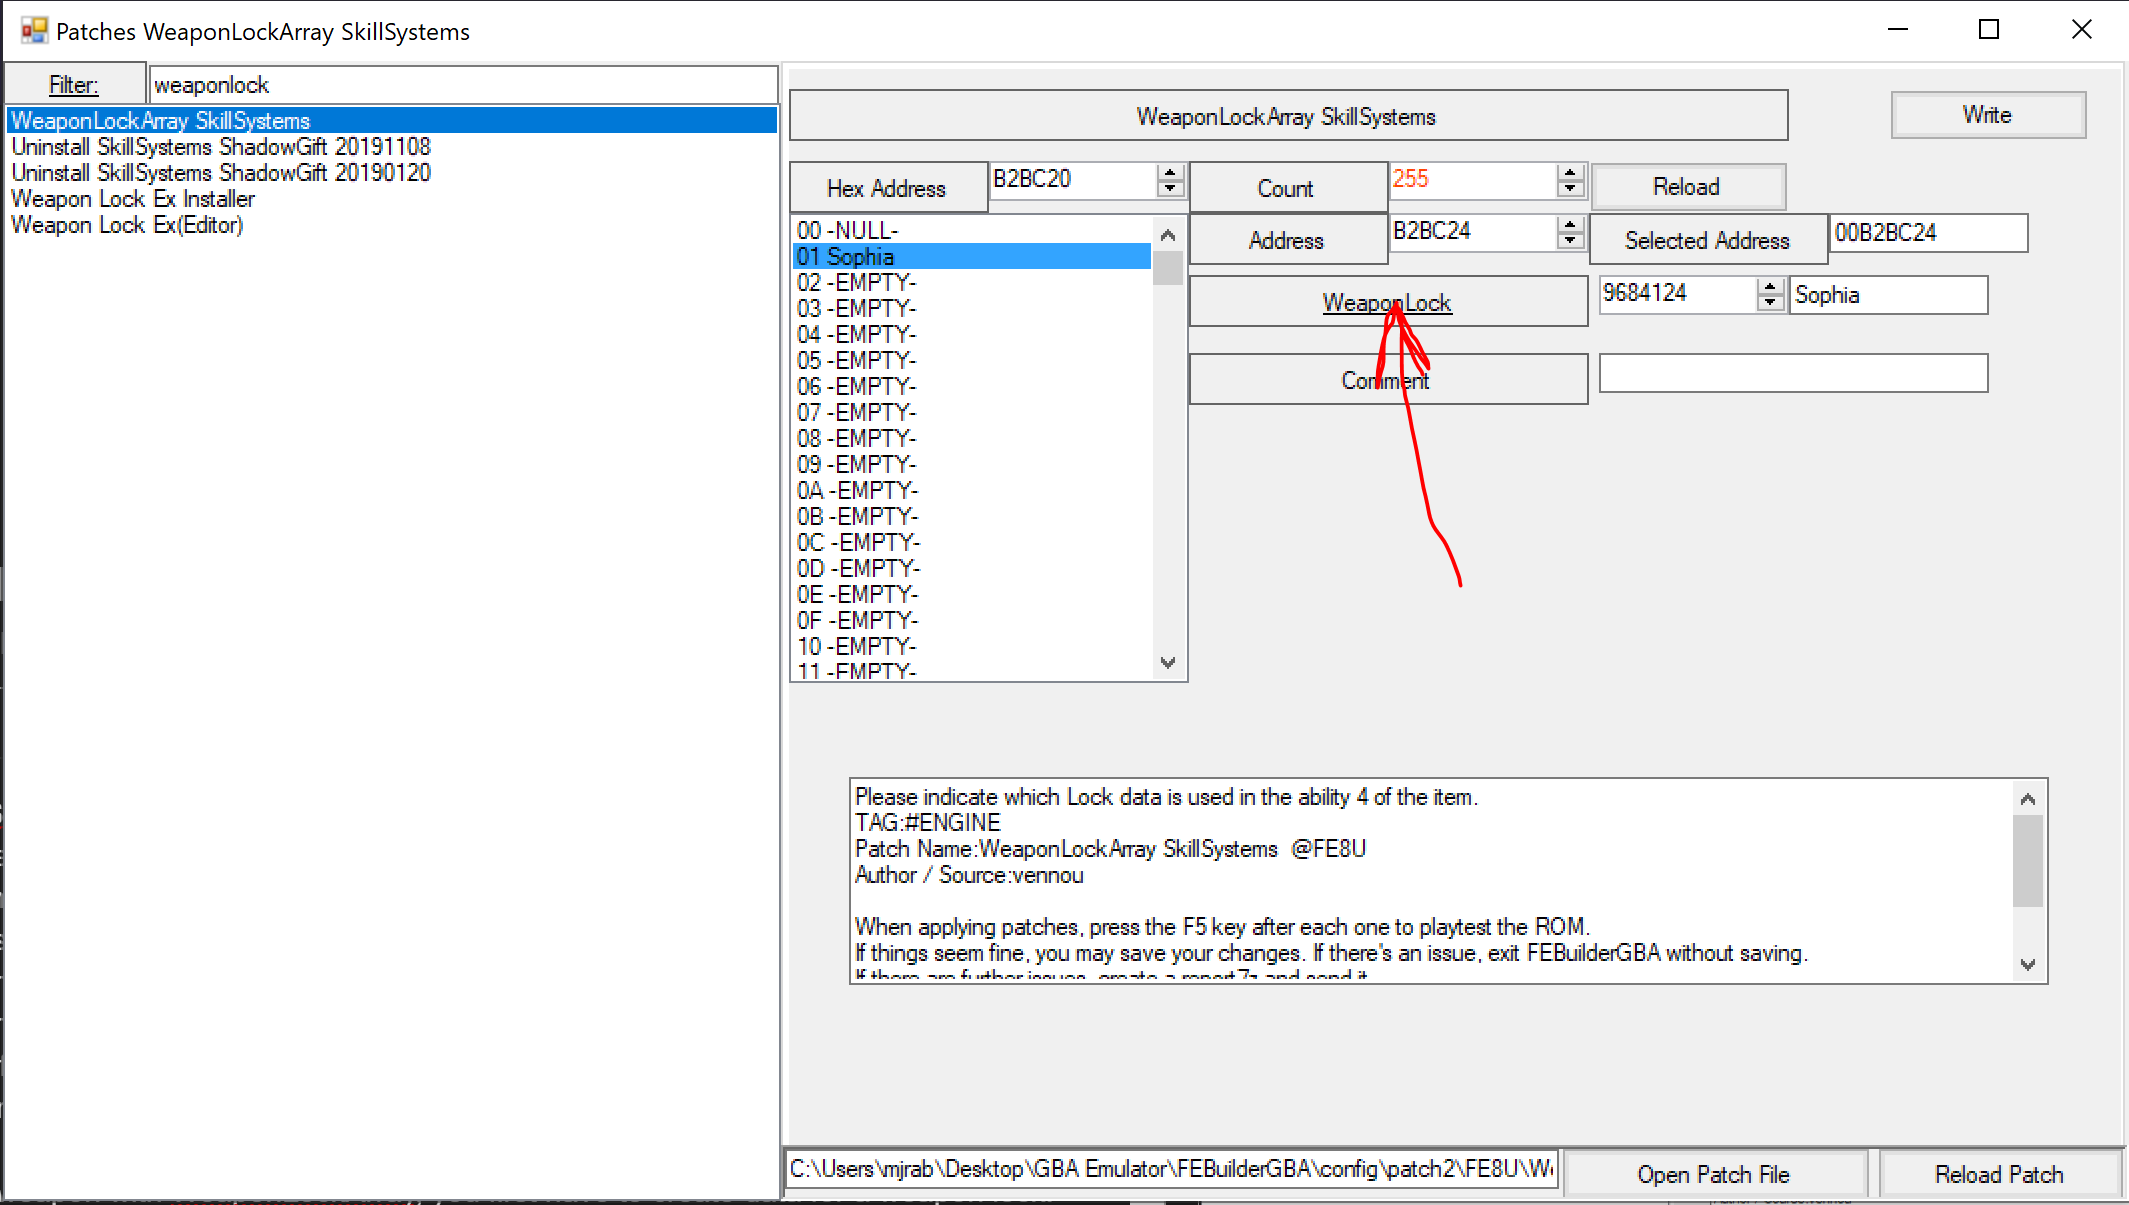
To lock a weapon with WeaponLockArray, you first have to create data for a weapon lock. With SKillSys instealled, find “WeaponLockArray SkillSystems” in the patches list to bring up the editor. Choose one of the “EMPTY” slots in the array and click “Allocate New” to create new data. Once data has been created, you can click “WeaponLock” next to the address to get to the editor for that entry.
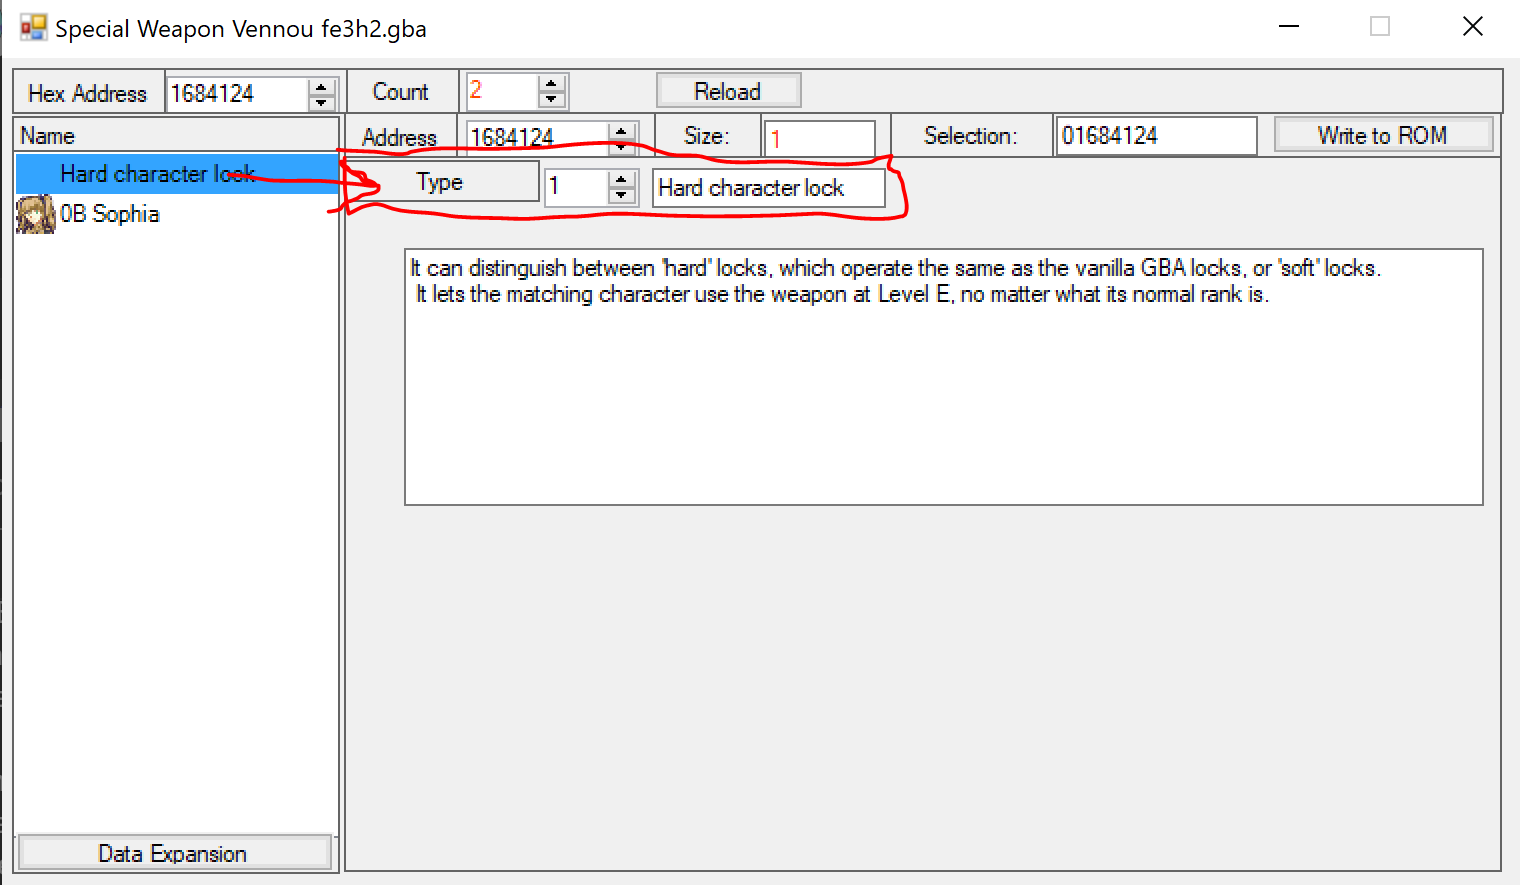
Within that editor is where you set the specifics. The first entry defines what type of lock this is. Enter a 0 for soft character lock, 1 for hard character lock, 2 for soft class lock, or 3 for hard class lock.
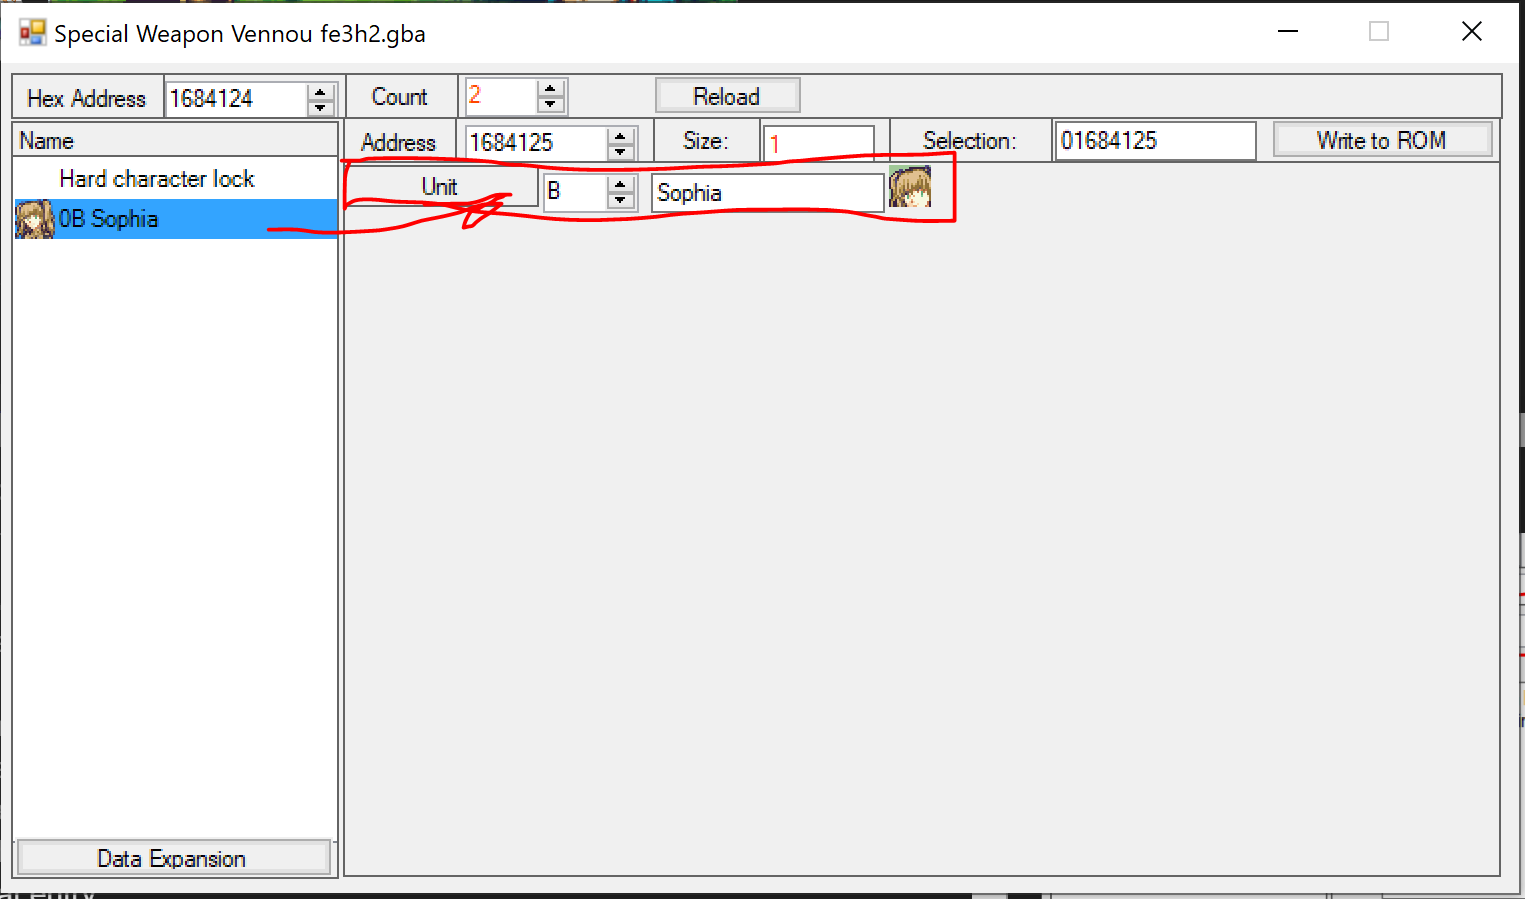
The rest of the entries in the list are the IDs of the units or classes you want to be able to use this weapon.
Finally, back in the Item Editor, in the bottom-right, you’ll find a field to set the ID of which WeaponLockArray entry to use.
If you have a version of SkillSys with functioning WeaponLockArray, the weapon will now behave according to the lock data you set up.
Can I apply weapon locks to items and staves as well?
Yes, with this patch:
Patch Name:Enable Locked Weapon Prf constraints on staffs and items as well. @FE8U
Author / Source:7734 Originally by Tequila, jjl2357
Do note that this will not work for Lockpicks, and by extension it may not work for keys. But it does work for staves, dancer rings, and standard items used with the Use command. I also do not know if this works with WeaponLockArray or only with vanilla weapon locks.