This guide presumes you have everything presented in its predecessor, namely a familiarity with how to actually insert the music as well as Anvil Studio. Additionally, I’m open to corrections on the information presented as well as suggestions for topics that I have not yet covered.
Pre-Insertion Instrumentation Previewing with Soundfonts
Through this method, we will be able to preview exactly how our music will sound ingame before we even start to insert it. We’ll accomplish this by using a few programs in conjunction to let us hear the midi as it will sound ingame.
1. VirtualMIDISynth
The program that will allow us to accomplish this first and foremost is VirtualMIDISynth. Additionally, you’ll need to grab the native instrument map soundfont .sf2 file, which can be found in the download here.
Run the VirtualMIDISynth installer and open the program to the Soundfonts tab.
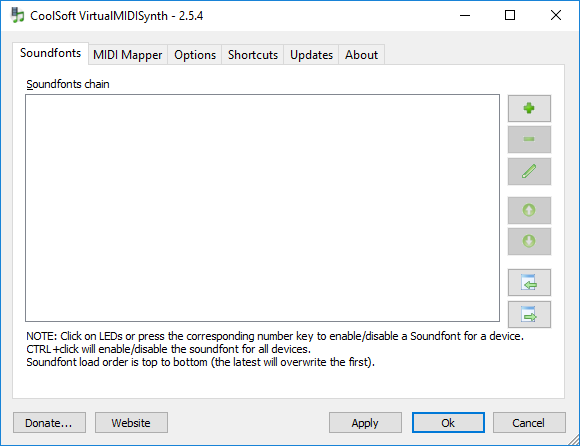
Click the green + button, then navigate to the soundfont for the native instrument map. Hit Apply, and close the window; VirtualMIDISynth should be on the taskbar, where it needs to be to work. If you plan on using this often, I recommend that you set the program to automatically open at startup.
2. Anvil Studio
In order to actually hear your music using the VirtualMIDISynth device that’s using the soundfont you selected, you’ll need to set it up in your preferred MIDI editor. This guide covers how to do it in Anvil Studio, but your preferred program should also have a method to do so. With any MIDI open, click here on any track to open the following window:

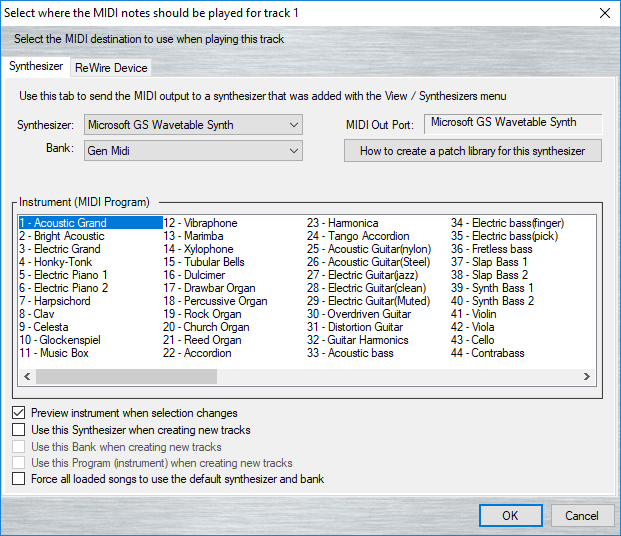
Under the Synthesizer dropdown box, select add new synthesizer to get this window:
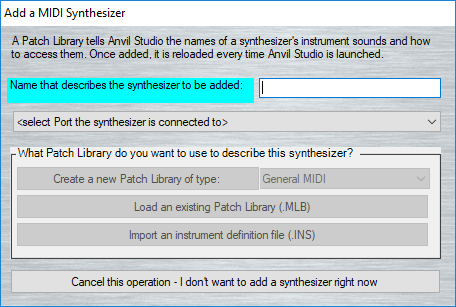
Under the <select Port the synthesizer is connected to> dropdown box, select VirtualMIDISynth #1 (you can have it act as up to 4 ports simultaneously, we only set up one port so you only get the #1 option) then give it a name and click Create a new Patch Library of type: (we want it to be General MIDI as the type and that’s the default option, so you don’t have to mess with anything there)
Now you’ll be taken back to the previous window, and if you check all 4 of the unchecked boxes at the bottom of the window now every track will use the VirtualMIDISynth device by default. Playback the MIDI and you’ll hear it in GBAFE NIMAP instruments! Note that the preview will be at a higher sample rate than ingame, so your songs will generally sound cleaner in the preview than they do ingame.
Cleaning Up Jenkiness
This will cover a few miscellaneous things, hence the more vague name. Going over a few functions of Anvil Studio to make things cleaner (once again assuming that you’re just using Anvil Studio), as well as midfix4agb.
1. Repair Song
The Repair Song function of Anvil Studio is one that is usually helpful for any midi that you didn’t make yourself from the ground up (and sometimes even ones that you did). It removes unnecessary MIDI events and generally lets you gain a little more control over the midi you’re editing. The function can be found here:

You can also run it on a per-track basis if you so desire, from the Track dropdown menu.
2. Program Changes
Say you have a MIDI where each track uses multiple instruments and switches between them regularly. In Anvil, the change instrument function is only going to let you change the very first time an instrument is set, which if the track switches to another instrument and then switches back won’t touch either. Some of the headache can be mitigated with Repair Song, since it removes instances of two or more instrument change events that change to the already set instrument (some songs, usually rips from older games, will have a program change every measure even if it stays as the same instrument. Repair song will fix this).
From this point, you have two fairly intertwined options. You can either elect to remove all program change events and set each track to always be a single instrument, or you can preserve the program change events while making them easier to manage on your end.
If you choose to do the latter, the first thing you’ll want to do is find where the instrument changes at in the track. From there, select the section that is a different instrument, right click, and select Move selection to another track and move to a new track. This moves the different instrument part of the track to somewhere that you can edit the instrument of like you would any track with a single instrument. Repeat this process for every instrument change in the track; remember to keep times it goes back to the initial instrument on that same track and to move instances of the same instrument to the same track to cut down on the number of tracks you’ll have.
Now comes the part you would do for both of your options. Go to View → Event List to open the event list, select the track you moved all the parts off of from the dropdown box at the top, and press Delete Events…. From here, check the Program Change box and hit OK. This will remove all instances of instruments changing on the track, including it being set initially, so you’ll have to set the track’s instrument again, however it will no longer change throughout the track. Repeat this process for all of the tracks you made from moving off different instrument sections of the original track. Now you can edit them all separately!
But what if you want to put in a program change yourself? This is even easier than taking them out. All you have to do is place the cursor where you want it to occur, go to Edit → Insert MIDI Event, check the Include all controller events box, then select Program Change from the dropdown box just above (it should be located above the default option). Now the bottom half of the window has changed to an event-specific option for program change, allowing you to select the instrument you want to change to. Change it as desired and press OK to insert the program change. To remove it, you can locate it on the event list and remove it manually or you can remove all program change events as was outlined previously.
Occasionally a program change event you added doesn’t seem to have an effect until a note or so after where you inserted it. This is because Anvil will round the cursor location slightly when deciding the timecode that the event will insert at. To circumvent this, you just need to set the time manually. One of the boxes in the Insert MIDI Event window we didn’t touch previously is the Time of box at the top. This is the timecode the event is inserted at. To get the timecode that you want to insert it at, find the first note you want to play as a different instrument and double-click on it. This will open Note Properties for that note. Listed under Note's Start Time is a timecode just like the one in the Insert MIDI Event window! Copy it, go back to inserting the program change event, and paste it into the Time of box. Now your program change will happen exactly with that note! It’s generally good practice to do this every time you insert a program change event, even if it wouldn’t otherwise be necessary.
midfix4agb
So you have a song and when you insert it it sounds like a loud siren where the midi sounds like a pitch bend. For a number of technical reasons (mostly outlined here), pitch bends need to have their effect lowered drastically when putting them through mid2agb. Fortunately this can be done, among other things, with midfix4agb. Just drop your midi file on it, and you’ll get a version of it that will sound much nicer ingame (If it’s still giving you issues, try running it through midfix4agb repeatedly to dilute the effects causing problems).
You can get midfix4agb here:
Automating MIDI to EA .event File
Utilities used for converting your MIDI to an EA installer for your buildfile cannot process more than one file at a time; therefore, you would need to run each MIDI through both mid2agb and s2ea every time you make a change to it. I found this to be somewhat antithetical to the purpose of a make hack script that runs all external programs and then EA, so I wrote a cmd script to automatically convert every .mid file into a .s file into a .event file. Put the script in the root of your buildfile, put your MIDIs in the subfolder Music, and put both mid2agb and s2ea in the same folder. You can run it from within your make hack full script if you so desire, though I would recommend keeping it a separate file if you do so and just running the cmd from within your make hack full cmd.
cmd Script
@cd %~dp0

@cd "%~dp0Music"

@echo Converting MIDIs...

@dir *.mid /b > mid.txt

@for /f "tokens=*" %%m in (mid.txt) do mid2agb %%m -V075

@echo Done!

@echo Converting to events...

@dir *.s /b > sappy.txt

@for /f "tokens=*" %%s in (sappy.txt) do s2ea %%s

@echo Done!

@echo Cleaning Up...

@del "mid.txt"

@del "sappy.txt"

@echo Done!

pause