(Reposted from Serenes Forest)
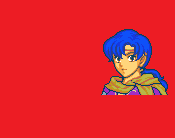
Hey there, boys and girls! Today I’m going to show you how to make simple splice portraits with the individual assets used by the Fire Emblem CharacterCreator program! Some of you budding fangame makers are probably using this program to make quick and easy splices right now. While the program is good for previewing part combinations you want to use for a real splice, the actual portraits the program makes are not good to use in actual games as the program’s available color choices (especially for skin tones) are awful. Here’s an example portrait below of Omar, a playable character in Sanctaea Chronicles, made with CharacterCreator:
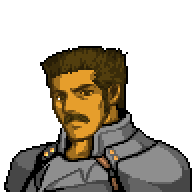
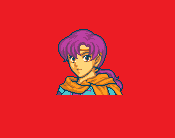
I tried the best I could to make it look decent, but it still looks a little off. Also, the size of CharacterCreator’s portraits is twice what the GBA games allow. So what I did was I manually recolored the individual parts used by the program as desired and put them back together like what is seen in the original portrait to get this:

Looks better, doesn’t it? I’m going to show you how you can do this too. You’ll need Usenti and MS Paint. The character I’m making in this tutorial belongs to @Jayderson, whom I have volunteered to help.
Step 1: Assuming you’ve already extracted from the program’s .zip file, you should see a folder titled “resources” containing all of the assets used by the program. Copy and paste all of the parts you want into MS Paint, with a high-contrast backing color behind them. Save this.
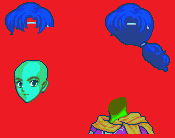
Step 2: Open it up in Usenti. Make sure the backing color is the top-leftmost one in the palette. If it is not already, use Palette -> Swap to swap colors by ID; the backing color should have ID 0. Click Palette -> Requantize, enter 16, and hit OK to bring the total colors in the image down to 16 (GBA limits). Change colors of pixels as needed to restore any lost details and assemble the parts as desired. Remove any hair below the shoulders. Save.
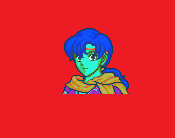
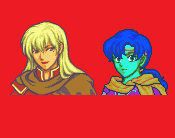
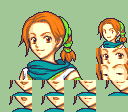
Step 3: Pick out existing GBA portraits whose colors you want to use. Open your WIP portrait in MS Paint again and copy and paste a portrait that has a set of colors you want. Since this character is supposed to live in a desert kingdom, let’s give her a dark skin color from Igrene. Save.
Step 4: Open in Usenti again and replace colors on the WIP portrait with colors from the other portrait. Remove the other portrait when you’re done and make sure the result still has 16 colors including the backing color.
Step 5: Repeat Steps 3 and 4 until you have all the colors you want. Let’s give her Astolfo’s hair color, a scarf color from a generic female NPC’s shirt, outer shirt colors from Ninian’s dress, and an inner shirt color from Legault’s cape.
What you want to do now depends on what software you’re using to make your game. If you’re like me and you’re using SRPG Studio, you can simply open your portrait in Usenti, move it into the top-left corner, reduce the image size to 96x96 pixels, and move it back so that the bottom of the portrait touches the bottom of the 96x96 frame. Save as a new, transparent image.

If you intend to insert your portrait into a GBA hack, however, you will need to do more work. In Usenti, move the portrait into the top-left corner, reduce the image size to 96x80 pixels, move the portrait so that its bottom touches the bottom of the frame, and expand the image size to 128x112 pixels. This will give you room to add talking and blinking frames and a mini portrait, like so:
That should be all for now! If you know more about this than I do, reply to me anything I may have missed. Happy splicing!