Hi there! Have you ever wanted to edit FE1 portraits? I’ll warn you, it’s not exactly easy. But, it’s doable.You may have seen that from my FE1 hack, Time For Tom ( Romhacking.net - Hacks - Time For Tom - Thomas and Jake's Excellent Adventure )
Just how did I manage to pull it off? Well, here’s how.
For this method, you’ll need a NES graphics editor like TileLayerPro, an image editor of your choice for drawing, and a debugging emulator like FCEUX.
First, you have to draw up your new portrait sprite, 48x48 for units, 48x64 for NPCs like villagers and kings. Your image can use up to three palettes, three colors for each plus black. You can use a fourth palette, but it’s shared with cursor graphics, so use with caution. Each 8x8 pixel tile of your portrait must use of one of your palettes, so a single tile can’t have four different colors (not counting black). Here’s a quick portrait I drew up as an example.
![]()
For palettes, since this lasagna-loving cat has a simple design, the palettes are:
- Orange, skin, white, black (for most of the image)
- Pink, skin, white, black (for his nose)
![]()
Here’s a crude example of how his image looks like divided into the tiles. I added a blue checkerboard overlay to show it.
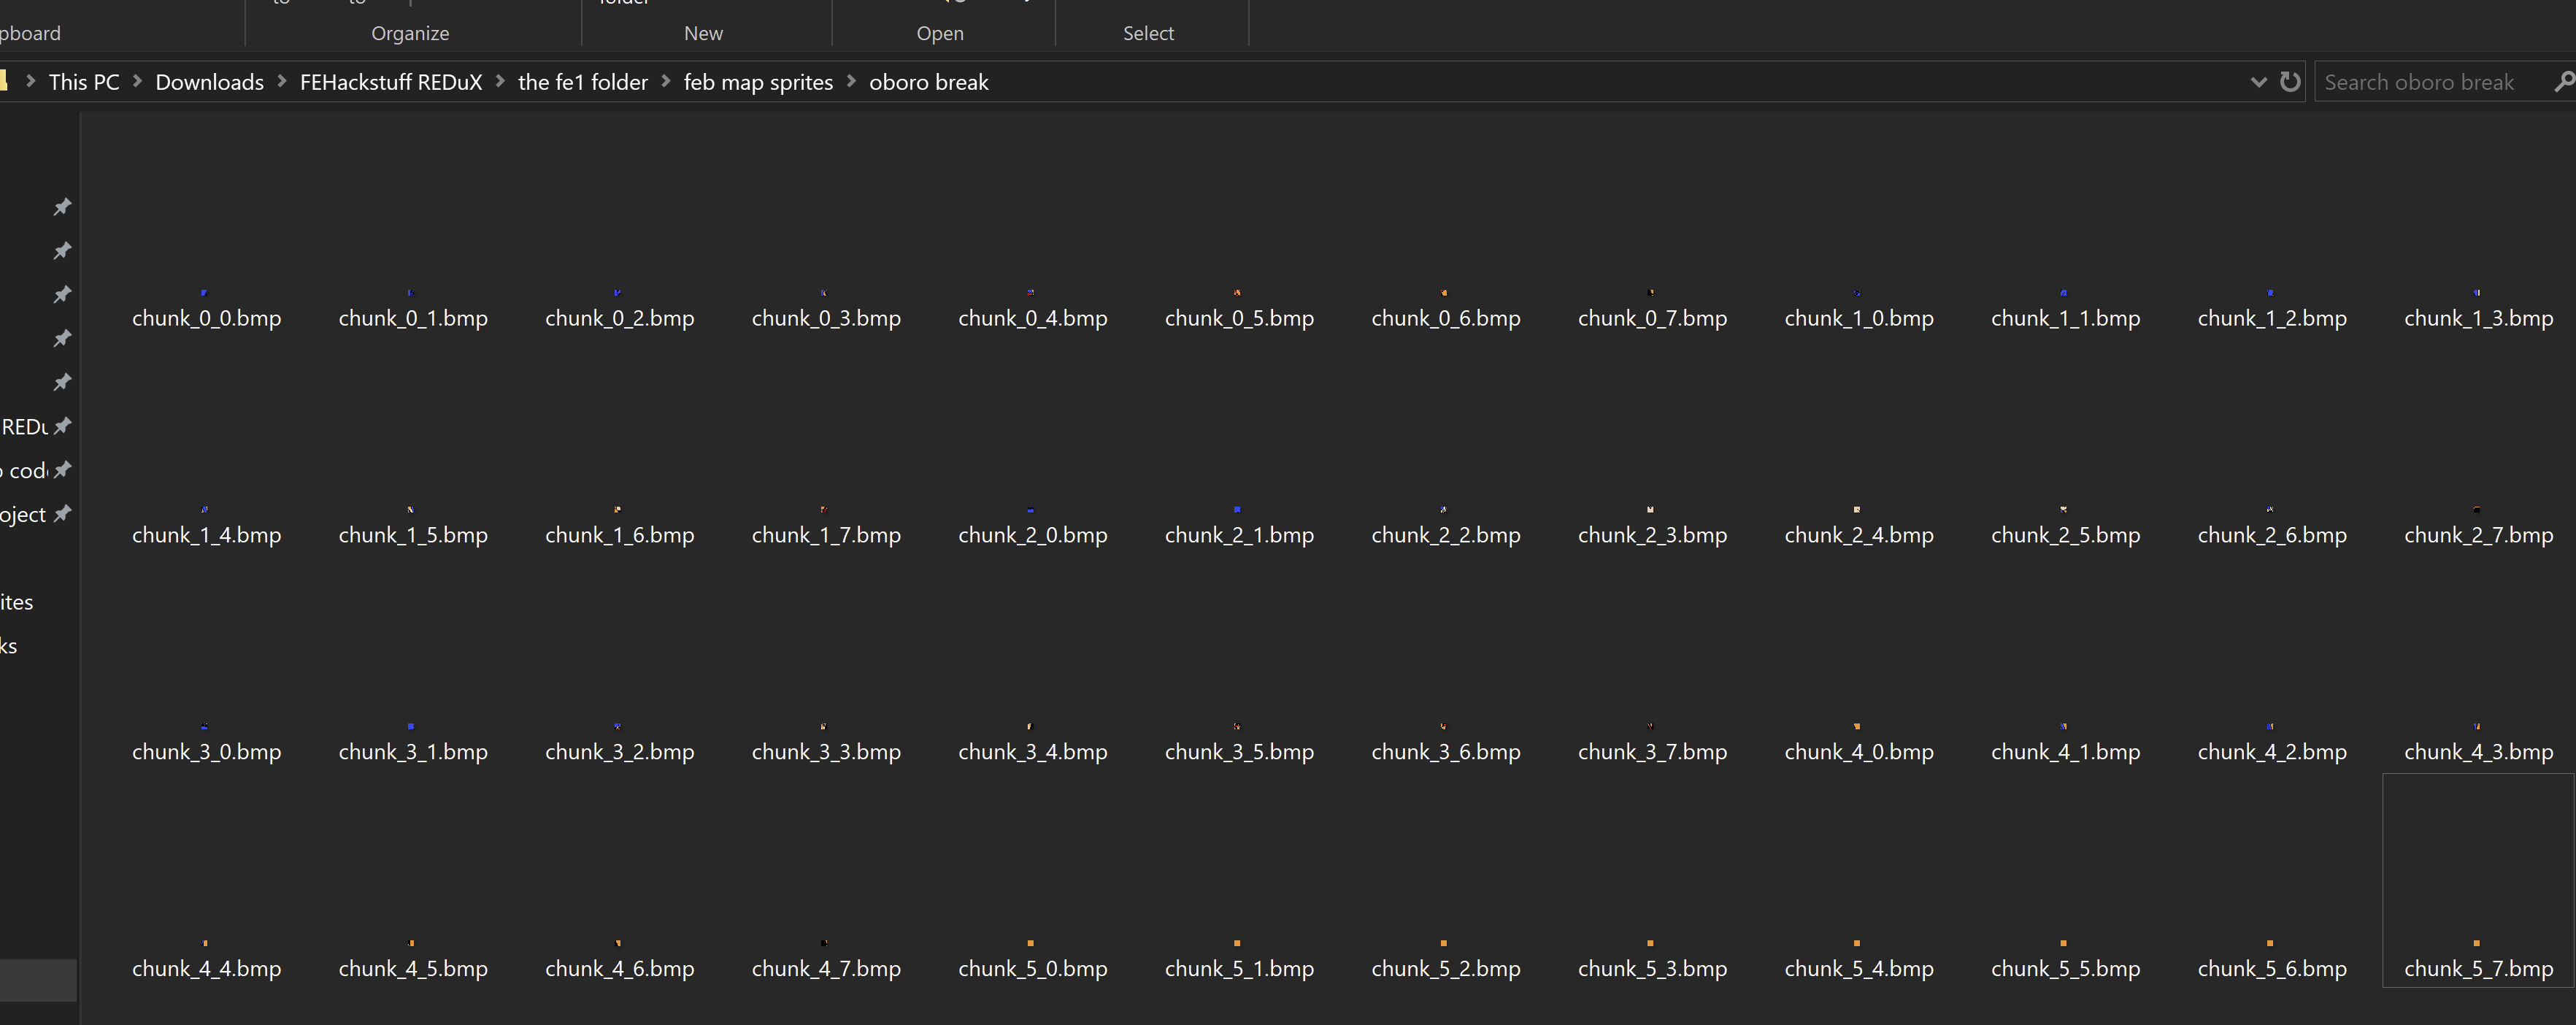
I exported each section seperately as bitmaps using Paint dot NET.
The next step is to insert them into the ROM using TileLayerPro. We’re going to have ol’ Garf replace Mars’s portrait, so I pasted the tabby cat’s bitmap graphics on the same page as Mars’s tiles. I used duplicate ROM as a clipboard to make sure it imported the bitmaps correctly, then copy-pasted the graphics over to the main ROM.

With that squared away, it’s time to start assigning those grahpics tiles to Mars’s portrait!
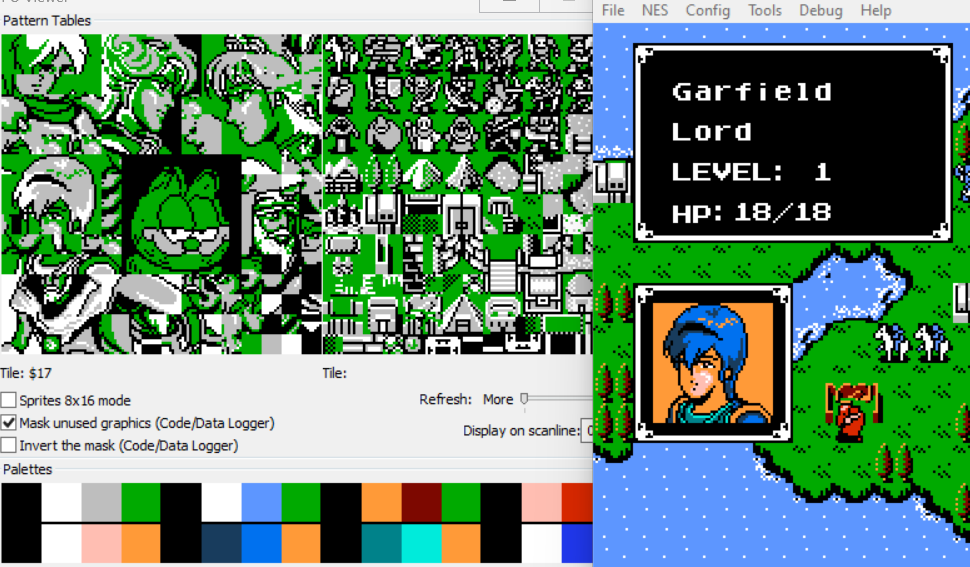
If you start up the game and open the menu with Mars’s portrait, you can see in FCEUX’s PPU viewer how the page with our new portrait’s graphics is loaded in.
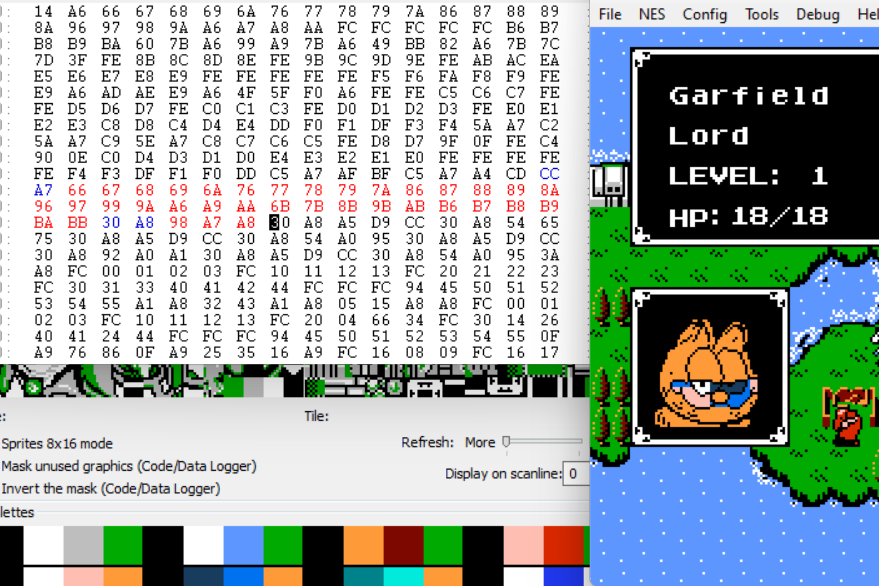
The tiles that each portrait uses from the page are assigned around address 0x293C1. In FCEUX, open the Hex Editor and set the view to ROM Memory. In the Hex Editor, click File → Goto Address, then paste the above address into the box and click enter. The cursor will jump to the portraits area. To have Mars’s tile data be highlighted, close the in-game menu, turn on FCEUX’s Code Logger, then open the portrait menu again and pause the logger. The tiledata should now be highlighted blue.
The first two bytes of the portrait data don’t matter here, but the rest (minus a few near the end) are tile ID’s, which you can see when you hover your cursor over tiles in the PPU Viewer. The format is a little odd, but I’m sure you can figure it out just by changing the ID’s and watching what happens. Note, the tiles for the mouth area are located at the end of the list, the last three bytes that follow 2 bytes of control codes. You’ll know you’ve touched a non-tile if you change it and the sprite completely changes in a bad way. The exact placement and format here is decided by the sprite’s attribute table, but for the purposes of this tutorial, we don’t have to mess with it today. When you’re done changing the tiles used to the tiles of your new portrait graphics, it’ll look like this:
When you got it all changed, be sure to press CTRL+S and save your ROM.
Now, Garfield’s portrait’s there, but the colors aren’t quite right! That’s cause we need to mess with palettes. First, we’ll ensure the first two palettes have the colors that we need, then we’ll assign each tile a palette in the attribute table. You can see the palettes in the PPU Viewer. They’re the colors at the bottom. The top row is for background images like the map tiles, units, and menus. The bottom row is for sprites, or specifically, the portrait on screen. Virtually every portrait in the game has a unique set of four palettes, though a few portraits re-use the same palettes, so watch out!
Portrait palette colors can be found at address 0x2BAC8, so let’s go there. Compare the values shown in the PPU viewer with the bytes you see at that area highlighted in blue, and you can see how they’re almost a 1 to 1. The NES as a whole only has a limited selection of colors that games can use. For reference, here’s all the colors you can use:
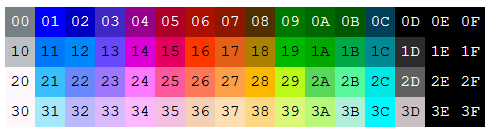
The colors may appear slightly different depending on which emulator you’re using, but they should be pretty close. Anyway, we just need to change all the colors so that they will appear correctly in the graphics. You can right-click the graphics page in the PPU Viewer to change what palette its display is using as a way of testing whether you’ve changed the color correctly or not. Palettes get loaded when the menu is opened, so you should open-and-close the in-game menu to reload your changed palettes. Our example will look like this when done:
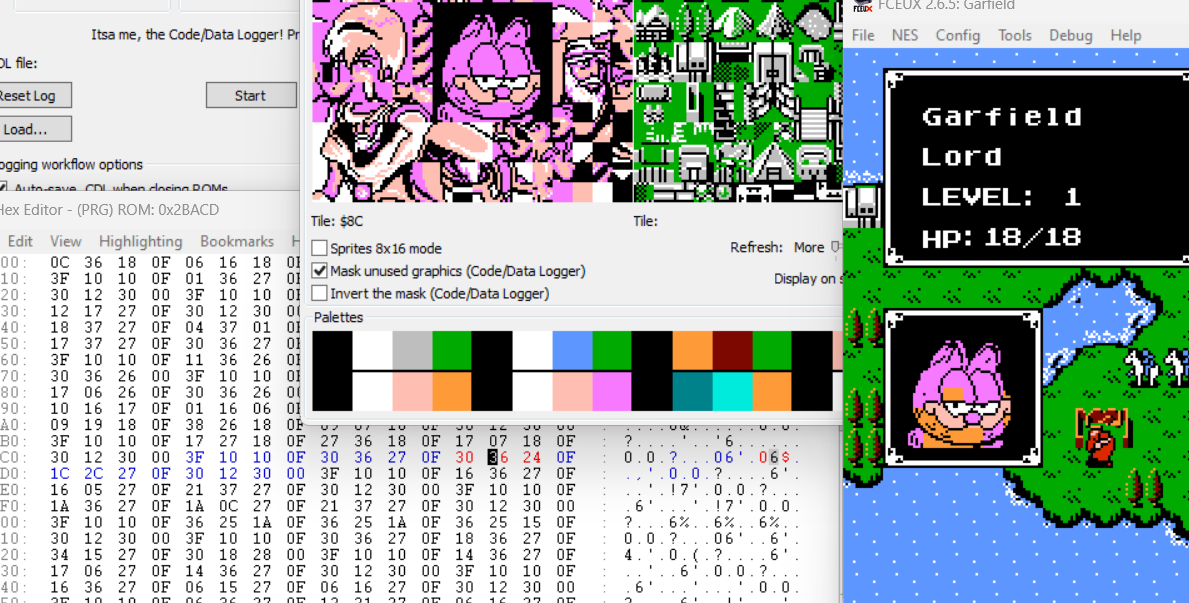
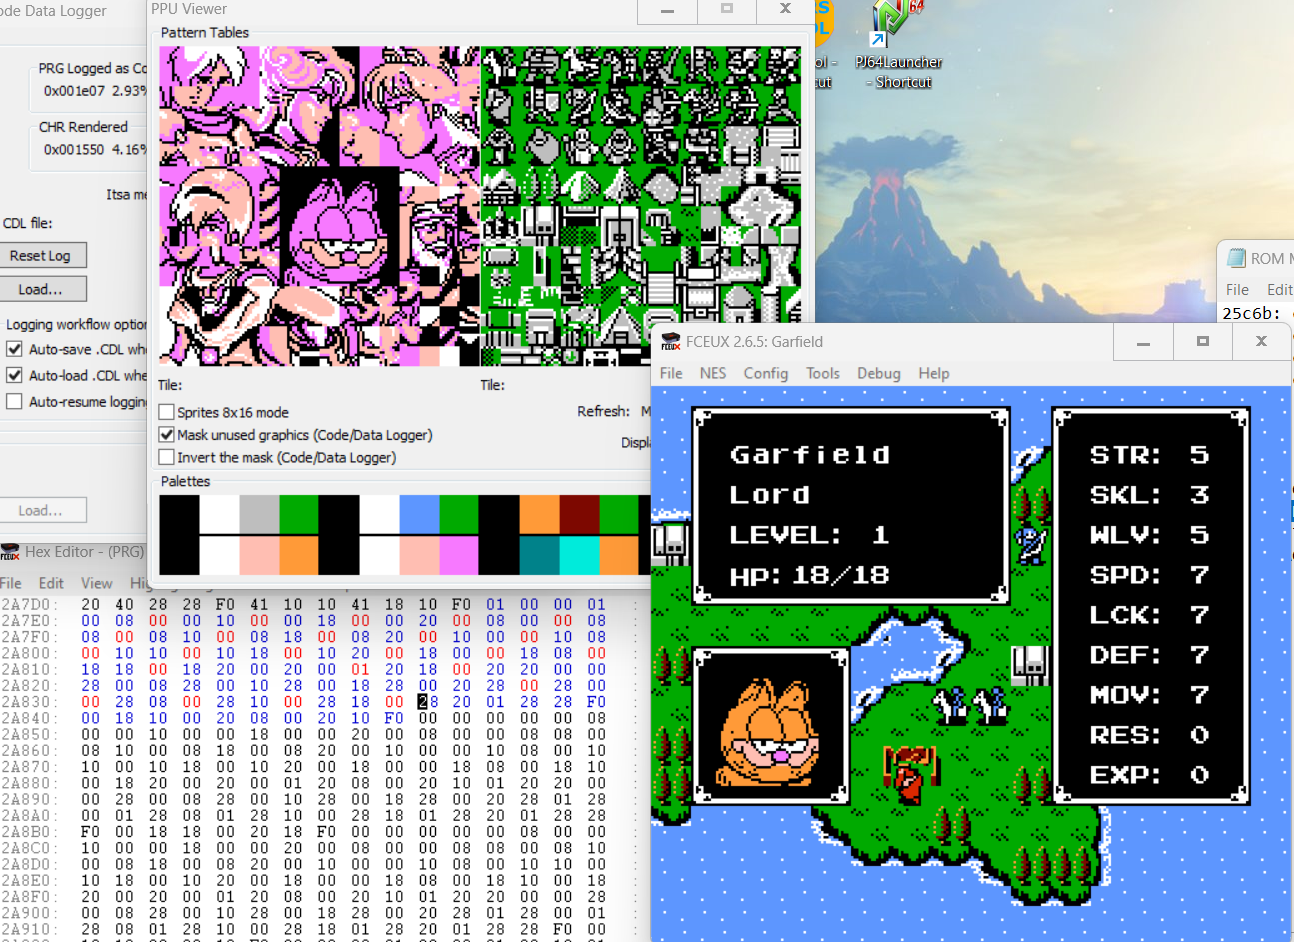
The last step is to assign each tile one of these palettes. The only palettes we have to worry about are 0x0 and 0x1. To make the changes, let’s go to the portrait attribute tables at 0x2A7DC.
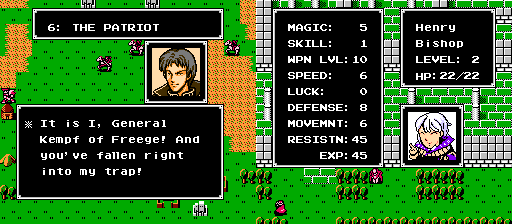
Each entry in the attribute table is a set of three bytes, x position, y position, and palette ID. For our new image, each entry should have 0x0 as the palette EXCEPT for the tile where Garfield’s nose is, which should have 0x1. If you’ve done this correctly, it should look like this:
And with that, you’ve got yourself a fat cat for a protagonist! I hope you were able to get something out of this tutorial. If you have any questions or run into any issues, ask away! ![]()