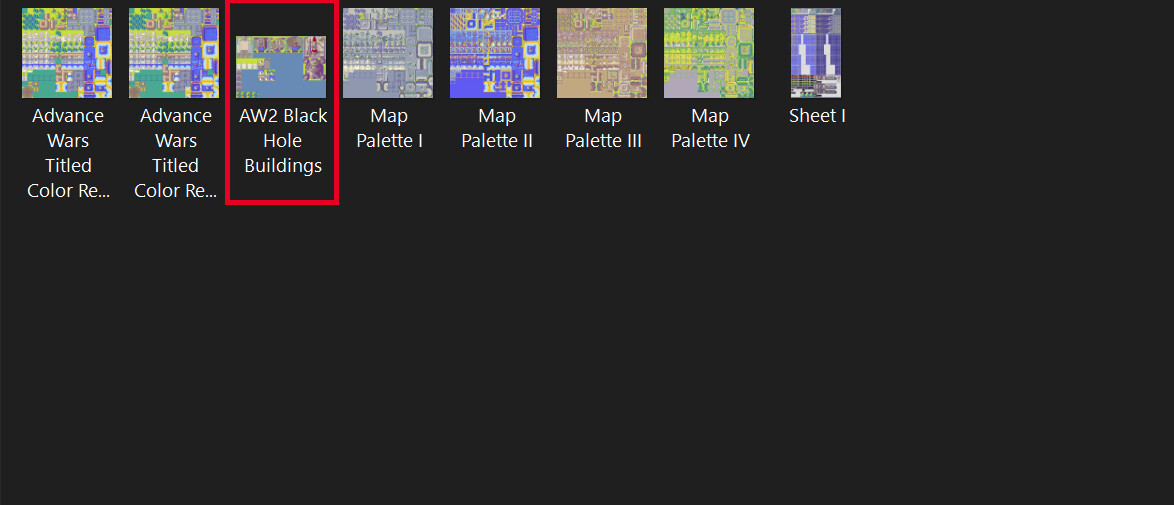
I need help to insert a title set. There’s this tile set call (AW2 Black Hole Buildings.png) I try to put it in but it wouldn’t let me for some reason. Can anyone help me?
1 Like
Hi there!
I believe you are talking about this TileSet.
So, just for clarification:
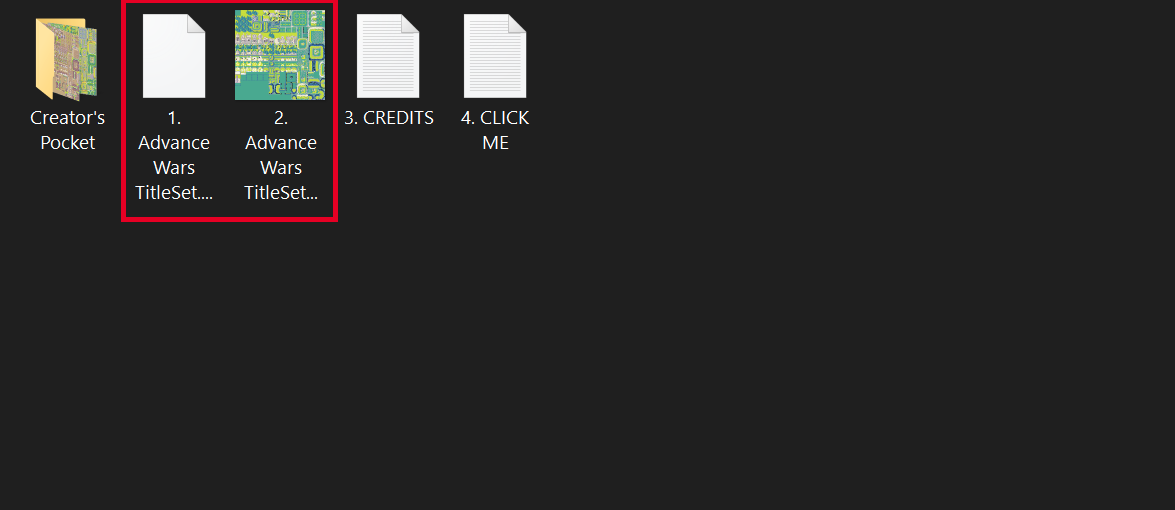
In order to use the TileSet, you will need these 2 files.
About the Black Hole Building… Unfortunately they aren’t in the TileSet. Due to problems with the maximum number of colors in GBA.
In the future I will try to Re-work the entire tileset in order to get everything running, but for now I can only ask patience and say sorry for the inconvenience.
The ‘‘Creator’s Pocket’’ folder, is a folder where I let everything that may be useful for another map creator/editor.
I hope I could explain and solve your problem, wish the best!
Thanks for helping but could u tell me the tool u use to make some titlesets since u make these I’m not like trying to steal or anything I just wondering how u made these so I can make my own for my project.
could u tell me the tool u use
Sure. I like to use GIMP and Paint.
I’m not like trying to steal or anything
Don’t worry.
I just wondering how u made these
Well, there are a lot of steps when creating a Tileset, and some issues that may appear too. But it’s definitely possible to do without much trouble.
I was going to write a small tutorial to help, but I noticed that depending on your choice, it may fit to do some small changes in my writing.
So, before explaining and everything. Between the 2 tools I mentioned. Which one do you think you will use or will try to use? I will be able to write an easier tutorial for you, depending on your choice.
It will take a couple of days to also finish everything, but I will answer as fast as I can.
Probably Gimp someone else recommended that for me when I was trying to make a map sprite. The only thing I wanna was the base and the cannons. I was going to make them into like a castle or something. My friend was going to help me with cannons he told me that he could turn into a ballista. He doesn’t really know how to make tilesets but him and i are working on a game for a friend of ours.
I see. Then Let’s Begin.
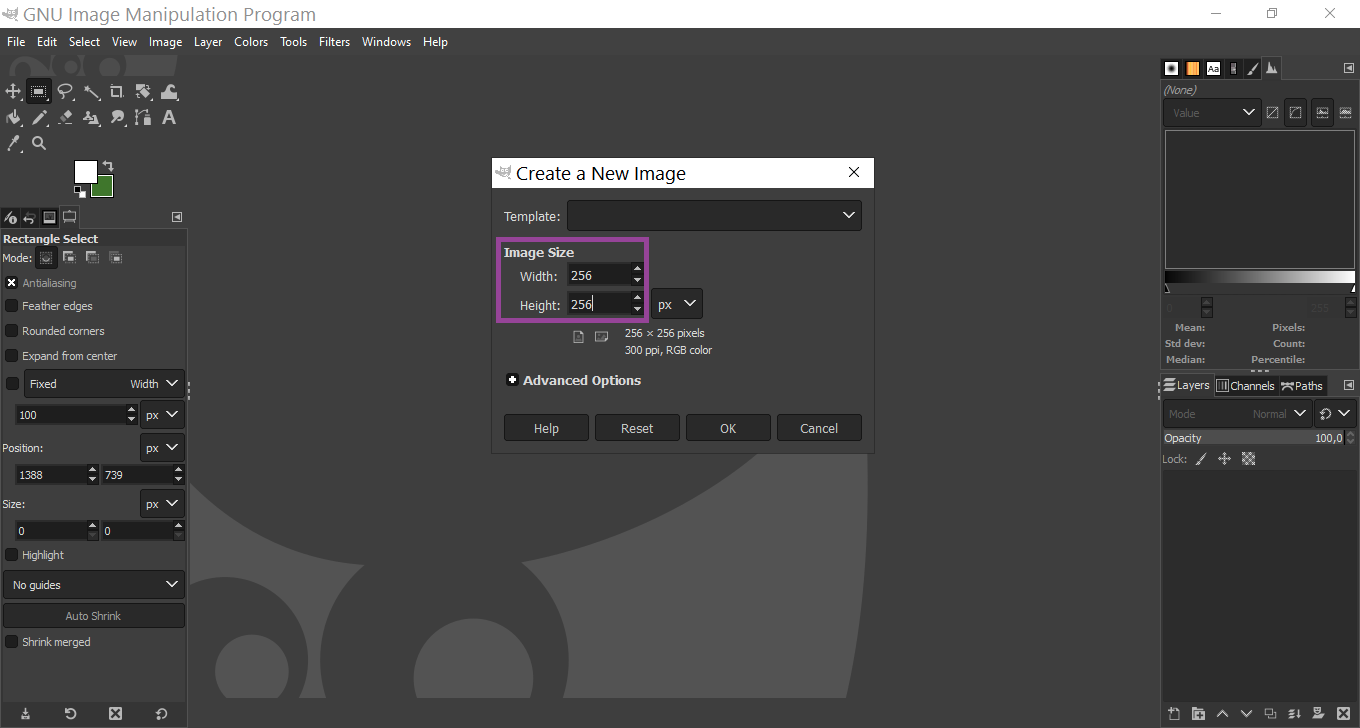
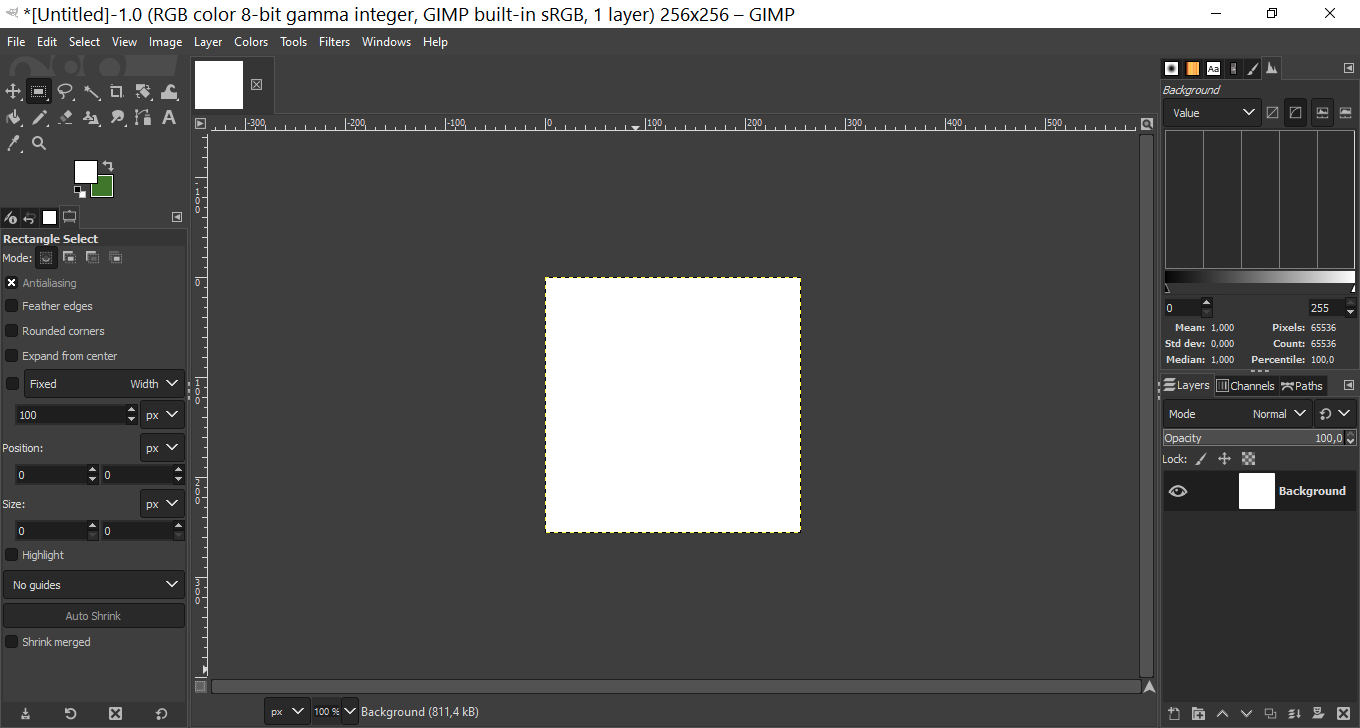
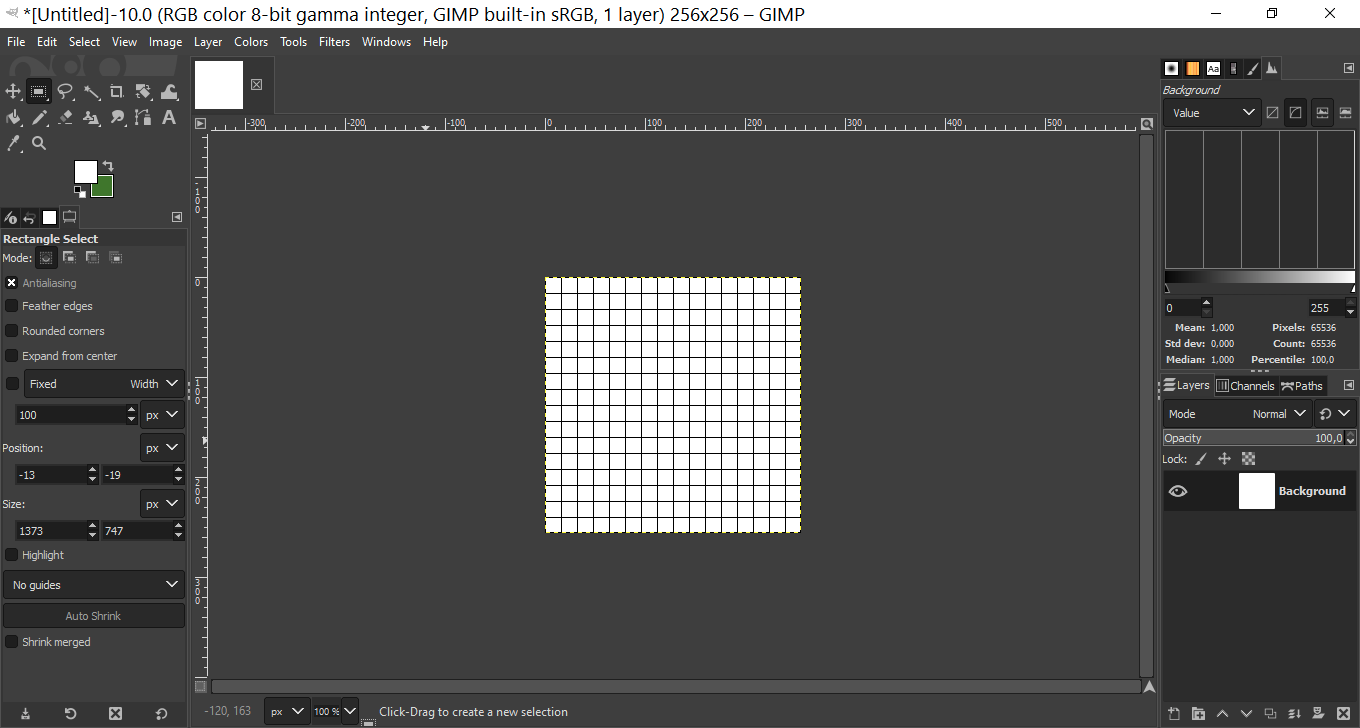
1 - Open GIMP.
Will you see a screen like this. Select ‘‘FILE’’ and then select ‘‘NEW’’.

2 - Resize your image.
In the options ‘‘Width’’ and ‘‘Height’’. Write 256x256.
256x256 means your image will have the size of 256x256 pixels.

3 - Setting GIMP to show 16x16 ‘‘Grids’’ or ‘‘Tiles’’.
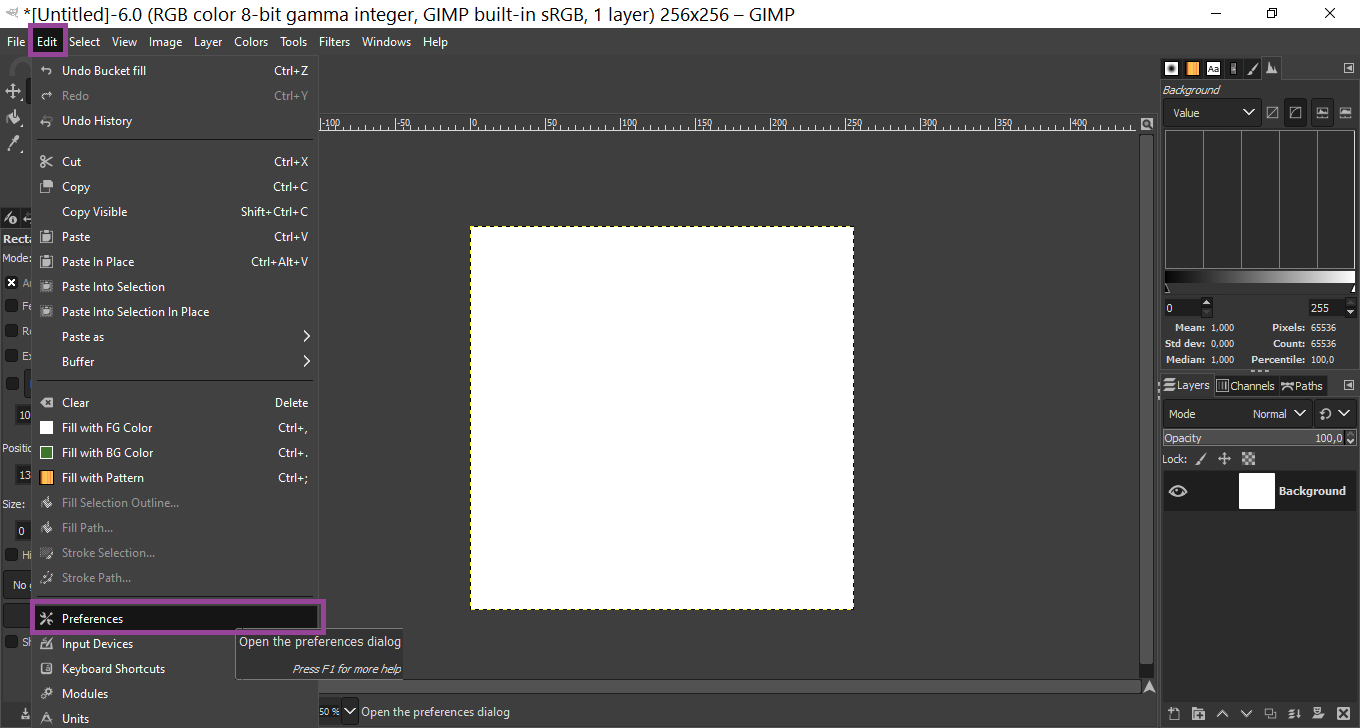
Select ‘‘EDIT’’ and go to ‘‘PREFERENCES’’.
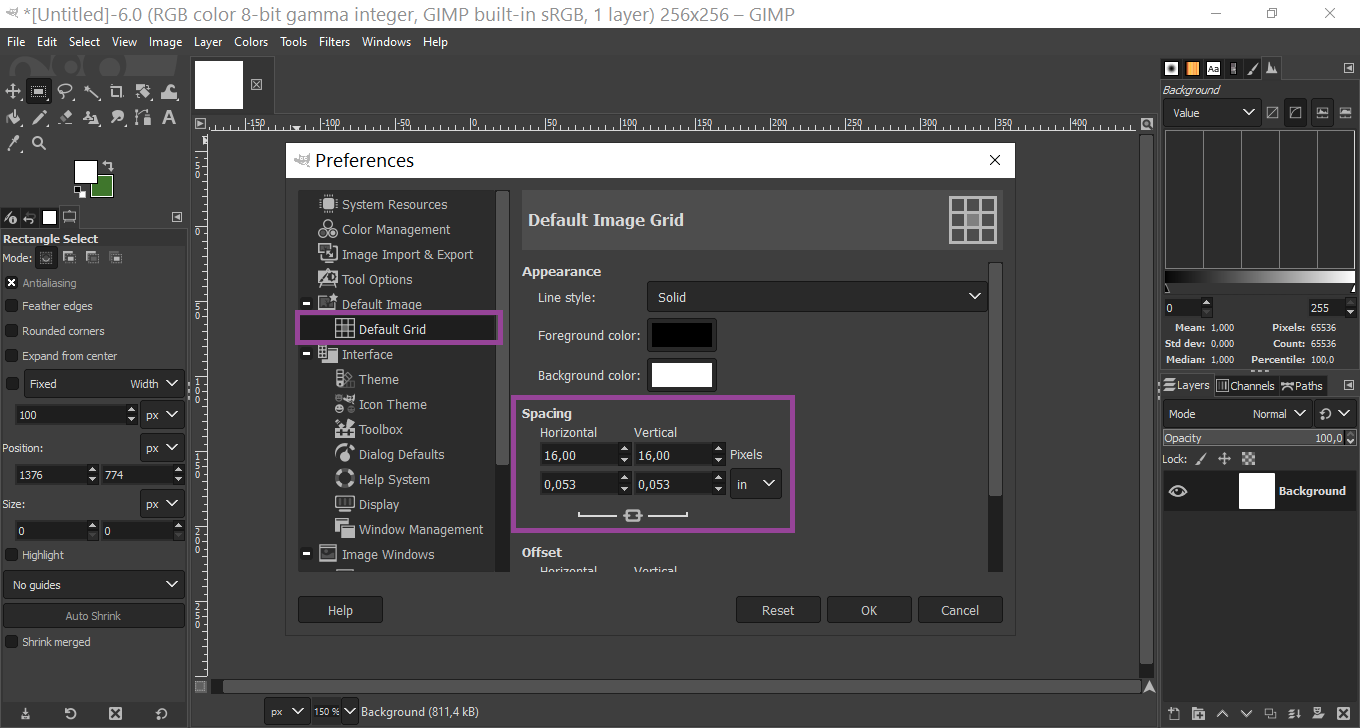
After that select ‘‘DEFAULT GRID’’ and change the numbers highlighted to 16 and 16.
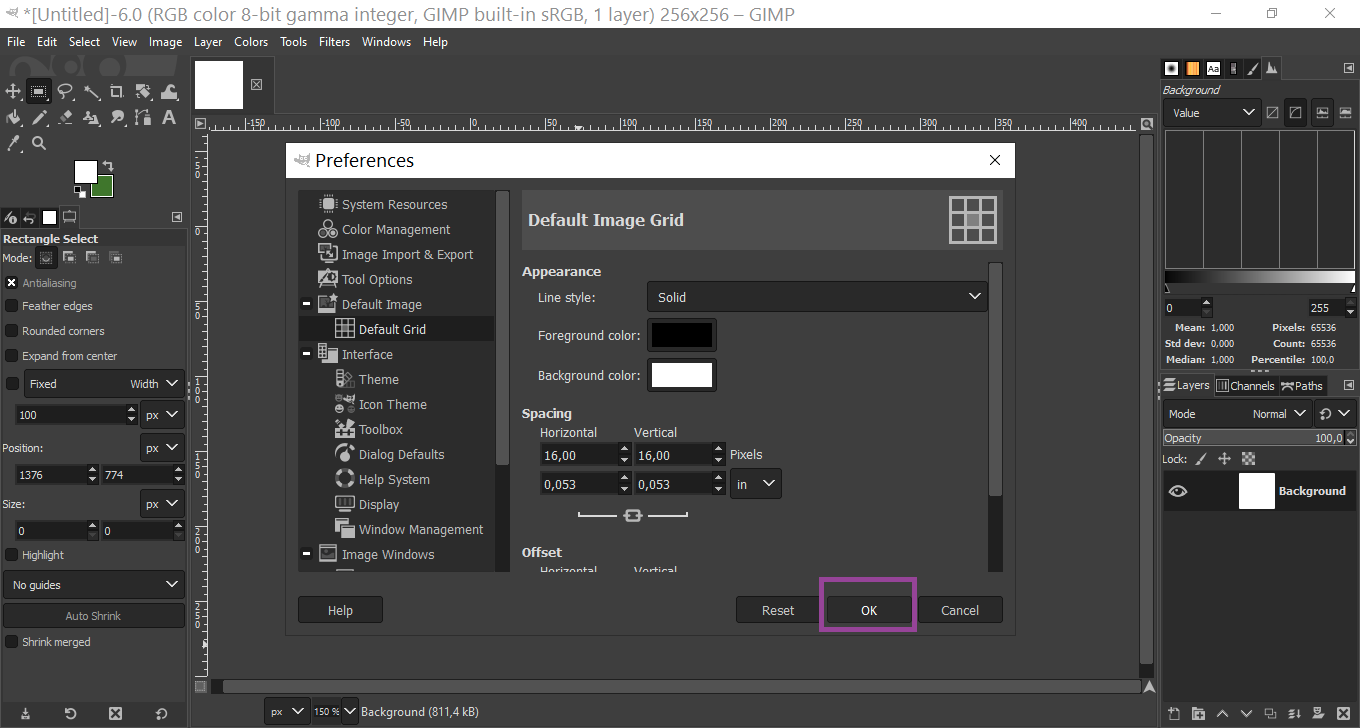
After this step, press ‘‘OK’’ and CLOSE GIMP and then RE OPEN it.
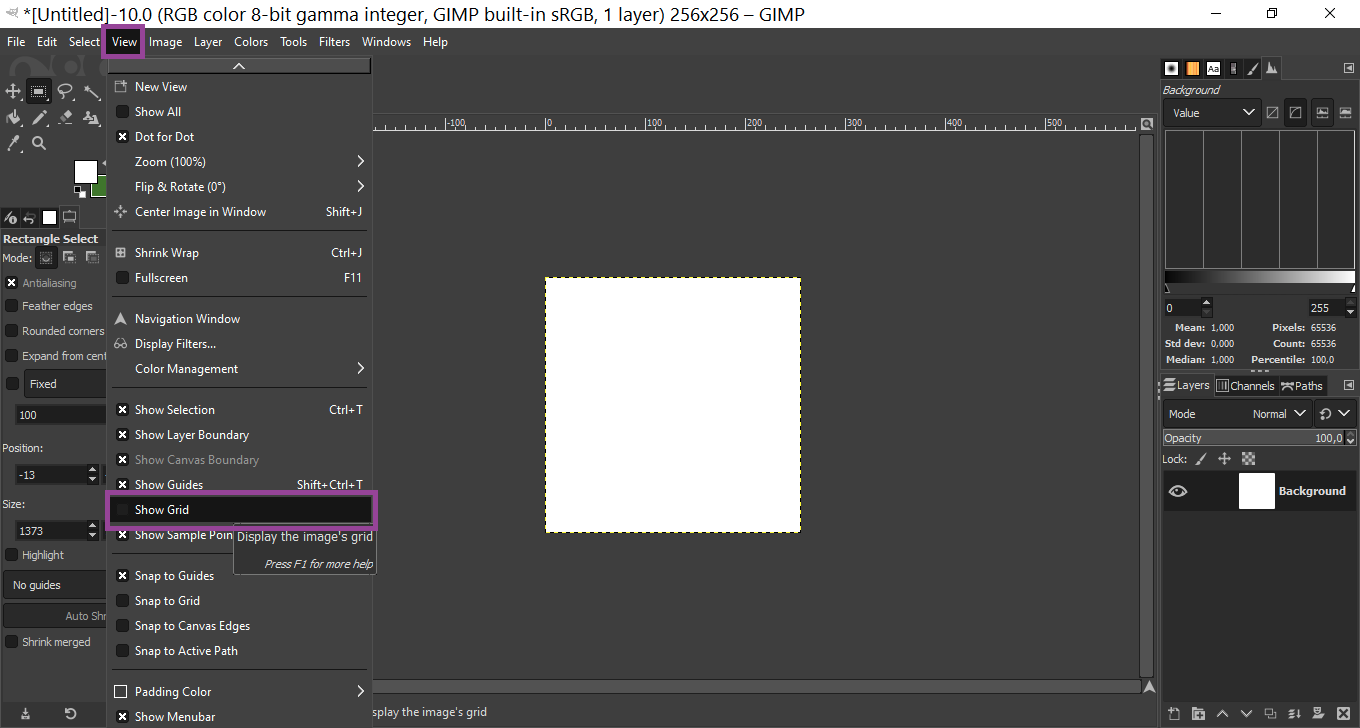
4 - Setting GIMP to show 16x16 ‘‘Grids’’ 2nd Step
After Re-opening GIMP. Go to ‘‘VIEW’’ and select ‘‘SHOW GRID’’.
5 - Important Information
-
Don’t forget that each Title has 16x16 pixels.
-
The tileset can’t handle hundreds of colors, eg: if you take a tileset from a modern last generation game and try to import it, the image will be imported with less colors.
-
Some tiles are especially made for ‘‘Animated Tiles’’, aka ‘‘Water and rivers’’. They are only needed when creating tilesets where it will be water/river/magma and goes on.
6 - Animated Tiles.
If you want to create a tileset with animated tiles. Use the image I will send here. GRAB it and DROP it on your image and will look like this.
Her purpose is simple: You will use it as a BASE to know where animated tiles will be. IF you want to create a tileset WITHOUT animated tiles, you can just scrap this step.
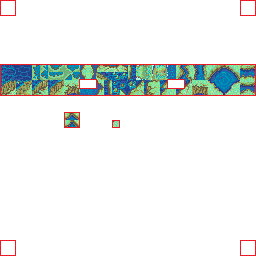 —Donwload this image, if you will use.

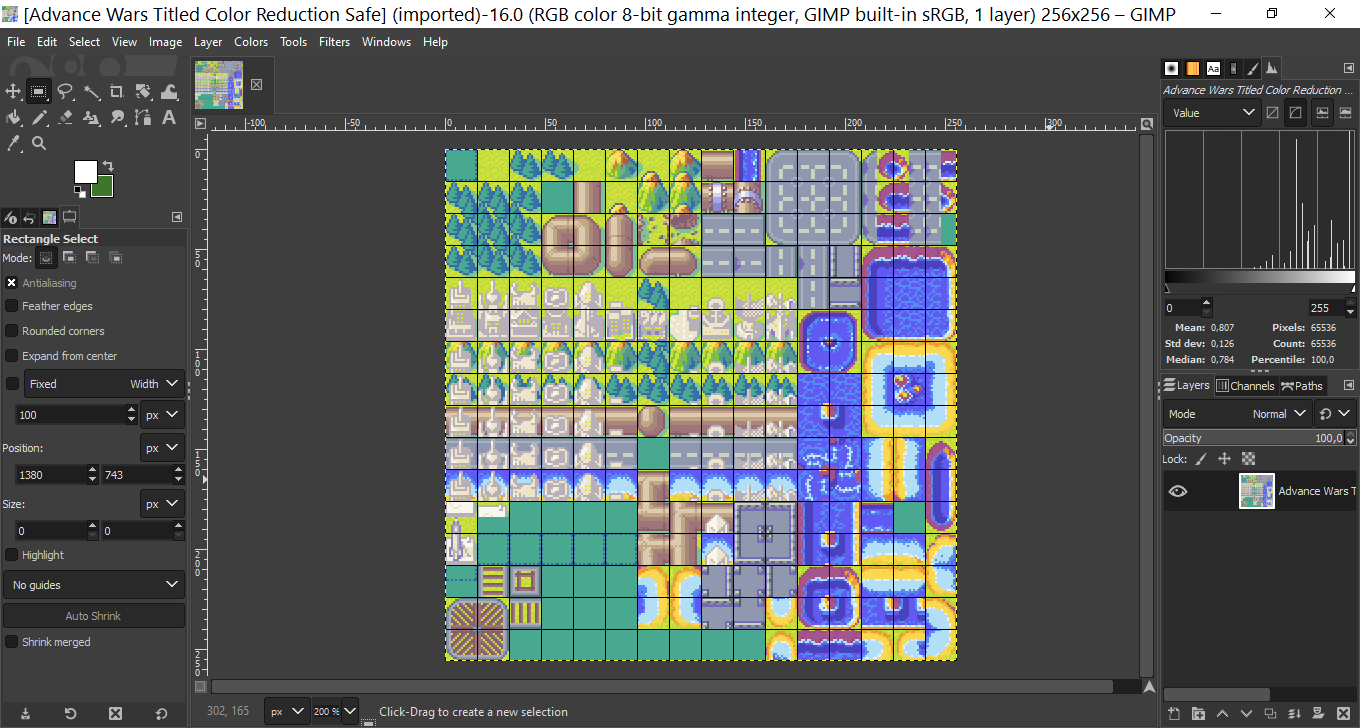
7 - Begin The Work
From now on, you will have to create what you feel like creating.
You can import tilesets from other games. You can create your own.
It’s up to you. Just be sure to create saves and ONLY begin the process of importing it into the FE once you have finished everything.
—Simulated Ending— Let’s use this as an example.
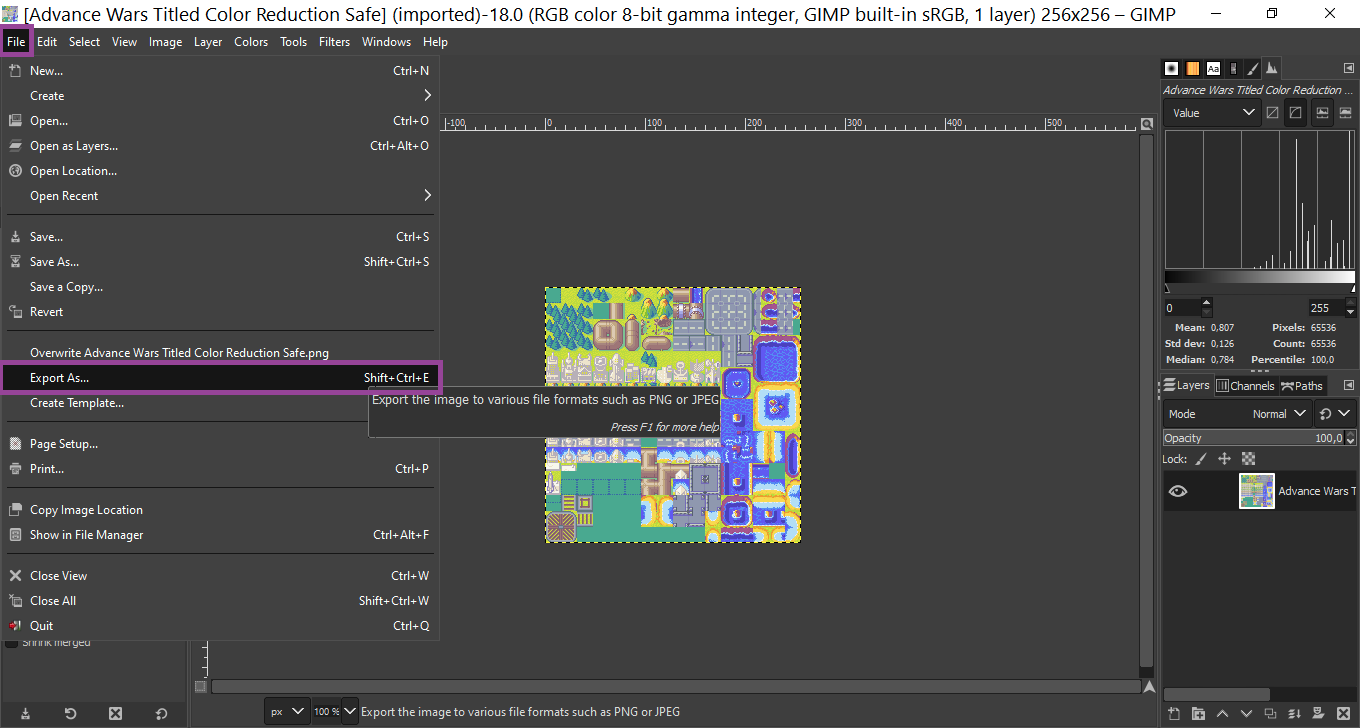
8 - The Process Of Importing Into FEBuilderGBA.
After finishing your tileset, select ‘‘FILE’’ and ‘‘EXPORT AS’’ and give it a name, select its destination folder and click ‘‘EXPORT’’.
After that, We will leave GIMP and We will start using FEBuilderGBA.
After exporting your image, be sure of SAVING a copy in case of things going wrong.

9 - Open FEBuilderGBA.
After opening it, go to ‘‘MAP EDITOR’’ and ‘‘EDIT PALETTE’’.
You will see this screen.
10 - Import This File And Import Your Image.
After you see this screen, download and import this ‘‘FILE’’ I will link to you. After this, go and ‘‘Import’’ your ‘‘TileSet’’ using ‘‘Import Image’’.
IF the image gives an error messenge, it means it has more than the maximum capacity of colors and soon I will adress this issue.
11 - Setting Your TileSet Up
After doing this step, you will have something like this:
Here is where the fun begins, or maybe not. You will have to select Tile per Tile and configure it using the Image on the Right Side.
Something Like This:
NOTE: See that I highlighted some places. You can change their colors if the image has more than one set of colors adressed to it.
You can flip the tiles.
You can change their ‘‘style’’, eg: Ruins, water, plains and goes on.
After finishing everything EXPORT both FILES. The CHIPSET and the OBJECT PALETTE.
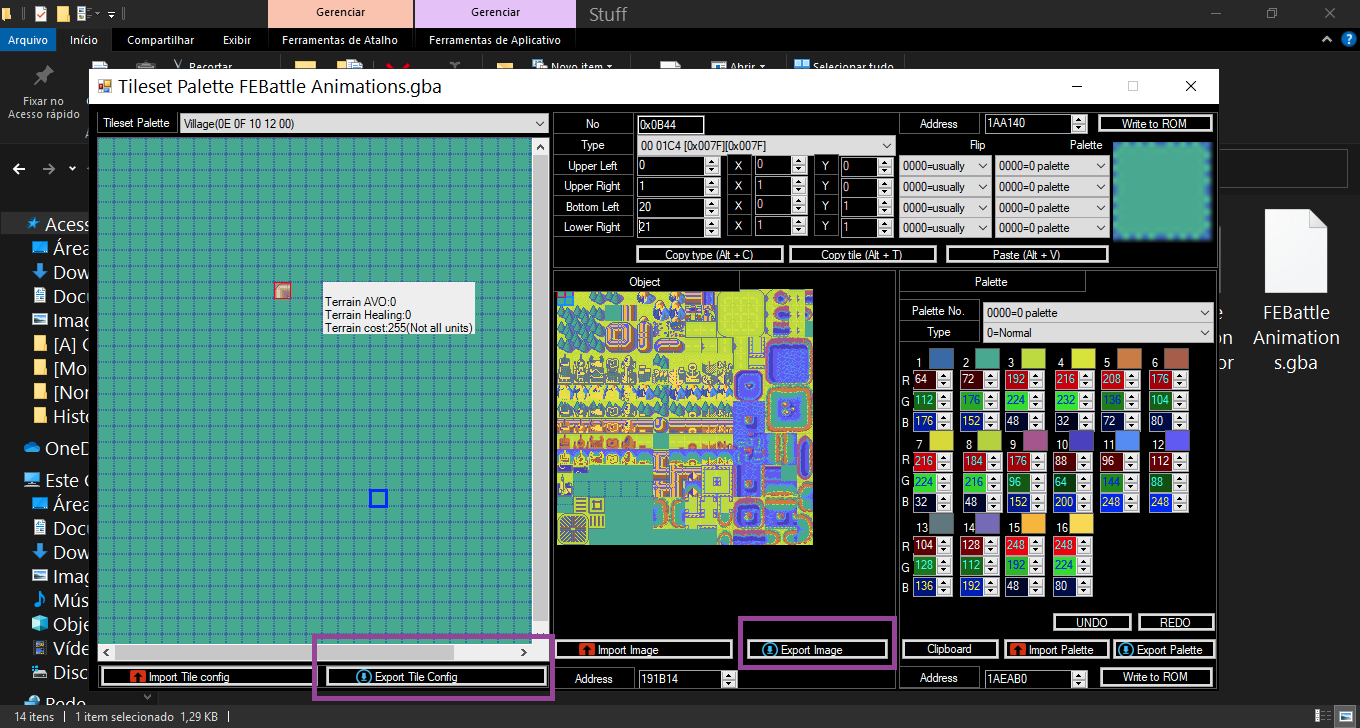
This way you will have everything as a file and you won’t lose it if your ROM crashes or something.
Now you can use it, edit it. Everything. My only tip is to keep backups of your files and everything.
Now if the image gave an error messenge, follow this step.
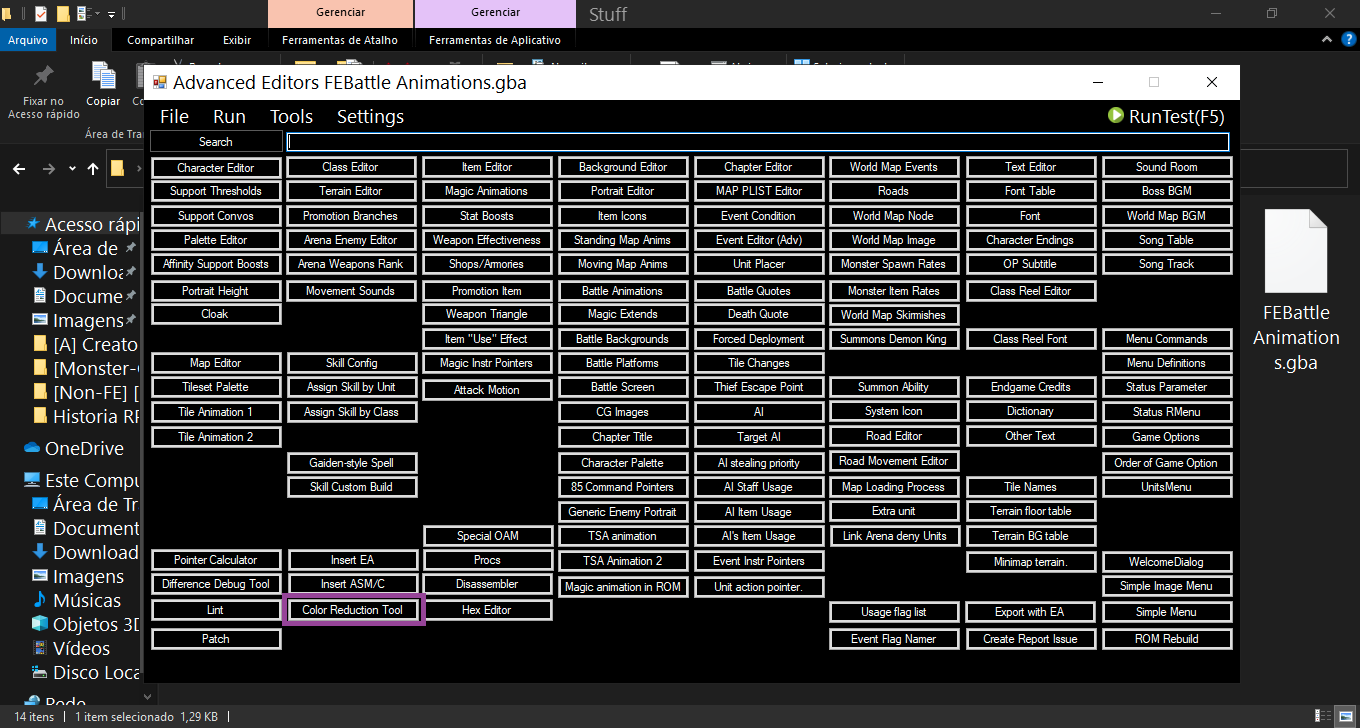
- 12 Using FEBuilderGBA Tools.
Select ‘‘ADVANCED EDITORS’’ on the main screen of FEBuilderGBA.
Then go and select ‘‘COLOR REDUCTION TOOL’’.
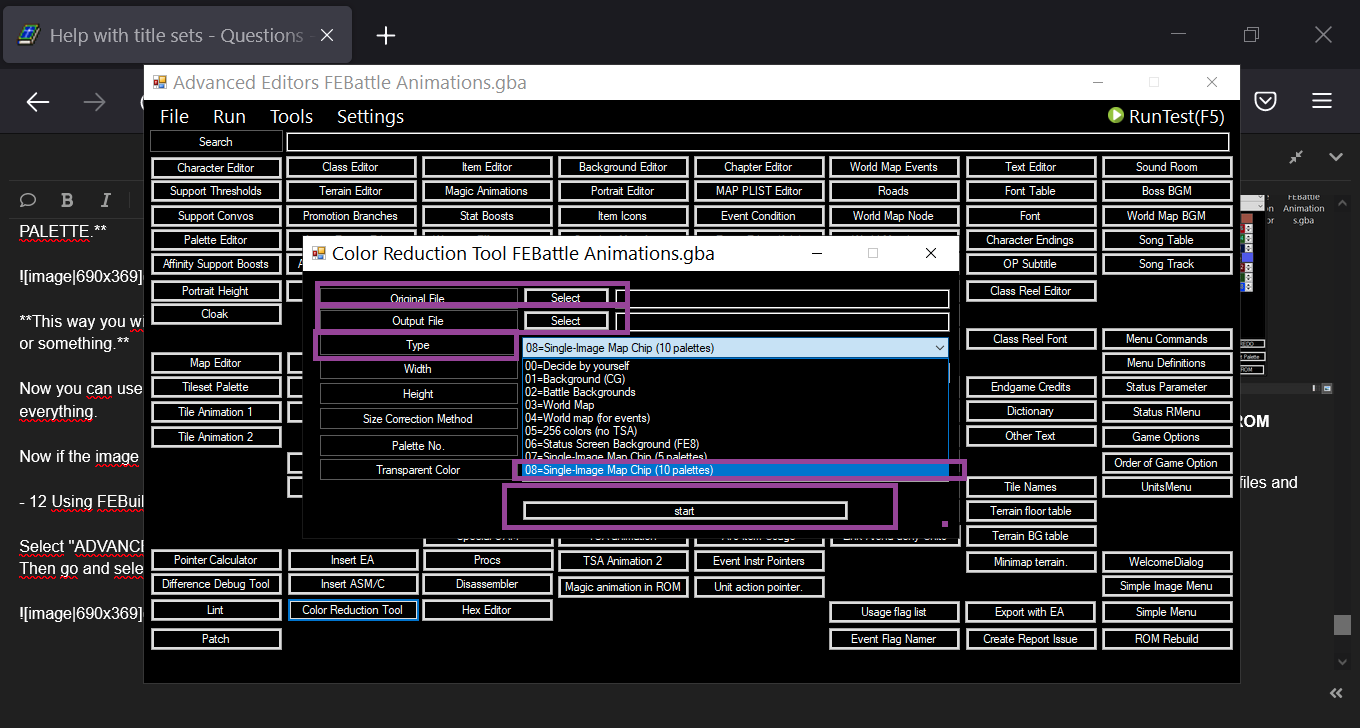
Here we can see the options. Original File and Output File.
Select the image you did and then select other image file (just Ctrl C and Ctrl V the same image and name it with another name).
After that go to Type and select 08-Single Image Map Chip (10 colors or 5 colors if your map has animated tiles).
Now press ‘‘START’’ and use the OUTPUT FILE. Import it and see if it works, if does not work, it means that the image has still a lot of colors and will need polishing.
Go to step 10 and see if it works.
I guess this is everything…
1 Like
Thank u for the tutorial
1 Like
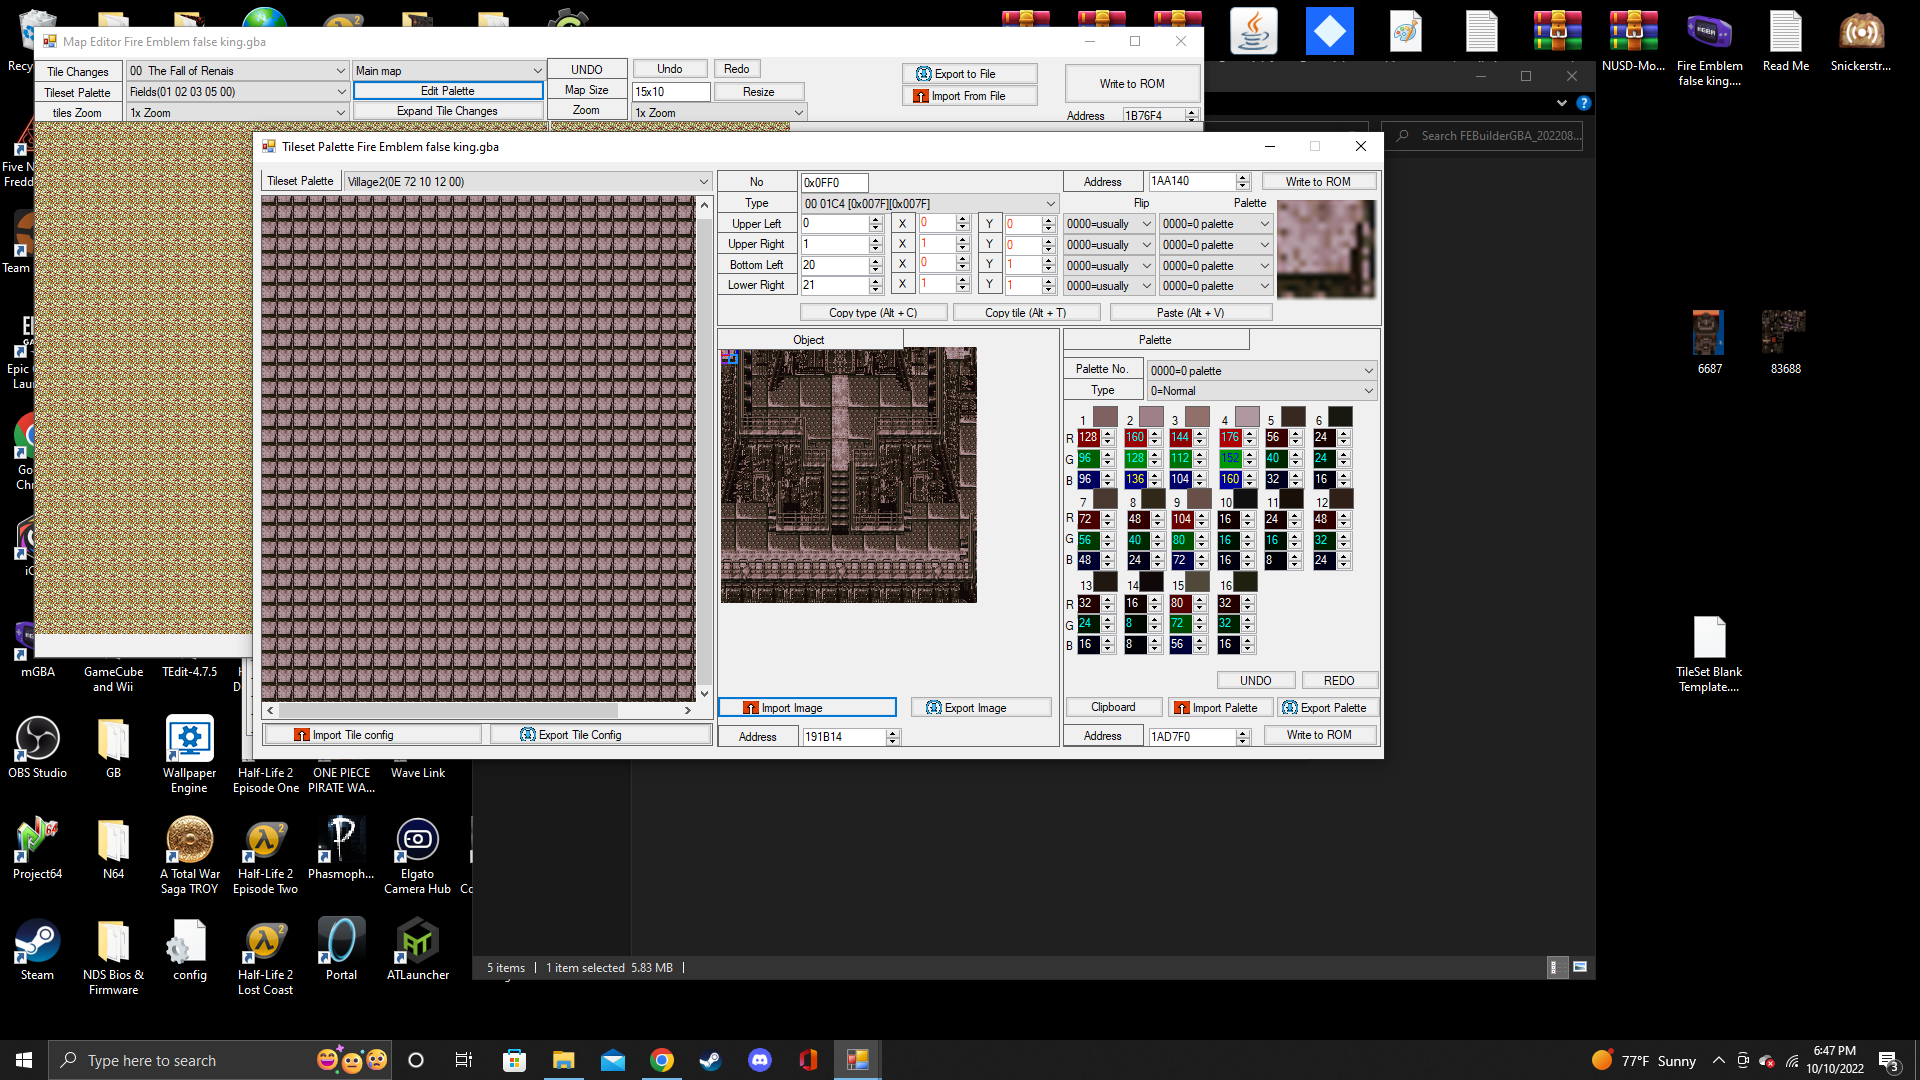
Now you need to configure the Tileset. Select a ‘‘Tile’’ in the Mapchip. I will use this one as an example.
The ‘‘Tile’’ is made by using the smaller image (that uses 8x8 tiles).
Select a tile to start. Now will have to select the 8x8 tiles in the smaller image using the options ‘‘Upper Left, Upper Right, Bottom Left, Lower Right’’.
Sorry for the late reply.
