Time for another recurring issue, and this is one that I find that trying to explain makes it more confusing than it really is, so I’ll show an example with pictures. There’s a longer tutorial here, but personally I prefer when things go straight to the point, so that’s how this tutorial will be.
The original request was “add vanilla rivers to a custom tileset”, so that’s what this example will do.
Required programs
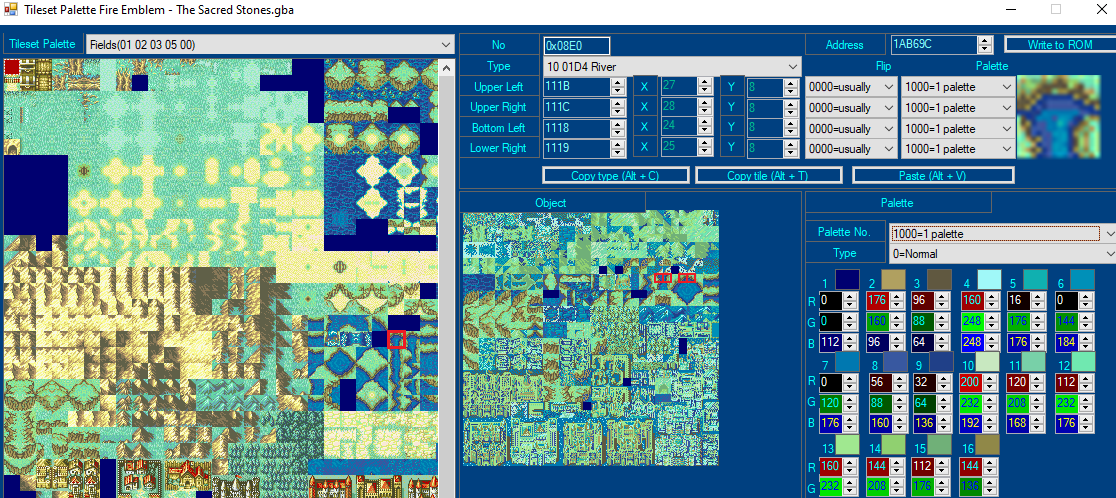
FEBuilder, specifically its Tileset Palette Editor.
An image editing program that preserves the palette order. Usenti (which is the one used in this example), Aseprite, GIMP are some examples. Paint, Paint.net, Photoshop are some anti-examples.
Step-by-step with images
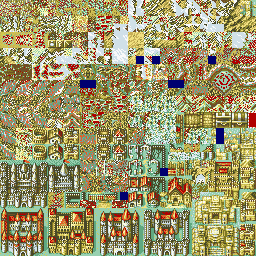
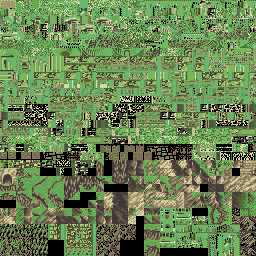
Open the object image of both tilesets on one of the aforementioned image editing programs. In this case I use Usenti, so from here on I’ll just say Usenti.
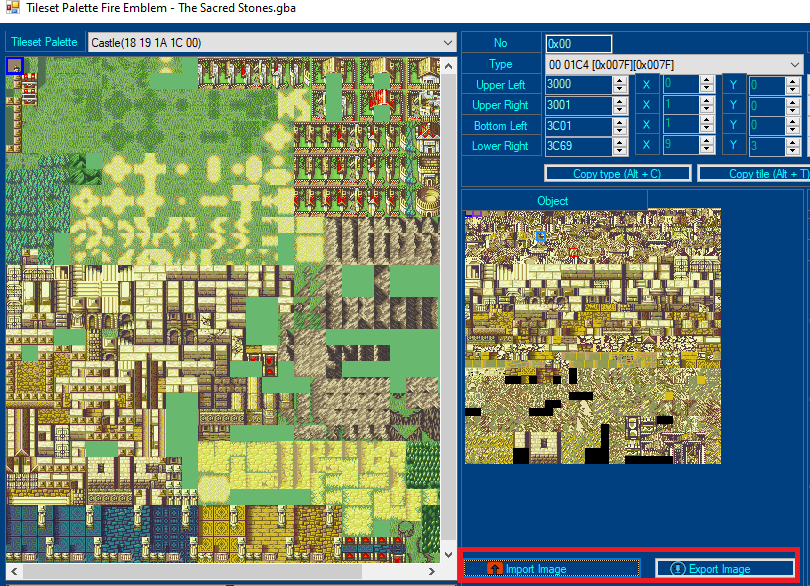
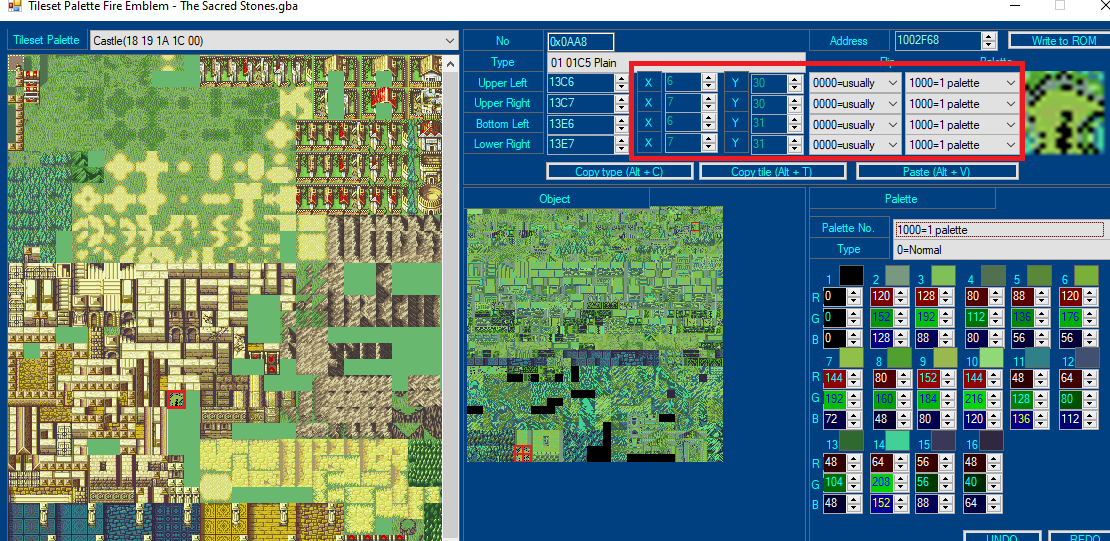
Open the tileset you want to copy from and click on the tile you want to copy. Up to 4 8x8 object tiles will be highlighted in the object image. It may be hard to see, but I highlighted them in red.
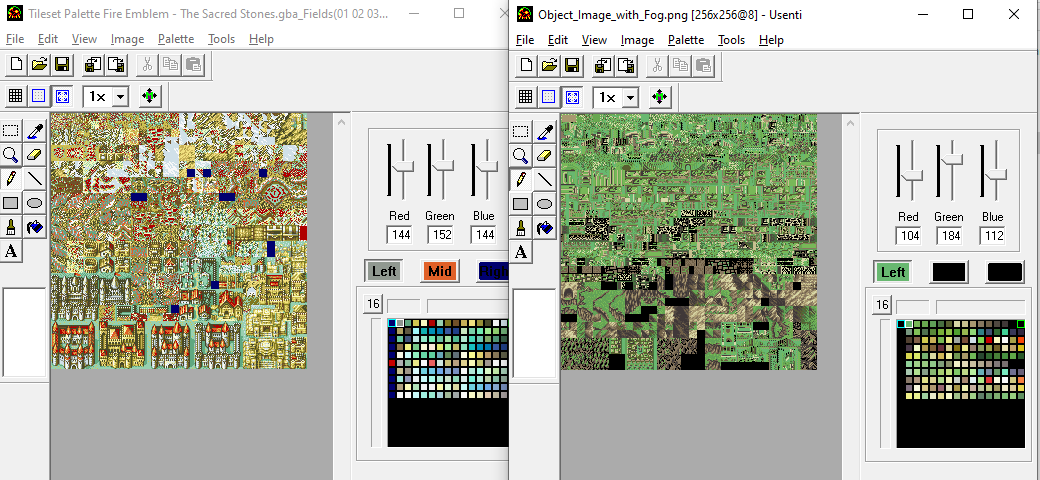
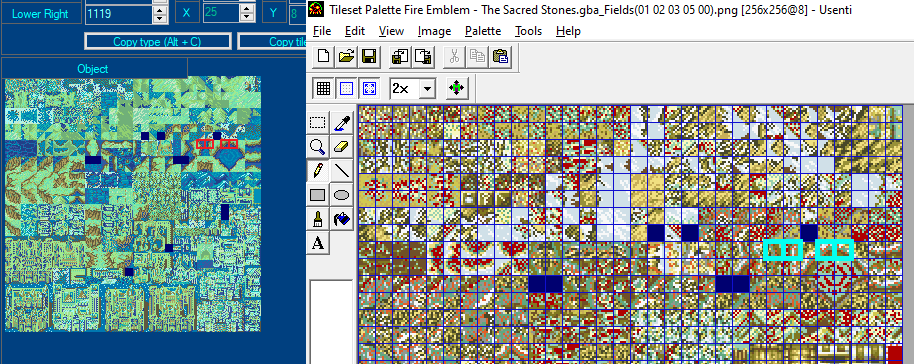
In Usenti, locate the (up to) 4 8x8 tiles that were highlighted in FEBuilder.
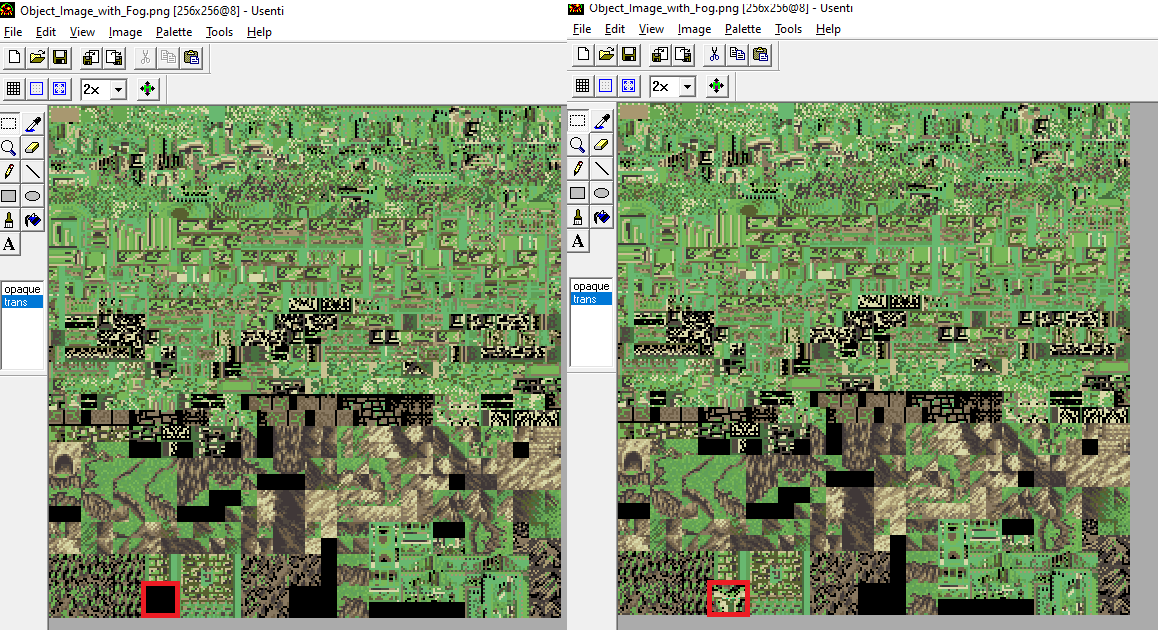
Copy each of those tiles into the object image of the other tileset. Preferably use empty spots on the image, but if there are none, then you’ll have to consider what to replace.
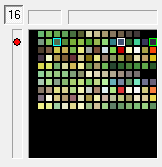
Before and after with the new tiles highlighted:
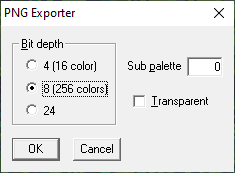
Save the image as 8bit (256 colors) and make sure Transparency is OFF.
Import the new object image along with its palette. Select an empty tile on the tileset and assemble the new tile using the new object image with the data on the top right.
You may have noticed that the colors are all off. This is just a palette issue, which you can correct in Usenti by editing the tiles you added until they look right.
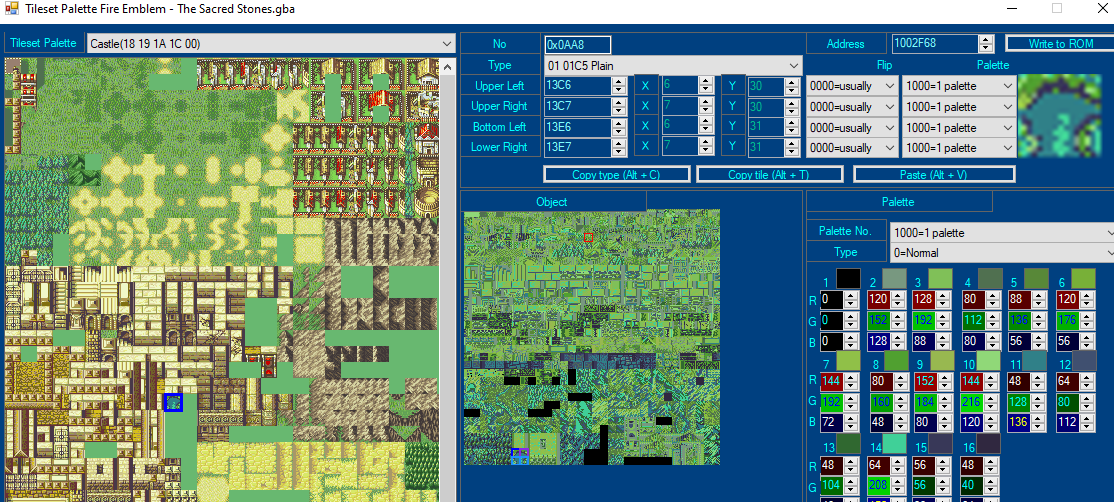
But if it does come down to this, one thing you need to make sure to do is only use 1 palette in each 8x8 tile. In Usenti each palette is displayed as a line, see how I only used colors from the second line?
Spriting isn’t the goal for this tutorial so I’ll just do makeshift edits until it loosely looks like the original tile.
If you want tile animations (which is usually the case for water), then you need to go into the tile animations editor and set things correctly there too, but that’s also beyond this tutorial to cover.
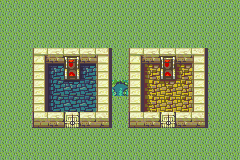
And there you have it, now you can use the new tile. As an example, have 2 castles with…part of totally-a-river between them.
This example was for copying a river tile into another tileset, which has been done. If you run into issues of “none of the existing palettes look decent” or “the tile looks bad” then you’re getting into spriting territory, which is beyond this tutorial.
Also, if you plan on sharing the edited tileset, make sure to contact the original creators of the tilesets if they were custom (which is the case for the castle one, in this example), and if they agree to it, then credit them.