If you’ve ever inserted music in a Fire Emblem game, then you’ve most likely heard of Sappy and Mid2Agb. Mid2Agb is a neat little program that turns your midi files into .s files. .S files can actually be modified to give songs even more depth to them. And all you need is a text editor, and basic music knowledge.
One thing to note before we start, Your midi MUST be in the 0 format! If it isn’t, you will be in for a very bad time. Use this program here: http://www.gnmidi.com/gn1to0.zip to convert midis.
For this example I’ll be using multiple songs of my own.
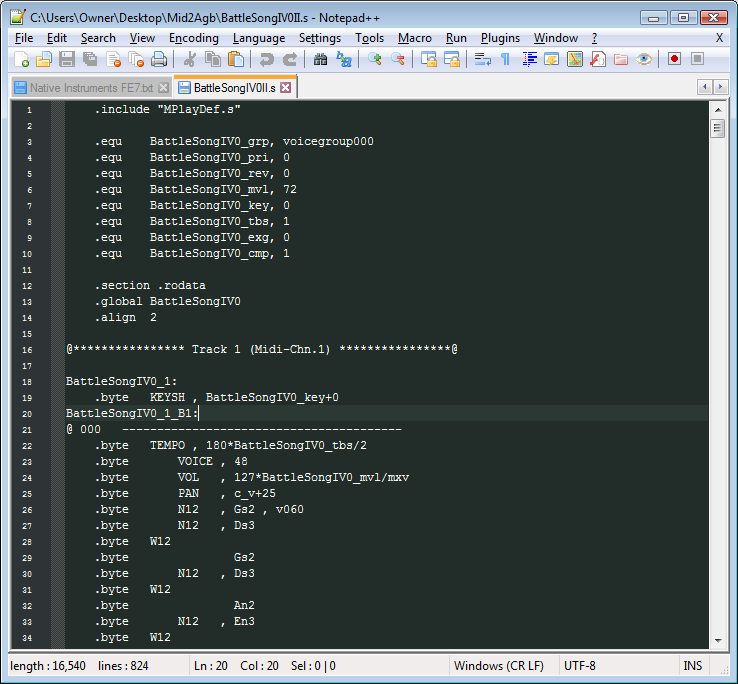
This is what a .s file looks like. Here you can see a bunch of different lines of code. Some of them are just definitions for the code to look back to and really shouldn’t be edited. However a lot of them can be modified.
Also, be aware that all .s files are sorted into tracks, and the @ 000 -------... is the measure number + 1. Since it starts at 0
Something to note, all .byte and .word codes should be tabbed in, others shouldn’t
The first line we should go over is the wait code: .byte WXX This is the only line of code that will stall for a given amount of time. The time set is measured in Ticks(Maybe,Idon’tKnowtheTextbookTerm). There are 24 ticks every beat. And since this song is in 4/4, there are 96 ticks every measure. Anything following the wait code will wait (duh) the given time to proceed
The second line we should go over is the Note line: .byte NXX , Gs2 , vXXX
As you can see, there are 3 parts to this code, the NXX defines the type of code and the amount of time the note should be played. The next bit is the note to be played, as you can see in this example, it is a G sharp 2. Something to be noted about notes (hah), they will be written in Naturals (Gn2) or Sharps (Gs2), notes will never be defined as flat. The 3rd bit in the code is the volume part, this tells sappy how loud to play that note And the preceding notes without volume bits. A note caode can also be written with the TIE code as opposed to the NXX code. I’m not exactly sure what the exact difference is, however to my understanding, TIE usually branch from one measure to another.
Lastly, we should go over the .byte FINE code. This is in short the end code. Nothing more should be added to the track after this line of code.
Now, more than likely, you wont need to edit these because that’s what your midi editor is for. The next lines we will go over you will most likely need to change in the .s file.
This line here: .byte TEMPO , XXX*BattleSongIV0_tbs/2 sets the tempo of the song. It only needs to be used in one track to set the tempo, unless your song changes tempo mid-way, this doesn’t need to be changed. However if you do wish to change it, simple change the number preceding the ‘*’. You can place this anywhere in the code to change the tempo, though it is best used right before a measure.
This line here: .byte VOICE , XX sets the instrument played in that track, this code is used very often the Vanilla games to change the instruments mid song. To change the voice, modify XX to your liking, and place it directly behind the note/measure you wish.
This one is simple: .byte VOL , 127*BattleSongIV0_mvl/mxv The volume.
If you wish to change the volume of a given track, use this code. This code can also be used to create fade-ins and fade-outs. They look something like this…
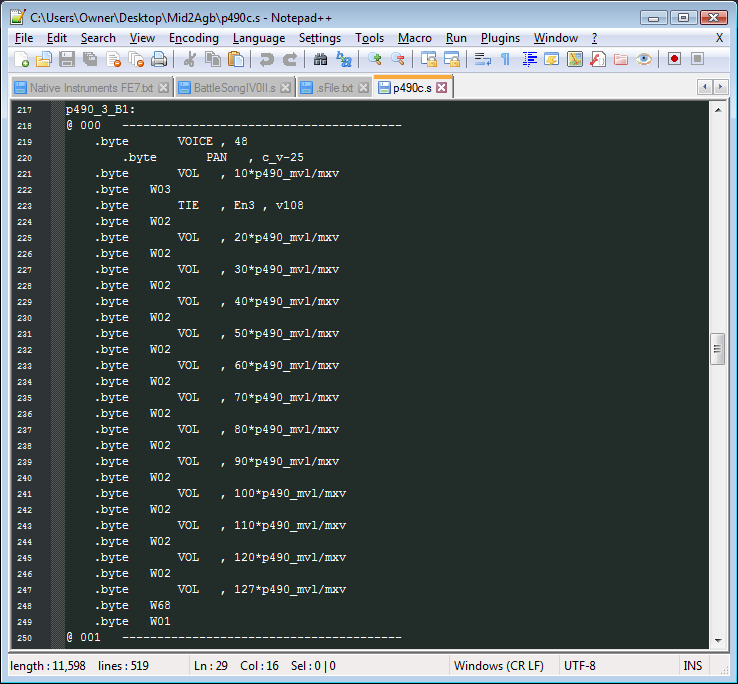
Notice how the volume changes after the note is played and how the wait codes spread out the length of the fade.
This code here: .byte PAN , c_v+25 is an interesting one. This will make the track play in either the Left or Right channel (Since the game’s music is in stereo). The “+” will make the track play in the right while a “-” will make the track play in the Left channel. The number following is the intensity of the PAN itself.
This code here: .byte BEND , c_v+0 is kinda weird. It changes the pitch of the note preceding it. This code is similar to the PAN code in regards to the variables. However, this code is really dumb and really shouldn’t be used.
You can also loop songs in the text as well. However this will also take a lot of explaining, so prepare yourselves.
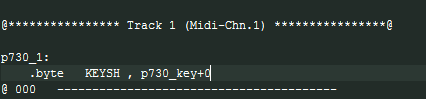
Here is where you’ll want to start. You’ll need to add a simple line of code before the first measure. nameofsong_tracknumber_B1: is the line you’ll want to add. Be sure to replace nameofsong and tracknumber respectively. You should get this here:
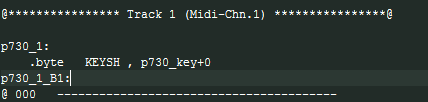
Perfect! Now we head to the last measure of this track…
![]()
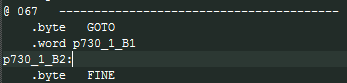
From here we’ll add some more bits of code before the FINE and After the -----------.
First you’ll add .byte GOTO This is the looping code.
After that you’ll add .word nameofsong_tracknumber_B1 Do not use a colon here.
Now after that add nameofsong_tracknumber_B2:
From that you should get this…
Now do this to each track. In short, what you did was define a variable at the beginning of the track, and tell the code to return, or GOTO the beginning at a certain point. With this method done to all tracks, the song should be ready to loop.
Well… that’s all I have for today. If I find anything else worth adding I will, so stay tuned.