Inserting Maps
The first step towards creating your fully-customized chapter is inserting a map. You need the map to do your events, get coordinates and such. I’ve never tried to do events without the chapter’s map, but I can’t imagine it’s any fun (you can try though, and tell me how much longer it takes).
What we’re going to need for this lesson is Nintenlord’s .MAR Inserter, and a .MAR file. “How do I get a .MAR file, Arch?”
Step 1: Get the .MAR File
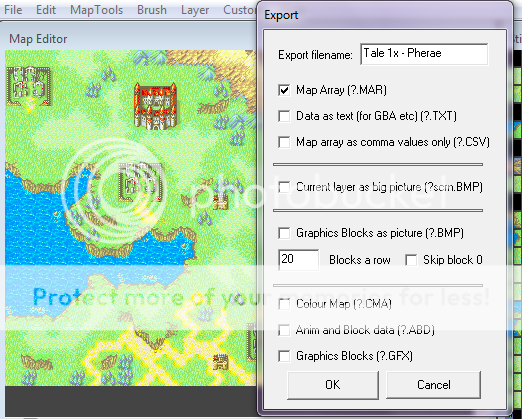
Open your map (should be a .FMP file) in Mappy, then click the “File” dropdown-menu and select the option “Export…” Put a check-mark in the box labeled “Map Array (?.MAR)” and click “Ok.” Your .MAR file has been created! Be sure to note the size of the map (X,Y), it’s important for the next step.
Step 2: Insert the Map
Open up Nintenlord’s .MAR Inserter, it should look like this.
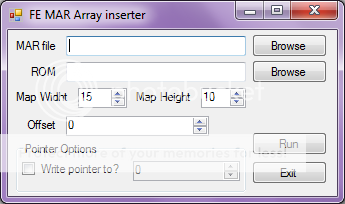
The first two are pretty self-explanatory. Pick your ROM and .MAR file. The coordinates you should have gotten from the map like I told you. Here’s the catch though: take those coordinates and add one to them for your input. Finally we’ll choose our offset, this is the location where the tool will write the map. If you’re learning events and don’t know what offsets are, I’d suggest you look it up or ask someone else (I mentioned before that I’m not explaining basics like offsets, this is your last warning of that).
Where to write your shiny new map? In FE7, there’s a bunch of free space beginning at offset 00D00000. I personally like to write my maps in the 00DA0000 area (from offset DA0000 and onwards basically). However, you write the maps where you want. It’s your ROM, organize it however you’d like.
Step 3: Tell the ROM where the map is
Step 3 involves using Nightmare. Load your ROM in Nightmare and then find the FE# Event References.nmm module and open it. Here’s what you should see:
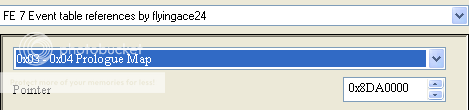
The “Pointer” is going to point to the offset of our maps. My screenshot already has the Prologue Map pointing to 00DA0000 (notice that the first two 0s are replaced with 0x8, that’s part of what pointers are). Once that’s taken care of we need to open the Chapter Data Editor.nmm to edit the tileset that the game uses for your chapter.
Step 4: Specify the Tileset
Step 4 is to edit the tileset (just in case you didn’t read the spoiler tag’s label). You’ll see these four labels with drop-down menus:
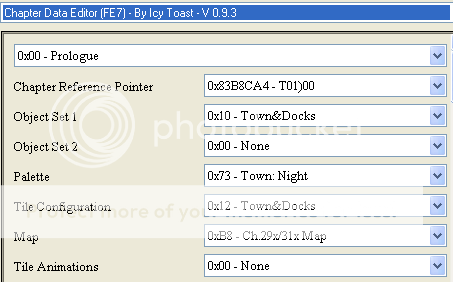
Edit those to suit the tileset of your map. Once that’s completed your map is officially ready to go!
Note: For those of you interested in importing tilesets from other games, read this.